What are the advantages of non-woven wallpaper?
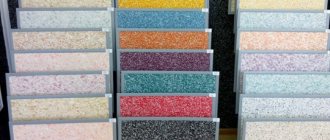
Non-woven fabric - it was he who gave the name to a whole group of materials that differ in structure, density, relief and composition. Non-woven wallpaper is a semi-synthetic material based on natural cellulose. Unlike paper or fabric base, non-woven wallpaper base has a number of advantages:
- This is a very thin base.
- During the wetting process, the non-woven fabric does not stretch or deform.
- fabric is vapor-proof and breathable .
- Old non-woven wallpaper can be easily removed from the walls.
- The service life of non-woven wallpaper is 3-5 times longer than the service life of traditional paper wallpaper.
Why do non-woven wallpapers have many advantages?
Non-woven polypropylene consisting of cellulose fibers joined together using adhesives or by extrusion. Thanks to manufacturing technology, non-woven wallpaper contains much less chemicals than conventional paper wallpaper.
The surface of the non-woven backing can be attached to any material: paper, vinyl, fabric, bamboo or cork. Most non-woven wallpaper has a paper coating of varying degrees of grain and is intended for painting with water-dispersion paints. After drying, the paint can be washed or repainted 2-3 times in a row. Fully non-woven wallpaper is quite thick and heavy. They are easily recognized by the small shiny cellulose fibers on the outer surface of the canvas. They usually have a smooth surface and are used under paint.
Also interesting: Ecowool insulation: blowing, pros and cons
Material properties
Durable, finishing material of noble style. Consists of two layers. The upper, outer side is polyvinyl chloride (vinyl), and the next one behind it can be made of paper or non-woven material.
Features: strength, durability, moisture resistance extend the service life of finishing materials up to 30 years.
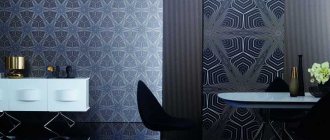
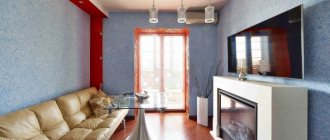
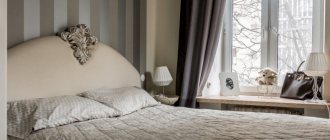
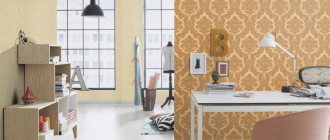
A variety of designs and fancy patterns will create comfort and style in the interior of the room.
The vinyl structure, consisting of polyvinyl chloride, does not absorb water. Thanks to this, the walls are easy to wet clean and are not damaged. Based on the many years of experience of master finishers, we can conclude that rolls of this quality are not suitable for gluing, the method of applying new wallpaper to the old coating.
Preparing walls for pasting non-woven wallpaper
If you do not want to lose all the qualities of the wallpaper, then before gluing non-woven wallpaper you need to prepare the walls well. Firstly, over the years of use, old wallpaper absorbs many chemicals from the surrounding air, including allergens contained in house dust.
Secondly, old paper wallpaper may have defects - tears, abrasions, dirt from grease and dried drops of paint. All this will inevitably affect you when you start gluing a new coating over these defects. This especially applies to thin non-woven wallpaper, which will repeat the relief of old wallpaper.
The third danger is the swelling of layers of old wallpaper , soaked from the action of glue on new wallpaper. This defect cannot be eliminated and the newly pasted wallpaper may simply move away from the wall along with the old ones.
The fourth disadvantage is that you deprive yourself of the main advantage of non-woven wallpaper - vapor and air permeability . The more layers of old wallpaper you have on your wall, especially heavy and old ones, the stronger the stale air in the apartment will be with the smell of wet paper.
Can new wallpaper be applied to existing vinyl?
Vinyl-based wallpapers have specific properties that allow them to repel water; accordingly, they are able to repel almost all types of glue, see the post on how to glue vinyl wallpaper.
So it is almost impossible to paste new wallpaper on this type of old one. Moreover, vinyl wallpaper almost always has a relief structure, which is easily visible through many types of wallpaper.
However, if you decide to glue wallpaper onto wallpaper with a vinyl base using a special glue, be careful with such a difficult task! I personally don’t believe in the success of such an idea.
How to glue non-woven wallpaper onto plaster?
Gluing non-woven wallpaper onto plaster is the most common method of installing it. It is important to level the plaster with sandpaper or an abrasive mesh on a block before pasting. After this, the surface of the plaster must be treated with finishing putty. If you are using fine-grained plaster, you can do without finishing putty. After sanding, you need to sweep the walls with a brush to remove fine construction dust and prime the walls with a primer.
In damp rooms, you can add PVA emulsion or liquid glass to the plaster. This is done to increase resistance to mold formation on damp walls.
Also interesting: Paper-based wallpaper - disadvantages and advantages
If the plaster on the walls under the old wallpaper is already peeling off after removing the wallpaper, you need to carefully examine the degree of preservation of the coating and update it if necessary. The photo below shows how to glue non-woven wallpaper with your own hands. Nothing complicated - just 9 steps and the renovation of the room is ready.
The result of pasting non-woven wallpaper
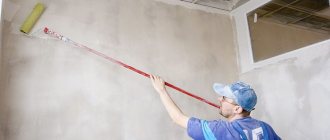
All finishing craftsmen, without exception, will never begin work on wallpapering walls if they have traces of old wallpaper. You should do the same if you decide to glue the wallpaper yourself . It’s not such a troublesome task to remove old wallpaper. All the tools you will need:
- paint roller with a long handle,
- bath,
- narrow metal spatula
- construction retractable knife
- a screwdriver will be needed to remove the covers of sockets and switches
You can buy wallpaper remover and use it according to the instructions on the package. Old wallpaper will be easy to peel off from the wall surface and remove without much difficulty.
Gluing any wallpaper onto old wallpaper is always a risk. Unpredictable results and the (very high!) likelihood that you will have to redo all the work again. Before re-sticking the wallpaper, you must remove the old wallpaper.
Watch an interesting video about how to glue non-woven wallpaper from real professionals in their field.
How to paint vinyl flooring
Methods for removing the old layer of vinyl wallpaper.
This is worth thinking about when new wallpaper has not yet been purchased. This method can save a lot of time and money. Painting is perfect if the old coating has retained its ideal appearance, there is no damage, but you are bored with the color or you just want to change something. Vinyl wallpapers come in regular and special types for painting. Both can be painted. The main thing is to choose the right type of paint.
It is possible to use several colors - this will significantly diversify the already familiar interior. There are several subtleties here. First, you need to carefully select the color so that when applied to colored vinyl, its distortion is minimal. It is advisable to check this on a small piece of coating remaining from the previous gluing. Secondly, it is better to consult directly at a hardware store about what type of paint to choose. As a rule, there are several options. The choice depends on the type of wallpaper and budget.
Gluing technique
There is no particular difficulty in gluing vinyl wallpaper on a non-woven backing. However, the technology still has certain subtleties that should not be neglected.
Tools and materials
What is needed for high-quality wallpapering of walls like this?
- wide spatula;
- container for diluting glue;
- stationery knife;
- sponge;
- plumb line;
- a special brush or rubber roller for smoothing the canvas;
- pencil;
- brush for applying glue;
- meter ruler;
- scissors;
- working surface.
Preparing the walls
Careful preparation of the walls directly affects the quality of the wallpapered walls. This primarily concerns the elimination of surface defects (filling cracks, potholes, leveling).
Any wall surface (concrete or plasterboard) must be treated with a thin layer of putty to obtain a uniform white base. Next, a layer of primer is applied. It’s even better to prime the surface twice: before filling and a second time after. Then you just need to proceed to further steps.
What to glue with?
For vinyl wallpaper on a non-woven base, you must purchase only special glue. It is usually presented in two versions:
- Ready-to-use adhesive composition.
- A dry mixture that must be diluted immediately before starting the gluing process.
Today the most common brands of glue are:
- "Kelid Special non-woven fabric." It is dry flakes based on starch, which are diluted with water before gluing. There are versions of this glue designed for light and heavy, narrow and wide wallpaper.
- "Pufas" Powdered adhesive composition, which is prepared 30 minutes before the start of work. Contains antiseptic additives that prevent the formation of fungus and mold. You can purchase varieties of glue from this brand for light and heavy vinyl wallpaper.
Pasting process
You should start work by marking the walls. Vinyl wallpaper on a non-woven backing is not glued overlapping, but joint to joint.
- Using a level, draw a vertical line. Any wallpaper is glued away from the window, so place the first mark at a distance equal to the width of the covering from the corner of the wall with the window opening. Please note that it is not recommended to join the panels in the corners. An overlap (5-10 cm) should be left on the adjacent wall in advance.
- Dissolve the glue. If it is a powder, then slowly pour it into the water while stirring the solution. Leave the composition to swell (time indicated on the instructions).
- Apply the swollen solution to the marked area for gluing the first canvas. This is done using a brush or roller. Coat the surface thoroughly so that there are no uncoated areas left. Please note that the glue is applied only to the walls, not to the wallpaper.
- Print out your first roll of wallpaper. You should not cut it into pieces in advance: this will be a waste of effort and time. Pull the free end of the canvas up to the level of the baguettes. Align the wallpaper exactly to the vertical marks. Smooth the surface of the coating well with a plastic spatula or rubber roller, expelling excess glue and air bubbles. The direction of movement is from the middle of the strip to the edges and from top to bottom.
- Use the sharp end of a putty knife to tuck the excess wallpaper under the ceiling plinth. Use a utility knife to trim off the excess at the bottom.
- Perform similar manipulations with subsequent strips. Further work will be much easier, since it will be possible to focus on the edge of the previous canvases. Don't forget to roll the joints with a roller.
- The most difficult stage is fixing the wallpaper in the corners. Perfectly straight corners will not create problems, but in crooked corners the stripes will wrinkle. That is why the work should have started by retreating from the corner.
Iron the corner thoroughly, eliminating any air pockets. The next strip must be fixed on the other side of the corner, also leaving a free edge for overlap. Iron the fabric on the fold and trim off any excess wallpaper with a utility knife. Carefully iron the edges of the joint, pressing them with a brush or clean rag. If you do everything carefully, you can end up with perfectly fitted canvases.
Paper coverings
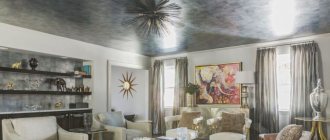
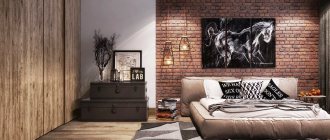
Room design
Let's look at some features of paper coverings:
- Low cost and the same quality . Such coatings will cost you much less, but is it worth saving? After all, after a few years you will have to face the problem of repairs again. If you want to glue them in the kitchen, this time will come even earlier.
- If the room where the renovation is being carried out has relatively stable humidity and temperature, paper coverings can still be glued . They will last longer there. Paper finishing is a great option for a living room, children's room or bedroom.
- Decorative paper surfaces can be single- or double-layer . Simplex can be difficult to find; paper duplex is currently being produced in the USA and Europe. They are characterized by increased density and strength. You can focus more design ideas on such a coating. They are also great for printing.
- Applying and removing such coatings is less convenient compared to non-woven finishes.
Features of gluing vinyl wallpaper
To begin, prepare the surface of the walls for wallpapering. Process it, freeing it from the previous finishing materials. Vinyl trim is even used for ceilings. In this case, the surface will also need to be thoroughly cleaned. At the next stage it will need to be leveled. All cracks need to be sealed.
When gluing wallpaper, you should take into account the base of the finish. It is impossible to say with certainty which adhesive composition will be the best in the case of vinyl wallpaper. Since non-woven and paper finishes require different types of glue. Wallpaper is cut in the standard way. Measure the height of the room and cut the wallpaper, making a “reserve” of 10-12 centimeters. You should not save material, as subsequently the lack of it will affect the appearance of the finish in the most unfavorable way.
Before gluing vinyl wallpaper to a paper base, you need to prepare for the fact that this process will be lengthy. To begin with, you will need to spread layers of material, and then wait for them to “fit.” As a rule, you can find out about the formation preparation time from the instructions for the material (indicated on the packaging). In the case of high density material, the preparation period will be really long. For fine finishes it is less.
The process of covering a room with non-woven wallpaper is much easier and faster. You will need to apply glue to the surface of the wall, and then apply the sheets to it. You won't have any extra hassle. Some people are interested in the features of covering corners with vinyl wallpaper. After all, the material is sometimes very dense. In this case, there is no need to use solid layers of wallpaper. Cut them so that one part of the material overlaps the corner. The second half is glued with an overlap. If you complete the finishing in the manner indicated, you will not have problems with it swelling in the future.