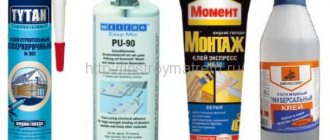
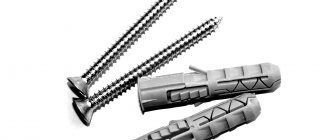
Concrete contact is often used to prepare a concrete wall. What it is? Betonokontakt is a special dispersion primer that has a high resistance to alkalis. The composition includes quartz sand. Concrete contact increases adhesion between the surface and the finishing material several times. The advantage is ease of use and efficiency.
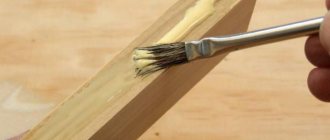
Since a concrete wall has a non-uniform density and porous structure, concrete contact can equalize the density of concrete, filling all the pores. This primer penetrates into all micropores, and after drying it forms a monolithic structure. All you need to do is buy the material and start processing. The mixture is thoroughly mixed and applied to the surface. It is convenient to work with a roller with a tray. If there is none, use a regular brush. Your task is to evenly apply the concrete contact to the wall using vertical movements. Do everything overlapping, leaving no untreated areas.
Many people doubt this method and ask whether it is allowed to glue wallpaper to concrete contact. The answer is yes. After all, it’s the same primer, only even better. The mixture will make the surface uniform and improve the adhesion of the wallpaper to the wall.
Note! You can also use a regular deep penetration primer.
Use of substrates
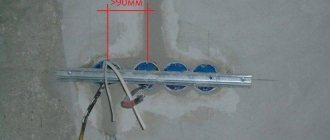
Another interesting method for finishing concrete walls for wallpapering is using backing on the wall. This method is used when non-woven wallpaper needs to be glued. This backing is made from cork or polyurethane. They can be called a universal tool, since thanks to them you can easily hang wallpaper and also provide good sound and heat insulation. This way you can kill two birds with one stone. Footboards are especially relevant in the decoration of external walls, which are always cold.
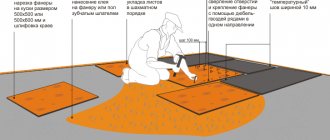
The products are glued directly onto the concrete. Cork or polyurethane substrates have their own type of adhesive that is recommended to be used. The material is applied in strips to the surface, creating an additional layer before wallpapering. The photo shows how to bring everything to life.
Note! The main advantage of substrates is their resistance to various fungal infections and mold.
Is it possible or not?
Many people ask this question. The answer is quite simple - it is possible, but it is important to take into account some points. Wallpaper can be applied to concrete walls only on a prepared base.
Practice shows that wall preparation is one of the most important stages when working with any coating. As for concrete, the arguments in favor of preparation are as follows:
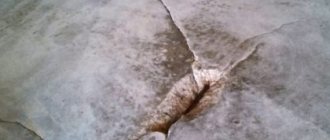
- Most often, the finished concrete surface has its own curvature and unevenness. It is impossible to paste paper wallpaper on such walls. The finished result will be disastrous. If you do not level the surface in advance, then the ideal sticker of the canvas will not work. In addition, it will also not be possible to join the strips close to each other; gaps will form. You won't want to look at such a wall.
- Ready-made concrete without finishing has a granular, rough structure (microrelief). After wallpapering, all these bumps and grainy structure will be clearly reflected on the surface, spoiling the appearance. They will be especially visible if you use thin single-layer wallpaper.
- The concrete is dark gray in color. In some cases it may be a light gray shade. But even so, light paper wallpaper on a dark wall can change its shade. The end result may not please you.
- White spots will be visible on the surface. This happens as a result of uneven distribution of glue on the wall.
- As the glue dries, bubbles will form around the holes and microcracks in the finished finish. This may result in partial peeling of the products.
- If you glue paper materials to an untreated wall, then most often there is a risk of mold growing on the surface.
These are the main reasons why before gluing paper wallpaper to concrete walls, they must be carefully prepared. If you stick paper wallpaper on a concrete wall, then all your efforts may be in vain.
Note! Typically, a concrete base has a reinforcing mesh inside, located close to the surface. All this promises the appearance of rust or dark spots during operation.
In this case, how to glue wallpaper on concrete walls correctly? They need to be prepared. Let's find out in more detail several ways how this can be done.
Putty as a leveling layer
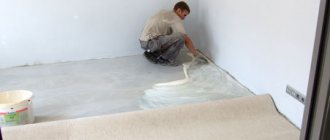
If the concrete is quite uneven and has deep cracks and unevenness, then the ideal and most effective method is to putty the walls. The surface is primed, after which a layer of plaster is applied, which will level the wall and fill cracks and potholes. Gluing wallpaper to plastered walls is the best option. There are a sufficient number of different types of plaster in stores.
Gypsum composition is ideal for this purpose. Its advantage is that gypsum plaster creates a uniform coating that absorbs liquid equally. The end result will be a perfectly smooth surface, suitable for both wallpapering and wall painting.
A simple and inexpensive way to prepare walls
So, we found out that it is impossible to glue wallpaper on untreated concrete walls. Before work, it is important to prepare it. For this, various materials are used, including concrete contact, plaster, deep penetration primer, etc. But the simplest and cheapest method can be called the old-fashioned method - using newspapers. When your budget is limited, this method is for you. What is it?
To bring it to life, you just need a lot of old newspapers and glue. The task is to completely cover the walls with newspapers. Everyone has a stack of old, unwanted newspapers, especially grandparents. All that remains is to apply regular glue to the newspaper and cover the wall with it. What are the advantages of this method?
But among the advantages, there are also two disadvantages:
Wallpaper gluing work
So, you have learned several ways to prepare the surface. Now, how to properly glue wallpaper to a concrete wall? It's quite simple. This work is no different from traditional wallpapering.
The canvases are cut into pieces of the required length, glue is applied to them and, with the help of a partner, everything is applied to the wall. Additionally, you can see the entire process in the video below.
Now you know whether it is possible to glue wallpaper on concrete and how to do it correctly. All that remains is to take into account all the recommendations, purchase the material and begin the task. Good luck in your work!
How to glue
When all the preliminary work has been completed and the necessary materials and tools have been prepared, you can proceed to gluing. As for how to glue wallpaper sheets, in this case everything remains standard: gluing wallpaper on concrete walls does not require any additional effort or equipment. In any case, you will not find any particular difference with the process of gluing wallpaper over OSB boards, wooden surfaces, drywall, and so on. So, here's a quick step-by-step guide:
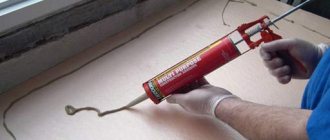
- First you will need to make an adhesive solution. As a rule, all recommendations are indicated on the glue packaging.
- While the adhesive composition is being prepared, you can, without wasting time, proceed to cutting the blades to the desired length. Please note that when choosing wallpaper with monograms or patterns, you will most likely need to take them with a significant margin, since when joining adjacent sheets you will end up with a lot of extra leftovers.
- After cutting, lay out the wallpaper sheets with the decorative layer down, spread them with the prepared adhesive solution and fold them for a few minutes so that the side coated with glue is on the inside. During this time, you can coat the wall with glue (if the base of the wallpaper is made of non-woven fabric, then you can do without it).
- Now you can outline a vertical line by measuring with a level or plumb line. “Which side should you start gluing wallpaper from?” - here you will learn in more detail about the order of gluing.
- You can proceed to gluing the first sheet. Continue with the rest of the canvases in the same way.
On a note! The article “How to glue wallpaper in the corners of a room” will tell you what to do in the case of gluing external or internal corners.
How to prime walls before wallpapering? Simple and classic way.
Before treating the walls with primers, the surface is prepared. The trellises are removed using water and a metal spatula.
Advice! If the wallpaper is difficult to remove, cuts are made in it to facilitate the penetration of water. You can use special solutions designed for removing wallpaper. The composition is added to water, the trellises are treated with it, wait half an hour and they are removed without any problems.
The surface is washed with warm water to completely remove old glue and whitewash. Help yourself with a wide spatula. If there was mold in the room, it must be carefully removed, otherwise after some time it will appear on the wallpaper and spoil not only the aesthetics of the room, but also its microclimate. To get rid of mold, the wall is cleaned and treated with lime mortar. To make it, 200 g of bleach is dissolved in a liter of water. For wallpapering, such areas are treated with glue and a fungicide.
How to prime walls
The classic method of priming walls.
To prime walls using the classic method, you will need a primer solution, a bucket, a brush and/or a roller. Primer compositions are sold both in dry form, requiring dilution with water, and ready-made. The accompanying document indicates the dilution proportion of the composition and its standard consumption per square meter.
Advice! If you are priming an unplastered surface, it is recommended to apply two layers and use deep penetration compounds.
The traditional method of treating the surface with a primer:
- Dry primer is diluted in a bucket or the finished composition is poured into it.
- Apply the solution to the wall with a roller. If the surface material is very porous or the primer is a quick-drying material, then the mixture is applied generously, without skimping. Use a brush in hard-to-reach places.
- The drying time of the primer is indicated in the instructions for its use. This period can take from five hours to a day.
- After the solution has dried, apply a second layer if necessary. After it has dried, they begin to paste the walls of the trellis.
In addition to the classic one, there is an original way of priming walls. To implement it you will need a primer, a 1.5 or 2 liter plastic bottle, a spray nozzle, which can be purchased at any gardening store. The processing process is simple - pour ready-to-use primer into the bottle, put on the spray nozzle - and off you go! Using this technology allows you to process the wall quickly, efficiently, cover all hard-to-reach places and, importantly, not get too dirty.