How to hang roller blinds on plastic windows without drilling
- Advantages and types of products
- How to hang mini curtains?
- Which roller blinds can be hung without drilling?
- Step-by-step instruction
- Disadvantages of fastening without a drill
Roller blinds have long been popular as a sun protection system for windows. Roller blinds are especially popular among new products on the construction market . . Many people are interested in how to attach roller blinds to plastic windows.
Which option to choose
The choice of installation method depends on the installation location. Alternative options for attaching roller blinds to the frame are possible:
- clamps without self-tapping screws;
- double-sided tape without drilling;
- screws.
When installing on a wall, ceiling, or slopes, the only possible option is self-tapping screws with or without dowels if the surfaces are made of wood. The fastening is reliable. In this case, the weight and dimensions of the structure do not play a role.
Fastening to the window with self-tapping screws is reliable, but the option is not always acceptable. It is not used if PVC windows are new: holes in the frame will void the manufacturer’s warranty for maintenance and repairs. When housing is rented, drilling into frames without the owner’s permission means damaging his property.
Installing curtains on plastic windows using Velcro does not damage the frames. But keep in mind that the mount is only suitable for small, lightweight curtains. The connection may not withstand a massive structure. Another drawback: the adhesive tape softens under the influence of heat, the fixation weakens, and the product may fall.
When choosing a method for installing roller blinds on PVC windows, all factors are taken into account. Each method is not without its drawbacks; they choose the one that has fewer of them, given all other conditions.
Types of placement of roller blinds on the window
First you need to decide where to hang the structure. Options:
- on the ceiling. Roller blinds from the very top will visually increase the height of the room. But it should be taken into account that such fasteners are not suitable for tension, hanging methods of surface finishing;
- on the wall. A small plastic window can be visually expanded using a system that is much larger than the width of the window sill. According to the standard, there should be at least 20 cm of overlap on both sides. A horizontal solution is not suitable for a room with low ceilings, as it will make it even more squat. The wall where the brackets will be installed must be strong enough;
- into the window opening. Roller blinds are attached to the walls of the slopes inside the opening. This option is the least convenient, but is sometimes found on blind windows without vents or sashes;
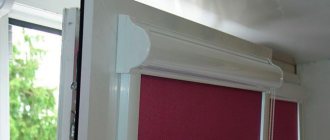
- directly onto the window sash. The good thing about this method is that it allows you to rationally use the entire surface of the window sill, does not interfere with opening and closing window sashes, and best helps darken the room. As a rule, lightweight structures are attached to the sash. As a decor, they can be complemented by a cornice with light tulle.
After determining the place where to hang the roller blinds, you need to decide how exactly the fastening will be done.
Mounting options for roller blinds
Roller blinds are not held on with tape. Double sided tape
Lightweight blinds can be attached to tape. To make them last longer, before gluing you need:
- degrease surfaces with alcohol;
- make sure that the frame is warm (in winter it is better to use a hair dryer during installation).
Important! The disadvantage of adhesive tape is that it will not support bulky products.
Light models with plastic slats have been in use for three years. If everything is done correctly, the curtains will be replaced due to old age, and not because they fell and became wrinkled.
You will have to carefully clean the plates, do not pull them by the bottom. To clean, use a weak vacuum cleaner mode or special brushes with long soft bristles to remove dust onto the windowsill, and from there with a rag.
When installed with double-sided tape, the lower part of the blinds touches objects on the windowsill - for example, flowers. If there is an animal in the apartment, it can catch the hanging part and the blinds will fall. Cats love to sit on the windowsill, so the bottom of the product will also have to be strengthened.
Are there any marks left after removing the tape? They remain, but they can be removed with a cloth moistened with vegetable oil. If that doesn’t help, then there is a special solution designed to clean parts from rust, called WD-40. You can buy it at a car store - craftsmen use it when disassembling car components. It will cope with marks on plastic.
How to install roller blinds with fishing line. Installation of “Mini” roller blinds on plastic windows
1. Unpack the blinds by carefully cutting the packaging sleeve. Be careful with cutting objects that may scratch the product. Unwind the chain of command.
2. Before installing the product, screw two magnets to the back of the bottom bar using self-tapping screws, which are included in the kit.
3. Before installing the brackets, you must tie a knot at one end of the fishing line. Thread the end of the fishing line with the knot into the upper (or lower) rectangular hole of the bracket and then install it. The assembly must be clamped between the plane of the bracket and the frame (platform or throw-on bracket). Perform this operation with another fishing line.
4. When installing with DRILLING, mark the intended mounting locations for the brackets (1) and fasten them with self-tapping screws.
5. When installing on CAP BRACKETS, simply slide them onto the window frame and insert the brackets (2) into them.
6. Insert the jaws of the bracket (3) into the mechanism and the curtain plug.
7. Insert the curtain assembly into the brackets until it clicks. The hole in the mechanism from which the chain comes out should be directed downwards.
8. Place the covers (4) on both brackets.
9. Lower the fabric to the lower position and install the lower chain stop near the bracket (5).
10. Thread the fishing line through the guide hooks in the bottom strip and bottom brackets. Tie a knot in the fishing line. Perform this operation with another fishing line.
11. Install the lower brackets onto the window frame. In this case, the fishing line must be taut. If the fishing line is not tensioned, repeat step 10. The fishing line should move freely through the holes in the hooks of the lower bar. Cut off the remaining fishing line with scissors.
12. After installing the product, stick strips of magnetic tape on the window frame at the level of the magnets, in the position of the lowered lower bar.
How to care for a roll structure
An unusual curtain requires special care, different from the care of a standard curtain.
Cleaning. It is better to clean curtains frequently using a dry method, namely with a vacuum cleaner. Wet cleaning of dust is carried out as it gets dirty (usually once a month) and for this use a standard sponge slightly moistened. Do not wash or soak the fabric in water, as this procedure will lead to damage. If there is a stain on the curtain, it should be treated with a stain remover spray and only then carefully remove the remaining spray using a damp sponge.
Drying. After wet processing, the curtain fabric does not need to be rolled onto a roller, but wait until it dries completely unrolled.
Exploitation. The process of folding the panel must be done slowly to avoid the formation of folds and creases. When preparing food, it is advisable to raise the curtains so that they do not absorb fat and food aromas.
Caring for roller blinds
Roller blinds are made from durable fabrics and are additionally treated with antiseptic compounds to prevent dust from settling. However, they require regular care.
The fabric surface is carefully wiped with a soft damp sponge with the addition of a gentle detergent. Machine washing is prohibited, but you can remove the fabric, place it in a bath of water and soapy water and wash it carefully with a sponge or soft-bristled brush. Dry flat, do not iron.
Some dry cleaners provide cleaning services for roller blinds. It is better to entrust the care of expensive roller blinds to the hands of professionals.
Roller blinds are truly a wonderful invention - everyone who uses them has already appreciated the convenience and comfort. They are not difficult to care for, there are budget options, and the choice of colors and patterns makes your head spin.
Attaching roller blinds
Attaching roller blinds does not require any special skills and will not take much of your time. Everything is very easy and simple.
Typically, roller blinds are attached to plastic windows, although they are also well suited for wooden ones.
One of the most important elements of success is to choose the right size of the canvas so that they do not interfere with opening the doors and do not cling to the handle.
To choose the right size, you must first determine where the curtains will be attached (to the wall, to the frame of the opening, or to the ceiling), and also select the appropriate system.
With the right choice, roller blinds will become a real highlight in the design of your home, as shown in the photo
- Mini;
- Classic;
- profile;
How to attach roller blinds largely depends on the system you choose and the installation location.
Mini system
This is the simplest design. It consists of a canvas wound on a shaft and a control mechanism.
To determine the required size, it is necessary to measure the distance between the outer edges of the window beads in width and height. The length and width of the fabric must correspond to the measurements received.
There are three mounting methods:
- on self-tapping screws;
- using brackets;
- on adhesive tape.
If you want to attach curtains using self-tapping screws, during the measurement process be sure to keep in mind that there must be at least 23 mm left on both sides to install the fastening mechanism.
Before installation, the curtain must be assembled. To do this, we alternately thread the edges of the fishing line through the holes in the mounting corners and tie them with a double knot. Next, cut the fishing line in half. We insert plastic capsules into the edges of the shaft, and then snap its edges into the mounting corners.
Roller blinds of the Mini system are the easiest to install
Then we carry out the installation itself:
- We apply the curtain to the top of the window sash and level it;
- We make marks with a pencil on the profile in the places where the mounting angles will be installed;
- We remove the mounting angles from the shaft, apply them to the places previously marked with a pencil, and use a screwdriver to make holes;
- We insert plastic capsules into the mounted corners and press them on top with a side plate;
- We insert the chain into the control mechanism so that one edge hangs down about ten centimeters;
- We mount the assembled corner into the drilled hole;
- We drill the second corner so that the fishing line is sandwiched between the profile and the corner;
- We insert the curtain into the corners;
- We thread the free edges of the fishing line through the holes in the bottom bar of the curtains;
- We secure the clamp for the lower edges of the fishing line with self-tapping screws;
- We pass the fishing line through the holes in the latch and tighten it, twisting the latch mechanism.
To avoid damaging the window frame, the curtain can be mounted using plastic or aluminum brackets.
The brackets (can be either plastic or aluminum) are attached to the window sash, which must be in the open position at this time. Then you need to press down the seal. We put side clamps on the brackets and fasten the curtain. This method of fastening is only suitable for an opening sash.
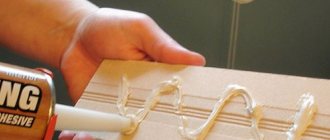
To attach the curtain using adhesive tape, you must first mark the locations of the mounting brackets and degrease the surface of the profile using a glass cleaner. Then you need to remove the protective tape from the fasteners and attach them to the profile. Press for 30 seconds. Then we put clamps and a curtain on them.
If you have not calculated the dimensions, such a curtain can be cut. To do this, completely unwind the fabric and separate it from the shaft. Take accurate measurements and use a ruler or level to measure out the desired piece on the canvas. Using a hacksaw or jigsaw, shorten the shaft. Then assemble the curtain according to the instructions.
Classic system
Unlike the previous system, the shaft of this type of roller blinds is hidden in the box, and they also have guides.
Measurements must be taken as follows: the height is measured from the outer edge of the upper bead to the inner edge of the lower bead, and the width is the distance between the inner edges of the beads. To use this system, the beads must be smooth and at least 12 mm wide. If they are narrower, you need to add 3 millimeters to the width of the curtains, and if they are wider, on the contrary, subtract a couple of millimeters.
- We degrease the glazing beads with a glass cleaner;
- Glue the guides;
- Place the fabric behind the guides and align it so that its top edge coincides with the outer edge of the glazing bead;
- We fix the curtain using self-tapping screws;
- We put on the side covers and attach the control chain;
- We mount the lock for the chain on the window frame.
Design features of roller blinds
Photos can help you understand the design features of roller blinds. Here is a minimum set of parts: roller, brackets, canvas, lifting mechanism. Depending on the design, the product is equipped with guides or blade clamps. They are of different types:
- glazing beads covering the gap between the frame and the panel;
- strings, one end fixed in the holder, the other in the eye of the weighting agent;
- magnets attached to the window with double-sided tape attract the metal bottom rail.
The roller is predominantly metal, but wood and plastic are also used. Brackets are static or spring: made of metal, plastic, fixed to the frame. The fabric is synthetic, but can be made from cotton, linen, straw, or bamboo. The density of the material affects the level of illumination in the room. According to this indicator, 3 types of curtains are produced:
- transparent ones allow light to pass through, but visibility from the street is not available;
- shading ones make the sunlight soft;
- opaque ones completely darken the room.
The operating principle of roller blinds is to wind the fabric onto a roller and lower it if necessary to close the window. The control mechanism, in most cases, is manual and consists of a chain that drives the shaft through a gear on it. Spring drives are used less frequently. Small children in the house can quickly break it. A more expensive option is with an electric drive, controlled via a switch or remotely using a remote control. Such a drive is installed in cassette structures.
Roller blinds “Standard”.
There are different types of roller blinds:
- “Standard” – shaft diameter 25-30 mm. The size of roller blinds of this type does not exceed 1.8 m in width and 2.0 m in length. Installed on standard double-hung windows in the opening or on the wall above it.
- “Lux” - on a reinforced shaft with a diameter of 35-70 mm you can attach a panel up to 3.5 m wide and 4.0 m long. Used on large windows.
- “Mini” are small in size, so they are installed on separate doors: blind or opening. The roller for winding the fabric is placed on top. The curtain lowers under the weight of the load installed below.
The structures can be open or placed in a box (cassette) made of aluminum, plastic, or wood. The shaft is placed there and the wound fabric is hidden. The curtain is hardly noticeable when not in use, the fabric is protected from dust and UV rays. All of these types of roller blinds are produced in open or cassette versions.
Mini-cassette types are designed for installation on window sashes, incl. those that open. They have a thin shaft with a diameter of no more than 15 mm, which, together with the fabric, is hidden in a semicircular box made of aluminum.
There are guides on the sides that do not allow the canvas to sag when attached to opening sashes. UNI-1 models provide for their installation on the inside of rectangular beads. At the same time, the canvas fits as tightly as possible to the glass. Modifications UNI-2 are mounted on the outer part of the glazing beads. The box is attached to the top bar of the window.
Fastening roller blinds in a window opening
Attaching roller blinds directly to the window opening is a more popular way of placing them. It allows you to use the entire area of the window sill.
Depending on the design of the curtains - open or closed (cassette), the distance from the upper edge of the window frame in which the mount for roller blinds will be mounted is determined. Modern roller blinds allow two mounting options - using self-tapping screws and using double-sided foam tape or glue for PVC structures.
It is not recommended to use cyanoacrylate-based Secunda glue for gluing brackets. It is destroyed by exposure to air humidity. After a couple of years, your roller blinds may fall off.
Most people prefer tape. It avoids damage to the structure of the plastic window profile. Faster and more convenient, does not require absolutely any additional tools.
If you plan to decorate the entire window opening with a wide roller blind (for non-opening windows), its width should be 3-5 mm less than the width of the window frame so that when lowering the curtain, the weight bar does not touch the slopes. It should be noted that this method of placing roller blinds is not very convenient, since it will not be possible to place the winding mechanism directly on the PVC profile - the window handle will get in the way. Therefore, the winding drum will have to be 70-80 mm away from the plastic frame. You will have to use elongated L-shaped brackets that will provide the necessary gap between the window and the curtain.
Another option is to use “Mini” roller blinds - structures that are mounted directly on the window sash and allow you to fully use the windows - tear them off without lifting the roller blinds, tilt them to the “ventilation” position.
Dimensions
The appearance of light filters is due to the popularity of plastic windows, because with their installation there was no need to hide window openings behind the usual curtains. Therefore, the dimensions of the products are mainly adapted to the standard sizes of modern double-glazed windows. However, it is also possible to resort to making them to order according to individual parameters.
The table shows the standard sizes of ready-made roller blinds for plastic windows in centimeters.
| Width | Length |
| 34 | 170 |
| 43 | 170 |
| 48 | 170 |
| 52 | 170 |
| 57 | 170 |
| 62 | 170 |
| 68 | 170 |
| 73 | 170 |
| 81 | 170 |
| 95 | 170 |
| 115 | 170 |
| 68 | 215 |
Attention! The exception is the “Lux” models. A shaft with a diameter of up to 70 mm can withstand heavy, large blades. Therefore, such products can reach sizes of 3.5 m * 4.5 m!
Mini roller blinds
The most common option today is “Mini” roller blinds. They are a piece of fabric wound on a metal shaft, equipped with a mechanism for raising and lowering the fabric. Experts also call this type boxless (this is due to the fact that the canvas itself is not covered with anything). The advantage of this option is that the canvas can be quickly cut to fit a window of any size . Mini roller shutters are affordable and take up little space, but at the same time they look aesthetically pleasing and do their job perfectly.
In the Mini version, the fabric is located on an open shaft
Measurements
The first thing to do before installation is to carefully measure the opening. This is important not only for Mini, but also for other models of roller shutters. Otherwise, installing a roller blind on a plastic window may result in the curtain, frame or shaft simply not fitting into the opening. The main thing is to do everything clearly and without errors; write down all measurements carefully.
At the first stage of installing roller blinds, measure the dimensions of the window
The first step is to measure the dimensions of the glass without taking into account the parameters of the frame. To the resulting numbers, add 3 cm to the width and 12 cm to the height. Next, you need to decide on which side it is preferable to hang the control chain. The hinge side is preferable so that nothing interferes with the roller shutter.
Self-tapping installation
Installation of “Mini” curtains on self-tapping screws is carried out in several stages.
- The assembled roller blind is applied to the top sash of the window, leveling it.
- Marks are made on the profile for the corners.
- The mounting angles are removed from the main shaft and attached with screws to the marked places.
- The structure is assembled and pressed on top with a side plate.
- The chain should be threaded through the hole on the side, it should hang down by 10-15 cm.
- The curtain is mounted in the corners, after which it is fixed on both sides.
- The clamps are installed, the weight is hung on the chain.
Important: if the installation was carried out correctly, the installation of the shaft should be accompanied by a distinct click. The complete decorative cover should be installed last after testing the structure for strength.
Mounting on spring brackets
This method is somewhat simpler and has only one, but very important nuance: spring brackets can be attached to the opening sash and only to it. In general, the technology of installing mini roller shutters on spring brackets is no different from the version with self-tapping screws. The only difference is that instead of attaching the corners, you will need to snap the brackets onto the top of the sash at a given distance.
Velcro mounting
The third installation option is with Velcro. Most often, they come already included and, despite the visible fragility, are able to provide a fairly reliable attachment to the frame. An additional advantage is that such installation of roller blinds does not imply any damage to the window, and if necessary, the Velcro can be removed quickly enough.
Attaching the roller blind with double-sided tape eliminates the need for drilling plastic.
The process of installing roller blinds on a window is simple:
- The surface of the frame at the attachment points is degreased to ensure maximum adhesion.
- The installation site is heated with a household hairdryer.
- The fasteners are attached to the frame.
- The curtain structure is mounted in fastenings.
Important: Regardless of the type of fastening, it must be remembered that the uncovered section of the chain mechanism must face down. If you compromise this rule, the roller shutter simply will not work .
Installation without drilling
Roller blinds “Mini”.
“Mini” curtains, open or cassette, can be hung on the frame of a plastic window without drilling, using spring brackets (clamps, clips).
They start with measurements so that the selected model fits in its intended place and is not too big or too small. For UNI-1 models, measure the distance between the internal parts of the beads. When installing UNI-2, take into account the width of the beads.
Measure with a tape measure and write down the dimensions of the glass without frame. The product requires 12 cm more in height and 3 cm in width. It is not always possible to buy a model with these parameters: they are purchased with slightly higher ones, then the fabric is cut with scissors. The roller is also shortened using a hacksaw.
Spring brackets
Before choosing this installation method, take into account important points:
- The clips are attached only to the opening sash;
- plastic clips just need to be put on and snapped into place;
- The metal clamps are pre-bent.
Step-by-step instructions for installing roller blinds on opening sashes without drilling window frames:
- Prepare brackets that cling to the sash and are additionally secured with double-sided tape. The places where it needs to be glued are degreased and dried. Then use tape.
- Semicircular holders are placed on the brackets. They are installed in a specially designed mount.
- Brackets with holders are placed on the shaft. In this case, take into account that one holder has a tenon, the other has a groove. There are counter elements at the ends of the shaft. Combine the grooves with the tenons.
- Try on the assembled structure: put the brackets on the top of the open sash. Determine the correct location, mark the location of the brackets with a pencil and remove. Disconnect the shaft from the holders.
- Degrease the top side of the frame with a special PVC cleaner or alcohol. Solvents are not used for this purpose. Remove the protective film from the tape on the brackets. Install exactly at the marked place, pressing firmly until it stops to snap the clamps into place.
- Mount guides or magnetic holders: depending on the design.
- At one end of the roller (mainly where there is no handle on the sash) a fabric lifting mechanism is installed. The bracket on this side has a spike with a gear. Carefully insert the roller with the canvas into the holders, being careful not to damage the plastic.
Check the performance of the curtains by opening and rolling them.
Duct tape
Attaching curtains with adhesive tape.
The method is used for open roller and cassette designs. Roller blinds are installed on blind and opening sashes.
The material of the windows is predominantly PVC, with wooden surfaces the fastening with adhesive tape is short-lived. Many manufacturers' products include adhesive tape already applied to the fastening elements. Before installation, only remove the protective film.
An important point in installation is surface preparation. The top strip of the plastic window frame is washed and dried. If it is cold, heat it with a hairdryer to make it warm. Then degreasing is carried out with alcohol and gasoline for refilling lighters. Cassette designs are mainly sold with Velcro. If it is not there, also degrease the connection points on the fastening.
Using a pencil and a level, mark the frame to indicate the location of fixation. It is a mistake to focus on the window sill when setting it horizontally - it can be uneven. To prevent the canvas from warping during operation, marks are made only according to the level. Remove the protective film from the adhesive tape and secure the curtain to the frame or glass.
Cassette structures are mounted in a similar way. The differences are in the design of the guides, which are installed in the following sequence:
- They carry out fitting, combining the parts with the box.
- Degrease the surface that will be adjacent to the glazing beads and apply tape.
- Remove 4 cm of film from the adhesive tape and mount the part into the cassette.
- Hold the element with one hand and gradually remove the protective film with the other.
- When all is removed, glue it to the glazing bead.
- Place the panel into the guides.
In a similar way, open roller blinds are mounted on blind sashes using Velcro. It is impossible to use spring brackets, so they use plates into which the side brackets are installed with latches. They are secured with tape to the window frame.
Installation of roller blinds
Given the variety of roller shutters, there cannot be any one universal installation method that is equally convenient for all cases. Heavy curtains are mounted using screws. Here you cannot do without a drill, as is the case if the fasteners are installed on a wall or in a window opening. Some lightweight models have holes for self-tapping screws, which does not require any other installation method.
Attaching blinds to plastic windows without drilling is only possible if they are hung directly on the sash. Of course, the use of screws here is permissible, but not necessary and even undesirable, since it can lead to depressurization of the double-glazed window and deterioration of its thermal insulation properties. Without drilling, they are attached in two ways:
- using double-sided tape;
- using special hooks made of plastic or metal that are fixed on the sash.
Let's look at both possible methods.
Securing with double-sided tape
The easiest option to implement. The roller or cassette is glued to the base. It is important to degrease the surfaces to be glued, otherwise the connection will not be strong. The advantage of this method is its ease of implementation. However, you need to remember that the glue will only support light-weight roller blinds, so cassette-type products can hardly be secured in this way.
Another disadvantage is the sensitivity of the adhesive layer to increased temperature. There are often cases when, in the summer heat, curtains simply slide out of place, leaving melted glue on the frame. First, they assemble the product, which is sold disassembled. To do everything correctly, you need to use the manufacturer's instructions.