The content of the article:
- Classification of self-leveling floor
- What thickness to choose for high loads
- Acrylic-cement mixtures
- Low temperature conditions
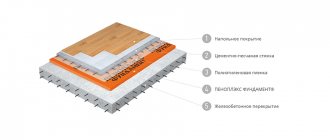
- Self-leveling floors in a residential building
- Save floor mixture
- Optimal layer thickness
- Advice from professionals
- Thick Layers
- Thin floor
Today, self-leveling flooring is a separate group of special materials applied to the surface using pouring. In fact, under their own mass, they take on the most horizontal state. With their help, the bases are leveled and protected. These floors have unique strength characteristics and have an attractive appearance even without additional finishing. But it is necessary to take into account many factors when making a self-leveling floor. One of the main ones is thickness. You should always take into account the maximum thickness of the self-leveling floor under tiles or laminate. In order to create a base, you can use any composition. But you need to take into account that they may differ in maximum thickness.
Classification of self-leveling floor
You will be interested:How dangerous is the new coronavirus?
The following types of self-leveling floors can be distinguished from a wide variety:
- Mixtures for application in a thin layer. In this case, the layer thickness can be a maximum of 1 mm.
- Mixtures for application in a medium layer. In this case, it is allowed to apply the solution to the floor surface; the thickness can reach 5 mm.
- The coating is of a highly filled type, in this case the maximum layer thickness can be 8 mm.
Most often, mixtures that are applied in a thin layer are used only in industrial premises. But only if there is a low or medium load on this coating. This type of finishing coating is usually chosen based on practicality and cost-effectiveness. The maximum thickness of a self-leveling floor for an apartment can also be up to 1 mm if the rough substrate is made correctly.
Thin-layer mixtures look good and can be used to solve any design problem.
But, despite all the high economic indicators, such a coating does not have a high degree of wear resistance. It wears off quite quickly.
As for self-leveling floors of medium thickness, they have much higher characteristics than those discussed above. These mixtures can be applied even in rooms where the floor surface will be subject to fairly high mechanical loads. But they should be below the maximum value, but above the average.
The advantages of such a coating include a high degree of strength, cost-effectiveness, and maintainability. In addition, coatings of this type are quite durable. As a rule, this floor has a matte finish. But there are mixtures that are intended for use in residential buildings. They have a glossy shine. The recommended thickness of the self-leveling floor is 1-8 mm. There is no point in pouring more, since the strength will not improve significantly, but the costs will increase.
Mixtures that have a high filling level are used for difficult conditions. After polymerization and hardening, the self-leveling floor will be able to withstand high mechanical and impact loads. The wear resistance of this type of coating is very high, so these floors will be an ideal option for industrial workshops, as well as other production facilities. It is also worth noting about resistance to abrasive elements.
What determines the thickness of self-leveling floors?
The thickness of the self-leveling floor layer depends on a number of factors.
To understand all the features and nuances of their pouring, you should become more familiar with this high-tech flooring.
The main parameters on which the thickness of the self-leveling floor depends are:
- maximum weight of the expected load on the base;
- other possible loads - vibration, temperature changes, abrasion, etc.;
- the need to level out defects in the subfloor;
- performance characteristics of each individual brand of leveling compounds.
When pouring self-leveling mixtures, you should not save too much on layer thickness. If the minimum thickness of the self-leveling floor is less than the permissible value, its service life will be significantly reduced.
Types of self-leveling mixtures by thickness
Based on the thickness of the poured layer, self-leveling floors are divided into three types:
- Thin-layer. Such mixtures are intended for ultra-thin pouring and are more of a decorative nature than have a leveling function. Also, such a coating can be used to create a protective layer that prevents the destruction of the base base under the influence of external factors. The maximum thickness of the self-leveling floor in this case does not exceed 0.5 cm.
- Self-leveling. This type of mixture is specially designed for leveling subfloors in case of small horizontal differences. The largest permissible layer of such compositions is already 2 cm.
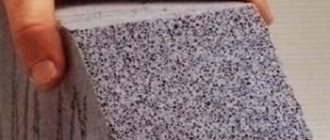
- Highly filled. They differ from the first two types of self-leveling floors in that they use special fillers that increase the internal connections between the components. Expanded clay, coarse sand, etc. can act in this capacity. They are used if it is necessary to eliminate any major defects in the rough foundation. The minimum layer of highly filled compounds is usually 2 cm, and the maximum is 5 cm or more.
When applying a layer of highly filled self-leveling floors exceeding 5 cm, it is recommended to fill it in two stages.
For this, double-pouring technology is used: first, the first layer, less than 5 cm thick, is poured, and after it hardens, the second, finishing layer is poured.
What thickness to choose for high loads
Quite often, self-leveling floors are used in warehouses, garages, underground parking lots, and industrial enterprises. They can be used where the floor surface is subject to mechanical or vibration loads. They can be used even in conditions with high temperature differences. On sale you can find a large number of mixtures for making self-leveling floors.
In industrial premises, it is best to use mixtures made on the basis of methyl methacrylic resins.
As a result, you will receive a coating that has very high resistance to moisture. It is not affected by ultraviolet radiation. Drying occurs literally in 2-3 hours, and there will not be a single seam on the surface.
Using such compositions you can create a variety of colored decorative surfaces. It is also worth noting the high maintainability of the coating. The maximum floor covering can withstand a load of 15 tons. Low temperatures are not scary for it; the thickness ranges from 4-6 mm.
Thin layer coatings
Thin-layer paint coatings for floors are used for industrial floors with medium mechanical loads, to prevent dust and protect concrete floors from aggressive environments, as well as to give floors a decorative appearance. A good solution would be to use paints and enamels for concrete:
- Epoxypol is a glossy, odorless epoxy enamel. Allows the application of thick-layer coatings up to 500 microns.
- Polybetol-Ultra is a glossy polyurethane paint. The coating is odorless, excellent for surfaces with high loads, and is not afraid of gasoline, technical oils and detergents.
- Polybetol is a polyurethane matte paint that is odorless, impact-resistant, does not allow water to pass through and is not afraid of chemicals and petrochemical products.
- Texipol is a glossy paint based on organic solvents that is not afraid of water, diluted alkalis and acids. This economical paint significantly increases the lifespan of concrete floors.
- Texil is a matte paint that dries quickly (in 2 hours) and allows application to concrete at sub-zero temperatures. Reliable protection of the floor from abrasion.
- Polymerstone - 1 is a heavy-duty polyurethane paint for concrete floors, absolutely waterproof and resistant to process fluids. Excellently protects the surface from wear.
- Epostone is a water-based epoxy paint for newly laid and old concrete bases that perfectly protects the floor in conditions of high humidity. It can be used in open areas.
- Epostone-Ultra is a glossy, odorless epoxy enamel that allows the surface to “breathe” due to the vapor permeability of the coating, is environmentally friendly, and has increased resistance to all types of influences - chemical, mechanical, atmospheric.
- Avopol is a water-based acrylic paint that protects concrete floors from corrosion, dries quickly, and forms a durable coating. Excellent for rooms with normal or medium loads.
Thin-layer systems are inexpensive and quite common. The thickness of such coatings is small, so they can be abraded and scratched over time. For this reason, mechanical loads on floors should not be too significant (pedestrians, rubber-powered vehicles), and exposure to aggressive environments should be in the nature of occasional spills.
Of particular importance in this case is the quality of the base (strength, evenness and absence of cracks), since it is this that determines the performance properties of the floor as a whole.
Thin-layer polymer floors are recommended for car parks, warehouses, terminals, and industrial workshops.
Low temperature conditions
As we said, the mixtures are for use in low temperatures and are made from methyl methacrylic resin. The composition also contains various additives that improve the characteristics of the mixture. In order to ensure maximum resistance to temperature changes, it is necessary to maintain a layer thickness of 5-7 mm.
Such coatings are usually made in refrigeration chambers, in rooms adjacent to them. And let’s gradually move on to how thick the self-leveling floor should be in residential buildings.
How to make a self-leveling floor yourself?
First, you need to prepare the materials and tools for installing the self-leveling floor yourself.
Materials:
- ground impregnations;
- base;
- finish.
Tools:
- building level;
- container for diluting solutions (usually a bucket);
- drill with a mixer attachment for mixing components;
- priming roller;
- squeegee for leveling the solution;
- a spiked roller to eliminate air bubbles;
- a construction level is necessary if the concrete-sand screed has significant differences across the entire plane. Therefore, it is recommended to make the surface as smooth as possible in order to use the base layer economically.
READ MORE: How to make a self-leveling floor with your own hands
Self-leveling floors in a residential building
Now let's talk about residential buildings. As you understand, it is unlikely that every homeowner will be able to allocate large funds for the production of a self-leveling floor. This is one of the problems encountered during renovation and construction. In addition, you may encounter the fact that the rough base is very crooked. Please note that the amount of building material used, and therefore the financial investment, depends entirely on the thickness of the coating. Therefore, it is necessary to know what thickness to make the floor in order to avoid large financial investments.
When creating a self-leveling floor, literally every millimeter must be taken into account. For example, coatings made from polymer materials have very high strength. Therefore, in private houses or apartments a very thin layer, up to 1 mm, is enough. In this case, you will forget about repairing the flooring for a long time. But it is best to entrust all work to professionals. The smaller the layer, the less you will spend on purchasing materials. It must be taken into account that there may be potholes, cracks, and depressions in the concrete screed. This will affect the consumption of mixture and money. Therefore, it is recommended to make the finishing coating of minimum thickness.
Self-leveling floor on concrete screed: types of compositions, pouring technology, tools
To correct defects and level out differences in the surface of the base for laying sports flooring, you can use various types of self-leveling mixtures.
Types of self-leveling floors
Depending on the main binder component, self-leveling floors come in five main types:
- cement-acrylic mixtures - moisture-resistant compositions with a rough surface, can be used as a base for flooring;
- methyl methacrylate - chemically resistant mixtures with a short setting time, intended mainly for industrial premises due to the presence of caustic components in the composition;
- polyurethane - durable and elastic compounds that can withstand various aggressive environments;
- epoxy – high-strength self-leveling floors, resistant to various chemicals, but very fragile;
- epoxyurethane - high-strength and elastic mixtures that can withstand heavy loads.
All self-leveling floors can be divided into two large groups according to the method of application.
Some are designed to level out large irregularities and defects on the surface of the base and can be poured in a layer of up to 60-80 mm. Such mixtures (levelers) are intended for rough rough finishing of the floor. They contain a larger fraction of aggregate; the main binder is gypsum or cement. With their help it will not be possible to bring the floor mark to absolute zero; additional finishing will be required.
The second group includes compositions for working with a base that has minor differences. Finishing mixtures are applied in a thin layer - no more than 6-8 mm, and are capable of creating a perfectly smooth surface. To add strength, the composition may include epoxy resins or polymer components.
For the base for laying a sports surface, you should choose the type of mixture that corresponds to the condition of the surface being prepared and the further operating conditions of the room. If it is necessary to eliminate significant differences, then leveling mixtures are needed; finishing mixtures are suitable for correcting minor defects.
In rooms with difficult humidity conditions, you need to choose moisture-resistant compounds. Self-leveling floors not only level the surface and give it horizontality, but also:
- significantly increase its strength, which affects the operation of the floor covering;
- increase the adhesion of the adhesive composition by reducing the porosity of the base (but you should not choose mixtures with a glossy effect);
- significantly reduce the consumption of primers and adhesives when laying linoleum due to a decrease in the absorption of the base.
Preparing the base
When applying a self-leveling floor to a concrete screed, you should know that for its long-term operation, and therefore for the top floor covering, quite stringent requirements are imposed on the base.
First of all, the adhesion of the poured mixture to the surface of the base depends on the quality of preparation. If the technology is violated, during operation the self-leveling floor may peel off and be destroyed.
It is necessary to repair damaged areas, fill large depressions (more than 5 mm) and grind the protrusions. Cracks with a width of 0.4 mm or more should be expanded and filled with epoxy compounds or strengthened with repair solutions using sickle mesh. Smaller cracks, as well as shrinkage joints, must be sealed with sealant. The same applies to junctions near walls.
All grease and oil stains should be removed from the surface of the base; it should be cleared of construction debris and dust-free. To do this, it is recommended to use a construction vacuum cleaner that can remove small particles from deep pores. Special requirements are imposed on the moisture content of the base.
Filling with self-leveling mixtures can only be done on dry surfaces - the moisture content of the screed should not exceed 4%. This is due to the fact that excess moisture can reduce the strength characteristics of the finished surface and also lead to its detachment from the base. Work on the installation of self-leveling floors is allowed to be carried out at an air temperature of 15-25°C and a relative air humidity of no higher than 80%.
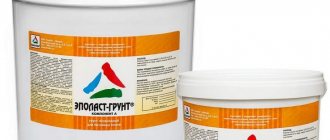
Primer of the base for self-leveling floors
Mostly, cement-sand or concrete screeds serve as the basis for self-leveling floor mixtures. But the former are characterized by high absorbency, which reduces the moisture content in the hardening solution and leads to a loss of strength of the self-leveling coating.
Concrete screeds have a monolithic structure, but a smoother base does not provide the required adhesion. The porosity of the base can be reduced by using special primers that polymerize on the surface and close the pores with a thin latex film, preventing moisture from being absorbed into the subfloor.
On a concrete base, primers containing quartz chips are used to increase the adhesion of the self-leveling floor. After their application, the surface of the screed has a rough texture and looks like fine sandpaper.
The primer should be applied using a roller in two or three steps (according to the manufacturer’s recommendations), and the next layer is applied only after the previous one has completely dried (depending on the composition of the primer, from 4 to 24 hours).
In addition to closing pores and increasing adhesion, penetrating primers can strengthen the top layer of the base by crystallizing in its pores. They also bind tiny particles of dust that cannot be removed mechanically. The choice of primer type is determined by the base
Preparation of a self-leveling solution
To final level the screed, a cement-acrylic, polyurethane or epoxy self-leveling floor can be applied to its surface. The technology for laying a self-leveling mixture differs from the installation of an ordinary screed. Since the composition is applied to the surface in a very thin layer, it has a liquid consistency for ease of application.
The solution must be prepared according to the manufacturer's instructions indicated on the packaging. Part of the required water is poured into the container and the dry mixture is poured. The process is carried out in exactly this sequence, otherwise the mixture will not dissolve completely and lumps will form in the solution.
The resulting mass is thoroughly mixed using a mixer attachment on an electric drill, gradually adding the remaining water. After letting the solution settle for 3-5 minutes, stirring is repeated.
Since most self-leveling mixtures are quick-hardening compounds, they have a short “potlife” period during which they must be laid on a prepared base. Typically, the “working time” of self-leveling floors is no more than 30-40 minutes. In this range, the mixtures have sufficient plasticity to ensure uniform spreading over the leveled surface.
If the floor area to be filled is small, then the solution should be prepared for the entire volume at once, otherwise you will have to make several batches, without deviating from the technology and observing the proportions of water and mixture. As a result of preparation, you should get a mixture that resembles the consistency of fatty kefir. But there are times when, due to the hardness of the water, the solution does not have the proper thickness or, on the contrary, is too viscous. In this case, you should change the ratio of water or dry component in the composition, and remembering the quantity, prepare further batches with the same proportion.
The degree of spreadability can be determined in a simple way. It is necessary to pour about 100 ml of solution onto the glass; if within 3-4 minutes it has spread into a spot with a diameter of 18-20 cm, then the composition is suitable for installation.
The mixture consumption depends on the average height of the leveling layer and the volume of defective areas. Typically, the manufacturer indicates the average consumption for a layer of 1 mm. Having determined the maximum and minimum thickness of the self-leveling floor in the room, you can approximately calculate the required amount of dry mixture for installing a self-leveling coating.
Depending on the composition of the components and the brand of the manufacturer, the average consumption of dry mixture per 1 m2 is 1.5-2 kg for each millimeter of layer.
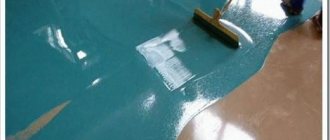
Pouring the floor
Laying the self-leveling mixture in the gym starts from the far corner and works towards the door. The solution is poured onto the surface and distributed using a squeegee - a special spatula with a gap height adjuster.
Each subsequent portion should be poured at the junction with the previous one, leveling the border. After the mixture has been distributed over an area of 15-20 m2, it is necessary to roll the entire surface with a needle roller to remove air bubbles from the solution. This is necessary so that after the hydration of the solution is completed, there are no air cavities left in the body of the self-leveling floor, which reduce its strength characteristics.
To move around the freshly poured solution, you can use special shoe pads - paint shoes. The spikes on them, 20-30 mm long, allow you to move on a fresh self-leveling floor without damaging it. All these operations must be carried out during the “survival” period of the mixture.
Depending on the composition of the self-leveling mixture, pre-hardening occurs within 4-24 hours. After this time it is possible to move along it. However, full strength gain and drying occurs after 3-4 weeks, after which it is allowed to lay sports linoleum on a self-leveling floor.
The installation technology must be strictly observed, since in the event of an error, it is impossible to correct the consequences in a local area and the entire coating will have to be dismantled.
Tools for installing self-leveling floors
- Construction vacuum cleaner for removing dust from the base surface.
- Containers for preparing self-leveling mixture and primer.
- Low-speed drill with a mixer attachment for mixing components.
- Spatula for repairing the base.
- Squeegee for distributing the mixture over the surface of the base.
- Paint roller and brushes for applying primer.
- Needle roller for air removal.
- Paint pads for walking on freshly poured floors.
sportkv.com
Save floor mixture
If you are applying a topcoat, you do not need to make a thick self-leveling floor. Please note that it is the type of coating that is usually used in houses and apartments. As a base, you can use basic and medium compositions. These mixtures are not very expensive; they are made on the basis of sand, gypsum, cement, and plasticizers.
They do not contain polymers, so this layer can be laid even with maximum thickness.
But it is advisable to use such mixtures only to level out large uneven areas. For example, using base mixtures you can make the thickness of which will reach 8 cm. The thickness value should be about one centimeter. The finishing layer must be applied on top of the base layer; its thickness will be minimal. Moreover, you should not make the maximum thickness of the self-leveling floor under the laminate more than 1 mm. But you can’t save much either, since the laminate can bend during use.
Types of self-leveling floors by composition
Methyl methacrylic floors are very durable.
The permissible thickness of self-leveling floors also depends on what material is used in their manufacture. In terms of their composition and, consequently, their performance characteristics, self-leveling screeds come in the following types:
- Methyl methacrylic. These components are most often used to make thin-layer floors intended for application to concrete or metal surfaces. A distinctive feature of such compositions is their strength and ability to increase adhesion (coupling) with smooth substrates such as steel or galvanized sheets. Another positive property of methyl methacrylic compounds is ultra-high strength. Thus, methyl methacrylic floors 0.5 cm thick can withstand a static load of 15 tons per square meter. m.
- Polymer. The range of pouring thickness for such floors is from 3 to 40 mm. Thanks to this, polymer compositions can be used both as a finishing thin-layer coating and as a leveling layer for base substrates.
- Acrylic cement. The most common composition for self-leveling floors. It is characterized by sufficient resistance to various external influences - chemical, physical, temperature. The thickness of the layer of acrylic cement floors recommended by the manufacturer is about 1 – 2 cm.
- Cement-polymer. One of the varieties of self-leveling compounds, designed specifically for pouring a fairly thick layer of up to 5 cm or more. Excellent for leveling rough substrates with large differences in the horizontal plane, as well as for correcting other defects - depressions, bumps, etc.
The table shows the compositions of some brands of self-leveling floors from domestic and foreign manufacturers represented on our finishing materials market.
Before you purchase one or another type of self-leveling floor, you should decide what minimum or maximum layer of fill you will need.
Optimal layer thickness
Polymer mixtures have one drawback - their cost. But they also have an advantage - the thickness of the coating should be very small. For example, if the mixture is based on polyurethane, then the optimal thickness for it will be 2.5 mm. If you need to make a glossy layer or paint it later, it is enough to apply no more than 0.5 mm of the composition. The maximum layer for polyurethane compounds is 5 mm. There is no point in making the thickness more than 5 mm, since this will not increase the strength much, but you will spend more money.
Epoxy bases have similar characteristics. The optimal thickness is about 2.5 mm. In this case, you will get good strength characteristics; the floor can withstand any load that may occur in the house.
Methyl methacrylate mixtures can be applied in a very thin layer. But it’s best not to skimp on them. To achieve quality, it is necessary to apply a layer of more than 8 mm.
Wet screed leveling technology (self-leveling floor)
Wet screed is a cement or gypsum mortar with a liquid consistency. This allows the mixture to independently take an even shape, spreading evenly over the floor area and compensating for all unevenness.
How to level a concrete floor under linoleum with a wet screed - the sequence of actions is similar to the installation of a semi-dry screed:
- Floor preparation and marking.
- Surface primer.
- Purchase the mixture and knead according to the manufacturer's instructions.
- Pouring the mixture.
To release air from the lower layers of the mixture, after pouring you need to treat the surface with a needle roller.
Drying time depends on the brand of the mixture; this value is indicated on the packaging. After drying, the finishing mixture is applied and linoleum is laid.
Advice from professionals
To get a high-quality surface without extra costs, you can use the techniques of experienced specialists. For example, if the base is fairly level and there is no major damage, it can be fixed quite easily. You will get rid of the purchase of a basic or medium bulk composition and save on repairs. Using a sander, you need to carefully sand the floor surface. This will smooth out all the unevenness, as a result you will significantly save on building materials.
As a primer, you can use a dry mixture for self-leveling floors. It must be diluted in water. After that, a thin layer should be applied using a roller on the base of the floor. As soon as the primer has dried, you can begin pouring the finishing coat.
When making a self-leveling floor with your own hands, step-by-step instructions will help you follow the required sequence:
- Prepare the base for the subfloor.
- Apply the subfloor mixture. It could even be a simple cement-sand mixture.
- Level the base.
- Apply primer to the surface of the subfloor.
- Apply self-leveling floor.
- After the surface has dried, you can begin painting it or installing laminate, tile, or linoleum.
In order to obtain the highest quality surface at an affordable price, experts use some techniques.
Selection of self-leveling floors for concrete screed and technology for working with leveling mixtures
Back
Self-leveling floors have simplified the leveling of the base surface, reduced labor costs and expanded the design possibilities of floor coverings made using the screed principle.
Self-leveling floor in the apartment
Types of modern dry floor mixes
Self-leveling floors are all mixtures that have replaced the outdated technology of cement-sand screed. This whole family is divided into two classes:
- Plastic levelers, whose properties are more similar to a screed than to self-leveling mixtures in the traditional sense. All of them are united by the presence of cement or gypsum components mixed with sand. These compounds perform rough leveling of the base; they are applied in a thick layer.
- Finish self-leveling floors, which contain a significant amount of polymer additives. They are designed for final fine leveling of the surface.
Floor leveler
Thick self-leveling floors or levelers differ from traditional cement-sand screeds in the homogeneous fraction, the use of purified components with the addition of plasticizers. These additives reduce porosity and improve the plasticity of the mortar during installation. The compounds are applied according to the same principle as the screed: along the beacons using the rule.
Finishing compounds are capable of spontaneously forming a flat surface under the force of gravity; they are used for fine leveling of the surface.
Finish self-leveling floor
These formulations are recommended to be used in pairs. For the subfloor, use a leveler or a thick self-leveling floor, and for finishing, use a thin-layer leveling mixture.
Features of the use of finishing mixtures
Finishing mixtures are applied to any solid base, including wooden floors. But it is considered optimal if the self-leveling floor is poured onto a screed or concrete base.
To ensure a durable finish, the base must be level. Moreover, the fact that a thin layer will not cover large tubercles and the surface will be uneven is not the main reason. In the pits and in the places of the tubercles, the poured floor has a different thickness, which will lead to uneven drying and a decrease in strength in some places. Therefore, if possible, it is recommended to perform a rough screed.
Having completed a preliminary rough screed, you will get an ideal surface that can be leveled with a regular finishing poured floor and even a colored or 3D floor.
Material selection
When choosing the type of finishing self-leveling floor to pour onto a concrete screed, consider the following nuances:
- Inexpensive cement-acrylic mixtures are poured in rooms with high humidity, where the floor is constantly in contact with water: kitchen, bathroom. A finishing coating (tile, linoleum) is laid on top of such floors.
- In residential heated premises with a constantly dry microclimate, gypsum-based floors are poured.
- If the room has a heated floor, then the finishing coating should have elasticity and the ability to expand without cracking due to temperature changes. The best option is polyurethane or epoxy-polyurethane mixtures. This option is also chosen to create a 3D floor.
- If the subfloor was completed a long time ago, and the finishing coating needs to be done in a short time, choose quick-hardening (methyl methacrylate) mixtures.
The choice of materials is huge. If the old base is strong and level, it is permissible to immediately pour one layer of a compound designated “extra strong.” You can use universal compounds with a wide range of minimum and maximum thicknesses, and use them immediately for both roughing and finishing work.
Pouring technology
The technology for pouring a self-leveling floor onto a cement or concrete screed is simple. The master will only need to carefully prepare the base and follow the recommendations for mixing, pouring technique and drying regime for the self-leveling floor.
Rules for working with self-leveling floors
To get a high-quality coating that will not crack and will be uniformly durable over the entire area, follow these requirements:
- The cement screed must be intact, without peeling or crumbling areas. Lumps and pits larger than 2 mm are not allowed on the surface. Such problems occur on old screeds. All problem areas are cleared of fragile material, sealed with cement-sand mortar, and rubbed down. All pits and cracks are eliminated, the tubercles are sanded off.
Cleaning the base
- To ensure that the final self-leveling floor adheres firmly to the sub-base, primers are used. For a cement screed, use a deep penetration primer, which will close the pores and prevent the absorption of moisture from the self-leveling floor.
- A mandatory requirement is the installation of a damper tape around the perimeter, which will form a compensation gap and prevent the appearance of stress in the screed during thermal expansion. After the floor has dried, the tape is cut, and to completely seal the surface (in bathrooms), the gap is filled with sealant.
Damper tape
- To obtain a high-quality result, it is important to take care of a constant temperature in the room. The optimal indicator is 15 degrees. As the temperature decreases, the fluidity of the mixture decreases, making it difficult to obtain a uniform layer. This will especially affect the uniformity of color mixtures. At high temperatures, the lifetime of the mixture will be shortened, and you will have to work with the solution faster. This will negatively affect the quality of work.
- While the poured floor is drying, drafts are eliminated.
- Ensuring the required level of moisture in the cement screed. A moisture meter is used for this. It is recommended to work at 4%. If the humidity level is higher, you need to use waterproofing.
Pouring technology
To work, you will need mixing containers, a mixer, paint shoes, a squeegee, a spatula and a needle roller. If the master is not confident in his skills, leveling the thin layer can be done using pin beacons. They are set to a layer height of 2-2.5 mm.
After preparing the base surface and completely drying the primer, begin pouring the self-leveling mixture. The solution is prepared by mixing the dry mixture with water. Mixing proportions are indicated by the manufacturer on the packaging.
Important! The viability of the solution is no more than 40 minutes, so it is necessary to fill the entire floor within this period of time.
It is important to ensure continuous preparation of new portions of the solution. This will require a partner. Large areas are filled in segments, delimiting them with wooden slats and creating dividing seams.
Leveling the floor along the screed with a self-leveling mixture is carried out in the following order:
- A rail, a piece of plastic or drywall, is installed in the doorway, which will act as a limiter and prevent the mixture from flowing outside the room. If the room is large, the slats are installed along the border of the marked segments for filling.
- The liquid mixture is poured in strips, starting from the wall farthest from the passage. The width of the strip is 50 cm. When filling each subsequent strip, the solution is distributed over the previous one. In this case, the liquid mass is constantly leveled with a spatula.
- After filling the entire surface of the floor, the resulting layer is treated with a needle roller. This procedure will remove air bubbles from the thickness of the mixture. Otherwise, bubbles will appear on the surface and burst to form craters. To work with a roller, you may need to go onto the poured surface. To do this, use spiked shoe pads (paint shoes).
Leveling with a spatula and rolling with a roller
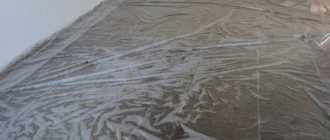
- After the initial setting of the mixture, a plastic film is spread over the screed. It will prevent uneven evaporation of moisture from the floor surface.
Video of a team of craftsmen filling the floor:
Depending on the design plans, after the self-leveling floor has dried, it is varnished or any other type of covering is installed.
Average score of ratings is more than 0
laminatepol.ru
Thick Layers
When making a thick layer, experts recommend using leveling mixtures rather than self-leveling floors. It is worth noting that, depending on the manufacturer, the compositions may have different properties. For example, one company may produce products that can be installed as thick as 80mm. And another may offer seemingly similar materials, but they can be used to make a layer of 100 mm without any problems.
If possible, use concrete mortar to level large differences. Leveling mixtures are not suitable for finishing coats.
Experts do not recommend making the thickest possible coating - the floors will take a very long time to harden. To achieve high quality, you will need to maintain constant temperature and humidity. To make a self-leveling floor with your own hands, step-by-step instructions are given a little higher. It is enough to adhere to the work algorithm to get a high-quality layer.
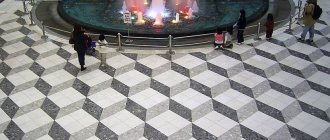
Varieties
Do not confuse screed and self-leveling floor due to their ability to quickly harden. These are materials that are fundamentally different in purpose.
READ MORE: Do-it-yourself self-leveling floor - how to make 3D self-leveling floors (photo)
Commercially available self-leveling floors for tiles are distinguished according to various criteria.
If we qualify them by binder, we get the following types:
- Cement. They serve solely to level the surface, but further processing, such as grinding and the use of other techniques, has a surprisingly interesting decorative effect. Ideal for rooms with high humidity.
- Plaster. An excellent option for heated floors. Moreover, the material does not shrink and is easy to work with.
- Cement-gypsum. Combines the advantages of the first two types of floors.
Thin floor
Such mixtures are not used to level the surface. They are used to make the finishing coating. The minimum layer is 1 mm, the maximum value is 10 mm. When pouring and working with the finishing layer, you need to take into account that the mixtures harden quickly.
The quality of the floor does not depend on thickness at all. Therefore, you need to adhere to the maximum thickness of the self-leveling floor. To get a high-quality surface with minimal investment, you need to prepare the base. The composition must be selected based on the conditions in which the floor will be used in the future. As you understand, the maximum value of 10 mm should not be achieved if the floor is installed in a private house or apartment.
Source
Maximum and minimum thickness of self-leveling floor
The maximum thickness of the self-leveling floor depends on the intended purpose of the selected composition, professional training and the limiting parameters limiting its destruction.
They have high plasticity. Therefore, they are used where walking comfort is needed, in waiting areas, in industrial premises with high shock or vibration loads, gyms, warehouses, etc.
Price of poured floor from 355 rub.
Durable and reliable. The optimal choice is floors for production, restaurants, hospitals and children's institutions and everything else where reliable protection of the concrete floor is needed. Chemically resistant to many chemicals and easy to clean. 3D floor decoration.
Price of poured floor from 335 rub.
The minimum cost of working with the material is 781 rubles. per m2. Call us and we’ll tell you everything in detail and calculate the cost of your floors.
The constant tightening of standards applied to the finishing of floor surfaces in Moscow has become the main factor motivating manufacturers to search for innovative solutions. Thanks to this, fundamentally and qualitatively new thin-layer floor coverings – self-leveling floors – appeared on the market.
The line of these compositions has firmly occupied its niche in the segment of finishing technologies, since the main functional and physical characteristics of these mixtures have no analogues that could create worthy competition and displace these materials from leading positions. However, it should be noted that there is a small difficulty that prevents widespread distribution - the too high cost of expensive components, limiting the mass popularization of these self-leveling materials instead of the classic screed.
Although professionals were able to rationalize the consumption of each material and optimize the final cost of the floor covering, it is worth considering an important condition: the maximum thickness of the self-leveling floor contributes to a proportional increase in the price of such a covering. Therefore, before choosing one or another mixture, it is worth carefully studying all the varieties and features of the use of each composition, how they are applied and under what conditions.
For this reason, all polymer compositions are divided into three types with differences in the thickness of the formed layer and, accordingly, their functional application.
Although sometimes the cost may seem high, with proper design and rational use, the compositions can create such a strong and durable foundation, with a total service life of 50 years or more. This is the most important aspect, which has become the main factor in increasing the profitability and popularization of these basic compositions in industrial construction, finishing of commercial buildings and even residential premises.
Highly filled floors
When arranging industrial facilities, the main value influencing the choice between one composition or another always remains the increased functionality and strength of the floor surface. It is not economically profitable to make a thick layer of epoxy or polyurethane compounds, because for large areas such a floor will have a high cost. Therefore, in search of an alternative, manufacturers were able to find the optimal solution - highly filled floors, the thickness of which is 100 mm.
Thickness of the poured floor.
Self-leveling flooring can be thin-layered and highly filled, so it all depends on the specific choice. You need to focus on the height differences in the room. The thickness of the maximum and minimum level of screed for self-leveling mixtures is described in the instructions. Typically, for residential premises, the minimum thickness of thin-layer poured floors ranges on average from 0.5 to 3.0 millimeters. There are also thick-layer universal self-leveling floors with a thickness of about 5.0-7.5 mm and special leveling mixtures with a thickness of up to 12.0 mm. But there are self-leveling floors with a screed thickness of up to 50-100 mm (up to 10 cm), although they are more suitable for industrial buildings.
Laying the self-leveling base.
After stirring, proceed to pouring the surface. Start repairs from the wall opposite to the interior entrance door. Pour the self-leveling floor onto the surface in stages and in small portions – an area of one and a half to two “squares” (a strip of about 0.75-1.0 meters).
After filling the area, you need to level the screed with a wide comb on a long handle, then be sure to roll the mixture with a needle roller. This is done in order to remove excess air and level the solution. Use a spatula in hard-to-reach places. Level the surface of the poured floor in one step, without long breaks.
If necessary, use point markers (or thread) or special guide rails for alignment.
Repeat the repair procedure for the entire room. If necessary, the poured floor can be sanded later (for example, if it goes under carpet or linoleum).
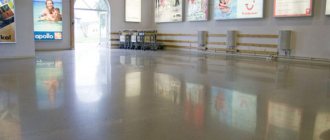
The final stage.
In principle, this completes the installation of the poured floor. Its drying time is on average from 3 to 6 hours. During the drying period, do not allow sunlight or excess moisture into the room and make sure that there are no drafts. The surface of self-leveling floors can be stepped on within just a few days; the subsequent decorative coating can be laid no earlier than 14 days after the leveling screed has completely dried.
Thus, the technology for laying a poured floor is not very difficult. Enjoy your new beautiful and comfortable coating. Good luck with your repair.