Main material: chipboard
Wood in its pure form is practically no longer used in cabinet furniture; solid wood is considered an expensive luxury material.
Now wood is being replaced with a cheaper material - laminated chipboard (abbreviated laminated chipboard). Most often, these boards have a thickness of 16 mm; chipboards with a thickness of 10 and 22 mm can also be found on sale. 10mm sheets are typically used to fill wardrobe doors, and 22mm sheets are used for bookcases and shelves where high bending strength is required. Also, sometimes the structure is decorated with elements made from 22 mm laminated chipboard.
Almost all furniture parts are made from 16 mm laminated chipboard (except for doors and facades).
Laminated chipboard
Laminated chipboard is cut on special machines along guides. Of course, you can saw it off at home using a jigsaw, but then there will be chips and wavy irregularities on the edges. It is almost impossible to saw off chipboard evenly with a jigsaw at home.
Edges
The most vulnerable place of laminated chipboard is when it is cut down. It is the easiest way for moisture to penetrate inside, so if the protection is poor, the ends may soon swell. Therefore, the ends are closed using edges; there are several types of them.
- Melamine edge is the cheapest, but of poor quality. You can stick it on at home using an iron.
Melamine edge
- PVC edge 0.4 and 2 mm is the best option. It can only be glued on a special machine, so it is done immediately when ordering a cut. To save money, 0.4 mm is glued to the invisible ends, and 2 mm to the external ones, which will experience constant loads and friction.
PVC edge 2 mm
- ABS edge is similar to PVC, but made from environmentally friendly material.
- Mortise T-shaped profile - inserted into a groove previously made with a milling cutter. Rarely used.
Mortise T-profile
- Overhead U-profile - can be easily glued to liquid nails at home. The main disadvantage is that the edges will protrude a few millimeters, so dirt will get stuck under it. On the other hand, this drawback allows you to hide a poor-quality cut.
Overlay edge
Article on the topic: edging laminated chipboard.
Advantages and disadvantages of homemade furniture
Original do-it-yourself furniture, advantages:
- Unusual interior design, something that neither your friends, nor colleagues, nor neighbors definitely have.
- The ability to use items that would otherwise go to landfill.
- Less investment than buying furniture.
- Opportunity to realize your passion for creativity.
- Moral satisfaction from doing it yourself.
Remodeling an old one to create an unusual interior is a great opportunity to save money.
The disadvantages of the furniture will be the same as those of the materials and objects used. Yes, no one will give a guarantee on a self-made sofa either. Perhaps this is where the disadvantages of hand-made furniture in the furniture field end.
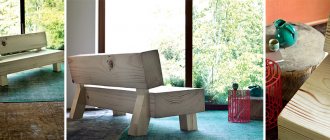
There is no need to paint the wood, as it should be associated with the forest and nature.
Facades
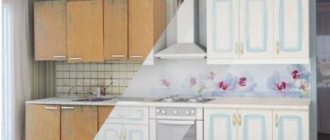
Kitchen fronts and furniture doors are usually made of more elegant material. But if you are making a drawer door inside a sliding wardrobe that no one will see, you can use regular 16 mm laminated chipboard with a 2 mm PVC edge for it. But the cabinets in the kitchen should look more presentable.
The facade is a separate furniture element. It is usually made to order. If the dimensions of the facades are non-standard, their production may take several months.
You can easily navigate the standard dimensions: usually the facades are made 2 mm smaller than the cabinet itself on each side. Therefore, for a standard 600 mm cabinet, a 596 mm façade is used.
The height of the kitchen cabinet also depends on the facade and ranges from 715 to 725 mm for floor cabinets (without legs) and low wall cabinets, and 915-925 mm for high wall cabinets.
Standard front sizes for kitchen cabinets
Types of facades
Since facades serve mainly a decorative function, the choice is huge; they differ in appearance and material.
- Facades made of laminated MDF. This is a pressed material, more moisture-resistant and dense compared to chipboard. Most often, the surface is laminated to look like wood. But no matter how strong the film is, over time it can come off at the edges and crack. The main advantage of this material is its low price and fast production.
MDF facades
- In addition to standard blank facades, there are also options with figured cutouts for stained glass. The glass is attached to the cover on the reverse side.
- Softforming - such facades are similar to ordinary MDF, but have a characteristic two-color layout with relief on both sides. They can only be used in dry rooms, bedrooms or living rooms.
Softforming
- Postforming – even higher quality and durable products. Thin plastic at the edges is wrapped 90° or 180°, thereby eliminating unnecessary seams at the corners. Chipboard or MDF boards are used as the base. Typically, postforming is done in a strict form, without unnecessary pretentious decorative elements.
Postforming
- Plastic facades are of high quality, but expensive. They consist of a base (chipboard/MDF) lined on both sides with thick plastic. They always have a strict design and a flat surface, glossy or matte. The edges of the slab are sometimes protected with ABS edges or aluminum profiles. Super-glossy acrylic plastic has been especially popular lately.
Plastic facades in aluminum profile
- Facades made of wood and veneer are suitable for lovers of natural materials, but they are expensive. In addition, there is a long debate about environmental friendliness: there is an opinion that there is so much varnish and impregnation that there is only one name left for the tree.
Wooden facades
- Painted facades to resemble enamel. They have a significant drawback - the surface is vulnerable to scratches and deformations, and has low chemical resistance. They used to be popular due to their rich color, but with the advent of glossy acrylic plastic, everything changed.
- Aluminum facades with glass are suitable for a high-tech kitchen. They look modern, but are difficult to manufacture and install. Non-standard fittings are used for their fastening.
Master class on making simple models
Anyone can make furniture with their own hands. If you have the necessary tools at home, you can try to make an unusual shelf, table or sofa. , diagrams, drawings, list of materials and tools are freely available If you follow all the recommendations and take a responsible approach to the implementation of the idea, the homemade design will turn out no worse than the factory one, but will cost much less. The advantages of making furniture with your own hands are the ability to choose the size, type of material and color so that the finished product fits perfectly into the interior of the room. If you use your imagination, you can realize any model with an exclusive design. But how long it will take to make furniture with your own hands depends on the complexity of the chosen design and the level of skill of the home craftsman.
Below are fairly simple master classes with a step-by-step algorithm of actions. After familiarizing yourself with them, even novice furniture makers will be able to make a beautiful and stylish product with their own hands.
Shoe rack with soft seat
Shoe racks are an organized storage system for shoes, boots and boots. In the factory they are made from various materials. The model range of this furniture is also represented by a huge range of products: from shelves and cabinets to banquettes and whatnots. To create a homemade product you will need the following blanks, consumables and available materials:
- wooden blocks;
- stands made from old furniture legs;
- wooden layers;
- foam rubber and fabric;
- glue, screws;
- paint or varnish.
After preparing the materials, you can begin to work. It is important to ensure that there is enough free space in the room for design and assembly. Making furniture with your own hands will be much faster if you strictly follow the instructions:
- Carefully study the finished sketch, and then, guided by the diagram, cut out the base, side and back parts, and the shelves themselves from wooden layers. At this stage it is better to use a jigsaw.
- Sand the edges of the workpieces with sandpaper.
- Assemble a frame from bars and furniture legs.
- Provide supports for shelves. It is better to fix it with self-tapping screws when the entire basic structure is assembled.
- Using wood glue, glue the sheets to the frame, additionally securing them with self-tapping screws for reliability.
- Cover the entire resulting structure with paint or varnish.
- Cut the foam rubber; the piece should be the same size as the top cover. Coat the base with glue, attach burlap to it, and then foam rubber. Secure the resulting “pie” with a stapler for reliability.
- Cut a piece of durable fabric with a seam allowance, stretch it over the foam, fold the edges and staple again. If necessary, decorate with ties.
The described model of a homemade shelf provides the opportunity to sit on it while putting on shoes, which means that the frame must be very durable. If desired, you can further strengthen the structure.
Making a cabinet for a balcony with your own hands, master classes
Tools
Cutting parts
Grinding
Attaching the legs
Screed with self-tapping screws
Painting
Drying
Fixing foam rubber
Covering with fabric
Ready product
Chipboard table
You can assemble any table model from chipboard. It’s easy to work with the material; it’s freely available on thematic resources and you can select drawings for structures of the required configuration and preferred level of complexity. Dimensions are chosen so that the furniture fits well into the interior. To work you need to prepare:
- circular saw;
- electric drill;
- screwdriver;
- milling cutter
Additionally, you will need an iron to glue the edge tape. Self-tapping screws, corners, dowels and wood glue are used as fasteners. When preparing parts and assembling, you can use a detailed plan:
- Select a drawing.
- Prepare the details. In accordance with the diagram, cut the chipboard sheets. Cut out the tabletop, frame elements and supports.
- Place the tabletop panel horizontally on the floor or wide table. Attach strips around the perimeter, creating a frame. Tighten with self-tapping screws. Drill holes to attach the frame.
- Clean the surface and side parts from dust and dirt. Using an iron, attach the edge tape. Cut off the excess with a sharp knife or blade.
- Insert fasteners into the holes and assemble a reinforcing frame. Build side parts (legs) from chipboard strips. Attach them to the frame supports. Install plastic elements at the bottom of the legs.
- Attach the frame to the tabletop. Close all holes with decorative plugs. The furniture is ready, all that remains is to wipe it from dust.
When purchasing chipboards, it is better to choose high-density modifications. They are smoother, cut easier, and in this case the product itself will be stable. All work must be carried out in a dry, warm room to avoid delamination of the material.
Tools
Drawing
Sawing
Manufacturing of a reinforcing frame
Assembly
Ready product
Sofa made of pallets
Making an inexpensive, easy-to-care sofa is possible from pallets. They weigh on average up to 20 kg and can be standard or euro size. You can purchase both used and new pallets. If you study thematic forums, you will be able to save money: warehouse owners often give away pallets for free. Tools and consumables you will need:
- nails, screws, corners;
- paint or varnish;
- rollers, brushes;
- primer for garden furniture;
- furniture stapler;
- foam rubber
From available materials you can assemble not only simple furniture on one pallet, but also complex structures. Using the finished pattern, we make the base, then the legs, decorate with pillows and other decorative elements. Step-by-step algorithm on how to make furniture:
- 8 pallets must be laid out in the shape of the letter “L”, then another row must be laid on top. It is advisable to glue the pallets together with wood glue.
- Use nails and self-tapping screws to secure the back; it will be the cut-off lower part of the three pallets.
- Sand the surface with sandpaper, then coat it with a primer for garden furniture. After drying, apply protective varnish or paint.
- Place soft pillows on the seat - you can sew them yourself or buy them ready-made in the store.
You can’t skimp on primer and varnish - if the sofa is going to be placed outside, it must withstand any weather conditions.
Most often, home furniture is assembled from scrap materials. To work in this case, you will only need a carpentry kit, a little patience and accuracy. If you follow the instructions, the chosen design will be strong and durable.
Tools
Dismantling
Sanding boards
Assembling the lower part of the frame
Backrest fastening
Painting
Installation of wheels
Cutting foam for pillows
Making cases
The sofa is ready
Back walls and bottoms of drawers
The back wall and bottom of the drawers are most often made of HDF. The smooth side of the sheet should face the inside of the cabinet/drawer. The thickness of the sheets is 3-5 mm, the color is selected to match the chipboard.
Some people prefer to attach HDF to a furniture stapler, but this cannot be done. Over time, the brackets will become loose and the structure may warp. It’s not worth talking about the bottom of the drawers - a stapler is clearly not suitable for fastening.
Furniture LDVP
Sometimes it is inserted into a groove prepared with a milling cutter, but all dimensions must match down to the millimeter.
Most often, HDF is attached to nails or self-tapping screws. It is better to use self-tapping screws with a press washer, but before screwing them in, you must drill a hole, otherwise the product may crack.
In rare cases, for example, to create a “stiffener” in a tall cabinet or in drawers with high loads, fiberboard is replaced with laminated chipboard. These materials can also be combined.
Varietal wood species
Before choosing a particular type of wood, you need to decide what kind of wood furniture can be made. Species are divided into hard and soft wood.
Hard varieties include apple, ash, beech, acacia and elm. They are used for the manufacture of frame structures and furniture that can withstand heavy loads. Soft species are juniper, pine, willow, fir. Decorative parts that are not designed for heavy loads are made from this material.
When creating solid wood furniture with your own hands, it is important to take into account future conditions when using it. For example, for rooms with high humidity you will need wood with good moisture resistance. It could be cedar.
Interesting products are made from wenge, meranti, mahogany and makore; such rocks have an unusual texture.
Pine is used for the frame of upholstered furniture and decorative elements.
Beech is durable, but not resistant to moisture. Before starting work, this type of wood must be coated with special protective agents.
Oak is ideal for making solid furniture, such as chests of drawers, beds or wardrobes.
Birch is a fragile material, prone to cracks, as a result of which it is used to create smaller furniture elements - coffee tables and chairs.
Tabletops
A tabletop is a horizontal work surface on which you can cook, eat, read, write, etc.
Most office and desk tables, as well as cheap dining tables, have a tabletop made of the same chipboard as the main parts. The thickness is 16 or 22 mm, it is necessary to frame it with a 2 mm PVC edge.
Special countertops are used for the kitchen. They are a sheet of chipboard 28-38 mm thick, which is covered on top with durable plastic using postforming technology. Moisture-resistant countertops are green when cut, while regular chipboard is gray. A proper kitchen countertop should have a drip tray that will prevent dripping liquid from getting onto the fronts and drawers.
Cutting a regular and moisture-resistant countertop
The weak point of such countertops is the cut edge. They are usually covered with a simple melamine edge, so they become unusable within the first year of use. To avoid this, it is recommended to protect the edges with special aluminum profiles (end strip), and to protect against moisture, pre-coat the cut with silicone sealant.
There are also other types of profiles: corner and connecting strips, which are needed for joining several cabinets with different countertops.
Corner, connecting and end strip for table top
Another element is a decorative corner that closes the gap between the wall and the tabletop.
Skirting board for table top
A wall panel is sometimes used to finish the apron. Unlike tiles or mosaics, it is more practical due to the absence of seams and is inexpensive compared to glass splashbacks.
The tabletop is attached to the cabinets from below using short self-tapping screws to horizontal spacers so as not to spoil the smooth front surface.
Scheme of fastening the tabletop to the cabinet
Countertops made from natural or artificial stone are higher quality and more durable than others. Natural stone is heavy and requires special care due to its high porosity. But artificial stone does not have such disadvantages; it can be given any size and shape. The main disadvantage of stone countertops is the high price; for a small kitchen they cost from 40 thousand rubles. and more.
An alternative option is a countertop made of tiles or porcelain stoneware. You can make it yourself, but the tiles cannot be mounted on regular plywood or chipboard. The base must first be covered with cement-fiber sheets.
Location of parts
A detail is any element of cabinet furniture: lids, tabletops, walls, facades, shelves. Each part can be either nested or invoice. Choosing the right type of location is very important.
Let's look at examples of two kitchen cabinets: one of them will stand on legs, and the second will be hanging.
Base cabinet:
As can be seen in the photo, the operating stress in the floor-standing cabinet is directed downwards from the lid and in the first option is naturally transmitted through the parts to the cabinet legs.
Correct and incorrect options for assembling a floor cabinet
In the second, incorrect option, the load is transmitted through the confirmat (furniture screw), and because of this it will be torn out of the part at a fracture.
Wall cabinet:
In the second example, the opposite is true: the load will go to the bottom shelf, and the attachment point will be on top.
Correct and incorrect assembly of a wall cabinet
If we use the same fastening scheme here as in the floor cabinet (option 1), all 4 bolts will be constantly under the load of being pulled out of the wood. Therefore, it is better if the confirmations experience stress on the fracture (see diagram “correctly”).
Carpentry lessons
Part connections
All structural parts are connected using glue with additional fixation with dowels. Such a connection is not much inferior in strength to self-tapping screws and differs favorably from them in that it does not force the caps to be masked.
Connecting wooden parts with dowels.
The assembly technology is not complicated:
- Glue is diluted in warm water. Before use, it is aged for 40-60 minutes;
Please note: casein glue must be used within three to four hours. After this period, it loses its stickiness, gradually thickening.
- Holes for dowels are marked and drilled in both parts. The total depth of the paired holes should be slightly greater than the length of the dowel;
- The dowels are lubricated with glue and placed in the holes on one of the parts;
- Both surfaces to be glued and the free parts of the dowels are coated with the thinnest possible layer of glue, after which the parts are connected and placed under pressure.
Attention: squeezed out glue must be removed from the surface of the product immediately. Once it sets, it will be almost impossible to clean it without scratching the surface.
Planing
There are a couple of subtleties when working with an electric planer.
- The knives should protrude beyond the ski by no more than 0.5 millimeters. It’s better to make a couple of extra passes than to ruin the part with a deep groove;
The smaller the layer removed in one pass, the higher the quality of the surface.
- The slower you move the plane over the surface, the less likely it is to get a “wave” from the knives on the planed timber.
Grinding
For rough sanding of wood, you can use not only sandpaper, but also a sanding mesh. It is better to grind only along the grain: with a transverse movement, a coarse abrasive will leave deep scratches that will take a long time to remove with fine-grained paper.
Brushing
This technology allows you to make a cabinet or table from timber with your own hands, giving them the appearance of old products with pronounced surface wear.
The procedure is as follows:
- We process the front surface of the part with a metal brush. The pressure on the brush should be minimal, and its movement should be as uniform as possible. This will remove the softest wood fibers; a relief texture will stand out on the timber;
- Then the stain is applied - in one or several layers until the desired tone is achieved;
- The next stage is sanding with fine sandpaper. The pressure on the sander should be insignificant: our task is not to level the surface, but to grind off the texture protruding above it, highlighting it with color.
The photo shows the brushed surface of the ceiling beam.
Varnishing
The varnish is applied last, after the product is completely assembled. If you try to glue pre-varnished parts, the varnish will interfere with the adhesion of the glue to the wood, severely weakening the joints.
When varnishing, you should follow a few simple rules.
- The coating is applied in 5-6 thin layers with intermediate drying. There is no point in trying to varnish the surface with a thick layer in one go: the total drying time will not decrease, but will increase;
- If possible, the varnish is applied to the surface in a horizontal position. This will avoid drips;
- After drying the first layer of varnish, intermediate sanding with zero paper is required. Humidification raises the lint (fibers of the top layer of wood), which will make the surface rough to the touch.
Intermediate sanding will make the varnished surface perfectly smooth.
Furniture fasteners
Furniture fasteners are hardware (metal products) that are used to connect parts. Most often, connections are made at right angles.
- Wooden dowels - inserted into pre-drilled holes in both parts. They are used for preliminary fixation and increasing the shear load, then the parts are fixed in a more reliable way.
Dowels
- Furniture corners are a popular, but outdated type of furniture fastening. Among the disadvantages: appearance, loosening over time and bulkiness.
Furniture corner
- Euroscrew (confirmed) – furniture screw. This is the main fastener for parts in modern furniture. Furniture makers almost never use ordinary self-tapping screws. Confirmats have a larger thread, so they stay inside the chipboard much better.
Confirmat
The holes for them can be drilled directly on site. To do this, use a special drill that makes a hole with different diameters for the thread, neck and head of the Euroscrew. The most commonly used confirmats are 7*50 mm. When drilling, special attention should be paid to the perpendicularity of the drilling, so as not to spoil the coating of the part with a through hole.
Drill for euroscrew
Furniture screws are tightened with a hex key or a screwdriver attachment. The caps for a Phillips screwdriver cannot be tightened tightly until the end.
The main disadvantage of this type of fastening is that screwed-in caps remain visible. To hide them, use plastic plugs matching the color of the chipboard.
- Eccentric ties are a modern and correct method of fastening. It leaves a hole only on the inside of the product, but requires very precise drilling.
Eccentric coupler
To obtain the required holes, use a Forstner drill. There's not much point in going to the trouble of using them to assemble items that will be hidden, but they work well for attaching drawer doors.
Forstner drill
Article on the topic: DIY kitchen assembly.
Preparing for work
Tools
Let's find out what tools you will need to make a table, stool or sofa from timber with your own hands:
Folding sofa bed made of timber and boards.
- Stationary or hand-held circular saw. Pay attention to the maximum cutting depth: for compact circular saws it often does not exceed 55-65 millimeters;
- Plane. Better - electric: it will greatly reduce the time spent on leveling the surface;
- Sander. It can be belt or vibration;
Even an inexpensive vibration sander will make your work much easier.
- At least three types of sandpaper - from medium to zero;
- Drill and brush attachment for it. It will be needed for the already mentioned operation - brushing. The brush should be made of brass-plated wire 0.3 millimeters thick;
- Wood drill with a diameter of 16 - 20 millimeters;
- High-quality brushes for staining and varnishing. The bristles of cheap brushes often remain in the varnish layer, spoiling the appearance of the surface.
Additional materials
In addition to the above, we will need:
- Stain;
- Wooden dowels with a diameter corresponding to the diameter of the drill;
- Wood glue (albumin, casein or bone);
- Varnish. If you are making a stool for a dry room, you can opt for polyurethane-based parquet varnish; a do-it-yourself outdoor bench made of timber is coated with a more moisture-resistant yacht varnish.
Furniture fittings
- Handles - everything is clear here. They are usually attached with screws.
- Legs are convenient in rooms where wet floor cleaning is often done, for example, in the kitchen. Any wood, especially chipboard, will quickly deteriorate from daily contact with water. In addition, the legs can be used to level furniture on uneven surfaces.
- A silicone damper is a cheap but very useful part that can reduce the noise of impacts from cabinet doors. It is glued to the top and bottom of the cabinet door or end to soften the impact.
Silicone damper
- Furniture hinges. Round cutouts for them (additives) in the facades can be made in any furniture workshop, if the manufacturer has not made them in advance. The hinges differ in the degree of door opening. Standard hinges have an opening angle of 180° and a closed angle of 90°. The hinges have a special mechanism that allows you to adjust the doors in height and seating depth. Separate hinges are sold for glass doors; you can clamp the glass into them without drilling a hole.
Furniture hinges
Among the inexpensive manufacturers of accessories, we can recommend the Chinese Boyard, and among the serious global manufacturers, the Austrian Blum.
Minimum set of tools
Making glass furniture with your own hands is an extremely complex process. All actions are performed manually using a diamond glass cutter on a table without deflections or bumps. Movements must be perfectly smooth and precise. Cuts along the edge of the glass are treated with an emery block, occasionally wetting the canvas with water. To drill holes you will need to select a cylindrical crown.
It is much easier to work with plastic pipes; it will require the material itself, plugs, glue, and connecting parts. A hammer drill, a screwdriver, a hacksaw and scissors will come in handy. A soldering iron for polypropylene pipes will also be useful, as it will make working with the material easier.
To process wood, panels, MDF, chipboard, you need a rotary miter box and an electric jigsaw. A sanding machine will help to process the wood for later cutting. It is necessary to purchase in advance a router with cuts for different grooves and holes. For fastening, use a screwdriver, glue, and nails. This is a standard set; certain furniture models will require additional tools.
Stages of self-assembly of furniture, rules for decoding drawings
Creating furniture with your own hands using a master class is not difficult. Typically, the videos list the necessary tools, show how to cut and process the material, how to correctly use furniture edges for the end part, plus offer a detailed algorithm for assembling a table or cabinet.
To eliminate the possibility of error, it is better to entrust the construction of the drawing, cutting and edge cutting to experienced specialists.
Drawers and slides
There are many ways to make furniture boxes. The simplest of them is to assemble a perimeter from laminated chipboard. If a beautiful facade is required, it is screwed onto the main frame from the inside (like the tabletop). The façade can also be secured to eccentrics as the fourth wall of the drawer.
But the main thing is not to assemble the drawer, but to secure it correctly.
Drawer guides are divided into roller or ball guides.
- Roller guides are usually attached to the bottom of the drawer. He will ride on them on two rollers. A pair of such guides costs about 150 rubles, but it is highly not recommended to use them. The main disadvantage is that they do not allow the drawer to be pulled out completely; a heavy drawer in the more than half-open position may simply fall.
- Ball guides, or as they are also called, “full extension telescopic guides,” can exactly double the length. They have many balls inside, like bearings, so they provide a smooth ride.
Roller and ball guides for drawers
- In addition, Blum has metaboxes and tandemboxes. These are ready-made side walls of drawers with installed guides. All that remains is to install the façade, back wall and bottom.
The simplest furniture options
The easiest way to make garden furniture is from ready-made parts. As a base, you can take aerated concrete blocks, short pieces of timber or logs. Country furniture made of wood will only need proper assembly.
How and when to plant perennial flowers in open ground || Flowers perennials planting rules || || || Forcing bulbous flower plants || || || Diseases of daffodils and measures to combat them || || || Choosing a site for peonies, preparing
The surfaces of the timber must be planed smoothly with a plane, then chamfered from the upper edges. Place the ends of the beams into the holes of the concrete blocks stacked on top of each other. If desired, do-it-yourself country furniture can be supplemented with a backrest.
Short pieces of timber 10x10 cm or thicker logs for making legs can be used in different ways:
- Place the log vertically on the evenly cut end. In this case, the number of legs will depend on their thickness. A single leg may be sufficient to support a table or stool. To give stability to such a structure, you need to build a wide base from a cut of a thick trunk, boards or thin bars placed in a cross-shaped recess at the lower end. The same principle is used to make a seat or tabletop.
- For the legs, you can lay the logs horizontally. To prevent the completed element from falling apart, it must be secured with wooden dowels. It is convenient to use thin cuttings for gardening tools. A piece of cutting 7-10 cm long must be placed in a hole drilled in the upper edge of the block. The depth of the hole is equal to half the length of the dowel. You need to make one hole at each end of the bar, placing them diagonally. In the log that will be laid next, make matching holes on the bottom edge and place it on the previous one. If 1 more tier is required, then the holes for the dowels on the upper edge should be made with an offset in relation to the lower ones: on a beam this will be a different diagonal, and on a round log the offset is made along the length.
When the base is ready, lay boards or thick plywood on top for the seat (table top) and attach it with long self-tapping screws. If the tabletop is made of very thick material (timber, halves of logs), then it is better to make a dowel connection.
How to make legs from waste materials?
You can also find a use for construction waste, glass fragments, remnants of crushed stone or other small materials by making your own garden furniture from them. To do this, you will need a rigid galvanized mesh with a mesh size slightly smaller than the waste fraction.
The mesh can be used to make cylindrical or rectangular baskets. Joining the edges is very simple by tying them with soft wire. Its ends should be directed inside the basket. The finished mesh structure is filled with crushed stone, pebbles and other materials.
To decorate unusual garden furniture with your own hands, you need to line the areas near the mesh with beautiful cuts of wood, large stones, exotic objects (bottles, aluminum cans, etc.). The rest of the basket can be filled with unsightly pieces of brick, rubble or other construction debris.
The resulting product is called a gabion structure and is widely used for the manufacture of a wide variety of supports. By laying boards or thick plywood on top of the gabion, you can make a comfortable garden sofa and assemble both a table and a bench with your own hands. Gabion supports, being compacted during operation, can only become stronger.
