Hot stand: advantages
Coasters are needed to place hot dishes on them without fear of damaging the table surface. They are special islands for eating or drinking tea, dividing the table into zones.
The design of the stands can be very different, made in the style of the kitchen or serving as a bright contrast in the overall interior.
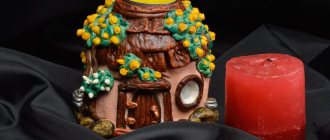
In the photo of a homemade hot stand you can see an example of what a proper stand should be like.
This element is used for the following purposes:
- As a table decoration
- To protect the surface of the table top
Modern coasters are most often made of wood or textiles, and making them yourself is not at all difficult.
Apple oven mitts and hot mats to bookmarks 34
Apple potholders and coasters
I will have apple potholders!
For sewing you will need strips of fabric of different lengths, width from 2 to 4 cm.
The good thing about these potholders is that even the smallest scraps will fit here.
First you need to draw a pattern of an apple on paper. If you don’t feel like drawing, you can copy mine directly from your computer monitor.
According to the pattern, we cut out one piece from the auxiliary fabric, onto which we will sew strips of fabric. The color doesn’t really matter, but some calm, plain fabric is better. Cut this part about 1.5-2 cm larger than the pattern.
In the middle of this part we pin a small square flap measuring approximately 3*3 cm. There is no need for precision here; you can cut all the flaps by hand.
In patchwork sewing, this method of sewing is called differently: hut, well, etc. Strips of fabric are sewn in a circle to each other. We apply a strip of the same length to this square. The width of the stripes is at your discretion.
We attach the strip and bend it. You can, if you have an ironing board and iron nearby, immediately iron the sewn patches. Or run along the bent strip with a fingernail, a small ruler, or a stick. Ideally, of course, it is better to constantly run to the iron. It will turn out much neater.
So, we turned away the sewn strip, ironed it and applied the next piece. Apply in a circular motion clockwise.
And so on, one after another, we apply and attach yellow-red stripes until we fill the entire space.
Half the work is already done!
And here is the other side of the semi-finished product coin
We attach the pattern and trim off the excess fabric.
Now let’s take the lining, the gasket and put together such a sandwich: at the bottom is the lining with the wrong side up, then the gasket (I have a layer of synthetic padding) and on top is our sewn, ironed part. We pin our delicious sandwich and stitch it a little along the seams.
Here's the inside out of what a labyrinth turned out to be!
Trim off the excess.
From a dark strip of 12*3 cm we will sew a loop-stick for hanging. And we attach it to the back of the potholder.
PS The loop can then be sewn to the finished edged potholder.
But I wanted to make sure that there were no raw edges of the loop at the back.
Now we need an edging cut on the bias. I cut out a edging 4-4.25 cm wide. You can buy a ready-made edging at a sewing store.
We process our product with edging. There are several ways to sew on edging; each craftswoman does what is convenient for her. I think we have master classes on sewing edging at the Crafts Fair, so I won’t dwell on this operation.
In this case, I stitched an edging on the back of the potholder to the width of the foot, trimmed it in the corners, turned the edging onto the top of the potholder, folded it over and stitched it.
If you doubt that you will not be able to sew the edging beautifully, then sew it not with a straight stitch, but with some kind of decorative stitch that is on your sewing machine.
Cut out a leaf from green felt (you can also sew a leaf from fabric). Sew the leaf onto the button.
Our delicious apple is ready!
These potholders can also be used as hot mats.
Main types
The base of the stand can be made of any material, most often it is wood, cork, cardboard, rubber, etc. It can have any shape, and hot pads are divided into types:
- Stands for cups and glassware;
- Plate stands;
- For frying pans and pots;
- For Dummies;
A stand made at home will be unique and inimitable. It will help refresh the interior and bring a little warmth to your kitchen.
Tips for choosing
When purchasing a hot pad, you need to pay attention to the following criteria:
- High temperature resistance.
- Ease and convenience of moving around the table, including with hot dishes.
- Ideally flat surface without slopes. It is possible to have figured patterns-recesses, relief is unacceptable.
- Made from a material that must have anti-slip properties.
By taking care in advance that the product meets all these criteria, you can avoid disappointment and unnecessary expenses. A properly selected stand will last a long time while maintaining its performance characteristics.
Wooden coasters
A wooden hot stand is very popular; it has many advantages and is easy to make.
It dries quickly, withstands high temperatures well and does not suffer from water. The following materials can be used:
- Basics from branches cut.
- Thin branches.
- Standard wood blanks.
The easiest way to make a stand out of wood is to use saw cuts that are glued to thick fabric. To make a tree into a shape, a chisel and a jigsaw are used; a design stencil is selected in advance, which is applied to the tree and cut out with a jigsaw.
To ensure that the product lasts as long as possible, it is varnished.
Hot pads - how to make them yourself? Step-by-step instructions with photos
Winter has come again. It's cold and snowy outside. Naturally, in such weather you can’t do without a cup of hot tea or your favorite chocolate. In the modern rhythm of life, when there is an eternal lack of time, we can drink tea while running around the house getting ready, so we can put a hot cup anywhere.
And so that furniture and tablecloths do not deteriorate from hot temperatures, we recommend making hot coasters with your own hands. In addition, if you make several such masterpieces, the problem of leftover traces and damaged furniture from hot temperatures will cease to exist for you, and not only cups can be placed on them.
Why do it yourself?
After all, today there is a wonderful variety in stores and you can buy anything! But the fact is that coasters made by yourself will be cuter. Don't believe me? Make sure of this in the photos of hot coasters presented in this article!
And so, the main advantage of such products is that they tend to get dirty. Naturally, no one will buy new ones every time if they are soiled at the slightest level. Working independently in this regard is much more profitable.
The stand can be made of anything. For example, fabric with threads, tiles, cork, an old unnecessary CD and other things. This way you will get rid of unnecessary things, and with considerable benefit.
The style, size and color scheme of handmade coasters can be anything you want. In addition, you can make a stand yourself not only for a cup, but also for a pan! And so, let’s look further at the main options and instructions on how to make hot pads.
How to make a key holder for the hallway with your own hands: ideas and tips with photos
Simple and inexpensive
A stand made of wine corks is the most common option. This material will perfectly protect the furniture surface from heat. They are easy to wash, and if any of the elements are damaged, they are easy to replace.
And such stands are very easy to make. The corks need to be fastened together to form any figure. The corks may be intact, but the stand will be high.
It’s easier if you cut them into thin and flat pieces. It will be easier to fasten them together, and the thickness of the stand itself will be quite practical.
The main disadvantage of this option is the amount of wine drunk in advance.
You can also make a stand from an old newspaper/magazine. They are cut into strips, then twisted into a spiral, resulting in squares that are connected or stitched with thread, or can also be glued. To make the finished product durable and waterproof, you can cover it with varnish on top.
This option is easy to do and is very inexpensive. But they won’t last very long after all.
Strips of corrugated cardboard can be twisted to create interesting patterns. The parts are attached to each other with glue, and fabric ribbons are used to decorate the products.
Stone
What can you use pebbles brought from the sea for? This stand will look very original. The pebbles are glued to the base, tightly attached to each other. The base should first be covered with ordinary putty, onto which the stones themselves are attached. You can coat them with varnish on top to make them shine.
- Tiles can be used to decorate products; they are connected by slats in a frame, and attached to a cork sheet.
Wooden hot stand
If you go to a store, that’s where you’ll most often find wooden coasters. However, you are unlikely to find beautiful ones. Although, by buying the simplest wooden stand, you will create the decor yourself! But having acrylic paints this is very easy to do. The product using the decoupage technique looks original.
Foil flowers - step-by-step instructions from designers with photo examples
Sewn, knitted, braided
Yes Yes! If you have weaving or knitting/sewing skills, this will not only be not problematic for you, but also quite exciting!
The fabric version of the stand is made incredibly quickly, because it will require felt scraps, or new fabric. And the technique is very simple, the strips need to be intertwined. As a result, a checkerboard surface is formed. If you take scraps of fabric, you can even make a stand using Patchwork. True, this option takes longer to complete.
The set of stands made of linen fabric also looks original. The main thing is that they are made in the same style.
Stylish and durable felt coasters. The felt itself can be processed in such a way that its seams do not have to be processed.
In fact, such things are not only useful in every home. The activity itself is very exciting! And your guests will be surprised when they come to you again and see something new!
Photos of the best ideas for a hot stand with your own hands
Source: https://mirdizajna.ru/podstavki-pod-goryachee/
Master class: wooden stand
Any detailed diagram of a hot stand will be an excellent assistant in your work. To make a wooden stand, it is best to use hardwood.
- It is necessary to prepare cuts of branches three to six centimeters thick.
- The front side of the stand is sanded with sandpaper.
- Using glue, the cut parts are glued together on a base made of plywood or thick fabric.
- The stand needs to be put under pressure and wait until it is completely dry. This may take about 6-8 hours.
You can take a wooden block and cut out identical squares from it. After this, the pieces of wood are fastened together with glue or dowels.
To prevent the stand from deforming, it must be varnished.
Do-it-yourself hot stand made of fabric: master class with video
A hot tray is a very common thing, because no one wants to spoil their kitchen, furniture and surrounding objects with hot dishes. This stand can also be used during a feast; you can put not only a frying pan or saucepan on it, but also a jug with a hot drink or a kettle. If you are a real housewife or owner, you will probably have a DIY hot stand in your kitchen.
No matter what such stands are made from, all materials that can withstand the onslaught of temperatures are suitable for such creations. And it is not necessary that the materials be new and purchased; the beauty of the stands is that they can be made even from old things, fabric scraps, etc.
Let's talk about all kinds of stands
- Made from felt. Such an interesting material as felt has been used in needlework for a long time; in addition, it can withstand elevated temperatures, which is very beneficial in our case. That is why it was chosen to make a hot stand. So we want to always be young and cheerful, let's make a stand that will not only protect our furniture from heat, but also improve our mood. Looking through fruits and vegetables, our choice settled on a bright orange.
You can choose not necessarily a standard color, but absolutely any color that will harmonize with your kitchen and mood. The size of the stand is also individual, choose for yourself whether it will be a stand for a pan or a cup. We will need felt in two colors. Cut out the following elements:
Next, we attach all the parts into place with pins and see how our creation will look.
Once we are sure of a good layout, the elements are manually sewn into place, that's it, the stand is ready, simple and easy.
- Made from fabric and discs. This seemingly strange combination will make excellent coasters for hot cups or small dishes.
To make one stand we will need two disks, fabric and a lining; synthetic padding will do this role perfectly.
We assemble a certain sandwich in layers: fabric, padding poly, disc. When everything is folded, we overcast the fabric and tighten it well. We perform this operation for both the first and second disks.
We received two ready-made parts like this:
We connect them with a ribbon, carefully sewing it on.
The result is a fairly strong and stable stand, since thanks to its base it does not bend or wrinkle.
When choosing fabric for such stands, any cotton materials and even linen fabric are suitable. Therefore, if you are eager to make such a kitchen item, do not rush to the store, but rummage through old things.
- From newspaper tubes. Products made from newspapers have become so popular lately that all stores are sure to have something made from newspapers. And all the needlewomen have long furnished their homes with cute baskets and stands woven from newspaper tubes. We will also tell you how to acquire such a thing. First, we need to make a blank, that is, wind the tubes, they should be the same in thickness.
This is easy to do, just take a knitting needle as a base and wind newspaper diagonally around it, finally securing it with glue.
Now that the number of ready-made tubes allows us to weave a stand, let’s work on it. We take a pencil and begin to wind one tube onto it.
When we screw it to the end, we use silicone glue to secure the result, as shown below:
For the largest base of the stand you will need more than one tube along the length, but this is not a problem, because they can be fastened together.
When we have woven a sufficient number of elements, we begin to connect them.
You can wrap several rows of strips around the edge to strengthen the shape.
All that remains is to paint this stand with varnish and decorate it.
Decor of products
To make your stand look attractive, you can use different decorative methods.
Fabric half-staffs are decorated with the choice of fabric; colors that are in harmony with each other will perfectly highlight your taste. You can also create a light pattern from various scraps. A technique such as decoupage is perfect for decorating hard surfaces.
The technique is simple in its execution and will allow you to use absolutely any image for implementation on objects.
If you are thinking about whether to buy ready-made coasters or make them yourself, imagine how interesting handmade is compared to a store-bought template. And you will immediately understand that your handmade product deserves a place in the kitchen. From the proposed stand options, you can choose one master class and try to make your own masterpiece.
Knitted coasters
One of the most interesting ways is a crochet stand, which is made using knitting. It is best to use acrylic yarn, it is more wear-resistant and will last a long time. There are many knitting workshops that have varying levels of difficulty.
In order to make such a stand, you need to find a suitable diagram and act strictly according to it. You can choose any colors of thread; multi-colored yarn looks very interesting and will please the eye.
Why do it yourself?
After all, today there is a wonderful variety in stores and you can buy anything! But the fact is that coasters made by yourself will be cuter. Don't believe me? Make sure of this in the photos of hot coasters presented in this article!
And so, the main advantage of such products is that they tend to get dirty. Naturally, no one will buy new ones every time if they are soiled at the slightest level. Working independently in this regard is much more profitable.
The stand can be made of anything. For example, fabric with threads, tiles, cork, an old unnecessary CD and other things. This way you will get rid of unnecessary things, and with considerable benefit.
The style, size and color scheme of handmade coasters can be anything you want. In addition, you can make a stand yourself not only for a cup, but also for a pan! And so, let’s look further at the main options and instructions on how to make hot pads.
Baba for a teapot - master class on how to make it yourself with photo examples
Fabric stand
First you need to prepare the following tools:
- Scissors;
- Pins;
- Needle and thread;
- Textile;
Stages of work:
- Sewing is best done on a sewing machine. The fabric should measure 30 by 30 cm.
- First of all, a pattern is made and transferred to the seal.
- The fabric for the stand should be folded in half, right side inward.
- A sealant is placed inside, there should be a space of 0.5 cm on the side for seams.
- It is best to stitch the seams, this way they will look much neater.
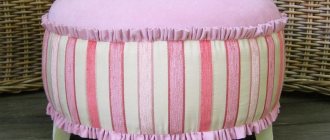
A stand in a patchwork style looks very interesting when different scraps of fabric are used for sewing.
Mosaic stand
Natural materials also look great as a stand. For this purpose, sea pebbles, shells and pieces of multi-colored or plain ceramic tiles are used.
Rubber or thick fabric is used as the base. Before gluing, mosaic pieces must be degreased with alcohol. The binding material can be glue, epoxy resin or plaster.
You can use a silicone mold, which is filled with epoxy resin, and mosaic elements are laid out inside.
Original stands
- A stand made from old disks - the disk is covered with fabric, and an additional lining of synthetic padding is added inside.
- Plastic bottle caps are suitable for plates and cups, but pots and kettles that are too hot can melt and emit an unpleasant plastic smell.
- Wine bottle corks - they are glued to a base made of thick fabric and look very nice when finished. Instead of fabric and glue, the corks can be fastened together using regular toothpicks. Such stands easily absorb grease and other contaminants, so they are not considered particularly practical.
- Laying ceramic mosaics on a solid base.
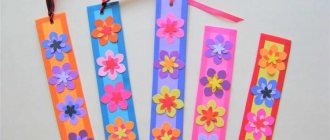
- Paper coasters in quilling style.
Simple and inexpensive
A stand made of wine corks is the most common option. This material will perfectly protect the furniture surface from heat. They are easy to wash, and if any of the elements are damaged, they are easy to replace.
And such stands are very easy to make. The corks need to be fastened together to form any figure. The corks may be intact, but the stand will be high. It’s easier if you cut them into thin and flat pieces. It will be easier to fasten them together, and the thickness of the stand itself will be quite practical. The main disadvantage of this option is the amount of wine drunk in advance.
You can also make a stand from an old newspaper/magazine. They are cut into strips, then twisted into a spiral, resulting in squares that are connected or stitched with thread, or can also be glued. To make the finished product durable and waterproof, you can cover it with varnish on top.
This option is easy to do and is very inexpensive. But they won’t last very long after all.
Strips of corrugated cardboard can be twisted to create interesting patterns. The parts are attached to each other with glue, and fabric ribbons are used to decorate the products.
Other materials
Making coasters from wood and knitting coasters for hot dishes are very popular, but besides them, there are many other options for this decorative element.
- Coasters made from bamboo sticks and silicone turn out to be very beautiful; they can also be sewn from felt and made from metal.
- Tempered glass trivets are suitable for pans and pots and are incredibly strong and durable.
- Stands woven from willow or birch bark look very original.
A well-made hot stand will last a very long time and will fit perfectly into any kitchen interior.
Photo of a hot stand
111111111