How to take a photo with numbers
To take a good digital photo, you need to think through everything to the smallest detail. First you need to decide on the topic of the photo. And then you need to prepare the figure itself, choose an outfit, an interior.
This could be a nautical style for a boy...
... or Disney style for a girl.
You can also use the services of a photographer and do a photo shoot outdoors or in the studio.
It is affordable and easy to take a photo with a number using inflatable balloons.
Photo ideas with numbers
Monthly photo ideas with numbers
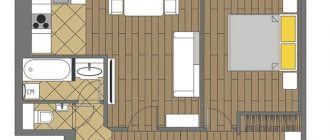
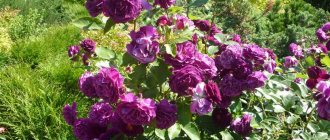
The baby looks unusual and beautiful on the bed, around which a number of flowers is laid out. The optimal angle is from above, since in the first months of life the baby can only lie down. Later, the baby will learn to sit and will be able to look into the lens.
For a child, you can create a festive series of photographs that depict the baby’s life month by month. In the summer, use fresh fragrant flowers. It is not necessary to buy varietal roses or exotic flowers; field daisies, cornflowers, and poppies are quite suitable. Artificial flowers are a good alternative.
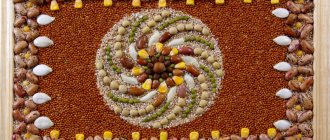
Creative photos can be created using seasonal vegetables and fruits, autumn leaves, New Year's toys, and other improvised decor.
The baby does not always have the desire to participate in a photo shoot. To interest your child and at the same time create an atmosphere of childhood and fun, take your favorite toys.
Large numbers made of cardboard or felt will come to the rescue. They are easy to make yourself, and then use for subsequent photo sessions, combining numbers into dates.
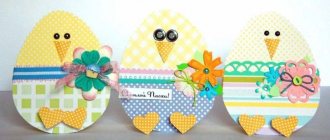
Number sheets are the easiest and most affordable number photo idea.
We assemble a three-dimensional figure from polystyrene foam with our own hands in a master class
Our master class on making numbers from foam plastic will begin with compiling a list of necessary materials. The list will look like this:
- The most important thing we need to have is the desire and the slightest skills in cutting foam.
- Styrofoam. Depending on which figure size you choose, you will need different amounts of foam. The main thing is that we need a large polystyrene foam parallelepiped.
- A device for cutting foam plastic with nichrome thread. Without this device, you should not start cutting foam plastic. You will only ruin the material and will not get anything good.
- Black marker and ruler. It’s better to take a larger ruler; one and a half meters should be enough. The marker can be replaced with a simple pencil.
- Glue. You can use any glue as long as it sticks the foam to the paper.
- Materials used to make jewelry. Here you can make a very large list, but we will look at paper and napkins.
In our case, we will also need scissors, a stapler, napkins and paper.
We make the base - the frame.
This step should not pose much difficulty for people who have the slightest skill in foam carving. If you do not have such skills, then it is best to learn how to cut out simple shapes using the smallest amount of foam. Remember that you must choose foam with a volume proportional to the size of the intended figure. Below you can see the number 2 that we received. We will also show the importance of decoration.
The second photo, in which the number is already decorated, clearly shows how important it is to decorate the frame. This may take most of your time and effort, but the result can be truly impressive.
We make flowers from paper and napkins.
We will make the first flower from napkins. There is no exact name of the flower, so you can take napkins of any color. Only white ones probably won't work. Take a napkin, unfold it and get a square. Now fold the napkin in half and in half again. As a result, we should get the napkin “out of the package”. Many people will ask: “Why did we do this?” The napkins from the package are not folded into a perfect square, but we need to get it as even and neat as possible. To get the best possible result, make sure that the edges match as much as possible when folding. Fold the resulting square like an accordion. And secure it in the center with a stapler or thread. We round the edges with scissors and straighten the flower. Our beautiful flower is ready!
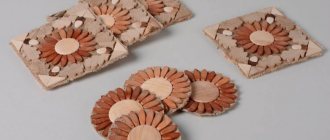
For the next flower we will need several colors of napkins. For best results, take three different colored napkins. Cut out identical circles from napkins and carefully place them on top of each other. We fasten it in the center with a stapler and lift each napkin up in turn. As a result, we should get something like this. You can see it in the photo below.
The flower is very easy to make and at the same time it is beautiful.
Now we will tell you how to make a beautiful poppy from corrugated paper. First we have to cut some teardrop-shaped petals. We stretch the wide part and try to get a result in which the workpiece would look like a mushroom.
We make the core from a small piece of wire wound on a small piece of paper. We attach the petals to the core so that each next petal overlaps the previous one. Once all the petals are attached, you can tighten the bottom of the flower to make the structure stronger.
It is worth talking about the approximate number of flowers needed for one number. For two meters in height we used about 230 flowers made using the first method. Consider that for a figure half a meter high you will need about 120 flowers. But here a lot depends on how you stick them on and on the size of the plants themselves.
Ideas for numbers for children's photos
There are many creative options for making beautiful numbers for original photographs.
The most popular version of numbers for photos of children made from balloons. You can purchase an inflatable ball in the form of a number or weave a number from several balls of different sizes, shapes, and colors.
If you cut out the blank of the required number, prepare a lot of flowers from napkins and stick it on a cardboard frame, you will get a delicate number from napkins.
You can replace napkins with corrugated paper.
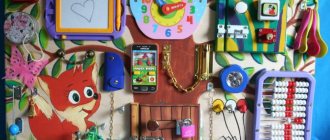
If you are no stranger to sewing skills, you can make photo numbers from colored felt.
Do you want maximum creativity? Then use numbers from old photos, newspaper clippings or children's magazines, postcards for the photo shoot.
Materials for production
In order to create the number 2 with your own hands, you will need:
- cardboard (you can take an old cardboard box);
- paper tape;
- pencil;
- ruler;
- scissors or stationery knife;
- glue or glue gun;
- corrugated paper or napkins;
- ribbon;
- leg-split;
- any decorative elements as desired.
The larger the number, the more costly it will be in terms of creation time. The same applies to materials; you will need quite a lot of them.
Photos with balloons and numbers, ideas
Inflatable balloons always symbolize fun. If the ball represents the date being celebrated, the holiday becomes even more solemn and interesting.
Taking a photo with the balloon is an obligatory part of the celebration. But how to conduct a photo shoot so that the photos turn out perfect? You need to create a suitable interior of the room in accordance with the theme of the holiday.
Or you can conduct a photo shoot outdoors, for example, in a park or forest.
A figure made from several balls assembled together looks interesting and quite unusual. The best option would be a separate photo zone.
As you can see, there are many options for photos with numbers. Therefore, fantasize and bring your ideas to life in photographs.
For a boy's birthday
If it's a boy's birthday:
- Boys will be delighted by figures with cartoon or movie characters.
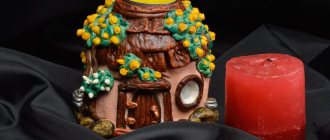
- An original surprise for an active child will be a papier-mâché craft filled with sweets.
- For boys in their first years of life, you can make a floral number, but it should be made from materials in masculine colors or match the colors of the baby’s suit.
- If a boy is interested in cars, then the craft is decorated with small toys.
There are many ideas for making birthday numbers. The main thing is that the birthday person likes the craft, created with his own hands, and brings him joy. Older children can make their own holiday decorations using available materials and simple techniques for working with them.
Article design: Svetlana Ovsyanikova