Materials
Papier-mâché is paper, either regular colored paper (sometimes newspaper is used), which is torn or cut into pieces and mixed with an adhesive. You can also use toilet paper for the base. It has the excellent property of dissolving uniformly with both water and glue.
How to make papier-mâché correctly and efficiently
Before gluing the prepared product, the crushed pieces are slightly moistened without using an adhesive. All subsequent layers are carefully glued. Experts recommend performing pasting in two steps.
Firstly, you can apply the product starting from the middle of the craft to its edge. Secondly, the adhesive composition is evenly distributed over a certain area from edge to edge of the workpiece. The minimum number of overlapping rows should not be less than six, ideally 12. Colored paper will help to ensure their uniformity.
Note!
How to make flowers from cold porcelain: chic floristry and DIY crafts for the New Year step by step
- How to make cold porcelain from potato, corn starch, liquid, without soda. Recipes and cooking methods
- How to properly make a birdhouse with your own hands from scrap materials: we create an original birdhouse according to sketches
Such colored layers help to avoid omissions or repetitions. After every two to three layers, give the workpiece time to dry thoroughly. If there are small bulges in the manufactured item, they are pasted over with very small pieces in several layers, and then they continue to work in the usual manner. The pieces must be laid overlapping, repeating the surface topography.
It is recommended to make the final layer from white parchment pieces. The figures are dried for two days, and the temperature regime (25 degrees) must be observed to avoid cracking of the resulting figure. There are internal and external machining. This technology is very convenient for beginners.
Adhesive composition
Used as an adhesive
- PVA glue. This is the most suitable ingredient, as it quickly mixes with strips or pieces of paper and is suitable for simple crafts made by preschoolers or younger schoolchildren.
- Wallpaper glue. It is easy to brew and easy to mix with paper.
- Paste. Store-bought or hand-made, I use starch boiled in boiling water.
Ikebana vase
This craft can be done by anyone who has decided to take up this exciting activity for the first time.
It is unlikely that your guests will guess what it is made of. Required components:
- balloons as the basis for future decoration;
- PVA glue (or paste);
- toilet paper;
- half a glass of flour.
Follow all the steps clearly and carefully and you will succeed.
- Place the toilet roll (pre-unwind) in a container with a fairly large amount of water. A quarter of an hour is enough for excellent swelling.
- Allow the mixture to get rid of excess moisture (place in a colander).
- The next step is to carefully tear the wet papyrus into small pieces.
- Add flour to PVA glue mixed with water.
- Place the crushed wet mixture into the resulting solution and stir until smooth. For these purposes, it is better to use a mixer.
- Make small flat cakes and wrap them around the inflated balloon
- Let's get creative a little: put a bag on it and drag it at the top to give it a unique shape.
- Remove the bag and allow time for the form to harden.
- Finished products can be painted in any color, decorated with patterns, or natural materials can be used for decoration.
Place dried flowers, twigs, and leaves in a toilet paper vase. By changing the inside, you can make a vase for fresh flowers (instead of a ball, take a glass jar or bottle of an original shape).
This technique is suitable for making various kinds of papier-mâché toys. Today they sell balloons that, when inflated, become quite long. You can use them to form any animal, toy figurine, or flower.
You can involve a child in the manufacturing process, who will gladly take part in creating a beautiful thing. Children are truly delighted with making New Year's crafts from papier-mâché with their own hands. They can become both a Christmas tree decoration and a surprise under the Christmas tree.
Structural strength
To increase the strength of the structure, other ingredients are added. This can be plaster or putty, pre-diluted with water, the consistency of thick sour cream.
Any detergent or a small amount of vegetable oil will add plasticity.
In fact, any master has his own tricks, which he acquired through experience or experimentation. During the creation process, he modifies the recipe and improves the skill.
Methods of application
There are several different papier-mâché techniques - working with a pre-prepared mass and pasting with pieces of paper of a certain shape. The method of work must be chosen depending on what kind of product you want to make.
Working with mass
A sticky plastic material made from paper soaked in paste is excellent for creating large voluminous objects using the papier-mâché technique. For example, in ancient times, Chinese guards were dressed in light paper armor.
Modern craftsmen use this technique to create toys, decorative elements for home decoration, and even furniture! The work process is reminiscent of sculpting.
Pasting with pieces of paper
Maching is what this papier-mâché technique is called. Initially, the master selects the shape that he would like to repeat in his product. After this, you need to prepare a lot of paper pieces - you can simply tear newspaper sheets into small pieces. The base is covered with several layers of paper, after which the product is removed from it and painted.
Using machining it is easy to create dishes: vases, dishes, plates. In addition, in this way you can make small three-dimensional figures that are hollow inside - rattles or maracas, for example.
Manufacturing technology
There are several required steps in order to begin creating your masterpiece. This is a small instruction, consisting of the basics, for beginners to work with papier-mâché crafts.
Chinese papier-mâché plate
To create such a miracle, you will need already familiar material, just change the previous thing to a plate of the selected size, and replace the toilet paper with newspaper pieces. But the creation method is completely different, it will differ slightly from the previous method. Let's look at the question of how to make such a thing from newspapers in more detail:
- shred sheets of newspaper approximately two cm;
- place the plate upside down;
- When soaking the scraps, place them over the entire surface so that the scraps hang over the edges of the plate;
- cover the layer with glue, then cover it again with papyrus pieces and repeat the procedure three times;
- Having covered the next row with glue, leave the plate to dry;
- after drying, repeat the same thing (do a couple more layers);
- every three coatings – drying (9 – 12 layers in total);
- after final drying, carefully cut off excess paper from the edges and remove the workpiece;
- apply white paint so many times that newspaper pieces do not bleed through (dry each painted row thoroughly);
- paint the created figurine at your discretion with red and black paints (Chinese shades);
- decorate the plate with sprigs of painted sakura branches, add hieroglyphs;
- The final step is to apply varnish to the created decorative piece.
Having become acquainted with the unique creativity and technology of making papier-mâché with your own hands, you will gain enormous opportunities to create unique things, original works, New Year's toys, household goods and decorations the way you want them to be. After all, papier-mâché is one of the most ancient forms of art, which is as popular today as in ancient times. Touch this absolutely uncomplicated creativity, test yourself in creating new creations.
Craft design
Once the form has completely hardened, you can begin painting. Here you can let your imagination run wild and decorate it in all the colors you want, subtly drawing out all the details. Acrylic paint is best suited for decoration. It is sold in stores, has good stability, does not crumble or fade.
At the end, you can coat the finished product with varnish, transparent or with glitter, matte or glossy - at the choice of the creator.
Technique options
Papier-mâché can be made using different methods. A popular method is gluing pieces of paper layer by layer or sculpting figures from wet dough.
Step-by-step gluing of pieces
To make a figurine using this method, you should do the following:
- Shred toilet paper. It is also acceptable to use a newspaper.
- You should not use scissors for this. It will not be possible to align the dense boundaries of the material in a dried figurine.
- Apply the first layer to the prepared figure and apply glue on top.
- After applying every two layers, the product should dry. There should be a total of 10 layers.
- The edges of the paper fragments should overlap each other. It is important to ensure that there are no uneven fragments on the surface.
It is recommended to dry the finished product for 2 days. In this case, the temperature should not exceed 22-25 degrees. Otherwise, cracks will appear on the product. The last layer is made of white paper.
Modeling from wet paper pulp
In this case, models are not used. You can get a mass for modeling from any paper or cardboard, since when heated the material softens, becoming homogeneous. The stickiness of the mass affects the quality characteristics and durability of the craft. Therefore, during the preparation process it is worth assessing the stickiness of the substance.
To give it elasticity, it is worth introducing glue or paste. Chalk and alabaster will help make the mass smooth and durable. However, these components should be added immediately.
It is permissible to make the following types of crafts from this mass:
- figures with voids inside;
- models with frame;
- frameless items.
To get a hollow figure, you should use models. They put a lot on them. After which the sample is disconnected from the craft. To make a frame product, you should take the bases. They should be left inside the figure. They can be made from wire, cardboard or plastic items. Frameless products are molded from paper pulp. It is recommended to dry the figures for several days. In this case, the temperature and humidity should not change.
From paper and newspaper
To make a figurine from paper and newspaper, you should follow these steps:
- Lay an oilcloth on the table. You have to work with glue with your hands, so it’s worth preparing a dry cloth.
- Glue pieces of paper onto the workpiece. Having smeared the first layer, you should move on to the next one. To differentiate the layers, it is permissible to use paper of different shades. This will help achieve uniformity.
- You can apply glue in different ways. They are allowed to cover layers. It is also allowed to immerse the paper in a container with an adhesive composition. The second method is considered more effective. In this case, the substance better saturates the material, which avoids untreated areas.
- Objects that resemble a craft in shape are suitable as models. It could be a ball, a plate or a cup. The mold can also be made from plasticine. If the surface of the product is not too smooth, it should be covered with an aqueous solution of putty. When the primer dries, it is sanded with sandpaper.
- At the final stage, the models are decorated. To do this, it is permissible to use dyes - oil or acrylic. It is also allowed to decorate the product using decoupage technique. If you plan to use gouache or watercolor, you should prepare the varnish in advance. It is permissible to decorate the product with textiles, beads or paper. It is also allowed to use cereals or pasta.
See also
Is it possible to iron jeans and how to do it correctly at home
From egg cartons
To obtain a papier-mâché product in this way, you should do the following:
- Chop the trays and put them in deep containers.
- Add boiling water and leave for a day. It is important to ensure that all pieces are covered.
- Once the paper becomes flexible, it is ready to be used.
- The mixture should be whipped with a blender to obtain a homogeneous consistency.
- Add 2-3 spoons of PVA glue to the composition.
- Take a sieve and cheesecloth and drain off the excess liquid.
- Wrap in gauze and put under a press so that all the water pours out.
- Keep the mixture in the refrigerator. This is done in sealed packaging.
- Make a craft by mashing or sculpting it. Experienced craftsmen prefer modeling. From egg cartons it is possible to obtain an elastic mass, which in consistency resembles plasticine. At the same time, high density makes the substance heavier. Therefore, it can be used to make large figures that can be used for garden and interior decoration.
- Before decorating the product, it is worth treating it with putty. To decorate the craft, it is recommended to use varnish and paints.
From napkins
Such figures can be made by sculpting or mashing. Depending on the chosen method, it is recommended to make dough from the napkins or tear them into small pieces. To make a figure from napkins, you should follow these steps:
- Prepare several packs of white napkins.
- Place them in a deep bowl and fill with water. It is important that the liquid is no colder than room temperature.
- After 5-10 minutes, the material will completely absorb moisture.
- The resulting mass should be squeezed out and mixed with glue or paste.
- Knead the dough thoroughly until it becomes completely homogeneous.
- The figurine can be made with or without a frame. It is permissible to use cotton wool or wire as a frame. The frame should first be treated with glue, after which the mixture should be laid out in layers and left to dry. It is recommended to lubricate each layer with glue.
- Products made from napkins have a flat and smooth surface. It is recommended to dry them for 4-6 hours. The dough has a loose and elastic consistency. Therefore, it is possible to obtain lightweight products.
- After drying, items can be decorated. To do this, you can use gouache or acrylic, which are applied in several layers. Finally, the craft is treated with varnish.
Description of crafts using the mashing technique
- Pre-cut strips of newspaper, soft toilet paper or plain paper of any color.
- For the frame, you can take a simple plate/cup of any desired size. Do not forget that the surface of the mold must be greased with oil to make the craft easier to remove.
- The first layer requires care. Moisten the paper with water and carefully apply it to the mold. Do this until the entire plate or cup is covered with a thin layer of prepared paper.
- Cover the first layer with PVA glue, wallpaper glue or homemade paste.
- Continue layering the paper pieces and coating them with glue. The thickness should be about 4-5 mm.
- Leave the workpiece to dry for a day. Once cured, carefully remove from the mold.
- All you have to do is remove the protruding edges and sand the inside and outside of the craft with fine-grained sandpaper.
- Paint the craft with gouache or acrylic paint. Leave until completely dry and coat with varnish.
DIY papier-mâché dishes are ready to use!
Egg Tray Craft Ideas for Home
By following the step-by-step guide, you can make beautiful items for your own use or as gifts to friends.
Egg Tray Frame
To make the craft, use a mass made from cardboard egg cartons; it must be fresh.
- Take a cutting board and wrap it in cellophane. This is necessary to separate the craft from the board without spoiling it.
- Using a rolling pin, roll out the wet cardboard mass to a thickness of 1 to 2 cm; the mass must be prepared in advance. Cut a rectangle with a width of 15 cm and a length of 21 cm.
- You can create a recess for a photo in a frame using a smaller box. Insert the box into the center of the mass, circle it with a plasticine knife. Pressing along the outlined perimeter, make a depression.
- If there is no box, you can use a ruler and pencil: draw a smaller rectangle inside and deepen it around the perimeter.
- When decorating, use the indentation method, for example, lace. Place the lace on the surface of the frame in the shape of a pattern, push it through, and remove it. You can use a knife for shallow patterns.
- The product must be dried at natural temperature; paints and varnish can be applied to the dry frame.
- To insert a photo, you can use double-sided tape.
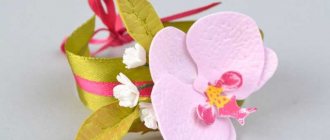
Christmas wreath of flowers
Papier-mâché (a master class for beginners will help you make a craft using maching methods and sculpting from wet paper pulp) is suitable for making a Christmas wreath. The wreath will consist of flowers and spruce branches, which will be attached to the base in the form of a ring, hollow inside.
Ring sculpting:
- Mix small pieces of cardboard boxes and boiling water and leave for a day.
- Twist in a blender, drain off excess liquid and add a spoonful of PVA glue.
- Roll out the resulting mass on a cutting board.
- Take a round tray or plate with a diameter of at least 30 cm, place it on the mass and trace it, cut a circle with a kitchen knife.
- Using a plate with a diameter of no more than 23 cm, make an impression of a circle and cut it out.
- Leave until completely dry.
Making flowers:
- Prepare small pieces of paper and tear them with your hands.
- The adhesive base is paste, cook as follows: dilute 2 tbsp. l. flour in a glass of water, pour into boiling water (2 liters), bring to a boil, breaking up small lumps with a spoon.
- Inflate a balloon with a diameter of up to 15 cm.
- Dip each piece of paper into the paste and cover the entire surface of the ball in 5 even layers.
- After drying, cut the ball lengthwise into 2 equal parts, paint it red, blue, yellow. This is what flower petals look like.
- Cut a circle with a diameter of 10 cm from cardboard and paint it in the desired color.
- Glue the petals to the circle with PVA glue with the addition of paint that is used to paint the circle.
Assembly begins with attaching spruce branches - artificial or live - to the ring, then flowers and ribbons are attached.
Papier-mâché vase
Papier-mâché (the master class for beginners advises starting with choosing a method: maching or modeling) is used to make a vase. If the vase is hollow inside, then you need to choose machining. If you need to make a vase without space inside it, turn to the modeling technique.
For sculpting a vase:
- Make a wet mixture from egg trays: soak the trays, squeeze them out and add 1 tsp. glue and 7-10 tbsp. l. paste.
- Make 2 balls of different diameters, one larger than the other at least 3 times. From one ball - sculpt the neck of the vase, from the other - the base. Connect the parts, adding more mass so that the lines are smooth.
- Apply a layer of putty and dry. Decorate to taste.
Making a vase using the mashing technique:
- Prepare an item that will be used as a base. The shape of the dishes should not be complicated, since after the work is done, the papier-mâché must be removed from the object.
- To avoid damaging the surface of the mold, wrap it with cling film.
- Place the base upside down and apply Vaseline to the cling film.
- Pour white PVA (good quality) into a small container.
- Soak the pieces of cardboard in glue and place them on cling film in layers, 10 layers, dry each well. After finishing work, dry the craft for a day.
- If the sample vase has a complex shape, cut the cardboard layer along the product.
- Glue the resulting halves together with several layers of paper, and after drying, apply a layer of putty.
Craft Kolobok
This is the easiest craft for children. You can just play with it, you can study fairy tales or use it in a puppet theater.
It can be made by analogy with a plate or mug, but for the initial frame you will need an inflatable ball.
Manufacturing stages
- Inflate a small balloon.
- Tie it with a thread so that it holds the ball tightly tied.
- Moisten the paper cut into pieces with water and place it on the ball in layers.
- After the product has completely dried, untie the thread on the ball and remove it from the resulting Kolobok.
- Varnish and decorate. Draw a funny face - eyebrows, eyes, nose and smile.
- You can use wire or thick thread for the arms and legs of the toy.
Note!
- DIY paper origami craft step by step: ready-made diagrams for creating beautiful origami at home (90 photo ideas)
Crafts from paper and glue for children: step-by-step instructions for creating interesting crafts with your own hands (90 photo ideas)
- Children's paper crafts: 110 photos of the best ideas for creating unusual crafts with your own hands. Master class + step-by-step instructions
Making decorative jewelry
For beginner needlewomen, a master class on making papier-mâché beads is suitable. These simple decorations will delight you with their appearance and colorfulness, complement your image, and become a wonderful souvenir.
The crafts are light, colorful, do not require large expenses or special tools, and are not difficult to make. This creative activity is suitable for both children and adults.
Making dolls
A doll for children or a masterpiece doll for an exhibition? With a little paper and glue in your arsenal, you can make both options. Making a doll is suitable for both children and adults. This will require more time and components, but the result will definitely be worth the time and effort.
Arms and legs can be made movable. You can sew a suit or dress for the doll. Decorate the face so that the doll looks like a real little person.
Manufacturing instructions
You will need: plasticine, paper, glue, water, wire, acrylic paint and thread of medium thickness.
- Make an egg shape from plasticine, this will be the frame for the finished product. Cover with a thin layer of dampened paper and glue. Give time to harden. Cut the already dried form and remove the plasticine. Carefully cover the fragile shape with layers of paper and leave to dry. For a more natural and realistic image of the doll, make a relief of the nose, eyes and lips.
- For the body you need to take a wire. Give it the shape of a human body. It is desirable that there is a lot of wire and that it is thick enough to hold its shape well. When the frame is assembled, paper coated with glue is applied to it in the same way. The wire parts remain in the doll and cannot be removed.
- The head is attached to the body with PVA glue or super glue for good fixation.
- After complete drying, coat the product with acrylic paint and allow time to dry. Draw the necessary details - mouth, nose, lips and eyebrows. Varnish.
- For hair, floss, cotton or wool thread is used, the hair is attached using the same glue.
- You can buy an outfit for a doll in the toy department or sew it yourself.
Papier-mâché is an excellent pliable material for creating toys and tableware for beginners. This craft technique is suitable for even the youngest children.
A large number of adults around the world are fond of creating these crafts, and such creativity can often turn into a hobby, decorating not only the apartment and interior, but also exhibition studios.
Technique for making papier-mâché from paper and newspaper
Papier-mâché (the master class for beginners recommends following a number of rules) requires the following recommendations to be followed when making crafts:
- It is more convenient to work on a large table covered with oilcloth. Since all work with adhesives is done by hand, you need to prepare a dry cloth to wipe them off.
- Glue the pieces onto the surface of the mold, lubricate the first layer, and place the next one. To differentiate the first and subsequent layers, you can use paper of a different color, this way you will avoid making gaps and the layers will be uniform.
- There are 2 options for applying glue: on layers or by dipping pieces of paper into a container with glue. The second method is considered more effective, since the glue penetrates the paper better and there are no untreated areas left.
- Objects that are similar in shape to the intended crafts (balloon, mug, plate) are chosen as models. The shape can also be made from plasticine. If the surface of the craft is uneven, it must be treated with water-based putty. When this layer of soil dries, it needs to be sanded over.
- The last stage is decoration. To do this, use decoupage, decoration with acrylic or oil paints. If watercolor or gouache is used, they must be varnished. You can decorate the surface with beads, fabric (organza, chintz, guipure) or paper applique using PVA glue. Crafts are decorated with pasta in the shape of butterflies and spirals, which are painted and varnished. When finishing, they use grains and lay out drawings.
Photos of papier mache crafts
Techniques used
Having chosen the materials that will be used as raw materials, you need to choose a work technique . There are three ways in total:
- layer-by-layer method;
- hot method;
- industrial process.
The methods differ; only the first two are used at home, although industrial production involves the same manufacturing principles.
Layer method
To gradually cover the form with paper, a suitable object is selected. It is better that it be clay or plaster. The mold is greased with oil or wrapped in film. Paper pre-cut into small strips is overlapped onto it. To prevent the first layer from sticking tightly to the mold, you need to wet the newspaper and only then apply glue from the outside. The process is then repeated until a rigid structure is obtained. There are many layers involved in this. Ideally, there should be about 100 of them, but you can’t glue them all at once.
The strips must be carefully applied with a sticky base on both sides and dried after applying every 4 layers. The latter are best made from white paper. This is necessary so that the newspaper pattern does not show through the paint of the finished product.
At the end, you need to apply undiluted PVA glue to the craft, dry it very thoroughly, and then carefully remove it from the mold. To be able to carefully remove the shell and not damage it, it is better for beginners to choose simple objects - plates, balls or vases. More complex designs can be used as experience is gained.
The shell, cut with a stationery knife, is glued together with tape, which is masked with new pieces of newspaper. After this, the product can be painted. If possible, it should also be varnished to make it moisture-resistant and durable.
The method is lengthy and requires painstaking work by a master, but the result is usually very successful.
Hot way
The hot method gives the material a resemblance to plasticine . This is how you can make papier-mâché at home using this method.
The newspaper is torn into small pieces, folded into a container and kept in hot water for 10 hours. After this time, the wet mass is heated until the fibers are completely destroyed, and then the liquid component is drained through a sieve. The remaining paper is beaten with a mixer until smooth, and glue is added at the end to give it plasticity. Almost finished material, being wrapped in polyethylene, should spend several hours in a cool place.
With this method, there is no need for a long process of gradually gluing paper pieces: you can simply stick a layer of the required thickness over the form and wait until it dries completely.
After this, the shell is also cut, glued again and subjected to artistic processing.
This is an easy and fairly quick method, but you have to wait until the paper gets wet.
Industrial production
Products manufactured on an industrial scale are usually intended for artistic painting. The principles of manufacturing in industrial and home conditions are generally the same, but there is a difference between them. For example, in industry there is a stage of pressing material, which is difficult to perform without special equipment. In general, the process looks like this.