Reads: 7,755
Reading time: 17 min.
no comments
There are many ways to please yourself and your loved ones by making crafts with your own hands. One of them is to make a picture using the quilling technique, as experienced needlewomen advise. Of course, to master the basic techniques of this applied art, it will take a lot of time and a fair amount of perseverance. But the result will exceed all expectations! With patience, you will understand how to work with quilling and be able to create beautiful compositions.
What is quilling?
Translated from English it means “bird feather”. Historians claim that from the beginning of the 14th century, European monks trimmed the gilded edges of books and wound them with a pen, which they used to write strips of paper, hence the name. There are only two directions of this art in the world.
Europeans are laconic in their work and use a minimum of details for their crafts, while Japanese masters create complex and technical paintings, sometimes the number of parts can reach several hundred.
Therefore, it is wrong to say that quilling is fun for children. On the contrary, it is a complex art, like origami, that requires painstaking work and practice. But even a beginner can do something simple and extravagant.
What strips are used?
We should start by getting to know what we will be working with and what we will be using to create our paintings.
The length of the sheets is exactly the same as the A4 paper format; if necessary, the strips are trimmed or glued together.
The strips are sold already cut and their colors are completely different, able to satisfy any request - these are metallized, with different patterns, packaging with only one shade or with a color transition effect. In general, there is always something to choose from.
It is better to buy ready-made strips right away, since cutting them yourself with scissors is very painstaking work. There are special machines that will turn a piece of paper into what you want, but this is a technique for people who do this all the time. We do not consider this format. The width ranges from three millimeters to one and a half centimeters. The color is the same on all sides.
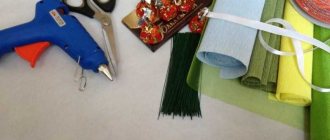
Materials
In addition to tools, to make quilling crafts for beginners you will need strips of paper. For paper rolling, you can use both special kits that are sold in craft stores, and strips prepared yourself.
In the latter case, you will need thick double-sided colored paper (the elasticity of the strips and how well they will hold their shape depend on the density). To cut strips, a sheet of paper will need to be lined into strips of equal width and then cut.
You can simplify the cutting procedure using special machines: a trimmer or a mini shredder.
In addition, at first, ready-made diagrams and detailed instructions will play a significant role in creating any crafts using the quilling technique for beginners.
About the tool
The most important tool in the work is a handle into which a thin steel rod forked at the end is inserted. It is used to grab the strip and then twist it. You can make it yourself: take a wine cork and insert a needle into it with the sharp end, then break the eyelet into which the thread is threaded.
Note!
DIY military crafts step by step: 150 photos of the best craft ideas for children for school or kindergarten
- DIY crafts for May 9 step by step: 150 photos of the best crafts for Victory Day
- DIY crafts for February 23rd step by step: master class with photos and descriptions of how to make crafts for Defender of the Fatherland Day
You will also need stencils, this is either a ruler with different diameters of circles or something more complex, where other shapes are present. To move the finished spirals along the sheet, you may need tweezers, but not cosmetic ones, but with curved, elongated edges.
Twisting device
Twisting of paper strips is done with a special tool - a steel rod inserted into a comfortable handle.
At the same time, eastern craftswomen use a device similar to an awl, while European craftswomen use a tool with a forked end. Beginners are advised to adhere to the European school.
Let's start with the basics
As in the art of folding paper, there are basic types of figures that serve as a kind of base, we cannot do without it. Any instructions for creating quilling crafts will be based specifically on them, so we need to learn how to execute them accurately.
Exposed parts
In such elements the end of the strip is not secured. The most striking examples could be:
- curl;
- S-element;
- C-element;
- V-element;
- heart;
- twig.
Similar details are used to decorate crafts made using paper rolling technology.
droplet
To make a droplet, which is also a fairly common form, you need to wind the strip not very tightly, then remove it and squeeze one of the sides on which the end of the tape was located with your fingers.
If you also squeeze the droplet from the reverse side, you will get the third basic element of the figure, which will resemble either a tree leaf or an eye.
Basic quilling elements and how to create them
Simple quilling crafts for beginners are made using various small parts. Basic elements are usually divided into closed and open.
simple flower
Now it's time to make your own quilling craft. We'll start with a simple flower.
Make six spirals from stripes of the same color, then form them into droplets, which you will then turn into leaves.
Your base elements should be the same size.
Glue one of the petals to the paper, then take the second one and place it opposite.
Glue the rest, leaving a space in the middle where you place the bead - your first job is finished.
Volumetric flower
Take ten white stripes and form them into either droplets or petals, then start gluing, first two opposite each other, and then the rest. If there is room left, make one more petal or two. Place them with sharp edges towards the center. Leave no space in the core.
Next, take a yellow ribbon one centimeter wide, cut one of its edges, creating a fringe and begin to make a spiral. When it is ready, glue it to the center.
A stem is made from green paper and set aside for now. Both ends should be sharp, and it should be tightly twisted. For strength, you can insert a wire into the center. Next, make a spiral out of the green strip and insert a stem soaked in glue into it, allowing it to dry for some time.
Glue the chamomile to the base of the stem and your craft is ready.
Materials and tools
Quilling fakes for beginners (flowers) involve the use of the following materials and tools:
| Special quilling tool | These devices can be purchased at an office supply store or specialty department. In appearance, the tool resembles a long ballpoint pen with a forked metal tip located at the end. |
| Paper strips | This material can be purchased or made on your own. It is important to remember that the process will require paper of different widths - from 3 to 10 mm. |
| PVA glue | You can buy the simplest option. You don't need a huge amount of glue to work. Therefore, at the initial stage it is worth taking a small tube |
| Ruler-stencil or backing | The tool is a simple ruler with cutouts of various diameters in the shape of circles. The stencil helps novice craftsmen cut out elements of the same size |
| Safety pins with colorful ears | They are used when decorating a large flower arrangement. |
| Cork base for gluing parts | Paper elements will not stick to such a base, and the master does not have to worry about the risks of ruining his work |
| Sharp scissors for cutting fine fringes | |
| Tweezers for compositions with a large number of small parts |
All of the listed quilling components can be purchased immediately in a kit. This will allow the craftsman to save time in searching for missing parts and reduce the cost of a set of quilling items.
Sunflower
Quilling crafts for beginners were listed above, but this figure belongs to the category of medium complexity, but once you have mastered the basic principles of working with tools and paper, you should be able to do it.
Take the yellow strips and form them into fluffy spirals, with a stripe pitch of one to two millimeters, and squeeze one of the ends to form a drop.
Take a sharp object, such as a needle, and move the center to the sharp end, fixing it in this position with glue.
Next, take the second petal and glue them together on the side at the sharp end and press them together again with your fingers. Make 20 similar petals and increase their number if necessary.
Cut out a circle ten centimeters in diameter from green paper, use a compass to form another one in it, but with a radius of two and a half centimeters.
Start gluing the petals, the blunt ones to the area of the drawn circle, and the sharp ones outward.
Take the green strip and glue two more to it, you should have a long ribbon. Start winding, making a spiral. Insert a wire into its center, bend it so that it does not fall out, turn the flower over and glue it to the green circle.
Follow the step by step instructions and use glue to place the second row of yellow petals. They should be located at the junction of the first row; your core will still be empty.
Form strongly fluffy petals from wide stripes of three millimeters of green color. They should be glued underneath the yellow ones, attaching them to the base of the round stem. Once ready, let the structure dry a little and form a stem from green paper, pasting over the wire.
To make the core, you will need either a long strip of several brown ribbons, or many tightly twisted spirals inserted into the center - your work is ready.
Practice
Before making any craft using the quilling technique, it is important for beginners to master a simple theory and practice step-by-step in creating basic elements.
The main elements of paper rolling are tight and loose rolls, and a regular curl. When forming a tight spiral, it is necessary to slightly stretch the strip of paper when winding it so that its turns fit as tightly as possible to each other.
The free roll is made from a dense material. To obtain it, after winding the tape, the spiral must be allowed to unwind a little. After obtaining the part of the required diameter, the tip of the roll is fixed with glue.
The process of forming a curl is no different from the procedure of twisting a roll. However, in the end, the tip of the curl is not glued to the base, remaining free.
Various “bricks” can be formed from basic elements.
Snowdrops
As you may have noticed, any scheme for creating quilling crafts involves several options for execution. This is the pleasant part of working in this direction. Everyone is able to bring something of their own, based on their experience.
The first version of snowdrops is extremely simple. In fact, we don't need to twist the spirals. It is enough to form three droplets from small pieces of white paper and glue them to the green tape. The attachment point is hidden under a strip of a similar color.
Make three flowers and you can decorate the work by diluting it with grass and cotton wool snow. You can complicate this option if you use full-fledged droplets, but in this case, attaching the flower to the stem should be better and tighter from a full-fledged spiral.
The second option differs in the design of the flowers. Make semicircular spirals that resemble an arch, then take a green ribbon and glue its end to the snowdrop and it is ready.
Paper
For this type of creativity you need paper with a density of 120-140 mg/sq. m, or rather, paper strips. Their width can vary from 3 to 15 mm.
We recommend reading:
DIY polymer clay jewelry: review of the best master class with step-by-step instructions for beginners (150 photos of original ideas)- DIY polymer clay flowers (120 photos of the best ideas) - simple instructions with full description + master class and video tutorials
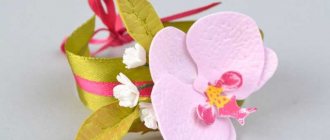
- DIY paper orchid - a review of the best ideas and tips from craftswomen. Step-by-step instructions + master class (photo + video lessons)
In stores there are ready-made sets of multi-colored or single-color strips, 30-60 cm long. Beginners can use office paper by cutting it as needed with a stationery knife.
Some ideas for quilling crafts involve the use of:
- cardboard;
- papers for creativity;
- foil;
- films.
Butterfly
It is made very simply from five parts. The base is a ribbon twisted in the shape of a petal, to the sides of which the wings are glued. They are made in the form of droplets, the lower ones are glued with sharp ends outward, and the upper ones with blunt ends. You can make antennae from the black stripe.
If you wish, you can use an interesting technique where you take short strips of different colors and glue them together one by one. As a result, wings are formed from them, a very interesting effect is obtained.
Master classes for beginners
Beginner girls, boys, and adults are recommended to use high-quality paper and tools for paper crafts - this way they will quickly learn this art by mastering its basics. Children will be most interested in making something that they understand - figurines of animals, birds, fish, doll furniture, New Year's decorations, a postcard for mom or dad.
The main basic figure is a spiral. To create such a dense roll, a quilling strip is tightly wound onto a stick and then fixed with glue. The free spiral is also wound onto a stick, but is then given the opportunity to unwind slightly, after which it is manually given a suitable shape and glued to the right place.
Quilling flowers
Using the quilling technique it is easy to make almost any type of flowers - dandelions, daisies, gerberas, roses, tulips, sunflowers and many others. To make the simplest flower, you will need a square of colored paper with a side of 12-15 cm. Inside the square, starting from the center, draw a spiral with a pencil, which is wound onto a stick and fixed with glue. The result was something similar to a rose.
More complex flowers are formed from several strips rolled into rolls using stencils with circles. A small fringe should be cut along one edge of the strips. For the center of the flower, take a pink, red or yellow strip measuring one by 30 cm, for a bud - a light green one, one by 10 cm. First, twist the middle tightly, fix it with a drop of glue, then attach a strip on top to form the bud. The fringe should be carefully fluffed out.
Making snowflakes
New Year's snowflakes are performed in stages as follows:
- seven “loose” rolls are rolled, the ends of which are secured. One will become the core, the rest will become the “rays” of the snowflake. The rays must first be manually shaped into droplets;
- Then six more rolls are made, which are flattened in the form of an eye. They are glued between the parts of the previous row;
- then make six heart-shaped spirals, which are glued with a notch onto the “rays” of the previous row;
- A thin thread is threaded into the finished product - it can be hung on a Christmas tree.
Quilling for children - ladybug
The ladybug is made from strips of red and black paper - for the shell you will need nine red stripes one cm wide, other details - a black oval for the muzzle, four to five circles for the spots on the back, six legs in the shape of corners, two antennae, a red arc mouth, two white circles with dots in the middle - for the eyes.
First, a symmetrical snowflake is glued together from red stripes, and a black circle is glued into the center of it. Afterwards, the opposite edges of the strips are assembled so as to form a ball, the bottom of which is pressed down, forming a plane. From a black oval, glued to the lower part with a protrusion on one side, you get an abdomen and muzzle. Afterwards the remaining spots, antennae, and eyes are attached.
Using a similar scheme, you can make figures of a spider, ant, and bee.
Making a butterfly
To make a butterfly you will need:
- strips of paper in yellow and black colors;
- cork board;
- sharp scissors;
- curly templates;
- screw rod;
- PVA glue;
- six safety pins;
- diagram with a drawn outline of the product;
- acrylic lacquer.
Progress:
- take four yellow strips, one by five cm, six – one by 10 cm in size;
- the strips are twisted into a spiral, adjusted to certain sizes, after which a bend is created on one side;
- the finished parts are laid out in accordance with the diagram, glued together - large ones in the middle, small ones - closer to the edges;
- the contours of the wings are decorated with black frames in two layers;
- the body of a butterfly will emerge from a short strip bent in half - the wings are glued to it in the middle, the upper part is formed with twisted antennae. To prevent the butterfly from falling apart, the parts are glued together and secured with pins to the mat;
- at the final stage, for strength, the structure is coated with transparent varnish.
To make the butterfly more beautiful, use a larger number of multi-colored stripes.
Chrysanthemum tree
Instead of searching the Internet for information on how to make quilling crafts, think about whether it is possible to implement something else from existing forms. For example, you can get a tree from an ordinary chrysanthemum, but if you use a napkin rather than paper as a basis, the result will be even more interesting.
Find an old napkin, it is better if there are several color options. Cut it into narrow strips three millimeters wide and make a fringe, the more magnificent it is, the better in the end.
Start twisting a loose spiral - the chrysanthemum is ready.
Make nine more flowers and start gluing them to the leaf. Four at the base, the next row three and so on until one. Decorate the craft with a stem of any color, beads, snow made of small white curls - you have a tree.
How to make beautiful flowers using the quilling technique: tips and reviews
- Quilling is a very painstaking form of creativity. Only after acquiring skills will the figures be obtained more or less quickly. Therefore, be patient
- Accuracy is the main factor for obtaining beautiful compositions. No matter how ingenious the idea is, if it is dirty or uneven, it will simply be impossible to look at it
- Paper parts are very small, so prepare the work area in advance
- Wait until the part is completely dry before attaching it to the base.
- Don't put a lot of PVA glue. Even a small amount of it glues paper well
- Don't skimp on your quilling tools. This will provide you with easier work and smooth parts.
- Take your time, stretch out the pleasure of creating your masterpiece
Flowers
Don't limit yourself to creating just one motif. Look for the ones that you like the most.
Quilling paintings
The beauty of this creativity is that you can print any image and decorate it with strips of paper. For example, after printing an image of a running animal or a dancing person, decorate part of the silhouette in the direction of movement with curls of various shapes and complexity. You can use dense spirals to fill the entire picture - this is at your discretion.
With stripes and spheres you can imitate images that are familiar to us, starting with something simple, for example fish, you can end with an owl or something else, there are no restrictions.
It is only important not to forget and actively use the technique of gluing different colored stripes into one tape. For example, for an owl's eye, one strip will contain black, then yellow for the pupil, then again yellow and white.
The more experienced you become, the more you can be inspired by the world around you. In winter, make a snowflake, in summer, flowers seen in nature. Try to realize three-dimensional figures of various animals, it may seem somewhat tedious, but the result, believe us, is worth it.
Remember that often from the simplest forms you can get complex ones. You can make a grapevine from droplets and voluminous, convex spirals. The leaves will be green and the berries themselves will be purple. Nothing can replace your imagination and ingenuity.