Types of curtains for sewing
First you need to decide on the type of curtains. Among the many, there are eight main types. Some are similar and differ only in nuances.
For beginners, the following popular styles are recommended for familiarization: English curtains, Roman curtains and classic ones with laces. The pattern for such curtains is perfect for beginners. Next, you should prepare the fabrics and tools.
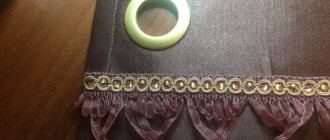
Straight curtains have a weak effect, but are suitable for rooms with simple decoration and small windows. They are often complemented with laces made from the main fabric, sometimes with tassels. It is common to place a hook in the wall to maintain shape.
Room specification
The choice of fabric should be approached responsibly. It is necessary to weigh the material and decide in advance on the room for which the curtains are being prepared. Cotton or linen are used to make patterns for kitchen curtains. They are lightweight and do not require complicated care. You should not take synthetic fabrics.
Peaceful and soft colors are suitable for the sleeping area. To block the sun, they must be dense, which requires appropriate material.
It is better to hang bright curtains in the children's room. For the living room, you should choose based on the design of the room. Consulting a salesperson in a store will help.
Print placement
Usually the pattern is perpendicular, and you can easily adjust the size of the roll. Otherwise, the width is limited to three meters. You need a lot of prints to accurately combine the pattern. Don't forget about seam allowances.
Counting expenses
There are three criteria for calculating material, the main one being length. It is calculated as the distance from the cornice to the floor or window sill. The curtain may not reach the floor by ten centimeters or be only slightly longer than the window.
To calculate the width, you need to take into account three parameters: the length of the cornice, the coefficient of material gathering and seam allowances. The width of the cornice is usually greater than the width of the window. The measurement result is multiplied by a coefficient.
We sew curtains for the bedroom with our own hands
You won't believe how easy it is to make your own bedroom curtains! If you wish, you don’t even have to scribble anything. All you need to create them are basic tools and imagination. In a couple of hours, you can transform a dull bedroom into a warm, cozy place that suits your taste.
You have never seen such DIY bedroom curtains before.
Below you will find instructions on how to sew curtains for your bedroom with your own hands. You can choose different fabric designs and make something else out of the same fabric, such as a pillowcase or bedspread. Look, maybe the curtain design in the photo will inspire you.
Necessary things:
• fabric • cornice and fittings • tools for installing the rod • special clips • sewing machine or adhesive tape • iron • pins • scissors • centimeter (for measurements) • meter stick
Step 1. Accessories
The clips will hold your
curtains
. To make curtains like these, the first thing you need to do is shop around. You need two things: a curtain rod and clips. Find a decorative cornice for each window you want to decorate. When choosing one, make sure that you can install clips on it that will attach to the rod and hold the fabric. Their number depends on how many swags (a semicircle draped with folds) you want to collect. (Do you want smooth, heavy-hanging fabrics or do you prefer them to drape with light folds? It's all up to you and your taste.)
Step 2. Installation
There are many options for installing cornices.
Then return home and install the purchased curtain rods. It is important to understand them before purchasing the material, since the length of your curtains depends on the height at which they will be attached. Follow the installation instructions.
Step 3.Measure
Then attach the clips. Take a centimeter and measure the length from them to the floor. Write this number down. You will rely on this data when calculating the length of your material.
Step 4: Fabric
Curtain fabrics are usually sold in rolls.
Curtains require material, hence you will have to go shopping again. It is advisable to choose curtain options, since their weight will be more suitable for your purposes. Curtain material is usually produced 1.5 meters wide, and this width is enough to make luxurious and strong curtains, as if from a store. In order to determine the amount of matter needed, remember the numbers you wrote down in point 3 and add another half a meter. This will be the final length. But don’t take too much material! Leave a margin of 10-15 centimeters in case of mistakes. (Read below for advice on how to choose the best fabric)
Step 5. Measure seven times, cut once
You can make the curtains long if you like them to touch the floor, as if merging with it.
Once you get home, you will have to make very precise cuts. Remember, in point 3 you determined the length of each canvas, adding half a meter. If you don't have a special table with cutting marks, use a tape measure to measure the desired length. Next, take a straight stick about a meter long and draw a “cutting” line. (Use chalk or soap to mark). Carefully cut along this line. (Read below for advice on how to trim correctly).
Step 6: Edges
Next, you need to process the edges to get curtains for the bedroom. Turn on the iron and let it heat up a little. Lower the top edge by 1 meter. Iron the material so that its edge remains down. Also iron the bottom and edges, meter by meter.
Step 7. To sew or not to sew
When you sew, do not lose sight of the lines on the panel of the machine and your lines will always be straight.
You can sew or use duct tape to fold it over. (Go to step 8 if you are not going to sew) If you dare to sew, attach pins at equal distances so that the fabric does not unravel when sewing. Follow the mark on the panel under the sewing machine foot and stitch all four sides of your curtain in this way. (Skip point 9).
Step 8. Glue
Adhesive tape is easy to find at any sewing store.
First of all, you need to cut strips of tape proportional to the edges. Then open the top and bottom ironed edges and spread the duct tape over them. Fold and iron according to package directions. Repeat again on all sides. Now the edge is processed like a professional! To make curtains for the bedroom you will never have to sew!
Step 9. Clips
You can find many different decorative clips.
Attach the clips to the curtain rod. Place them as close and often as you like. The distance between them depends on how exactly the fabric falls. A tail-hanging one sometimes looks more subtle, while a straight down one (or lack thereof) looks neat and modern.
Step 10. Hanging curtains
Fun clips and material will add a unique touch to your room.
Now you have finally installed the clips and can admire your unique curtains for the bedroom.
Useful tips
• Curtain rods can be expensive, especially designer ones. However, if you look at a regular store, market or sewing department, you can always find something you can afford.
• Material can also be an expensive item, especially if you need a large footage. But you can save money simply by checking out local small sewing shops and discount departments.
• If you're remodeling an entire room, look to your favorite pieces for inspiration. When my mother was choosing the color of the walls and trim for her new home, she first went shopping in search of something that would spark her imagination. She set her sights on decorative plates and used the colors from the plate design to decorate her home. If the item you've chosen has a nice color scheme, you can't go wrong by using those colors in the future. In such cases, the colors combine perfectly with each other, and you won’t get into trouble.
• Remember the old saying “measure twice, cut once” and you will make your life easier. Check all measurements carefully before the inevitable cutting of your amazing fabric. You will be very sorry if you make a mistake and have to run to the store for new fabric.
• You have another opportunity to decorate simple options with additional trim. Simply attach a hook to the wall next to them and tie a nice ribbon around the curtain at that level. Then attach this loop to the wall hook. It will “pull” the curtains closer to the edges and give them some zest.
• Do not allow the iron to touch the adhesive surface. It will melt and leave a sticky residue.
Preparing for sewing
To prepare allowances for the final length, add up to ten centimeters for shrinkage after washing. The size of the additive depends on the material. For natural materials, allowances are made up to twelve percent of the original length.
It is necessary to prepare sketches for sewing curtains in advance - take templates or describe them yourself. It is necessary to specify all the parameters and solve difficulties that may arise during work.
Your own drawings often turn out to be of better quality than store-bought ones. It is also worth checking that the window measurements are correct. Mistakes will lead to curtains that are not aesthetically pleasing, so you need to double-check all the nuances. The style should match the decor of the room.
Drawing creation and initial work
Before you start sewing, you need to find or describe your own curtain patterns, select sketches, patterns, more suitable materials and solve other problems. All size parameters must be noted on the pattern. Templates you make yourself can turn out just as good as store-bought ones. It is important to take measurements from the window correctly.
How to measure a window
If you need to sew curtains in a studio, then the success of the product depends on the size that a person takes. If they are incorrect, then in the end the curtain will turn out ugly, and the fault will lie only with the client. You need to think through all the details, color, shape and number of folds.
This might interest you. Learn more about the history of the first sewing machine.
The style of the curtains should fit completely into the overall design of the room and not look bulky or pretentious. Below you can read step-by-step instructions for sewing curtains with your own hands.
Kitchen Roman blinds
First you need to accurately and accurately cut the canvas. Then fold it on both sides and trim the edges. According to the instructions above, apply the braid and smooth it out.
Next, prepare the slats and remove the nylon threads. Excess slats need to be removed, focusing on the planned number of folds.
Usually, with a standard length of 130 centimeters, five pieces are used. Fold the edge and hang the base from the cornice. The slats need to be attached evenly across the canvas. You need to make sure that they do not touch the rope mechanism. You can secure the fabric with PVA glue.
How to diversify your home interior: DIY decor and beautiful design ideas- How to hang curtains - step-by-step instructions with photo examples and recommendations. Exclusive curtain design solutions from experienced craftswomen
- Curtain tiebacks - 150 photos of new exclusive designs
How to sew curtains with ribbon
Curtains on ribbons specially designed for draping and hanging on curtain hooks are the simplest option for window decoration. Simplicity of design is in no way related to decorativeness, which is ensured through the selection of fabric, trim and accessories.
First of all, you need to measure the width of the cornice and the height from the floor to the cornice, and take into account the fabric for the top and bottom trim. Create a pattern and prepare two identical fabrics.
The curtain tape is sewn according to this algorithm:
- Lay out the fabric with the wrong side up, and apply the tape also with the wrong side up on the top edge of the fabric.
- Carefully fold the top edge 2-3 cm, catching the edge of the braid.
- At a distance of half a centimeter from the fold, stitch the top of the ribbon, then the bottom of the ribbon.
- Release the cords, fold the side edges of the fabric 1.5-2 cm over the braid and stitch.
- Iron the finished curtains, observing the temperature conditions.
- Tighten the cords, forming even folds across the entire width of the curtain.
- You can do without additional costs and hang the curtain from the loops located on the tape on the hooks located on the cornice.
The classic version of curtains with hinges can be diversified with interesting hooks. You can make them from soft toys, artificial flowers and decorative ribbons.
Embroidery will turn a simple curtain into a designer one.
The work invested in creating a cozy family nest will be justified by the admiration and respect of loved ones.
Blinds
This option is stylish and easy to manufacture. For blinds, a dense canvas without patterns is used. First you need to decide on the size and number of lamellas. The standard values are 127 and 89 millimeters.
Then the lamellas are cut out according to calculations. Allowances are also taken into account. The lamellas are placed with the front side inward, and the stitches are started. After turning them inside out, they are ironed and put on the guides.
Making a lambrequin
Lambrequin can be soft, hard, combined and figured. Soft is made from thick or thin fabric. Decorated with sewn elements, folds and textile details.
The hard one is distinguished by a corresponding lining, which can be wooden or plastic. It gives shape and decorativeness to curtains. The figured lambrequin has a three-dimensional pattern and various holes.
When preparing, you need to make a pattern. Popular options are available on the websites. Then fabric of appropriate sizes is purchased. Initially, the canvas is attached above the window and sewn to the length of the floor. Then for a cornice half a meter wide you will need seventy centimeters of fabric.
Do-it-yourself tulle - step-by-step instructions on how to sew beautiful tulle. Photos of ready-made ideas and modern designCurtains for gray wallpaper - options for the ideal combination of curtains in a gray interior (TOP-150 photos of new designs)
- Quilt - 130 photos of the best new items of 2021. Step-by-step instructions on how to sew a beautiful patchwork quilt with your own hands
The lining should be trimmed. Having temporarily connected the layers with a pin, turn the curtains over and cover the holes. Then the cornice is attached, and the folds are tightened with laces.
Fabric consumption for different styles
Curtain, from the French word “store”, translates as “fabric curtain”. “Tulle” (a masculine word) is consonant with the city where this light translucent fabric was invented at the textile manufactory.
Each cultural era offered its own style, but the name does not always coincide with the place of origin.
The most common curtain styles:
- French "marquise";
- Austrian curtain (with soft gathers at the bottom and two tiebacks);
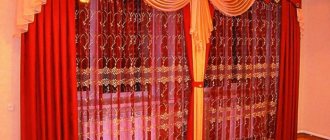
- English multi-layer curtains (with folds and fringes, often made of velvet or velor);
- Roman (with uniform folds and a lifting mechanism);
- Italian (narrow long canvases with interceptions in the middle, often used to fill the piers on bay windows);
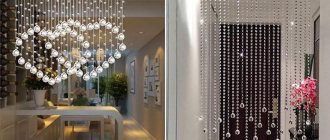
- Japanese (smooth screened curtains with a weighting material at the bottom edge, require special movable curtain rods with remote control and electric drive).
This is a design classification, it is very conditional, but it makes it easier to determine how complex the tailoring will be. Each type requires its own type of fastening - on a baguette, cornice or ceiling strip with runners.
The fabric pattern is determined by the style and overall design concept. Narrow fabrics are suitable for roller and Japanese curtains.
Today, many single-layer and multi-level curtain compositions, simple and complex styles have been developed. There are single curtains without drapes and multi-layer curtains with draperies, tiebacks and pelmets or color blocks.
Kitchen curtains can be decorated with ruffles and frills, but this is not always appropriate in a strict modern bedroom.
Nuances of measurements
To get a beautiful pattern for curtains, you need to make accurate and accurate calculations. A few tips to follow when taking measurements:
- The height should be measured in two or three places. If the ceiling or floor in the room is uneven, such a check will reveal this. If the heights are different, during the work you need to make a bevel in accordance with the measurements.
- You cannot subtract allowances from the result, since this is already done during the pattern.
How to take measurements correctly?
Correctly determining the size of future curtains is half the success. First measure the curtain rod. Its length will be equal to the width of the finished curtain. The length of the curtain can be up to the window sill or to the floor depending on your preference.
Now you need to calculate the amount of material required according to the following scheme:
Add 20 cm to the length of the fabric for hems. In order to determine the width of the fabric, it is necessary to decide how the curtain will be sewn: will it be with eyelets, with drapery, or will it be a smooth fabric. Most often, the drapery coefficient is two.
Thus, to determine the width of the curtain, you need to multiply the length of the cornice by two and add another 20 centimeters for processing the edges. It is worth paying attention to the fact that if the fabric is light and thin, then it is better to take a drapery coefficient of 3.
When purchasing material, remember that the remaining scraps can be used as decoration, but if there is not enough fabric, you will have significant problems, so it is better to purchase material with a reserve.
Making roses
There are two common options:
A decimeter wide fabric is taken, the length does not matter much. Only the splendor of the product depends on it. The strip is folded in half lengthwise. The stitching is then started and the edges are sewn together. The workpiece is turned out, twisted and fastened with threads. The method is simple, and even a child can make such a rose.
The flower is assembled from individual petals. Round petals of different sizes are cut out. You shouldn’t make them perfectly even - asymmetry is inherent in nature.
To avoid fraying of the edges, the petals are treated with fire. The result is interesting and more natural, but you need to put in more effort.
Other elements. There are many decorations for curtains. The most popular ones are listed here:
- jabot (specially shaped folds for additional decoration);
- tiebacks (patterning curtain tiebacks helps you make beautiful draperies with your own hands);
- decorative tassels (they add elegance to even ordinary simple curtains and can be used as tiebacks).
Photos of curtain patterns
Did you like the article? Share

+1