Paper baskets
Small decorative baskets not only decorate the room, but also help maintain order. Containers can be purchased at the store, but it is much more interesting to build them yourself. If you have a lot of scrap paper at your disposal and a few free evenings, you can design cute boxes in the right size and shape without breaking the bank.
Paper baskets are not as moisture-resistant and durable as wooden ones, but they are perfect for storing small items. In addition, thanks to proper painting, their appearance is practically indistinguishable from traditional products.
Baskets are woven by hand from paper twine or homemade ropes. The materials used to perform the latter are: baking paper, paper bags, postal leaflets, as well as sheets of newspapers and magazines.
Step-by-step instructions for any weaving technique can be found on the Internet. They are quite simple, all you need is desire and free time.
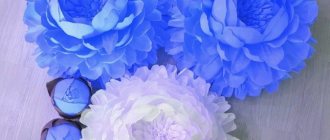
Fans and flowers made of paper
In childhood, everyone made fans out of paper, folding it like an accordion. Large fans that can be placed on the wall and flowers are made using the same principle. For them, colored paper is folded like an accordion; for a flower, the sides are connected into a circle. It is important that the sheet of paper has the shape of a long ribbon. A paper flower is glued to the center.
If you take paper with a pattern—you can buy it in craft supply stores or scrapbooking stores—the fan will look more impressive. You can apply glitter, and then under artificial light they will sparkle beautifully.
Huge flowers and pompoms are made from corrugated paper or thin tissue paper. The principle of creation is the same as that of a fan - the paper needs to be folded like an accordion. The width of the fold is approximately 3 cm. If you want to get a dense pompom, you will need at least 10-12 sheets.
DIY paper decor
Decor idea with paper products
Carefully tie the folded accordion in the middle with strong thread. The edges of the future flower need to be aligned; you can give them a rounded shape. Now carefully, layer by layer, straighten each petal of the future flower, giving it shape.
If you are making a flower to hang on a wall, straighten the petals in one direction; for a pompom, open half in one direction, half in the other. All that remains is to fasten the pompom to a thread, and for the flower, glue a small circle on the back side for mounting on the wall.
Decor design with paper crafts
Interior decoration with paper
Paper decor
Stars
You can decorate the Christmas tree with paper stars. They are made very simply, even kids can cope with this task, but they look very original!
#1 Simple New Year’s star made of colored paper: make Christmas tree decorations from paper with your own hands
#2 Do-it-yourself voluminous star for the Christmas tree
#3 We make Christmas decorations for the Christmas tree out of paper with our own hands: 3D star
#4 Origami New Year star for decorating the Christmas tree with your own hands
#5 New Year's toy from paper and baking dish: we make the toys ourselves
Useful on the farm
Craftsmen weave various baskets and boxes for different purposes from paper twine or homemade paper strands.
You can put albums, books, toys in the box. Store onions and garlic in a basket in the kitchen.
Boxes are woven from strands crosswise, and baskets are woven in a circle, starting from the bottom. After the item is woven, it should be painted and, after drying, varnished.
Dollhouse made of thick cardboard
To make a dollhouse you will need:
- Sheets of cardboard of a suitable size (approximately 40x40x15cm), it is better to choose the hardest one. You may be tempted to create a very large house, for example for Barbie dolls, from a cardboard box for industrial equipment or household appliances, but this too may need to be glued in several layers;
- Unnecessary boxes of cosmetics, medicines, and gift wrapping are suitable for furniture;
- Several linear meters of veneer of different colors in approximately the same quantity as cardboard. You can use finishing paper or thick fabric with it, so the house will look more interesting;
- Additional materials - spray glue, glue gun with rods, ruler, scissors, knife, double-sided tape.
Progress:
- The first thing to do is cut out the compartments from cardboard. They will be used for the walls and ceiling of the house. They must be the appropriate length and width (their size depends on the dimensions of our base). If the cardboard is not rigid, it makes sense to glue two sheets of it together.
- The cut out walls should be covered with veneer, the internal ones can be trimmed with fabric. Next, we proceed to veneer a large piece of cardboard for the base and roof. We choose the right colors and stick them on the “floor” on the first floor and the “ceiling” on the second.
- Now let's take care of the walls of the cottage. For this you will need a ruler. Place the pre-prepared tabs into the box and measure the “height of the floors.”
- We cut strips of veneer and other finishing materials of a given width and use them to glue the interior of the house. It would be good if each of the “rooms” had its own color. We start laying veneer/paper/thick fabric from the inside and finish with the outer part of the cardboard. We repeat the exercise four times.
- Now let's unite its outer walls. We cut out a long strip of veneer slightly wider than the depth of the cardboard. We paste over the house and glue the protruding parts to its back wall.
- The house is almost ready. All that remains is to make an attic and strengthen the bottom of the house. We attach the attic to the back of the house using glue. Cover the cut out parts with thick cardboard and secure them. We cut a wide strip of veneer and glue it to the back of the house (starting from the left side wall and ending on the opposite). We do the same with the bottom. These actions will increase its stability and give the bottom and back wall rigidity.
- We cover the rest of the cardboard surface with veneer of the same color. Now it is enough to secure the surfaces of the roof, walls and ceiling with hot glue.
- You can decorate it in different ways. Wall stickers, mini garlands, pictures, whatever!
You can buy furniture at most toy stores or make your own!
New Year's compositions
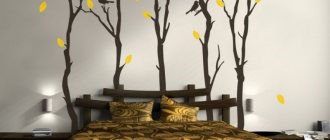
Everyone knows how to make openwork snowflakes from a paper napkin. Window decor can be made even more diverse. Elements of the composition are cut out of white paper using stencils - forest, houses, deer and Santa Claus's sleigh. You can come up with many stories.
These elements are placed on the window (you can glue them using paste made from flour or starch). If you want to create a completely magical atmosphere on New Year’s Eve, you can place small light sources nearby. They will shine through paper and glass, creating an unusual effect.
To make the interior beautiful, make the composition three-dimensional by cutting out another one of the same size and placing the lighting between the layers of paper. Add glitter to the interior arrangement.
DIY paper decor
Decor idea with paper products
You can make voluminous Christmas tree cones from paper, decorating them to your liking, or Christmas wreaths. They will create a festive atmosphere in your home.
A wedding, birthday, New Year, and just a desire to do something unusual with your own hands are a good reason to pick up paper. With its help you can do the following things.
- Unusual curtains for the doorway - from long, triangular-shaped multi-colored ribbons, twisting them into a “tube”, starting from the wide side. The finished elements are strung on threads and attached to the opening. Such curtains can be made from colored pages of glossy magazines.
- Panel - laying out its elements from paper strips.
- Volumetric letters – having made a blank like a volumetric heart, you can cover them with scrap paper and decorate them with additional elements.
Show your imagination and come up with your own “paper” room. With such decorative items that keep the warmth of your hands, your home will become even more comfortable and filled with love.
Origami paper decorations
Different shapes of elements and possibilities for their fastening allow you to create non-standard decorations for a Christmas tree or apartment. Top New Year's products:
- Original openwork snowflakes are cut out and laid out from white and blue crepe paper. To give your crafts a more decorative look, you can glue beads or use shiny paper.
- Draw a Christmas tree template on a sheet of paper. Five blanks are cut out of green paper, which are fastened together with PVA glue. The voluminous Christmas tree is decorated with multi-colored beads and satin bows. Crafts are hung on satin ribbons;
- A bright, weightless garland of multi-colored cubes will gently wrap around the green beauty. Cubes can be assembled of the same size or different. The elements are strung on a ribbon, fixing their position with knots.
These are popular crafts that are easy to create with your own hands.
The New Year holiday is special and bright. Decorating a Christmas tree and home is an entertaining and joyful activity; children look forward to it, especially if the crafts were created on their own the day before. Non-standard room decor for the New Year made of paper will become the pride of the family and will be appreciated by the guests.
Original lamps
Designers are increasingly demonstrating exclusive versions of modern lampshades. Such clothes for lamps often cost a lot. However, this is not a reason to take outdated specimens out of the attic and decorate lamps with them. Let's look at some varieties of incredibly interesting paper lampshades that you can design yourself:
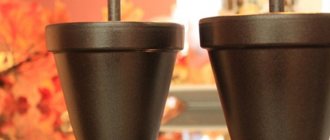
— Improvised rose garden. To create a floral miracle you will need 24 paper cups. Openwork roses are produced from them. It's not very easy, but the result is worth it.
— Another way to use the cups is to cut off the top of each of them and attach the parts to a Chinese lantern. Very bold and unusual.
— The Chinese lantern is a universal attribute in our business. You can also stick paper feathers, butterflies, flowers or circles on top of it. The lighting will be very soft and pleasant, and the atmosphere in the room will become more comfortable.
— Table lamps. Lampshades are constructed using weaving techniques or by attaching ornate paper plates to an existing base. Looks very stylish!
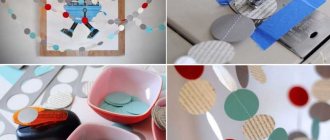
DIY paper crafts - photo
We talked only about a small fraction of those paper crafts that can decorate your interior. It would take a very long time to describe the various techniques, but it is much better to see the finished products with your own eyes. This is what we suggest you do. Our photo selection is at your service!