Any finishing work requires thorough preparation and a good supply of time. If you decide to paint the walls of at least one room yourself, you need to put off all current affairs and problems for a day or two and feel free to start decorating the walls. The painting process is not complicated, but requires a certain skill in the work. Moreover, with a general idea of how to paint walls with water-based paint, be prepared for the fact that the results in practice may seriously differ from theory and advice.
Choosing a roller for walls
To choose a suitable roller, you first need to decide what kind of paint you will work with. It is best to paint the internal surfaces of walls with water-based and acrylic painting materials, since they are perfectly diluted with water, are non-toxic, have a high degree of drying, and most importantly, are harmless to the human body. These paints can be used to cover any surface - wooden structures, stone, concrete and brick. Paints allow the wall material to “breathe”, make their surface rich and bright and do not lose their attractive and decorative appearance for a long time.
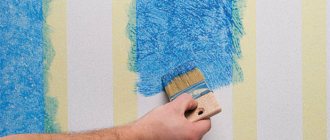
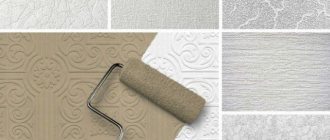
Wanting to give your interior a unique look, decorative paint is often used. A textured foam roller is suitable for this type of paint. The result is a textured surface after drying.
Modern construction supermarkets offer a huge number of tools and devices of various types, and choosing the right sample sometimes confuses the buyer. How to choose the right nozzle? Paint rollers are classified according to the following criteria:
- 1. Material of the soft paint part of the tool.
On the packaging of a high-quality roller, the product marking is indicated only in Latin letters. This means that high-quality material was used to make the construction tool. The absence of one indicates the low quality of the product. It can only be used for home repairs in small areas.
- 2. Soft element texture.
There are rollers made of artificial and natural materials. Fur tips are the most expensive. Felt and rubber are equivalent to artificial ones. Natural rollers have the highest degree of contact with the surface being treated. According to the method of application, depending on the quality of the nozzle, rollers are divided for walls and floors.
- 3. Shape and size of the roller.
For painting complex configurations and corners, small-sized products are used. The width of the nozzle is of particular importance. To paint small areas in an apartment, it is enough to take a sample 20 - 30 centimeters wide.
So which roller is best to paint walls with water-based paint? The choice of construction tool depends on the composition of the paint and varnish coating and the surface being treated; for example, for applying water-based paint, primer and liquid glue, a regular foam rubber attachment is more suitable.
When planning renovations on their own, many craftsmen wonder what roller to use to paint walls with acrylic paint and water-based compounds? The most popular rollers are foam rubber. This material wears out quickly, but at the same time, it is an inexpensive tool. For smooth walls you need to use fur rollers. The rubber nozzle is more used to create different textures.
Advice. When purchasing a roller for water-based paint for walls, do not forget to purchase additional accessories in the form of an extended holder, a grater and several replacement attachments.
Choosing paint and roller
The final result depends on the choice of materials and tools. You can choose a vacuum cleaner that will cover the surface without streaks, but working with a spray gun requires practice. For home use, it is better to take brushes and rollers.
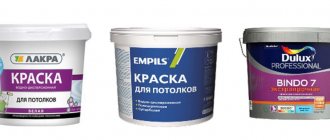
When choosing paint in a store, seek advice from the seller: he will help you make the right choice, tell you how to use it correctly, and for what rooms it is intended. If you don’t have a consultant nearby, you can read the information on the can or listen to the advice of professional craftsmen.
The most convenient to use materials that have all the qualities for successful painting are the following brands:
- Marshall;
- Alpina;
- Dulux;
- Tikkurila.
After you have figured out the water emulsion, you should purchase additional tools and materials. You should buy:
- hard brush;
- soft plastic brush;
- tape for repair work;
- sandpaper;
- a couple of rollers, choose rollers with medium hardness and length;
- you need handles for the roller that can be changed. The length of the handles for the roller is 1 meter, 1.5 meters;
- putty knife;
- paint trays;
- acrylic primer. To process 1 sq. m of surface, 200 ml of primer is enough.
We advise you to study - 100 living room interiors with a brick wall that will inspire your creativity
Find work clothes and suitable shoes in advance, because during repair work you will not be able to protect yourself from dirt and stains. Prepare dry, clean rags to remove dirt and blots.
If you have to work with uneven and textured surfaces, it is better to choose rollers from which you can remove the top coat. The amount of pile on the roller depends on how smooth the surface being painted is. On a more even surface, it is better to use a short-haired roller.
If you are painting the wall from above, it is better to take a tool with an extended handle. When painting corners and edges, use brushes with sizes of 50 mm, 150 mm. Experts recommend painting with a nylon polyester brush; it does not deform during work and the composition does not absorb into it.
Advantages and disadvantages
Pros of painting walls with a roller:
- Speed of work . You can quickly paint large areas of surfaces (how to paint walls quickly and professionally?).
- Ease of use . The tool does not require preparation or maintenance, and there is no need to follow complex rules when painting.
- The handle can be extended . By attaching an extension handle, you can reach high areas of the wall.
Minuses:
- It is impossible to paint corners and other complex reliefs and surfaces.
- The need to select a tool depending on the type of paint used.
Tip You can use a roller to paint walls in any room: kitchen, living room, bedroom, bathroom or toilet.
Advantages and disadvantages
Advantages:
- easy to apply to any plastered surface (wood, concrete or gypsum concrete);
- easy to dissolve, and rollers and brushes can be easily washed after work;
- dries quickly, does not peel off;
- non-toxic to people and animals;
- painted surfaces are easy to clean with plain water or any detergent;
- non-flammable, resistant to alkalis;
- some types were specially designed for rooms with high levels of humidity - bathrooms, kitchens;
- service life – up to 20 years;
- capable of masking small cracks (up to 2 mm);
- the price tag is low.
Flaws:
- Water-based paint cannot withstand low temperatures: at temperatures below +5 degrees it loses all its properties, and at 0 it freezes.
- Not suitable for metal, glossy surfaces due to the large amount of liquid in the composition.
- Certain types of coloring solutions have a short service life. Such emulsions are produced less and less often.
Which paint to choose
The most widely used are alkyd paints and water-based emulsions.
Water-based paints include:
- Acrylic - covers walls well, is very durable, without an unpleasant odor;
- Vinyl - gives the walls a pleasant matte shade and can be combined with various types of surfaces. Disadvantages: they do not allow water vapor to pass through well, and surfaces covered with them are easily contaminated;
- Acrylic-vinyl paints - have the properties of the two previous types;
- Latex is very durable, has excellent covering characteristics, and dries quickly. Disadvantage: characteristic odor;
- Acrylic-latex are very durable, they are used for painting rooms with high humidity. Ideal for corridors and staircases.
Usually water-based paints are white. To get different colors, tint is added to them.
Some prefer mineral water-dispersion emulsions. They are:
- Limestone (based on slaked lime) - surfaces painted with them cannot be washed, so now they are rarely used, although their price is budget;
- Silicate (based on lime and liquid potassium glass). The coating is durable, easy to clean and has vapor permeability. These paints are more often used for painting facades;
- Cement (binder - cement). The coating is durable, but the color fades quickly.
A separate group consists of alkyd enamel paints. Unlike aqueous emulsions, they are diluted with acetone or special solvents. These paints hide stains very well. Usually they are used to paint wooden walls. These include:
- Oil or chlorinated rubber paints. The coatings are durable, shiny and easy to wash.
- Acrylic enamels are abrasion-resistant and allow walls to “breathe.”
- Structural paints are innovative paints; they give walls a decorative texture. To apply a thick, plastic mass, special tools are used. These paints allow you to realize any decorative idea.
Unusual wall painting in the nursery
Preparing walls for painting with a roller
After purchasing the tools and paint material, you can move on to the next stage - preparing the room for painting. If possible, remove furniture from the room; if this is not possible, then it is compactly placed in the center of the room, completely covered with polyethylene or special capes. To keep windows and door panels clean, use film, securing its ends with masking tape. Skirting boards and door openings are also protected with masking tape.
To effectively paint the entire surface of the walls, it is better to dismantle heating appliances (radiators). For this:
- tightly close the shut-off valves at the entrance to the heating system;
- install a tray under the battery to collect water;
- unscrew the connection points between the device and the general system and drain the water;
- dismantle the radiator.
When all the preparatory work has been completed, we proceed directly to painting. It's best to start with a small area and see how long the paint takes to dry and what the results are. If you like everything, paint the whole room.
Advice. The power supply to the room should be turned off in advance to protect yourself and others from accidental electric shock. Masking tape is applied to open areas with removed sockets.
Some wallpaper requires additional painting after gluing to the wall. Such wallpapers very often help to find quite original and interesting color solutions for interior decoration. How to paint wallpaper for painting? To effectively apply the coloring liquid to the surface, a high-quality wallpaper roller is required. When making such a choice, you need to pay attention to the shaft itself. It is desirable that the nozzle material be homogeneous. The length of the pile is almost always the same and ranges from 5-25 mm. The holder must be attached to the body firmly, securely and comfortably for the hand. The roller should be easy to remove and rotate freely.
Painting a wall with water-based emulsion
After completing the preparatory work, the main process begins, which includes the following steps:
- Preparation of the coloring composition.
- Painting.
Paint can be applied manually or using special equipment.
Preparation of the composition
At this stage, it is recommended to shake and open the purchased paint. Some manufacturers warn that the material is completely ready for use, while others allow you to add water to make the consistency of the composition less thick and easier to apply to the surface.
You can purchase white water-based paint to add color during processing and stir the solution to achieve the desired shade. In this case, you should adhere to the required proportions - then the final color will be the same even after several mixing passes, and the addition of a pigment composition will give an unusual look to the finish.
It is important to maintain proportions when creating a shade of water-based paint
Applying paint with hand tools
Painting with hand tools is suitable if you need to repaint a small area of the wall.
The repainting process will be as follows:
- Pour the finished mixture into a tray.
- Paint hard-to-reach (problem) areas: areas along the baseboards, window and door openings, joints with the ceiling using a brush.
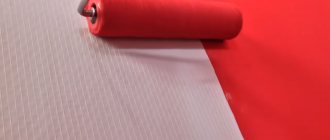
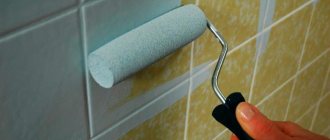
- Dip the roller into the tray and roll it out - this way you can remove excess solution, then apply the painting composition to the main area of the wall.
The wall needs to be treated in 2 layers. The basecoat must dry before the topcoat can be applied.
Application by spray gun
The use of special equipment can significantly reduce painting time and save energy, reducing the labor intensity of the process.
When working with a spray gun, the technology looks like this:
- The floor is covered with film or newspapers so that drops of dye do not spoil the coating.
- Diluted paint is poured into the spray gun container.
- The jet is first released onto a newspaper bed - this removes excess air from the equipment and evens out the flow of paint.
- The nozzle is directed at right angles to the surface to be painted at a distance of 0.3-0.5 m, and spraying of the material begins. Painting should be done in a top-down manner.
Professionals recommend purchasing spray bottles to accurately and evenly apply paint to the surface.
Application of paint should occur within 5 seconds - during this time you need to have time to paint 1 m of surface. The entire section of the wall is painted in a similar manner. After the coating has dried, you can begin applying the finishing coat; it is recommended to apply the 2nd layer from left to right.
If, after applying the finishing coat with your own hands, stains and stains appear, then you need to repeat the painting again. If additional painting without streaks does not help, you will have to reapply the material, having first removed the old coating.
We advise you to study - Rating of electric spray guns - the best air and airless models
Number of paint layers
The minimum number of coats is two, since the base application is always not thick enough to completely fill the surface to be painted and remain at the top of the wall. Some of the paint will be absorbed into the wall, so the treated surface may show through.
It is also worth considering that the topcoat must be applied parallel to the solar flow passing through the window.
Paint Features
As the name suggests, this type of paint is an emulsion. Its coloring elements remain undissolved until the mixture dries. After the emulsion dries, the coloring particles acquire a film structure.
The chemical and physical properties of the material make perfectly smooth walls an achievable result. At the same time, caring for the resulting surface will not be difficult. All it takes is a damp cloth and a little effort, and the coating will become clean while maintaining its appearance. Water-based compositions are suitable for children's rooms and delicate surfaces; varieties of this paint are also used in bathrooms.
Due to its characteristics, the raw materials are stratified during storage: the fillers and the aqueous solution are separated. A construction mixer will help, which is used immediately before applying paint. In a bucket, it sometimes has to be diluted with water, since the wet component can evaporate.
Application methods
To paint rooms you can use the following methods:
- in the direction from top to floor;
- back from bottom to ceiling;
- horizontally.
The first method covers large areas, and the second eliminates the appearance of stripes on the wall. For best efficiency, you can use all methods.
How to properly paint walls with a roller without leaving marks? The following steps must be completed step by step:
- a sufficient amount of paint is poured into the container (use a tray with a corrugated surface);
- the roller is dipped in the dye, soaked and rolled over the grooved part so that excess paint does not remain on the roller nozzle;
- They select a window and start painting from there.
To avoid leaving marks (scratches, streaks, visible overlapping of layers), it is not recommended to press the roller too hard when painting walls. Movements should be carried out very smoothly, without haste. Only in this case can gaps be avoided and the paint will lie evenly.
Advice. After applying the first layer, you must wait for it to dry completely and then begin applying the next one.
To ensure that the wall paint applies evenly, you need to:
- divide the surface into squares, the length of the side is determined from the calculation: the width of the roller, multiplied by five times;
- each figure is divided into five vertical canvases;
- paint the second and last, then return to the penultimate fourth, then to the first and lastly the third;
- allow the first layer to dry;
- apply paint in stripes in the reverse order as they were painted - from the third to the second (3-1-4-5-2), while the painting method is changed;
- then paint the next square in the same way.
The proposed option of applying the dye “in squares” allows you to effectively use expensive material, applying it in a thin layer to the surface of the walls.
If you had to stop work for a short time, simply put the roller in a sealed plastic bag so that the paint does not dry out. For longer periods (more than 3 hours), the instrument must be cleaned.
Wall painting process
Painting the walls with water-based paint, done in three layers. To do this, we will need the following working tools: a paint roller, a paint brush, a cuvette (paint bath), a small lamp with an extension cord, a stepladder or a telescopic rod. You can use a spray gun, but not everyone has such a unit on their farm, and purchasing it to paint walls in a small apartment is expensive.
Painted walls with water-based paint design photo ideas
Painting the walls starts from the lighter areas of the rooms to the darker ones, that is, from the windows. To do this, take a roller, pour the previously prepared paint into the cuvette, then thoroughly soak the paint roller in the paint, and roll it over the ribbed part of the cuvette to distribute the paint evenly. It is important to know that if you need to give the walls the effect of an orange peel, then you should choose a roller with a fur coat, but if you just have smooth walls, then it is enough to use a roller with a regular coat.
When painting, do not try to immediately make a saturated color, since after the paint dries, paint joints may remain noticeable; the best option is to make the tone a little lighter, while painting them in several layers. To better control the color and tone of the paint, use additional lighting.
How to paint walls with water-based paint yourself video
Don't try to put a lot of paint on the roller, as the paint will start to splatter. Walls should be painted with water-based paint in parallel stripes, up and down; painting in zigzags is not allowed. Use a brush to paint the corners. Please note that paint the wall only after painting the ceiling.
Completion of work
Upon completion of painting, all tools used in the work are thoroughly cleaned. The soft roller is squeezed out strongly and placed under running water. Liquid waste is washed down the drain. This cleaning method is only suitable for water-based paints.
Brushes and grooved tray can be easily cleaned in warm water.
Advice. Before painting, it is better to put the brushes you used last time in warm water for a couple of hours. If you do not want to wash the tray, then before filling it should be placed in a plastic bag.
How to paint walls
The lighter and thinner the paint layer on the wall, the more carefully you need to lay the paint on the surface. In theory, two main methods can be used for painting:
- With a spray gun. Operating at low air pressure, for example from a vacuum cleaner. In this way, wood is treated with an antiseptic and lime whitewash is applied, but before starting work, a little practice will be required;
- Roller and brushes. This tool can be used to paint everything from steamboats to ceilings, but first you need to decide which roller to paint the walls and practice using it on an inconspicuous surface, like behind a cabinet.
Important! When it comes to how to paint walls correctly, trust your hands and eyes more and do not blindly follow instructions and advice.
How to apply paint with a roller correctly
We fix the mixer-mixer in the drill chuck and thoroughly mix the contents of the bucket at low speeds so that there are no bubbles. Pour paint into the tray. Its level should not reach the axis of the roller. Rolling the roller back and forth in the tray, we draw paint onto the coat, then run it several times along the inclined corrugated surface of the tray. This operation will remove excess paint and distribute it evenly throughout the coat.
Now the most important thing: a certain amount of paint is retained in the coat of the roller. You need to determine experimentally how much area of the wall it will be enough for - just roll out the paint on the wall in the shape of a square until it is completely finished, i.e. The roller is already almost dry. Now mentally divide this square into strips equal to the width of the fur coat. Let's say we get five stripes.
Techniques for applying paint to walls
We start painting from the top corner (from the left or right - it doesn’t matter). We pass the first stripe, from bottom to top we pass the roller along the second stripe, we pass the third stripe, from bottom to top we pass the roller along the fifth stripe, then along the fourth and only then along the first stripe. Through such cunning manipulations, we approximately evenly distributed the paint across the width of the square.
Next, horizontally, each time, at the end, tearing the roller off the wall, starting from the top of the square, we draw successive stripes one under the other. We repeat the operations, only starting from the fifth stripe. After two passes, the paint is distributed over the entire surface of the square absolutely evenly.
We pick up the paint and continue painting according to the same pattern. When shading horizontally, we capture the previous square by the width of one stripe. When the top row of squares has been completed, we begin painting the next row from the side where we started. If the wall is very long and hot, the paint dries quickly, it makes sense to paint the squares vertically.
When finished, rinse the roller thoroughly - it will serve you for a long time. Good luck!
Video on the topic “How to properly paint walls with a roller”
How to paint without streaks
To paint walls with water-based paint without streaks, we recommend using special equipment - a spray gun. This tool will not only significantly speed up the painting process, but will also allow for uniform painting without streaks. This device is suitable for processing almost any coating. True, the price is quite high, and for a one-time painting it is irrational to spend such an amount. But if you are planning to paint a large house, then a spray gun will be an excellent choice and will allow you to achieve ideal quality work.
Requirements for the room before painting
Before you start painting, it is important not only to prepare the walls, but also the room itself. To do this, all the furniture needs to be taken out of the room to another room, and those that cannot be moved should be moved to the center of the room and covered with plastic wrap, on the floor along the wall, and newspaper or similar film should be laid down.
Painting walls with water-based paint design photo ideas
It is important to consider the temperature conditions of the room before painting. At low temperatures, that is, below 5 degrees, applying paint to the wall will be much more difficult, and the drying process may take longer. And at elevated temperatures of more than 35 degrees, the paint dries quickly without having time to set, causing such defects as peeling, roller marks, etc. Air humidity in the room should not exceed 70%.
