Painting surfaces with a paint brush or paint roller is one of the most effective ways to apply paint. One problem is that divorces may remain. How to paint the ceiling in a room without streaks , so that after drying we have a smooth, matte, uniform surface - in our material.
The aesthetic appearance of the ceiling largely shapes the impression of the residential and utility rooms of the apartment, so you need to approach painting seriously, thinking through all stages of the work. They can be roughly divided into:
- Choice of paint. Purchase and preparation of tools.
- Ceiling surface treatment.
- Coloring.
What paint to paint the ceiling?
The following types can be used for painting:
- Acrylic.
Paints are a pigment mixed with an alkali-resistant suspension. The coating density is high, resistance to washing is up to 5,000 cycles.
- Silicate based.
“Breathable”, vapor-permeable coatings that create a favorable microclimate in living quarters and in the kitchen.
- Latex.
Pigments and fillers mixed with latex. They do not lose their properties throughout their entire service life and are easy to clean without washing off layers. The main component is titanium dioxide.
- Silicone.
Emulsion compositions made of organosilicon with the addition of low molecular weight rubber and silicone oils.
All non-oil and non-enamel paints (for interior use) have a matte surface structure after drying. Drying lasts from 20 minutes to 1 hour.
Calculation of paint needs
For 1 sq. meter requires an average of 300 ml (depending on the thickness of the paint applied). Thick paint will take a little more, thinner paint will take less.
Tool for painting ceilings
To paint ceilings you will need the following tools and equipment:
- Container for paint.
Since you can buy paint in containers that are completely unexpected for you (for example, the 10-liter container you need won’t be on sale, but only liter or three-liter jars), prepare a large-volume container into which all the working solution you need will be poured or diluted to cover ceilings 2 times.
- A wide and flat tray for dipping a roller or a bucket for dipping a brush.
- Brushes and rollers.
Take a roller with a foam base, on which you must put a “stocking” made of shaggy fabric that absorbs moisture well. If coloring will be done with a wide flute, take care that no hair falls out of it.
- Spatulas 200, 350 and 500 mm wide.
- Sandpaper and abrasive mesh widths from 180 to 300 mm.
- Telescopic handle.
The telescopic handle is attached to the roller handle. And then you can work from floor level, without scaffolding and stepladders - although you cannot completely abandon them, since fine finishing work is carried out at arm's length and closer.
- A scaffold or stable stepladder.
- Small flutes.
- Masking tape.
Scotch tape will be needed to delimit planes (wall-ceiling), lampshades or decorative elements.
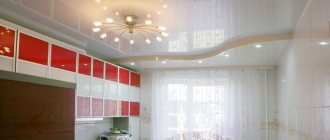
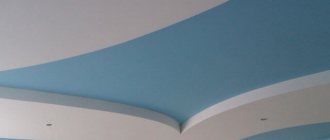
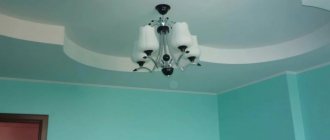
What color should I paint the ceiling?
If there are difficulties with this, choose the color of the walls, only 2 tones lower. This will prevent the ceiling from feeling pressure on you. The ceiling can be painted in the same tone as the walls only in small bathrooms. However, if the ceiling has decorative details, it is made darker than the walls, it all depends on the overall design concept.
Cool shades (blue and green) will look good only in brightly sunny rooms. In north-facing rooms, it is better to choose warm colors.
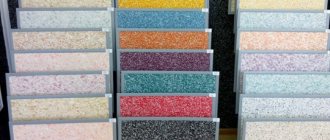
Powder or paste dyes of any color diluted in white paint can be purchased at hardware stores, the same place where you buy brushes, rollers and white ceiling paint. It is advisable to first dilute the pigments in water, and then pour the resulting liquid into white paint (in parts, so as not to make a mistake in the tone!) and mix thoroughly using a mixer.
Preparing the ceiling surface
The ceiling is cleaned of soot stains, grease and other contaminants, as well as paint flakes that have come away from the base. It is better to widen the detected cracks, prime them, fill them with putty, and then sand them.
Significant level differences and cavities need to be treated with a primer, followed by sealing with leveling mixtures like Volma.
Grease stains are cleaned using detergent mixtures. They will also soften the old layer of paint, which will then allow you, after working with spatulas, to remove it - in sections or completely. Lime whitewash in areas of delamination is cleaned off with scrapers and a spatula using a dry method. And in those places where it holds firmly, they work with grinding machines.
Wet removal of chalk coatings is done by preparing a soap solution when 300 g of laundry soap and 150 g of soda (sodium bicarbonate) are dissolved in 10 liters of water. This soap suspension is applied to the whitewashed ceiling with a sponge or spray bottle and then cleaned off with a spatula.
You can remove chalk whitewash with old newspapers. To do this, the ceiling and sheets of newspapers are covered with liquid paste. Newspapers are glued to the ceiling, waited for them to dry, and then torn off along with the layer of whitewash adhering to them. After this, the surface is cleaned with a scraper, spatulas and emery cloth.
Putty and primer
Use putty to level the ceiling so that over a section of at least 2 meters the height difference is no more than 1.5 mm. The dried layer of putty is sanded to an even matte state using sandpaper of varying degrees of grit. There is a distinction between starting putty, when filling joints between floor slabs and to eliminate large differences in heights, and finishing putty.
After the ceiling is completely leveled, the surfaces are adjusted using machines or manually, the adhering dust is swept away from the surface and the ceiling is treated with a primer. The purpose of this treatment is to reduce the porosity of the coating material.
The primer, due to its high fluidity, can be applied not only with a brush or roller, but also with a spray gun.
Both methods have disadvantages and advantages. It is cheaper to apply the primer with a brush and roller - renting a spray gun will still cost a hefty sum. In addition, they still need to be able to work. But if you know how, and are going to use it in the future (not only apply a primer, but also paint the ceiling with it), it is better to give preference to it. You just need to remember that you can’t work with a spray gun without safety glasses and a respirator - there is a great danger of inhaling sprayed small particles of paint.
When choosing the type of spray gun for the ceiling, it is better to choose models in which the paint tank is located below or to the side of the spray nozzle.
How to paint a ceiling with water-based paint
Before carrying out painting and painting work, make sure that the room temperature is not lower than 15⁰C, the relative humidity in the room is not higher than 70%, and the humidity of the ceiling covering does not exceed 8%.
Turn off the electricity in the premises - to do this, select the operating time during daylight hours.
When applying paint to the ceiling with a brush or roller, the work methods are usual - impregnating the working tool with paint, removing its excess, applying it to the surface and rubbing it over a certain area. If you use a spray gun, you need to keep in mind that the operating pressure in the system must be at least 8 bar, and water-based paint will need to be diluted with water, adding 1-2 parts of water to 8-9 parts of paint. In addition, it is advisable to filter the resulting and well-mixed paint through several layers of gauze or marquisette so that the spray nozzle does not become clogged with large insoluble particles.
After this, on any suitable surface (not on the ceiling!), adjust the spray “torch” and begin work, applying paint with a slight overlap of the resulting stripes.
Preparing for painting
In order for self-painting of the ceiling with water-based paint to be high-quality and uniform, preliminary preparation of the ceiling is necessary. Uniform coloring can only be achieved on a flat, puttied surface. Therefore, before starting work, you need to clean the ceiling from any previous coating (with the exception of water-based emulsion, which holds up very well).
How to remove whitewash
If you have whitewash on the ceiling - chalk or lime - you need to moisten the ceiling with water and remove the coating with a spatula. They clean everything down to concrete. Even the smallest fragments must be removed. Sometimes it is very inconvenient to scrape small areas with a spatula; it is easier to do this with a wet cloth.
It is easier to remove whitewash by wetting it with water.
In any case, after removing the whitewash, the ceiling must be washed with water and detergent. After complete drying, prime and putty with gypsum or cement (preferably white) putty until smooth, which is also called “egg-like.”
How to remove old water emulsion
If the ceiling has already been painted with water-based emulsion, you won’t be able to simply remove it. The procedure depends on how the paint adheres to the ceiling. If it just changed color and you need to renew the ceiling, there are no swelling, cracks or other similar problems, you can get by with a little blood. First, remove the dust (with a cloth and water), dry it, then prime it. After the primer has dried, you can paint it. But once again we draw attention to the fact that this procedure is used only if the water-based emulsion holds well and there are no defects.
Cleaning waterproof emulsion from the ceiling is still a pleasure
If there are cracks or swellings on the surface of the water-based emulsion, it must be cleaned off. There are two ways - dry and wet. Dry means cleaning with sandpaper (manually or using an angle grinder), wet means rinsing off. This method must be used for paint that is not afraid of water. But it is very difficult to remove such paint. If water-based paint holds up well, no tricks help, but there are surface defects and putty is needed, take sandpaper with coarse grain and make the surface rough. After this you can putty. Next - according to technology: we prime and then paint.
Wash off the ceiling painted with water-based emulsion by moistening it twice with plenty of hot water. The water should be almost boiling water - about 70°C. After wetting part of the ceiling, wait 10 minutes, then wet the same area again with hot water. After about five minutes you can remove the paint with a spatula.
Related article: How to update old interior doors: DIY restoration
Removing old paint is a lengthy process
You can repeat this procedure several times, gradually removing loose paint from the ceiling. Small residues can be sanded off, and then the ceiling can be washed, dried and primed. You can putty and sand over the primer, smoothing out imperfections.
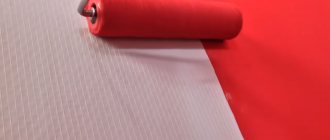
How to paint a ceiling with a roller
The roller ditch should have a grid on which the roller is rolled after it has been filled with paint to dump excess paint. After this, two or three strips about a meter long are smoothly drawn along the ceiling, and then a roller is passed over this place, without dipping it further into the paint, back and forth several times, rolling out the applied paint in an even layer.
The joints between the walls and ceiling are pre-painted with a narrow float so that the roller does not contaminate the walls. The wall at the junction with the ceiling is sealed with tape.
When applying a subsequent strip of paint when working with a roller, overlap the previous one by 1-1.5 cm. To create a uniform color, apply 2-3 mutually perpendicular layers. The last layer is made in the direction of the window - then the incident light from the windows will not reveal possible grooves from brush hairs or the edges of the roller.
When applying subsequent layers of paint after the first, make sure that the previous layer is completely dry.
Note: Sanding the final coat of paint is not permitted, as the ceiling may be contaminated with abrasive material or adhesives that were used to attach this material to the fabric or paper base.
How to paint - choose a tool
Choosing a paint composition, taking into account the purpose of the room and the base material, is half the battle. Then the question arises, how to properly paint the ceiling so that the surface is pleasing to the eye? The answer is obvious - you need to stock up on tools for applying paints and materials and prepare the surface well. In construction stores, tools are presented for every taste and budget. Our recommendations will help you choose worthy products for high-quality painting.
How to choose a roller
In an apartment or small office space, it is best to paint the ceiling with a roller . It is important to choose a tool with which you can get a good result with the least loss of paintwork materials. When choosing, consider the following points.
1. Roller dimensions (drum and handle size). Drums are from 50 to 250 mm in length, of different diameters, with a proportionally arranged handle from 150 to 500 mm in length. The diameter and length of the drum affect the speed of painting the object. It should be borne in mind that large drums become heavy when the coloring material is collected - only a strong person can paint with them quickly and for a long time. True, when the handle is lengthened, it becomes easier to work with such a roller.
2. What material is the roller made of (velor and foam rollers are not suitable for painting the ceiling - they often have to be dipped into the composition, they form a lot of splashes and leave smudges). To work with water-based paints, tool coats made of: polyamide, polyacrylic, polyester, thread pile, natural six are suitable. The best option for upholstery is sheepskin.
3. Length of the pile (with a short pile, you have to dip the roller into the tray more often; the paint flows down the handle less; with a long pile, more material is held on the tool, which makes it heavier). A roller with medium nap length is best.
4. Density of the fur coat - the denser it is, the better the quality of the paintwork on the base.
5. The presence of a seam. When purchasing a roller, check that the seam is well hidden, as sticking it out will cause unwanted streaks on the surface.
6. Pile strength. Check the quality of the roller - the lint should not fall out, otherwise lint will stick to the ceiling during painting.
How to choose a brush
A brush as a tool for painting ceilings is only suitable for treating areas that are difficult to reach with a roller, as well as for processing the joints of walls and ceilings. Any brush, even a high-quality one, will leave streaks on the surface. However, you need to buy brushes with split bristles, which are elastic and can always return to their place during work.
How to choose a spray gun
Painting the ceiling with a spray gun will provide excellent coverage. Of course, such a result can be obtained provided that the tool is of high quality and the painter has sufficient experience working with it. To carry out the work, there are electric spray guns on sale with a lower tank for paint and with a fence from a bucket. Let’s make a reservation that the latter are not suitable for high-quality painting in an apartment. The bucket intake does not provide a uniform stream of material.
Electric spray guns with a bottom tank do not have this drawback, but they often have to be filled with a new portion of material, and this puts forward new requirements for the uniformity of the paint composition.
When choosing a spray gun, it is necessary to take into account the following points: it is preferable to buy the body of the product from an alloy of aluminum and nickel, the nozzle from brass, and the sealing gaskets from Teflon. A high-quality spray gun cannot be cheap. There are also inexpensive products on sale, but it is not recommended to buy them for the intended purpose.