The dacha often becomes a place where it is necessary to work exhaustingly. Every trip out of town becomes hard labor. Weeds grow at a breakneck speed, plants dry out from lack of moisture, and the soil needs to be loosened every time. Do-it-yourself smart beds in the country will be a real salvation in this situation. This technology makes it possible to reduce the cultivated area of the garden by several times and reduce the amount of water used for irrigation. Finally, there is some time to relax. Below you can see photos of homemade smart beds on your site and how to build them.
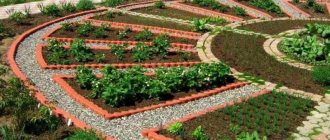
Raised beds can greatly transform a site
What is a smart garden and how is it different from a regular one?
Smart vegetable garden - high beds, which are often called warm or compost. The use of such structures eliminates the need to dig up the soil every season. With minimal labor costs you can get maximum yield. However, for this it is extremely important:
- plan plantings correctly;
- take into account the turnover of planted crops;
- apply various growing technologies;
- take care of mulching the ground or use covering material;
- Use drip irrigation to moisten the soil.
Some tricks
The technology is called smart gardening for a reason. You can test different approaches, new products, and the experience of “colleagues.” There are several tricks that come with use. We have already talked about one - about covering material. It really makes maintenance a lot easier and there is no need for mulch. There are other interesting ideas:
- After crops that are “heavy” for the soil, sow oats, peas, mustard, and rapeseed. After a couple of weeks, juicy greenery grows. It can be left “under the snow” and dug up in the spring. Or dig it up just before the snow, along with the greens. The goal here is twofold - the young greenery rots, enriching the earth. This time. And two - weeds do not grow, since the shoots are friendly.
This harvest makes my heart happy
- Use white covering material to extend the summer season and get an early harvest. Arcs are made from steel rod with a diameter of 8-10 mm. Drawstrings 2 cm wide or more are sewn into medium or high density spunbond. Arcs are inserted into them, spunbond is assembled on the wire so that the ends of the wire are free. The portable mini-greenhouse is ready. Stick arcs in at both ends of the bed. To protect the plants from frost, straighten the spunbond; you can open it for the day by collecting all the material on one side. The same design will also save you from overheating in the summer heat.
- Place a large metal barrel in the corner of the site. Place weeds and other plant waste in it. To fill with water. The greens will quickly rot and this slurry can be used for feeding. You just need to cover the barrel - the contents don't smell the best.
Advantages and disadvantages
The raised layer of smart beds allows you to isolate them from the soil layer. Each site owner can make simple box-shaped structures with his own hands, using available materials.
Among the main advantages of warm (smart) garden beds it is worth highlighting:
- Possibility of independent choice of shape, shade, coating and general design of structures. If you wish, you can create amazing compositions that will transform your garden.
- With the correct organization of sowing technology, you can achieve 2 harvests in one season.
- If the bed is properly maintained, the soil will be maximally saturated with mineral elements.
- The raised design makes it easy to care for vegetables.
- Reducing time for caring for the garden.
The disadvantages of smart beds are:
- Inappropriate and even unprofitable use in regions with arid climates.
- The need for systematic fertilizing. Raised soil requires frequent fertilization of the soil, which will make it possible to obtain a hefty harvest.
- Increased risk of developing unfavorable microclimatic conditions at the bacterial level compared to ordinary soil.
- It is impossible to grow spinach, lettuce, and beets in raised beds. The listed plants die in such conditions. This is explained by the discomfort that cold-resistant crops experience in well-warmed soil.
Paths between raised beds can be tiled
What it is
Insulated beds, also called smart or high, appeared in organic farming. These are structures filled with organic remains (twigs, grass, leaves, etc.). They slowly decompose, releasing heat and warming growing plantings. Plants begin to bear fruit much earlier than those planted in conventional beds. In addition, as a result of the decomposition process, the soil is enriched with macro- and microelements. This allows plants to develop normally without additional fertilizers.
Smart designs are made with your own hands in the fall or spring. The principle of the device is the same. The only difference is the filling. Before winter, you can fill the system with long-decomposing biofuel. In spring, it is better to use something that decomposes faster. It is easier to arrange such ridges in the fall. The explanation is simple. At this time, more plant material is added to the structure as biofuel.
Gardeners who use insulated beds are well aware of their advantages. Let's look at them in more detail.
Advantages of smart designs
- Possibility of early planting due to natural heating from organic matter rotting in the ground. If necessary, you can install covering arcs and get something like a greenhouse.
- Significant reduction in applied fertilizers. Most often, they are simply not needed, since the decomposition process provides the entire necessary set of macro- and microelements.
- Increased productivity, accelerated ripening of all crops.
- The care of plantings is simplified. Instead of digging - loosening, weeding is required very rarely.
- Useful disposal of organic waste. Any waste from gardening and garden work, vegetable and fruit peelings, etc. are suitable for biofuel.
Instagram ogorody_dacha
- Country cottage area
Assembling a drip irrigation system for a greenhouse from a barrel in 3 steps
Flaws
- Among the disadvantages, more frequent watering should be noted, since moisture evaporates faster.
- Another disadvantage is considered by some to be the effort that has to be spent on setting up the system. However, all costs, both physical and monetary, are paid off by the high efficiency of the agricultural structure.
The service life of one such ridge is four years. During this time, its filling overheats and the decomposition process stops. To renew it, it is necessary to remove the used biofuel and install new one. All four seasons can be planted in the same way, but it is best to make the most of the benefits of the system. Then you should listen to the recommendations of agronomists.
What to plant on smart beds
- First year. Squash, cucumbers, pumpkin, zucchini.
- Second year. The same thing, plus tomatoes and all varieties of cabbage.
- Third year. Beans, carrots, beets, peppers, potatoes.
- Fourth year. Peas and green crops.
It’s good to use “smart” systems for strawberries. After four years, she requires a mandatory transplant. This is just enough for one cycle. You don’t have to adhere to these rules and plant what is necessary.
Instagram ogorody_dacha
Instagram ogorody_dacha
- Country cottage area
We select neighbors in the garden beds: tables of plant compatibility in the garden and vegetable garden
Types and sizes of lazy beds
Do-it-yourself smart garden beds at the dacha, judging by the photo, can become a real decoration of the site. Various materials should be used as fencing for such structures:
- wooden boards;
- bricks;
- stones;
- plastic panels;
- metal constructions;
- slate pieces.
Attention!
Lazy beds can also be without edges. Depending on what material is used for the fence, you can calculate the amount of time it will take to create the structure.
The beds may differ in size characteristics. Narrow designs make it quick and easy to care for plants. Experts recommend making them at least 50 cm. Wide smart beds help save space and rationally use the site. To make it convenient to process the area, the width should not be more than 100 cm.
According to growing technology, smart beds can be divided into varieties.
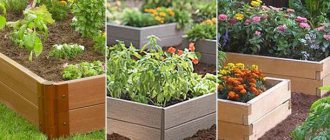
Box
The simplest option that every owner of a suburban area can easily build. It is recommended to locate structures of this type from north to south, which will make it possible to achieve the maximum level of sunlight. The dimensional characteristics of structures are selected individually. It is important to consider that their higher location will contribute to rapid warming of the soil. The harvest can be expected earlier than when grown in conventional beds.
The option of box beds promotes rapid warming of the earth
Containers
Original boxes, the height of which reaches 50-100 cm. It is very important that the length and width of the containers are identical. They are used by gardeners for early planting of zucchini, radishes, tomatoes and cucumbers. Such structures are made warm in order to create additional heating in the lower area. The beds are filled with a thick layer of organic matter. If necessary, the structures are covered with a layer of spandbond.
Paths between containers can be covered with a layer of crushed stone or gravel
Beds in a barrel
Devices for growing vegetables and herbs make it possible to get an early harvest. Also, such structures create fertile soil due to the fact that organic matter rots during the summer months. It is very convenient to grow pumpkin, watermelon, cucumbers and melon in barrels. The beds in the barrel should be located in areas that receive sufficient sunlight.
You can grow not only cucumbers and pumpkins in barrels, but also strawberries
Bags
This method is most often used for growing potatoes and tomatoes. This method is advisable in cases where the soil in the area is sandy, or a large number of mole crickets live in the ground. The durable burlap is filled with layers of organic matter, manure and fertile soil. Periodically add a small amount of soil into the bags.
Cucumbers grown in bags give a good harvest
Ditches and trenches
This type of bed is used in cases where it is planned to cultivate a heat-loving crop such as grapes. Growing in ditches is common in regions where high winds and low temperatures prevail.
Important! Plants are planted in ditches located in areas well illuminated by sunlight. In case of cold weather, you can cover the trench with a layer of spandbond.
Preparing trench beds takes a lot of time
Vertical
Vertical smart beds allow you to grow low-growing plants and flowers even in small areas. The sides of the structure can be made from scrap materials that can be easily painted in any shade. To obtain neat designs, it is important to first consider a plan for the placement of products.
Vertical structures can be placed along the wall of the house
When creating smart beds, experts recommend sticking to the following dimensions:
- Height. Often gardeners strive to make fences as high as possible. Experts do not recommend making the height more than 70 cm. When making high fences, it is important to take care of laying multi-layer insulation. If the height of the bed does not exceed 20 cm, then insulation is not required.
- The width should not exceed 100-110 cm, which will enable the gardener to comfortably care for the plants.
- Length. The recommended value for this value is within 5-6 m. A longer structure provokes a decrease in the level of rigidity of the sides of the beds.
Important! The width of the passage between the beds should be within 40-70 cm. If desired, you can lay out the path with tiles or cover it with a layer of crushed stone.
Self-organization of a smart garden
A rational approach to growing vegetables, applied to individual beds, can extend to the entire garden. This will allow you to arrange all the necessary plants as compactly as possible. Proper calculation will help you collect enough harvest to enjoy fresh fruits and make preparations. But there won’t be so much of it that you’ll have to decide who to give it to.
The smart vegetable garden is designed according to the following scheme:
- calculation of the required number of plants based on the average yield;
- determine which crops need sun, partial shade or shade;
- choose the order of placement of plantings.
Usually plants that get along together are planted nearby. Or which serve as natural protection against pests. The most capricious crops are placed closer to the country house.
Examples and projects
Depending on the size and parameters of the site and your own imagination, you can create different layouts of the beds: linear or figured. It is important to take into account the needs of plants for light and heat, the compatibility of different crops and crop rotation.
Examples of smart garden projects are given below:
Recommendations for further maintenance
To make the beds last longer, you need to:
- Periodically check the condition of the box (it is enough to inspect it once a week if the wooden box is not made of thin boards). If traces of wood destruction are visible, it is worth making a new structure and composting the old one.
- If slugs appear in the garden bed, they can be eliminated by introducing fertilizer components that interfere with their favorable residence. It is important to choose the quantity, concentration and not forget about safety for plants.
- Even in a small area, it is important to provide periodic rest to the soil. To do this, the beds are periodically moved to the place where the boundaries used to be.
- Between seasons, it is recommended to sow the space with green manure. These plants serve as sources of nutrients, and their root systems choke out weeds.
Having considered what a smart bed is, let’s summarize: this design is aimed at increasing the yield with minimal care. Although planting in smart beds increases the preparation costs, the effort pays off in a big way. For example: you need to allocate a lot of time for weeding or watering; by organizing an automated system and the correct design of the beds, you can forget about these troubles.
How to arrange the beds
To obtain a hefty harvest, experienced gardeners recommend placing lazy beds from north to south. This arrangement promotes abundant fruiting. Climbing vegetables are best grown on trellises. If desired, you can install vertical beds along the walls of the house located on the south side.
When choosing a location for smart beds, it is worth drawing a site plan on a landscape sheet. On the map you created with your own hands, mark the direction from north to south. Beds of various shapes are cut out of colored paper. The blanks are applied to the areas of the garden. Thus, the owner of the plot selects the most suitable composition, which will become a real decoration of the garden. Once the area for planting work has been found, you can begin to implement the plan.
A site plan will help you find the most suitable place to place smart beds
Box beds
Raised bed boxes are very popular among followers of organic farming due to their ease of arrangement and high efficiency of use.
A box is a stationary bed, the sides of which can be made from available material. In this case, any boards, slate, plywood, etc. will do. The height of such a bed is usually 15–20 centimeters, the width is 1–1.2 m, and the length can be adjusted to your liking. The box bed is filled with organic matter: a layer of half-ripe manure or compost is poured on the bottom, and ready-made high-quality humus is placed on top, in a layer of at least 6–7 cm.
If the box is wide, then the rows can be located both lengthwise and crosswise. In order for the plants to receive more sunlight, the rows in such a bed should be placed in the north-south direction.
In the middle of the box bed they make a trellis for climbing crops; such a bed can be covered with a roof. That is, simply put, a box is a low container. And its main advantage in this case is that you don’t need a lot of organic matter to fill the bed. However, a thin layer of compost quickly loses nutrients and moisture, and in hot weather such a bed needs to be watered more often. This can be done using a hose or with buckets from a large container. To retain moisture, you will need a fairly thick layer of mulch. To feed crops growing in boxes, it is recommended to use various organic fertilizers, which will be discussed in detail in the following articles.
If the soil on the site is good, then loosening the box is not necessary. The earth will loosen under it on its own to a fairly large depth (in the first year already about twenty centimeters). As we already found out in the article “Stop destroying the soil by digging and weeding”, the work of structuring and loosening will be taken up by soil inhabitants - earthworms and bacteria. Next spring you will just need to pour a few wheelbarrows of ready-made compost onto the garden bed and plant the vegetables directly into it. If the organic matter is of good quality, then there will be few weeds, and those that appear are removed quite easily.
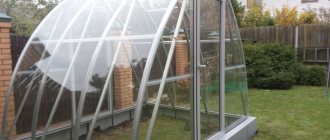
Using a simple frame or wire arches, a box bed can quickly be turned into a greenhouse, in which it is convenient to grow seedlings of various crops in the spring.
When using this type of “smart” beds, the main thing is to fertilize them correctly and water them in a timely manner. Then in boxes, as in a vegetable container, you can grow three or four crops of different vegetables per season.
How to make smart beds with your own hands
Below you can find a step-by-step process for creating different types of beds. They do not require special skills or expensive materials.
Box-bed
Boxes are considered the most convenient and popular type of bed. The structures allow you to isolate an isolated area for growing a specific crop, and give the area a well-groomed appearance.
To build box beds, you should first select and prepare an area for a smart vegetable garden. It is advisable to use wooden boards or sheets of flat slate as fencing. The materials listed are quite durable and can last for many years.
The construction of the structure occurs in stages:
- First of all, the gardener must mark the boundaries of the box. For this purpose, pegs should be placed, taking into account the dimensional characteristics of the bed and its outline.
- After this, you can begin installing the walls, which are placed in pre-prepared grooves. To make the structure stable, it is important to compact the soil around the fences.
- Layers of organic matter and fertile soil are poured into the garden bed. Now you can plant seedlings or seeds into the structure.
Important! At the end of autumn, the box beds will need to be disassembled and stored in a dry room. At the beginning of spring they are collected again.
Even a teenager can handle assembling boxes
Beds with drainage
Structures with drainage are indispensable in cases where the site is located in a lowland and the soil is clayey or waterlogged. Excess moisture has a detrimental effect on the development of plants and causes root rot. It is very important to ensure optimal gas exchange and constant removal. For this purpose you will need:
- Select a zone for a smart garden.
- Remove the layer of soil. The layer thickness should reach 55-60 cm.
- Place a layer of sand on the bottom surface (layer thickness 25 cm).
- Pour a large amount of sawdust, humus and fertile soil onto the sand.
- If desired, the beds can be fenced with slate or plastic panels. You can leave a smart garden without fences.
When it gets cold, you can cover the ridges with drainage with a layer of agrofibre or spandbond
High
The high ridge is ideal for placement in wetlands. Often melons, potatoes and zucchini are grown in such structures. The recommended wall height should be between 35-75 cm.
Step by step process
- The first step is to prepare the box by constructing it from boards, bricks, metal sheets or plastic panels.
- A piece of metal mesh is laid on the surface of the bottom of the structure, which will make it possible to avoid rodent infestations. Agrofibre is stretched over the mesh to prevent the germination of weeds.
- Next, a drainage layer is laid, which consists of a small amount of broken brick, expanded clay, and pebbles. The layer thickness should not exceed 8-12 cm.
- Pre-treated and disinfected soil against pests is poured into a high box. The soil is added until there are 5 cm high sides left on the inside.
Important! If there are mole crickets on the site, it is better not to add compost to the garden bed. Insects will quickly settle in and destroy the crop.
Raised beds can be built from plastic boxes
Vertical structures
A smart vegetable garden or beds for lazy summer residents is a real salvation. Thanks to such designs, less time is spent caring for plants. Vertical beds help save space on the site. Plants that have a poorly developed root system can be planted in such structures. Such crops include cucumbers, greens, tomatoes and strawberries.
In order to build such devices, it is advisable to use boxes, special racks or containers. You can also make containers from plastic bottles and place them on a frame made of metal profiles and boards.
Vertical beds can be placed along the walls or along the perimeter of the fence
Warm beds
Warm beds contribute to an early harvest. Constructions of this type are an excellent alternative to greenhouses. Organic matter, which releases energy during decomposition, provides plants with heat.
Step by step process:
- In the selected area, a layer of soil is removed, the thickness of which reaches 50 cm. The constructed box is installed in a pre-prepared recess.
- A piece of metal mesh is placed on the surface of the bottom of the pit, which will make it possible to avoid the invasion of moles and rodents. A layer of sawdust, pre-treated with a solution of potassium permanganate, is poured over the mesh.
- Next, you will need to lay a layer of organic matter, which consists of a large amount of fallen leaf blades, turf and manure. The organic layer is thoroughly compacted.
- A layer of nutrient mixture consisting of sand, peat and sawdust is poured on top of the organic matter. The listed components are combined with ash and 1 tbsp. l. superphosphate, urea, zinc sulfate. The thickness of this layer is within 25 cm.
- As soon as the first rays of sunlight appear in spring, organic matter will begin to release heat. This will make it possible to plant plants in open beds in early April.
Experts recommend growing cucumbers, strawberry bushes, radishes, dill and spinach in warm beds
Advantages and disadvantages
Summer residents who have been growing vegetables for more than one season using smart beds have identified a number of advantages of this method of cultivating crops.
Pros of raised beds:
- increased productivity with low labor costs;
- the ability to make several beds with different soil compositions, tailored to the needs of a specific crop;
- the speed of warming up the earth with the arrival of spring, which allows for early sowing of seeds and, accordingly, increasing the speed of fruit ripening;
- absence of sharp fluctuations in soil temperatures, which has a beneficial effect on plant development;
- the ability to preserve the mulch layer longer, thanks to the sides it is not blown away by the wind;
- reducing the area that needs to be dug up and subsequently weeded out;
- the presence of good drainage, which prevents rotting of the root system;
- no need to bend low when caring for crops;
- the possibility of organizing a high bed in any area with good lighting, even where the soil is rocky;
- aesthetic appearance of a personal plot;
- To make work easier when weeding paths between beds, some gardeners simply fill them with fine gravel.
Expert opinion
Zarechny Maxim Valerievich
Agronomist with 12 years of experience. Our best country expert.
Ask a Question
However, in addition to the advantages, this method of farming also has some disadvantages. The main disadvantage of beds made according to the mind is the rapid drying of the soil in the boxes. To solve this problem, experienced gardeners recommend not arranging beds in too high places and on the south side of the site. Drying out of the soil can be partially prevented by using a layer of mulch.
If there is an opportunity and appropriate resources, drip irrigation is installed, then the soil will remain moist for a long time, and the summer resident will not have to spend a lot of time irrigating the plants.
See also
Where to get turf land, from which areas it is harvested and its applicationRead
The following points are also considered disadvantages of raised beds:
- the likelihood of bolting of cold-loving crops due to overheating of the soil;
- the need for frequent application of mineral and organic fertilizers due to limited space;
- significant material and physical costs for creating such a vegetable garden;
- high risk of rapid proliferation of pathogenic microorganisms that have penetrated the soil.
After weighing all the advantages and disadvantages, they decide on the feasibility of arranging smart beds.
Selection of plants and technology for planting in smart beds
When planning smart beds, you should pay attention to the level of illumination of the area. Any plant needs systematic watering and good sunlight.
Below you can see the plants for a smart garden in detail. According to the recommendations of experts, it is better to plant in a slightly shaded area:
- sorrel;
- onion;
- rhubarb;
- spinach.
Advice! It is best to place fountains, gazebos and benches in shady areas.
It is best to plant radishes, lettuces, tomatoes, dill and parsley along the edges of smart beds. In the middle it is advisable to place cucumbers grown on trellises, corn, sunflowers, root vegetables, and pumpkin.
In order to plant seeds or seedlings, you will need to make dimples or grooves in smart beds. Before you start planting crops, it is important to moisten the soil well. Water for irrigation should be warm, but not hot.
After the planting work is completed, the soil surface will need to be covered with a layer of spandbond to retain heat. After the seedlings have time to get stronger, you can mulch the soil:
- bark;
- sawdust;
- seed shells;
- needles;
- sand;
- humus;
- compost;
- mown grass.
The mulch in the smart garden is systematically updated. This will make it possible to avoid the growth of weeds. The soil under the mulch layer will be light. Do-it-yourself lazy beds at the dacha will allow you to find time not only to care for plants, but also to relax.
Most often, smart beds are mulched with hay
In-depth smart beds: arrangement technology
If groundwater flows deeply on a personal plot and there is no danger of flooding the compost bin, then the procedure for creating a structure can be simplified by deepening it into the ground. The advantage of the in-depth structure is that it can be built directly in virgin soil, without thinking about soil development and other agricultural difficulties.
What is the best way to make deep, regular beds in the garden so that they are comfortable and spacious? If the location has been selected, then you need to dig a hole, the width of which is about 50 cm, the depth of a shovel. The length depends entirely on personal preference and capabilities. The bottom of the trench is covered with manure, and finished compost is laid on top (layer height is at least 7 cm). After planting the plants, the soil must be mulched to prevent active growth of weeds.
Caring for such beds involves timely watering and removing grass from between the rows.
Recommendations and principles of the lazy garden
It is advisable to plant local crops in smart beds. In order not to stand for hours and not weed, it is important not only to mulch the soil in the beds, but also to sprinkle the paths with a layer of gravel, pebbles or crushed stone. Weeds often become a nuisance not only in the garden beds, but also on the paths. To avoid unnecessary work, it is better to landscape the area along the garden in advance. Smart beds allow you to care for your plants without the hassle.
Watering plants growing in a lazy garden should be systematic and plentiful.
Below you can watch a video about organizing smart beds with your own hands:
Types and types of organic beds
Organic beds are divided into several types, which differ in shape and position. These can be bulk, high, low, trenches, and beds limited by a wooden box. However, everyone has common principles by which beds are created. A metal mesh is placed on the bottom layer, which creates a protective layer. Then an active layer is laid out, consisting of wooden logs, on top of which branches or tree bark are laid, paper boxes on them, and then an organic layer of fallen leaves, mown grass or rotten vegetables and fruits. The next layer consists of humus and ash. The completion is a fertile layer of soil or ready-made compost, where replanting will eventually be carried out. It is better to plant such beds in the fall; over the winter they will settle and form the necessary mixture, which will help produce a good harvest.
Where to start: site planning
If a person has a place where he can cultivate plants, he can plant a garden or vegetable garden there. The garden must be laid out according to all the rules, so that caring for it brings the joy of communicating with nature, and does not suck out the last of your strength.
First of all, you need to draw a garden plan on paper. This is done in order not to constantly redo something on the site, but to plan it on at least an approximate scale.
Area of organized beds
When starting to set up a smart garden without hassle for the elderly or lazy, you must first decide what will be grown and take into account the following points:
- amount of vegetables to eat;
- amount of vegetables for winter canning.
Therefore, a list of necessary vegetables is drawn up on paper and how many kilograms need to be obtained at the end. If the list is compiled by a novice gardener, then in obtaining the harvest you need to focus on the lower indicators in the table.
| Culture | Number of bushes planted, pcs. | Received yield, kg |
| Cabbage | 12 | 20-40 |
| Beet | 70 | 15-30 |
| Tomatoes | 17 | 20 |
| Carrot | 80 | 8-16 |
| cucumbers | 22 | 20-40 |
Based on the average yield of vegetables in kilograms, we calculate how many bushes need to be planted in the beds. At the same time, we increase the number of bushes planted by 5 pieces - this is necessary in order to insure in case of seedlings falling out. We also calculate the required size of the beds and understand that they need less than is currently plowed for planting vegetable crops.
Location of the beds
When planning productive beds for a smart garden, you must remember that all vegetables grown grow in direct sun and in the shade the yield will be halved. When planting crops, you need to focus on which ones will be needed every day for the table (they are planted closer to the exit from the site), and which ones can be planted further. Therefore, in the foreground they plant:
- various greens;
- radish;
- tomatoes and cucumbers;
- eggplants and cabbage;
- melons and potatoes.
You also need to remember that smart beds should be located on the site from north to south. With this arrangement, they will warm up well, and the quality of the harvest will be high.
What to grow
Anything can be grown in a lazy garden. You just need to remember that annual crops are cultivated in high beds, and all plants can be grown in low beds. Since, being located on the ground, they will not freeze out in the winter.
Therefore, berries - raspberries and strawberries - are cultivated only in low beds, since these are perennial crops. In all low-lying vegetable gardens the following are cultivated:
- berries;
- vegetables;
- greenery.
How to make lazy beds - basic tips
In this approach, preparation for future planting is very important - it is advisable to do this in the fall, when you can collect material for mulching the soil (you need to cover it with straw, sawdust, cones, etc.), which, in turn, will prevent weeds germinate in an area with such cover.
Do-it-yourself lazy bed: step 1-4 We determine the height of the board of all sides, depending on the location of the bed installation. We connect the boards with a screwdriver and remove the clamps. We turn the bed over and outline the installation location, focusing on the lighting conditions for future seedlings
Do-it-yourself lazy bed: step 4-8 We firmly install the bed by burying the corner beams in 12-15 cm holes. We check the sides of the bed with a building level (for normal operation of the future irrigation system). We attach PVC pipes to the sides from the inside (for hoops with mesh or film against bad weather and birds). Compact the soil and line the bottom with a metal mesh against moles (and, depending on the materials and purpose of the bed, with geotextiles)
Do-it-yourself lazy bed: step 9-12 Fill in the soil of the desired type. We attach the hoses of the irrigation system. We plant seedlings. If necessary, we install hoops for the awning. Ready!
Photo of soil mulching
Mulch is also useful for filling the areas between the beds.
- Install your own irrigation system. It is not necessary to choose the most expensive systems available in stores. In the case of such vegetable gardens, those from which you only need to press a button are quite suitable - and there will be no need to water it yourself. Watering will allow you to make beautiful beds: green and lush. It is also worth noting: watering can be done infrequently, but abundantly, giving the plants the necessary moisture until your next visit.
Automatic watering systemDepending on the relative position of the beds (and how long you will be away), choose auto-watering or drip irrigation
To prevent the soil from creeping out of the beds fenced with stone, you can use strips of geotextiles
- A tool for working in the garden is the key to saving time. Therefore, it is worth choosing one piece of equipment for many years. It may include not only the usual shovel and buckets, but also various little things that will make your work easier. Also, find a place for your inventory in advance.
Photos of gardening equipmentWhat trellises for tall plants will look like depends only on your imagination. There is always any option on sale, including wall-mounted ones, for a barn
Smart dacha: green energy and lazy beds
- At the beginning of the planting season, dig up the ground once and prepare it for future seedlings or seeds. Plant the plants and don’t disturb the earth anymore: mulching will do its job and protect you from weeds. All that remains for you before harvesting is to water the beds in your dacha on time.
Smart beds only need to be dug up once. They do not need weeding - mulch will prevent weeds from sprouting
Tomatoes on a trellis in smart beds
The metal sides of the beds should be dug into the ground to a shallow depth.
This is an interesting and effective method that is suitable for both lazy gardeners and experienced gardeners who know their business. A garden bed of this type will be worth the effort and can bring a lot of convenience.
French vegetable garden with lazy beds
Lazy beds (photo 2)
Flowers in a small garden design
Planting potatoes under straw
There are different methods, but we will describe the classic method of growing potatoes under straw. Using this method, we will get a good harvest of vegetables and less labor costs for their cultivation.
Method of planting potatoes under straw in a smart garden:
- We prepare the bed - in winter we plant rye on it and do not mow it. In the spring, it continues to grow, preventing weeds from growing, and at the same time reducing the number of pests in the ridge.
- A couple of weeks before planting potatoes, the rye is cut off and the ridge is dug up, embedding the greens inside the earthen clod.
- Mark the rows - the distance between them should be at least 60 cm.
- We make grooves up to 8 cm deep, into which we place the sprouted potato planting material, maintaining a step of 25-35 cm.
- Cover the spread out tubers with a layer of dry straw of 25 cm.
If the weather is dry when planting tubers, the planted material requires watering.
Using this method you can significantly reduce physical activity, which suits many gardeners. But this method has its drawbacks:
- Straw must be laid in a thick layer so that the tubers do not turn green from the sun's rays.
- Large plots require a lot of straw.
Video about planting potatoes under straw in a smart garden for the lazy:
Warm and high compost organic beds
Creating this option is more suitable for those regions where summers are short and cold. This species contributes to the rapid accumulation of humus in the soil, attracts beneficial inhabitants, improves the soil structure, and due to this, a good harvest is achieved. The main thing in this option is a large amount of different types of organic matter.
Vegetable container bed
A vegetable container is a convenient and fertile option. It differs from the others in height, which varies from 40 to 80 centimeters above the total surface. The frame for the container must be made of stone, timber or brick. It is filled with organic filler. Here you need to provide for internal watering by laying a holey hose between the layers, wrapped in synthetic fabric that allows water to pass through well. You can use old tights for these purposes. The end of the watering hose must be brought out and connected to the main system when watering. The soil here warms up faster, so such containers can be planted much earlier.
Warm bed in a box
This is the same vegetable container, only smaller in height. Such a bed is a kind of hybrid of a low and raised bed, because a shallow trench is dug for it, over which a box is built.
Organic trench
Suitable for vegetables that require high humidity. Such a bed is dug in depth and is at least 30-40 centimeters deep. It is best to fill the trench with a mixture of soil and compost, and put fresh organic matter or half-ripe manure at the bottom.
Planning a vegetable garden
If you already have a summer house or a plot of land near your house, you have probably already encountered a situation of an overabundance of fruits, vegetables and berries. When the harvest has to be distributed to relatives, neighbors, and colleagues. But in order to grow it, a lot of effort had to be made. To avoid such a situation, it is necessary to plan the harvest. It’s clear that you won’t get great accuracy, but results close to the planned ones are possible.
A smart vegetable garden is also a decoration of the site
We count the area of the beds
The first thing to do is sit down and think about what and how much you want to grow. The specific quantity is in kilograms. How much do you need to “eat” and “close”. Write a list of plants (in a column) and the desired harvest.
Having decided on the list of plants that you want to grow in your home, we sit down and look at the average yield that can be achieved when grown in smart beds. It is given in the table. Since you are still an inexperienced “lazy gardener”, reduce it by half. We put numbers next to each of the plants. It must be recorded in kilograms per square meter of area.
Approximate yield of vegetables and herbs when grown in smart beds
Now it’s easy to calculate how much area you need to allocate for each type of plant: divide the desired yield in kilograms by the average yield for each type of plant. We get the square footage for vegetables, berries, herbs, etc. If we add up all these areas, we will find out how many beds you need in total. These are the beds that should be placed on your site.
You're probably surprised by how little space you need for garden beds. And it's really not enough. Many times less than what we are used to! You will have very little land to cultivate. The freed up space can be used for flower beds, rockeries, fountains and other decorations.
Where to place
When planning smart beds, you need to take into account the degree of illumination. Almost all the plants you need prefer sunny places. In partial shade you can grow rhubarb, sorrel, and onions (including feathers). Perhaps that's all. There are no garden plants that grow well in shaded areas. Or rather, they will grow, but the yield will decrease by 3-4 times. Shaded areas should be set aside as a recreation area or a flower bed with shade-loving plants should be placed there.
Layout of beds: only in the sun
Another principle for placing beds: the more care (read watering) a crop requires, the closer to the entrance to the house it should be located:
- There should be a greenhouse with seedlings right next to the exit.
- Nearby there is a bed for radishes and salad.
- Right there or a little further - tomatoes, cucumbers, greens.
- Even further - peppers, eggplants, cabbage of various types, beans, root vegetables.
- In the back there are potatoes, pumpkins, squash, corn, sunflowers and perennials.
- The farthest thing is the garden.
Beds with capricious plants are located as close to the house as possible
Why arrange the plants this way? Because at the beginning of the watering/weeding work, gardeners are full of enthusiasm and the plants receive more water, weeds are removed more thoroughly. Gradually, the fervor subsides, less and less water is available per square area, and processing becomes less thorough. And with the approach proposed above, the amount of water will be “just right” and everything will be fine with soil cultivation.
Orientation to cardinal directions and precise location determination
If you want to get a harvest from the entire area of the lazy bed, the location is north-south. Strictly. This is the only way the entire area will bear fruit. Also place trellises for climbing vegetables. Although, they can be planted along the southern and eastern walls of buildings.
For a smart garden to also be beautiful, you need to think about where to place the beds. To do this, take a scale plan of the site indicating the direction to north/south. On it we draw all the buildings and main paths, water supply (we pay special attention to the position of the taps), trees and shrubs. On the plan we immediately outline the shadow zones - we will not place vegetables here, this is a place for flowers, gazebos, fountains.
One of the beds for a smart vegetable garden: a high bed
We cut out the beds from paper (on the same scale as the site plan). Moreover, we make them in the shape that we plan: rectangle, square, circle, triangle, etc. The shape is selected based on the area planned for the crop. And it doesn’t have to be a boring rectangle. Since there will be enough free space (you remember that you need much less beds), rationalism fades into the background, and the main emphasis is on aesthetics. After all, few people work in their dachas “so that they have something to eat”; mostly it’s also a pleasure. And what could be more pleasant than the beauty of a cultivated plot?
So, we sign each piece of paper indicating a smart bed - we put the name of the crop or crops (you can grow two, three or more on one bed). Now we are looking for a place for each, taking into account the rules described above. Along the way, you can change the shape of smart beds: for the sake of beauty or convenience. When you have found the places, trace the contours and transfer the inscriptions. All that remains is to implement our plans.
