Seed preparation
Let's start by preparing our seeds for sowing. Tomato seeds are usually small. They remain similar for up to 10 years. First of all, you need to start disinfecting the seeds. Prepare the following solution: 0.3-0.5% solution of potassium permanganate (3-5 g per liter of water). And put the seeds in a gauze cloth, wrap the gauze, and put it in the solution for 0.5 hours. This is how the seeds are disinfected and all surface infection is killed.
After this, we wash the seeds in running water, and then we can do as we please. You can germinate seeds in any growth stimulants; for this we use either aloe juice or wood ash. After that washing under running water, we can keep the seeds in wood ash for half a day. Leave until the seeds germinate, and then proceed to sowing.
We plant in containers with a depth of at least 4-5 cm, we can sow tomatoes directly in the pot. We prepare the soil for preparing and growing seedlings very carefully. It is better to put 100-120 grams per bucket of soil. dolomite flour, 50 grams of any complex fertilizer or 1 tbsp. superphosphate and 1 tbsp. potassium nitrate or potassium sulfate. Mix everything thoroughly, pour water on it so that the soil is always moist. And after that we start sowing.
Models of ready-made greenhouses
Russian offers models with an aluminum frame “Botanik”:
- “Mini”, the width of the greenhouse is 2.1 meters;
- “Standard”, the width of which is 2.8 meters;
- “Maximum”, the width of the building is 3.68 meters.
- The “Strelka” greenhouse is teardrop-shaped, a polycarbonate structure that does not require the construction of a foundation. The Uralochka model has a durable metal frame. Installed without a foundation.
- "Novator" is a greenhouse with a built-in automatic watering system. The Tsarskaya group of structures is represented by five models of various sizes, which are installed without a foundation. Model
- “Leader” are greenhouses of various sizes that are installed on a brick or concrete foundation. The Largusha model is a structure made of a profile pipe with a polymer coating and does not require a foundation.
Sowing
We take a container with drainage holes, put in the prepared soil, water it with hot water and a solution of potassium permanganate, and then make shallow grooves of 5 mm. depth at a distance of 3-4 cm, from each other. In this container we made 3 grooves, and after that we laid out the seeds. We place the seeds at a distance of 0.5 cm, without deepening them and not too close to the surface. Half a centimeter is the optimal depth for sowing tomato seeds for seedlings.
After sowing, the seeds can be covered with moist soil, but it is better to do this: add sand to the soil and cover it evenly.
Construction Materials
Another classification of greenhouses depends on the materials used - it can be brick, wood, metal profile, polycarbonate and glass. A combination of several in one building is also possible.
It is worth selecting based on several criteria, such as the chosen design, weather resistance, physical activity, cost and service life.
A glass greenhouse is the most classic option. They transmit light well and retain heat. Despite this, the popularity of this material is falling - the market is being replaced by new, lighter, cheaper and stronger products.
A polymer greenhouse will also transmit light well and will not require much effort to install. But, it is worth taking into account the formation of excess moisture - ventilation is required. Also, this material will quickly lose its appearance.
Glass and film are very successfully combined in cellular polycarbonate. This material has excellent properties, which are just suitable for building a greenhouse for the winter.
Microgreenhouse
The seeds are sown and after sowing the container must be placed in a warm place at a temperature of 20-25 degrees. You can make a small microgreenhouse: take a plastic bag, place a container with seedlings in it, making sure there is air in the bag. We will get such an airy micro-greenhouse, which we will place in a warm place.
After 3-4 days, if the seeds are good and the germination energy is also good, we will have seedlings. The moment the loop appears on the sprouts is the most important in growing the first seedlings. We must remove the container from the bag and place it in the brightest place, so that the loops stretch in the light, grow faster, and the temperature must be lowered, at night to 14-15 degrees, during the day to keep it at 18 degrees. After 2-3 weeks we will have good grown plants, after which we will start picking.
When we look at a plant, we do not notice and do not know that it is at this moment, when the plant has formed 2-3 true leaves, that the tubercle of the first flower raceme is formed in the growth cone itself. A very important moment comes when we are in a hurry with sowing and sow in February or early March, then it is at this moment that the plant finds itself in unfavorable conditions, this is very insufficient illumination. And this flower tubercle will not be initiated precisely because of these conditions, but the growth of leaves will be initiated. The seedlings are elongated.
Choosing a modern greenhouse by size
When choosing the size of a greenhouse, many factors should be taken into account, such as the size of the area and the height of the plants that you plan to grow. Standard sizes of polycarbonate greenhouses range from 2 to 6 m in length and 2-3 m in width. The height can be from 1.5 m and above, but, as a rule, no higher than 3 m.
Farm greenhouses are large in size, since the number of plants in them is very large. But for an ordinary summer cottage, small greenhouses and greenhouses, often wall-mounted, will be sufficient. If you plan to provide only your family with fresh herbs, a small greenhouse will be enough.
Whether to make a greenhouse single-slope or gable depends on personal preference. A gable roof is more difficult to construct, but more convenient to use. This type of roof allows heat and light to pass through well, and removes precipitation in the form of rain or snow.
About sowing dates
When should you sow seedlings? A lot of literature has been written on how long seedlings should be kept. Some people think it’s 50, others 60 days from the beginning. But there is no need to rush at all. Seedlings that are obtained later still catch up with the previously planted seedlings, and they turn out good and strong.
Good seedlings are grown in the right light and temperature, they are compact, the leaves are closely spaced, and they have a thick stem. Containers for growing seedlings can be different, plastic bags or pots, other devices, but a prerequisite is that the volume must be at least 0.5 liters. and not very high capacity.
Role in landscape design
When building a structure for growing crops, it is important to take care of its organic integration into the overall picture of the site. The greenhouse should become a full-fledged element of landscape design. Individual design will allow you to create a real masterpiece. There is room for all ideas and creativity. The frame of the structure can be openwork or made in an unusual style, repeating the architecture of the house and other structures. An unusual combination of the materials used, creative lighting and decoration of the greenhouse will allow it to become a real pearl of the garden. With sufficient financial resources, you can build a transforming greenhouse. From early spring to early summer, the structure will serve for planting and growing vegetables and flowers. And in summer it becomes a gazebo or recreation area.
Fitting an ordinary annual greenhouse into an existing style concept of a site is not so easy. Considering that the greenhouse should be located in a well-lit and visible area. Without being particularly aesthetically pleasing in appearance, it can disrupt the entire harmony of the garden. It is better to place it in a specially designated working area of the site, which will be separated by a hedge or other element of small architecture from prying eyes. The structure should not be larger than average in size, otherwise it will begin to cast a shadow that can block the greenhouse’s access to sunlight.
Picking
Tomatoes take root well, so when picking, be sure to deepen them, then the plants’ root system develops well and the stem becomes thick. In the center of the picking container you need to make a depression, place the seedling vertically, deepen it down to the cotyledon leaves, pressing the soil tightly so that there is immediate contact with the root system. The soil in the container does not reach the edges, keep about 3 cm. This was done specifically so that when growing seedlings, bedding could be made.
And then comes caring for the seedlings. If the weather is cloudy outside, then it is very good to lower the temperature to 14-15 degrees, so that the seedlings do not stretch out.
Greenhouse location
Although a polycarbonate greenhouse retains heat well and therefore helps save on heating costs, the choice of location for its construction should be carefully considered. This is especially true for winter greenhouses, for which the best option would be a location in the southeast, south or east, but if the greenhouses are located on the north side, too much electricity will be spent on heating and lighting.
When choosing a location, you need to pay special attention to ensure that the greenhouse is not in the shade of large trees or tall buildings, and, in turn, does not shade open beds and berry gardens.
Feeding seedlings
If we have good soil, then fertilizing can be done only as needed. If we see that the plant is very pale, then this will tell us about a lack of nitrogen. You can use nitrogen fertilizers (urea, ammonium nitrate), but it is better to use a small concentration of fertilizer when watering, water not just with water, but with a small content of nutrients, based on a teaspoon of complex mineral fertilizer per 1 liter of water. Tomatoes are very responsive to phosphorus and potassium, so it is necessary to periodically extract superphosphate and fertilize with only phosphorus.
History and current diversity of offerings
The first buildings that were designed specifically for the winter preservation of fruit trees began to be built in France in the second half of the 16th century. Glass greenhouses of the familiar type appeared in 1599 in Holland. They were intended for plants brought from overseas colonies and were equipped with stove heating.
By the mid-19th century, glass greenhouses had become a necessary addition to the gardens of the bourgeoisie; and in France there was even a fashion for greenhouse living rooms. By this time, a division of buildings according to functionality had developed.
Classic English design Source tildacdn.com
Greenhouse
It is intended for growing exotic heat-loving flowers and trees. In fact, it is a closed ecosystem in which palm trees, oranges and orchids grow, and amphibians, birds and reptiles often live. Greenhouses take a long time to build and are occupied gradually; Depending on local conditions, they can be heated and have a foundation. A heavenly place is often equipped with a recreation area.
Greenhouse Source pinimg.com
Winter Garden
Initially, a special spacious extension to the residential building was allocated for the winter garden; Many similar rooms have been preserved in country mansions in Britain and France. The winter garden is also filled with exotic plants, and birds and small animals enliven the atmosphere. If a pond is equipped in the winter garden, it is populated with decorative fish species.
A winter garden has always been an expensive undertaking. It created a recreation area and laid walking paths. During construction, a foundation was necessarily laid, and good lighting and heating were provided.
Winter garden Source greenhousemegastore.com
Greenhouses
Their purpose has always been purely functional, although in recent decades the attitude has changed. Previously, vegetables, flowers and berries were simply grown in a greenhouse, trying to make maximum use of the usable space; today ideas for a greenhouse as a recreation area are becoming popular.
Manufacturers offer owners a variety of (and relatively inexpensive) ready-made models. Their design is functional and thought out to the smallest detail, but is a standard product. They are made of metal, plastic and glass, and can only be used as decoration for certain landscapes.
Model with original roof Source hzcdn.com
Homemade greenhouses and greenhouses are more varied in design; among them there are original developments. The advantage of such buildings is quick construction and savings. In general, they can hardly be called a decorative part of the garden, given that many do not have a foundation and can only be used in the warm season.
If you want to decorate your site with a building that is as decorative as a gazebo, you should think about ordering a permanent model that is suitable specifically for your garden. An equally elegant decoration for any landscape would be the purchase of an English-style greenhouse, a recognized standard among greenhouse buildings.
Summer greenhouse Source topdizz.com
See also: Catalog of companies that specialize in the design and installation of greenhouses, canopies and similar structures
Arrangement of seedlings
We take the seedlings and arrange them so that all the plants get the light and the leaves of the seedlings do not intertwine or even touch. This is necessary to provide light and warmth. This will be the best care.
The plant is growing and needs to be planted in time in the main soil - greenhouse soil from the container, because the stems can stretch out enough and even 2-3 fruits will form on one cluster, and the plant itself will spend entirely on the formation of these particular fruits. We constantly remove small stepsons. The upper stepson can be left; it forms a second stem located next to the flower stem.
When transporting to the dacha, so that the plants do not break and feel comfortable, try not to water the seedlings a few days before transportation; it is better to dry them, the stems will not be brittle and the plant will better tolerate a stressful situation.
From the middle or end of May, you can safely begin planting tomato seedlings in a film greenhouse or greenhouse. If you have a warm greenhouse, heated, and if you have a warm heated bed, using biofuel, based on plant residues, then you can start planting tomatoes in early May. It all depends on the specific greenhouse and weather conditions.
A prerequisite for good production and good fruiting is that soil and bed preparation must be carried out immediately before planting tomato seedlings. We dig up the ridge, loosen it, level it with a rake, then you need to add mineral fertilizers so that fruiting is abundant and good.
Growing crops on racks
If the greenhouse is intended for growing low-growing plants, it is advisable to equip it with shelving. They are convenient for placing boxes with seedlings, pots of flowers, or growing strawberries in the autumn-winter period.
Shelving is installed instead of beds and assumes a similar layout in a greenhouse. This method of arranging plants allows you to save space by planting a much larger number of plants. Most often, racks are used for growing strawberries.
Advantages of shelving:
- ease of plant care;
- efficiency of space use;
- increase in yield;
- saving on heating.
Shelving can be installed above the beds. The lower tiers are planted with crops that will tolerate light shading from the shelves; on the upper tiers there are pots or boxes with more light-loving plants.
Making racks with your own hands
There can be no recommendations for the height of the racks; each owner builds them to suit his own height. But the width can be similar to what the beds are made in a greenhouse. If they stand in three rows, then the width of the shelves can be 80 - 150 - 80.
You can simply determine the height of the main shelf - measure the height of the kitchen table. If you are comfortable cooking with it, then it will be comfortable caring for your plants.
The length of the structure can match the length of the greenhouse itself or be shorter. For the strength of the structure (and it must withstand a lot of weight), intermediate racks are installed. Their number depends on the length of the rack.
The most widely used material for shelving is wood. It can withstand quite heavy loads and is cheaper than others. Timber is used for racks, and boards with a thickness of at least 4 cm are used for shelves.
All parts of the wooden structure must be treated with a special impregnation that protects against moisture and painted. Shelves should have sides with a height of 15 to 20 cm. The bottom of the shelf is lined with boards with a gap of up to 5 mm between them so that water does not accumulate in them.
Disadvantages of wooden construction:
- the need for constant processing and painting;
- heavy weight of the structure;
- inability to use with a drip irrigation system.
A much more acceptable option is a design made of metal and plastic. The assembly principle is similar to a wooden rack. Metal or steel profiles are used for racks. It also requires anti-corrosion coating and painting.
The cost of the rack will be higher, but it has advantages:
- durability;
- ease of design - if necessary, you can rearrange the greenhouse;
- possibility of using any irrigation system.
If there is no bed under the rack, you can arrange another shelf below for storing equipment and fertilizers and chemicals for pest control. In general, the number of shelves depends on the organization of access to them. If it is possible to use stairs in a greenhouse, then they can be made in several tiers.
The internal equipment of a greenhouse is no less important than what material it is made of and how it is made. By arranging it correctly, you will receive not only a good harvest, but also the pleasure of working in it. And we hope that we have answered the question of how to build a greenhouse inside using polycarbonate.
Greenhouse layout
The optimal width of the bed for planting tomatoes should be 80 cm, and 40 cm between the beds. And then we proceed to applying fertilizers.
- First of all: (taking into account that the soil is mostly acidic) add dolomite flour at the rate of 100-150 g. per square meter. We pour armfuls out of the bucket; you should have rubber gloves on your hands in any case. This is an additional feeding not only with calcium, but also with magnesium.
- Secondly: The next fertilizer that a tomato needs is superphosphate. They add 50-80 grams, sometimes up to 100 grams. per square meter. Superphosphate is a sparingly soluble fertilizer, but you should not be afraid that there will be a root burn of the system, because then we will mix everything and level it out. And even if the granules are visible, do not be afraid, the plant will not get burned.
- In the 3rd turn: Then we apply complex fertilizer Kemira Universal or Nitrofoska 50 g to the soil. per square meter. if you have a little fertilizer available, you can then apply it directly into the hole.
And mix the bed thoroughly. The soil must be pre-moistened so that fertilizers dissolve well, and tomatoes love a sufficient amount of moisture, especially when planting. The soil is wet not only in the bed itself, but even between the beds, the distance, more precisely 40 cm wide, in the place where you walk, should be wet. All soil in the greenhouse must be moistened.
Differences between greenhouses according to some characteristics
In general, greenhouses can be classified according to several criteria. By location they can be:
- Wall-mounted. The advantage is saving on heat and building materials, but the amount of light and space decreases in proportion to this. Snow falling from the roof of a house can cause deformation.
- free-standing.
According to the form of classification even richer, a modern polycarbonate greenhouse can be:
Scheme of a double-glazed greenhouse.
- Domed. Exotic appearance, very difficult to manufacture. Suitable only for small ornamental plants. In winter, when the area is covered with snow, it looks more than impressive.
- Trapezoid (Dutch). Rational shape, strong frame, ability to install partitions inside.
- Arched. Requires less materials for construction, the absence of sharp corners simplifies the installation of the coating, and such greenhouses have a longer service life.
- Polygonal. It can become the most expensive garden structure, surpassing even a house. The main reason for choosing such a greenhouse is its decorative effect. Despite the difficulties in construction, the polygonal shape is quite practical, as it optimally distributes light and heat.
- Tunnel. A simplified version of a greenhouse, without doors.
- Gable, or “house”. Ideal for tall plants.
Depending on what type of heating the greenhouse has, three types can be distinguished:
- Unheated, greenhouse greenhouse. Valid only in summer, dismantled for winter. This structure does not require a foundation, which speeds up and reduces the cost of its use.
- Partially heated. Such a greenhouse does not remain on the site for the winter, but begins to function early and remains in operation until severe frosts. Whether to lay the foundation for this greenhouse is up to everyone to decide for themselves. Most often, polycarbonate is used for such greenhouses, as it can withstand frost without problems and retains heat well.
- Heated, or greenhouse, winter garden. Such greenhouses require a well-insulated base and a full-fledged heating system. Operation in cold weather requires the abandonment of plastic and film for the outer covering. Only polycarbonate or glass can withstand frost.
A modern heated version of a polycarbonate greenhouse will allow you to grow vegetables, berries and exotic flowers all year round, but this type of construction is much more expensive.
On top of this are heating costs during the cold season.
Scheme of arrangement of a soil greenhouse.
Modern greenhouses can also be divided according to the method of growing plants. The following are highlighted:
- soil;
- hydroponic;
- aeroponic.
There are many ways to classify modern greenhouses. Based on the type of structure, greenhouses can be framed and frameless; based on the time of operation, greenhouses can be divided into winter and spring-summer.
An important point is the marking of the ridge
The feeding area of tomato plants depends on the planting scheme. And the feeding area depends on the variety, low-growing standard varieties can be planted more densely, at the rate of 4-5 plants per square meter, and tall varieties and hybrids no more than 3 plants (like cucumbers) per 1 square meter.
Let's make holes: since seedlings can also be different, they can be well grown, or they can be overgrown, then first we will mark the holes for properly grown seedlings. Let's take a medium-sized tomato variety called Garant. We make holes at a distance of 25-30 cm, dig a shovel full of bayonets and you can add wood ash into the holes, take one armful per hole, tomatoes are very fond of especially the pre-sowing application of wood ash.
In addition, tomatoes also love excess good moisture when planting. We will deliver Kemira Universal. And we’ll water it very generously, just fill the holes with water. If the seedlings are weakened, pale yellow, etc., add ash fertilizer and complex fertilizer and lightly mix everything. And after that we pour water with potassium permanganate from a watering can, an intensely colored one, it’s very good if the water is hot. The soil is also disinfected and the plant immediately falls into warm soil, it takes root very well.
- Soil cultivation: everything you need to know before sowing and after harvesting (91 photos)
- Downy mildew of cucumbers: methods for identifying the disease at an early stage and processing vegetables (79 photos)
- Cladosporiosis of tomatoes - what is it and how to fight it in greenhouses? 69 photo ideas
You don’t even have to wait for all the moisture to be absorbed, we’ve already watered it beforehand, and now we’ve watered it well with a solution of potassium permanganate, we lower the seedlings into this hole, bury it, and cover it with soil. It’s not without reason that they say that tomatoes love when their feet are damp, but their heads are always dry. This rule must always be remembered, especially when watering tomatoes, so that water does not fall on the leaves when watering.
We bury the seedlings in the hole until the first true leaves are planted and compact the soil.
If you leave for a long time after planting, to avoid evaporation, you can not water after planting, but mulch with either peat or compost. It is enough to add 1 cm of compost to prevent evaporation.
But tall varieties of tomato, hybrid tomato, of course, can be planted less frequently, at the rate of 3 plants per 1 square meter. We make holes for them of the same depth, i.e. on the bayonet of a shovel, but the distances between plants are somewhat larger, essentially the same as when planting a cucumber.
We do all the other techniques and fertilizers and watering and everything else in exactly the same way. This is Kemero and wood ash. We plant elongated and overgrown plants in holes, first remove all the leaves (one day, two days before planting) and make not a hole, but a small ditch, pour ash and some kind of complex fertilizer, mix, pour water and potassium permanganate into the ditch and proceed for landing.
We plant lying down, this technique is known to many, we don’t bury it very deeply, because the soil is cold deeper, into a ditch to a depth of about 10-15 cm from the surface and fill it up to the 1st leaf that we left below. And now the seedlings are planted, they take root, and in a week they will definitely need to be tied up.
- Treatment of tomatoes (51 photos): fungus, viruses, cladosporiosis, fusarium, macrosporiosis and other diseases
- Ants in a greenhouse (65 photos): how to remove them quickly and safely? Tips, instructions and recommendations
- Treatment of cucumbers: best advice from professional farmers. Effective technique (52 photos)
Standard varieties Nevsky and Baltiysky, which form very compact plants, are planted in three rows in a bed 80cm wide. We mark the plants 15-20 cm apart.
We prepare the holes as always. When planting tall and medium-sized varieties of tomatoes, the soil is also generously shed with water or a solution of potassium permanganate. You should try to grow low-growing standard varieties in one mass, and tall varieties in another mass, so as not to interfere with others.
If it is not possible to plant in different beds, then you can do this: plant standard varieties on one edge of the massif ridge, tall-growing varieties in another array, and medium-growing varieties in the third array. It is better, of course, to do this in different beds in the same greenhouse.
If you do not have enough seedlings, then you can plant determinate varieties, such as Bely Naliv, Tambovsky Urogozny, Selskaya Rannyaya, and many varieties, less frequently, but then the formation must be carried out in three stems. This means stepsoning. We leave stepchildren who have grown up and have strength.
Scheme for planting tomato seedlings:
- – Standard varieties of tomatoes: 6-8 plants per 1 sq.m.
- – Medium-sized varieties: 4-6 plants per 1 sq.m.
- – Tall varieties: 3-4 plants per 1 sq.m.
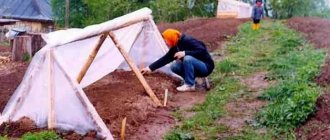
How to protect tomato plants from the first frost? Place arcs over the bushes and lay lutrasil (non-woven synthetic material made of polypropyl fiber) for insulation and protection from the May cold, and during the day when it is warm it is advisable to remove the lutrasil to avoid overheating.
Let us remind you that it is necessary to maintain a certain temperature, lighting, caring for plants, treating with fertilizers, if necessary, fertilizing, carrying out pinching correctly, not allowing the plants to freeze or overheat, observing the watering regime, etc.
Growing tomatoes, like other crops, in greenhouses with good care and constant attention brings great benefits, it is a rich harvest, the opportunity to learn all the pros and cons in specific conditions, enjoy your results, and have your work recognized by your loved ones and friends. Good results and excellent harvest!
- How to spray tomatoes to get maximum efficiency when harvesting? 71 recipe photos
- Aphids on cucumbers (68 photos): monitoring plant health in greenhouse conditions. Instructions from gardeners!
- Late blight on tomatoes: description of methods for protecting and increasing the resistance of tomatoes (102 photos)
The best arched polycarbonate greenhouses
Covering structures in the form of a hemisphere are called arched greenhouses. This form is very popular; it provides good access to plants and withstands gusts of wind. Experts paid attention to several models.
Dachnaya-Optima
Rating: 4.9
The arched greenhouse Dachnaya-Optima has won the hearts of Russian summer residents. The model turned out to be very durable, it is designed for snow cover weighing 280 kg per 1 sq. m. The frame is made on the basis of a steel profile 60x20 mm with zinc coating. With a standard width of 3 m, the height of the structure is 2.1 m. There are two hinged doors to enter the greenhouse, and ventilation of the interior space is provided by two vents. When assembling the model, no foundation is required, and you can handle the installation yourself, following the attached instructions.
Users have no serious complaints about the quality and functionality of the greenhouse. It is affordable for all segments of gardeners, which is why experts award the product first place in the ranking.
Advantages
- high strength;
- no foundation required;
- protection of the frame from corrosion;
- affordable price.
Flaws
- There are not always enough fasteners.
KREMLIN SUITE
Rating: 4.8
An ideal option for regions with gusty winds and heavy snowfalls would be to install a KREMLEVSKAYA LUX greenhouse. It withstood tests in harsh Siberian conditions. To create the arched frame, the manufacturer used a reinforced double pipe 20x20x1.2 mm. Maximum snow load per 1 sq. m is allowed up to 240 kg. Anti-corrosion protection of steel parts is provided by powder paint. The developers also took care of ease of transportation; you can even load the structure without polycarbonate into the trunk of a Lada car. The manufacturer is confident in the strength of its greenhouse and gives a 7-year guarantee.
Experts gave the product second place in our rating. Users are pleased with the durability and affordability. Among the shortcomings, the presence of defective rubber seals is noted.
Advantages
- ease of transportation;
- reliable protection against corrosion;
- durable frame;
- acceptable price.
Flaws
- defective seals.
BASTION PREMIUM, Bastion company
Rating: 4.7
The BASTION PREMIUM greenhouse can boast of high precision manufacturing of all parts. During assembly, no cracks or gaps are formed. This model has been produced since 2008 in the Moscow Region. The design received many gold awards at exhibitions for summer residents. To connect the 1.5 mm thick square pipe, the manufacturer used plasma welding, so the frame turned out to be very durable. The greenhouse can withstand a load of up to 1 ton. All steel parts are protected from corrosion using powder paint. To assemble the structure, you only need to tighten 20 bolts.
The model is in third place in our rating, because it is impossible to transport it without a trailer. Some summer residents are dissatisfied with the quality of ventilation of the internal space.
Advantages
- precision manufacturing;
- high strength;
- powder coating of steel;
- quick installation.
Flaws
- poor ventilation;
- large dimensions.
HARVEST ELITE-ABSOLUTE
Rating: 4.6
The improved design was noted by experts in the UROZHAY ELITE-ABSOLUTE greenhouse. It is suitable for both summer residents and professional vegetable growers. The model is offered in a width of 3 m, the length can be chosen from 4 to 10 m. The frame is made of galvanized pipe 25x25 mm. The basic configuration has 2 doors; they are equipped with vents for ventilation. In order to provide stability on an uneven area, the manufacturer recommends installing a foundation of wooden blocks. Summer residents can choose a greenhouse with different polycarbonates or buy only a frame. The quality of workmanship is confirmed by a 20-year guarantee.
The model stopped one step away from the top three in our rating. Users in the reviews are dissatisfied with the accuracy of the parts, which causes difficulties during assembly.
Advantages
- affordable price;
- reliable frame;
- Cink Steel;
- 20 year warranty.
Flaws
- difficult to collect;
- gaps in doorways.
ShelterLogic in a box (round roof) 240x300 cm
Rating: 4.5
An unusual version of a country greenhouse is offered to Russians by an American manufacturer. The ShelterLogic 2.4m round roof model offers plenty of interior space. The frame is made of steel pipe with a diameter of 35 mm, which is protected from corrosion by powder coating. The connection is made using reliable metal stabilizers ShelterLock 3X. As a covering material, Americans offer high-density polyethylene with UV protection. For ventilation, simply roll up the side walls to the required height.
The advantages of the model include quick installation (1.5-4 hours), compactness, and ease of use. The high price and unclear installation instructions do not allow the greenhouse to take a higher place in the ranking.
Advantages
- compactness;
- strength and reliability;
- quick installation;
- effective ventilation.
Flaws
- high price;
- unclear instructions.
Severyanka from NZT
Rating: 4.4
The Severyanka greenhouse from NZT has a classic arched shape. The basis of the shelter structure is a frame made of profile steel pipes 25x25 mm and 20x20 mm. The metal structure is zinc coated, providing protection against corrosion. The manufacturer equipped its product with two doors and two windows. In the basic version, the greenhouse is equipped with 4 mm thick cellular polycarbonate with ultraviolet protection. Experts note high-quality European fittings, 7 longitudinal reinforcements, and comfortable handles on the doors. Users liked the strength of the structure, the ease of tying up plants, and excellent lugs. Among the shortcomings, there is a lack of holes for fasteners, the use of a profile with a thickness of 1 mm instead of the stated 1.5 mm.
Advantages
- high-quality fittings;
- galvanized profile;
- reliable lugs;
- robust design.
Flaws
- no internal handles;
- There are no holes for screws.
URALOCHKA
Rating: 4.3
The URALOCHKA model closes the ranking of the best arched greenhouses. This design is over 9 years old and has undergone several modifications. Gardeners prefer greenhouses for their minimal cost and high strength. The four-meter frame is capable of withstanding snow cover weighing up to 3.5 tons and wind loads of up to 30 m/s. High reliability and stability is ensured by the location of the support arcs at a distance of 65 cm from each other. In addition, the manufacturer used a square pipe with a thickness of 1.5 mm.
Users report quick installation of the greenhouse. Working together, we manage to set up a greenhouse in 2 hours. But the model also has a number of shortcomings. This is low-quality polycarbonate that cracks. The paintwork also leaves much to be desired.
Advantages
- reliability and strength;
- easy installation;
- sustainability;
- affordable price.
Flaws
- low-quality polycarbonate;
- short-lived paint coating.
