If we’re going to create a New Year’s mood, how can we manage without decorating our home. Therefore, today we are making garlands for the New Year with our own hands. Previously, we have already made Christmas trees, snowmen and sweet gifts.
Nowadays there are a lot of materials that can be easily changed, including different types of fabric, paper, clay, etc. You can also make a banner for a Christmas tree or window from pine cones, sweets, even food. yes, yes, there are craftswomen who create garlands of gingerbread and candied fruits.
In general, there are an incredible amount of ideas, so the article turned out to be quite voluminous and long. But this is only to our advantage, so we will consider many options for inspiration!
DIY Christmas garland made of paper (templates for cutting)
So, the most accessible material for us is paper. Therefore, let's remember our childhood and go cut, glue and enjoy life. if you have children or younger brothers, sisters, then invite them to participate in this process. It's so interesting!
It is better to take medium-weight paper and double-sided. Then the craft will look neater.
So, we’ll start with the flashlights we’ve known since childhood.
We need two parts. One is 180*120 mm in size, and the second is 180*100 mm. We fold the larger one in half and make parallel cuts on the fold side, not reaching the edge 1 cm.
From a smaller strip we make a tube, gluing the edges, which have a size of 100 mm.
And now we wrap the resulting accordion around the tube. We fix the points of contact with glue.
Figures connected to each other are also a very good idea for a craft; at the end of this section, I will give a lot of templates and stencils for cutting.
Such cute penguins and snowmen can be made using this pattern.
The links of the garland are connected with threads or wire.
Santa Claus scheme.
Another idea is links fastened together with glue. So, the simplest option of rings. Surely everyone has done such a thing!
However, if you add imagination and modern materials to this idea, you will get a very stylish decoration.
Often garlands are created from separate elements and are connected only by thread, wire or cord.
Therefore, absolutely any elements of creativity can act in this capacity.
For example, here is a master class on creating cute stars. A large number of them will make a decoration.
Here's an idea for striped balls.
The idea of lanterns, also familiar from childhood. You need five strips of the same thickness. And along the length they go: 1 strip of 5 cm, 2 strips of 7 cm and 2 strips of 9 cm. We fix the edges with glue or sew them with threads.
You can use different colors and the simplest shapes: triangle, diamonds, squares, cones, etc.
Little kids will love making this craft. To do this, take a long strip of colored or corrugated paper. Along its entire length, mark stripes at a distance of 1 cm from each other. And cut through them 1 cm short of the edge. It is important to alternate sides. One cut from the right edge, the second from the left.
Now some ideas for inspiration. For example, I liked these cute snowmen.
People were also surprised by the idea of hanging Christmas trees upside down.
Or how interesting they decided to connect the parts with rope. They just tied it with ribbons and that’s it.
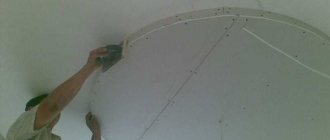
The craftswoman decided to sew these snowflakes on a sewing machine.
Parts can be not only flat, but also three-dimensional. For example, these 3D origami Christmas trees.
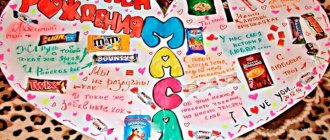
Children will also love the idea of a garland with candies. By the way, they can be made from real candy wrappers.
And this photo shows a step-by-step master class on creating the candies themselves.
The idea with ballerina snowflakes is quite unusual. You can use them to decorate windows and Christmas trees. I am attaching templates and a work plan.
You can use not only the paper we are used to, but also newspapers.
Experiment with colors.
sometimes it turns out to create a whole. composition of garland details.
By the way, it can not only be stretched out as usual, but also hang vertically from the ceiling and look like children's mobiles.
Here are photo instructions on how to make the simplest garland with only scissors and a circle of paper.
It’s also interesting to make a stretch out of fans. You can combine them by color, size and number of rows of elements.
This fan can be made like this. We take a sheet and mark stripes 1 cm thick across its entire width. Then we begin to fold them like an accordion. Along the marked lines, bend the sheet in different directions alternately.
Fold the resulting accordion in half.
And use double-sided tape to connect the two inner edges.
Now let’s connect all the details into one whole.
And if you get creative and use new forms.
Check out this paper leaf garland idea. The main thing is to take winter color options: white, silver, blue, light blue and red.
This decoration made from voluminous balloons looks very stylish.
The photo shows the steps for folding such a blank.
You can turn an ordinary idea into a magical one by simply adding more unusual solutions. For example, use circles of different colors.
Or sew a garland in five minutes from miniature triangles.
Figurines hanging from the ceiling immediately create coziness.
There are a lot of ideas with snowmen.
Use golden shades to create decorations; they will decorate any background.
The outlines of houses and tree branches are very memorable in winter. When you walk on the street in the evening, and such a cozy and warm yellow light turns on in the windows.
What other ideas should I take? Yes, let's take a look around. After all, there are a lot of winter symbols, for example a hat.
Light bulbs from electric garlands.
Look at the night sky, there are so many distant stars, for some reason in winter they are associated with the color blue.
What do we expect from the New Year? Of course, gifts. Let's translate this into decoration too.
Remember about unusual shapes? So, this instruction shows how to roll a volumetric rhombus.
This cube is made according to this scheme.
Remember "snake"? It was definitely done by everyone and candy wrappers.
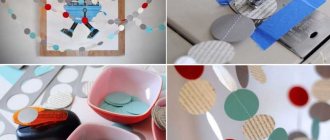
See how a garland is made from paper circles.
Or the circles can be folded in half and the adjacent sides glued together.
The following garland was made according to this scheme.
As you can see, you can glue not only circles this way, but also squares and rhombuses.
It seemed unusual to me that three-dimensional cones are used in suspensions. You can put sweets there too.
Look how cute this wall decoration is.
Again the idea with the snowman, snowflakes and stars.
Such a “snake” is created from corrugated paper. We cut a strip 2 cm wide along the entire length of the blue roll. Glue a red strip to it perpendicularly. This is what happens.
A few more ideas.
The use of postcards and photographs in decoration has become unusual.
We take different elements: boots, stripes, Christmas trees. All this will do.
You can use different templates for Christmas trees.
For example, use this one.
The parts can be connected both vertically and horizontally.
You can decorate not only the apartment, but also the street.
We made snowflakes like this here.
And these snow balls can be made in five minutes.
For more serious premises, such as offices, it is better to take rectangular or triangular flags in pleasant shades.
Cupcake liners make a wonderful Christmas tree.
How do you like a garland of such small voluminous stars? At the same time there will be a master class.
You can cut out such figures from a strip of paper folded many times.
There is a wonderful idea to create a decoration from mittens and mittens.
To do this, use this template.
From this Christmas tree you can make a three-dimensional part of the Christmas tree. To do this, translate the diagram and make cuts along straight lines. Then insert the parts into each other.
Now, as promised, there are a lot of diagrams and stencils for cutting.
Well, what do we move on? All these patterns can be transferred not only to paper, but also to fabric or felt.
Christmas flags
As decor, they are suitable for a variety of occasions: birthday greetings, the phrase “Welcome”, any phrase on the occasion of a party.
We transfer the image of the flag onto colorful leaves: fold them in half and draw a triangular or rectangular shape. We cut out the shapes according to the stencil. Attach the molds to the thread, determine the length selectively.
We suggest improving the decorative element with the ideas presented below:
- As a complement to the paper garland, use ready-made templates for cutting - small snowflakes, fabric blanks that repeat the dimensions of the main flag, etc. Secure them by gluing or sewing on sequins and buttons.
- More geometry - cut out shapes inside the flags.
- The look will be refreshed by fringe - cut the bottom into thin strips.
- Phrases - to clearly read the name of the holiday, create a contrast: attach a white circle to the main element, and a large printed sign on it. Finally, you can print out the letters for the Happy New Year garland.
Garlands for kindergarten for a competition
Before the New Year, parents can receive assignments from kindergarten and school. I need to make a craft for a competition. Often this idea is created in order to have something to decorate the Christmas tree with. Well, we don’t mind, we’ll make a beautiful garland.
To do this, let's look at several master classes.
So, the first idea is to make light bulbs.
To do this, we translate this diagram.
Using a ruler on the blunt side of a knife or scissors, bend the sides of the petals.
Where there is an allowance, we apply glue and form the part. Insert thread into the places where the dots are drawn.
Now we make a light bulb socket from dark cardboard. Roll and glue the strip.
Glue it to the light bulb. We make a lot of these blanks and combine them into one large garland.
By the way, you can also insert real flashlights inside.
The second idea for the competition is three-dimensional balloons.
This master class shows each step of creating elements.
The idea with deer seemed quite unusual to me.
The elements are cut out using this stencil.
The parts are connected to each other by stripes of contrasting colors.
This idea is quite complex. It will be difficult for kids to complete. However, this decoration looks simply gorgeous.
For beauty, you can use a gradient effect. Sort colored paper by saturation. From dark to light.
We cut many strips of the same width, form an ornament and fasten it with a stapler and staples.
This option is also quite bold. We will use felt and clothespins. Nothing complicated, but very unusual.
We cut out the elements of the Christmas tree from different shades of felt and glue them onto a clothespin. We connect them with a strong thick thread.
I think that for the sake of the competition you can work hard!
Paper garlands for the Christmas tree
To decorate the Christmas tree, choose a garland with small elements made of paper or cardboard so that it does not stand out too much and fits organically into the chosen style of decorating the New Year's tree.
Bright garland using origami technique
An excellent option for decorating a Christmas tree for the New Year holidays would be a paper garland of bright multi-colored elements made in the fashionable origami style.
What you will need:
- colored paper;
- ruler;
- pencil;
- needle;
- thick thread;
- scissors.
Step-by-step production with photos:
- From colored paper of different colors we cut out squares measuring 8x8 cm.
- We fold each square in half diagonally in one direction and repeat the action twice.
- After each fold, we make clear creases and straighten the workpiece.
- Fold the workpiece in half again, connecting the opposite sides, turning it over to the other side. We also repeat the process twice.
- Easily fold a pointed figure with double “wings” along the resulting lines.
- We straighten each petal of the figure, giving volume, then press the upper surface to the opposite one, obtaining an equilateral triangle.
- Fold the triangle in half lengthwise, flip it to the left, and move on to the next one. We connect two pieces into one shape, inserting the ends of one between the layers of the other.
- We string the resulting elements of a multi-colored garland onto a thick thread using a needle. We insert a needle along the figure, achieving a garland of the desired size.
Attention!
If desired, the elements can be coated with nail polish with glitter to add shine to the garland and make it as New as possible. It is not necessary to cover all parts; you can do this selectively.
Garland "Hearts" made of paper
For a very simple, spectacular garland for the Christmas tree for the New Year 2021, we will make simple elements from paper with our own hands, using a detailed description with a photo.
What you will need:
- colored paper;
- scissors;
- pencil;
- heart template.
Step-by-step manufacturing process:
- From colored paper, cut into squares of different colors with a side of 8-10 cm (optional).
- We fold each square in half diagonally, put a “heart” template with a free middle on one of the blanks, and outline it.
- We put several blanks on top of each other and cut them out. The remaining internal “hearts” will also be useful to us.
- We take three contour “hearts” and make a cut on one from the bottom. We thread each of the resulting sides of one cut piece into two other “hearts,” connecting them into one whole.
- At the bottom of the cut we glue one of the small hearts of a different color (obtained by cutting out the contour hearts).
- In the same way, we connect all the elements of the garland together into one bright colorful composition and decorate the Christmas tree.
Attention!
This garland is hung on the Christmas tree only in a horizontal position.
Felt workshops with patterns
Felt is very popular among craftswomen. I dedicated a separate article to crafts made from this material.
So, there will be both complex and easy crafts. Choose your own difficulty level.
So, master class one. Volumetric ornaments. You will need a square of thin felt, a ruler, scissors and glue. You need to connect the edges alternately from different sides of the square.
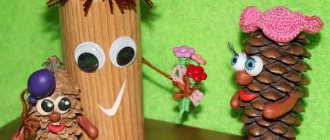
To decorate a children's room, make a garland of mischievous Christmas trees and snowmen.
The templates are shown below. All animals are made according to this scheme: parts of 2 pieces are cut out according to the template. The mouth, eyes and other details are embroidered on the front side.
The edges are sewn together, but one corner remains unsewn. We push the filler into it. And this hole is held together.
You can use these same templates yourself.
Flat felt figures are also used for garlands. It can be easily sewn on a sewing machine. Therefore, more often these soft parts are connected this way.
You can try to depict a garland in the form of leaves.
To do this, you need to place an ornament on a long strip of felt, as shown in the bottom diagram.
Cut out the workpiece and connect all the parts into one long stretch.
Another master class on creating decorations for soft snowmen.
Let us remember that the garland can hang from top to bottom.
Tilda dolls are popular in Europe. Especially in the Scandinavian countries. We can use this idea in home decoration.
Here is a master class on making a “sweet” garland. There are sweets and lollipops here. But you can’t eat them, they’re made of fabric.
This is how candy is made.
And so we make a blank for the candy.
You can use real lollipop sticks.
Balls of sisal, cotton wool or wool can also be wrapped in felt.
If you have only one shade, then you can cover it with fabric or multi-colored paper.
Another decoration idea. And here we see clothespins again.
and here the figures alternate with pom-poms.
The diagrams for this craft are below.
You can combine materials. This is what felt and pine cones look like together.
More ideas for decoration.
Let's take a closer look at how such Christmas trees are made.
This, of course, is only a small part of the ideas. Experiment and create a new option for decoration.
Volumetric decorations
Their main feature is that they are noticeably different from ordinary New Year's origami.
For one decorative figurine you will need 3 leaves. Fold like an accordion lengthwise. Cut holes along one edge in your own style, straighten the accordion. Repeat the previous steps with the other two leaves. Glue the outer edges of the models to each other.
Decorations made from plastic bottles and cups
This material is not very popular, but it is quite easy to use. Most often, cups are used to make lampshades for garlands. It acquires soft diffused light. And you can decorate them with eyes, hats and scarves.
Snowflakes and other individual decorative elements are often made from plastic bottles. For example, rings like in this idea.
They can also be combined with lids. Holes for thread can be made in them with a hot knitting needle or an awl.
DIY New Year's fireplace garland
If the room has a fireplace, this is a huge plus in interior design for the upcoming holiday. You can make it yourself from cardboard boxes, gluing them together with the letter “P” and decorating them with white or red brick. Whatever it is - real or artificial, a DIY New Year's fireplace garland will be a wonderful decoration. The ideas for DIY Christmas garlands for the fireplace are inexhaustible: use large ribbons of green tinsel, complement it with red and gold bows, bright glass balls, pine cones painted with white acrylic paint. Since the main color of the coming year of the Earth Dog is yellow with all its shades, the decorations will be oranges, tangerines and other fruits, which, by the way, can be eaten after the holiday.
New Year's shoe pendants and garlands, decorated with your own hands, which will take up space above the fireplace, will look very Christmassy. You can add to the composition with slides of candles, a Christmas wreath, and also put a small porcelain or self-sewn figurine of a dog - a symbol of the coming year.
Fabric flags
Flags can be different: square, triangular. Paper and soft. Glued or stitched. Today I will focus on the idea of fabric. Because there are three ways to connect elements.
Secure the pieces with tape or bias tape. For this you definitely need a sewing machine. Otherwise it won't work out neatly.
The second option is to sew pockets for the cord.
The third option is to simply make slits into which the thread is inserted.
Well, for inspiration, an idea with burlap. It looks simply amazing.
You think you now understand that there are absolutely no limits to creativity.
Do you have fancy fabric? Great, you can also make a New Year’s garland from it yourself!
Whatever the type of fabric, if its color matches your wishes and the theme of the New Year, then we put the fabric into action. To do this, we will prepare needles, threads, the material itself, a sewing machine or a lot of patience in its absence, cardboard for the template, a simple pencil and stuffing material.
We cut out the shape of a Christmas tree from the fabric, sew the edges on a machine, leaving the space for stuffing unsewn. We turn the product inside out, fill it with cotton wool, padding polyester, pieces of fabric and sew it up with a hidden seam. We sew each tree to the braid at the crown
Pine cone decoration ideas
Of course, cones! What we didn’t do with them! One hedgehog is worth something. And it’s a piece of cake for us to make a garland.
For beauty, the material can be spray painted or dipped in gouache and acrylic paint.
Natural material looks harmonious with environmentally friendly ideas. For example, with dried berries or fruits.
This material will also feel good outdoors. It won't get soggy like paper if it snows.
For decoration, take Christmas tree branches. You can attach them to the ceiling curtain or to the cornice.
As you can see, everything is very beautiful and very accessible. There is no need to buy expensive jewelry when you have such ideas right under your nose.
Christmas garland and tree from modular origami (diagram and description for beginners)
The next garland, as you already read in the subtitle, we will make using the origami technique. Let's make these snowflakes, and then make a chain out of them. The result is a delicate and beautiful decoration for the holiday.
Necessary materials:
- White paper;
- Ruler;
- Pencil;
- Glue;
- Scissors.
Subsequence:
We draw a sheet of paper into 3x3 cm squares. To make one snowflake you will need 16 such squares and 2 paper circles with a diameter of 2.5 cm.
We assemble modules from squares according to the following scheme.
We glue the 8 resulting blanks to the circle, as shown below:
We attach another circle and 8 remaining blanks on top.
Glue the snowflakes together using the rays.
These snowflakes are also assembled from modules. And they can also be combined into a bright garland.
The result depends solely on how complex you have the patience to create modules.
Such snowflakes from modules, if connected, also form a wonderful decoration.
The only caveat is that the modules will need to not just be inserted into each other, but glued together. Otherwise, the structure will simply crumble.
In general, create for your health, there are many ideas in the origami technique:
Master class on garlands with fringes
A fringe garland looks quite stylish. You can do it in several ways. Let's look at everything in detail in the photo instructions.
Option two, from threads.
Made from fabric strips.
Made from corrugated or crepe paper.
Fast, but very individual. Try it and you will have designer things!
"Lattice"
We get a bright and elongated decoration using several different color combinations. Having decorated the wall with stylish decorations, you can no longer think about how to make a garland from colored paper.
Fold the sheet in half lengthwise and repeat the process again. Using a lead pencil, draw lines with a difference of one and a half centimeters, moving 1 cm from the edge. Remember that they should not reach the other edge. Cut the resulting “noodles”.
We move the opposite clean edge towards us and make cuts between the cuts exactly in the middle, still not reaching the opposite side by 1 cm. We unfold the figure and carefully stretch it.
Streamers-decorations for windows (ideas)
Let's take a little look at how you can decorate window openings. After all, this is not only gluing paper protrusions. You can make fairy-tale garlands for children, or elegant and adult ones.
An idea made from flat circles of different sizes. It looks a lot like falling snow.
Or replace the paper with pompoms.
Or even cut out snowflakes.
Pendants with real Christmas balls look beautiful.
Again we use different forms and heroes.
Even if the garland is small, then distribute its center exactly in the center of the window. It will look symmetrical and self-sufficient.
New Year's garland made from natural materials
If previously pine cones and acorns were considered natural materials for crafts, today nuts, cinnamon stars, sticks, rowan berries, and dried fruits are also used. The main question is how to connect it all on one thread.
We use cones
It doesn’t matter what kind of coniferous tree grows in the forest from where you will get the cones: it is best to make a hodgepodge of cedar, spruce, pine and larch cones.
Cones can be easily painted with spray, gouache, acrylic, coated with glue and sprinkled with glitter
Glue (carpentry or for ceiling tiles) is applied to the stem of the cone and glued to the twine
There is another option for attaching cones to a rope: using pliers, it’s easy to screw a small hook into the cone. All that remains is to pass the rope through this hook, and you can immediately hang the decoration
Assorted cones look atmospheric
Other natural material
What else can you use as a Christmas and New Year decoration? We go on a raid not only into the forest, but also into the refrigerator and kitchen shelves!
Stars are cut out of wood, and the products are attached to the rope using a drill or just glue.
Dried fruits are prepared in the oven. They remain in this state for a long time and are easily attached to a thread
How to make a garland of snowflakes, diagrams inside
Let's touch on the idea of snowflakes a little. This paraphernalia is very popular during the New Year holidays. After all, the beauty of snowflakes is mesmerizing, we all know that there is not a single beauty that is alike.
There are complex ideas, and there are simple ones. It is important to understand who will make the craft - an adult or a child.
It is difficult to make many elements for a garland. You can make just a few elements and hang them on a chandelier, curtains or a clock.
Mobiles are very similar to garlands, only they are placed vertically rather than horizontally. Use this idea.
Unusual and soft felt garland for the New Year
Anyone who hasn't tried working with felt yet has missed out on a lot. It’s impossible not to take advantage of such a rich color palette of not particularly expensive material that can easily be cut with scissors and a needle and thread. Depending on how the final product should turn out, a cardboard template and threads are selected. Usually floss is used if the stitches are applied by hand.
If you want to surprise your loved ones and hang hearts on the wall instead of Christmas trees, you will need a sewing machine and red felt. The whole task boils down to the fact that you need to make two machine seams and one hand seam, which will collect all the pieces into one garland
By cutting the same type of felt strips and stringing them on a thick thread, you get an interesting product
Bright and pleasant to the touch garland
How to make a template for a garland
Well, since we're talking about snowmen, let's make another garland in which the snowmen will hold hands.
And in order for everything to turn out smoothly and neatly, and for the snowmen to be the same size, they need to be cut out according to a pre-prepared template.
To make 8 figures, one A4 sheet will be enough.
1. Cut one such sheet in half along the long side.
2. Take one half and fold it in half first.
3. And then we bend both edges to the fold to form an accordion.
4. Draw a snowman on the front side of the accordion and cut it out along the contour.
5. Expand the accordion and get 4 linked figures.
6. We do the same procedure with the second half of the sheet, using the first as a template.
7. Glue the snowmen together by the hands and the garland is ready. All that remains is to paint it.