We will need the following materials and tools:
- hydraulic jack, preferably ten or twenty tons
- beams measuring approximately 150x250 mm, you can take sleepers
- various construction tools
- thick steel plate
Sequence of work:
- calculate the load incident on each corner
- choose a place where the jack will stand
- put a jack
- raise each wall and place supports
- fix the raised wall
- replace crowns or top up foundation
First of all, you need to calculate the load falling on each corner. This is the total weight of the house divided by four. Based on this, the bars are selected on which the corner will rest after lifting.
Next, you should choose a place where the jack will stand. It depends on the purpose for which you are lifting. If you need to change the lower rims, you need to cut a hole in them until the next log, which will become the support of the jack. The hole should be wide enough to accommodate the jack itself, as well as the boards that will support the house after it is raised.
If the purpose of the lift is to increase the height of the foundation, it will be necessary, if the foundation is of a strip type, to make a recess in it for the jack. If it is columnar, there is no such need.
Next you need to install the jack. If it will stand on the ground or a concrete foundation, you should place a thick board under it, preferably wider.
Place a thick steel plate under the head of the jack. It’s good if there is some kind of milling in its center, then the head will not slip off.
You need to place a rod not far from the corner and stick it into the ground. You need to make marks on it and on the corner at the same level. The ratio of these marks during lifting will indicate how many centimeters the angle is raised.
Work begins by turning on the jack. It is necessary to ensure that the jack is vertical. If it deviates to the side, you need to stop work and install the jack correctly.
When lifting, the following rule must be observed. It is necessary to lift with two jacks at once, which are placed at angles. Raising one corner should be done if it has sagged in relation to the other corners and needs to be leveled.
Each wall at a time must be raised to a height of 4 to 6 cm and no more. Then you should place stops under the wall and begin lifting the opposite wall.
There are two options for how to fix an already raised wall. The first is to place boards between the foundation and the log. The second is to make a “bench”, that is, place boards under the wall at right angles to it. The ends of the boards should be placed on supports located on both sides of the wall. The choice of option should be determined by what you need to do with the house, for example, replace crowns, top up the foundation, etc.
How to raise a corner of a house video
The foundation is the basis of any structure; the comfort and safety of the people or animals living in the building depends on its reliability. During operation, under the influence of weather conditions, there is a constant shrinkage of the foundation. Shrinkage is a change in the volume and size of the foundation under certain conditions.
Causes of foundation deformation
If the foundation is deformed, then it is necessary to find out the reasons for this deformation and then look for solutions to restore it.
If measures to repair the foundation are not taken in time, then its further restoration will be very difficult. And if the case is very complex, then recovery will be completely impossible.
In the event that the foundation has subsided due to the fact that it is being washed away by groundwater, then it is necessary to pump it out from the problem areas.
If the foundation collapses due to the fact that during the construction of the foundation there was uneven drying of the concrete or its uneven distribution.
In this case, it is necessary to strengthen the foundation with a metal frame and then fill it with concrete. In this case, the concrete used is the same grade that was used when pouring the foundation itself.
A common factor for the destruction of the foundation is its saturation with moisture. Once the moisture freezes, the foundation is subjected to heavy loads and its structure eventually collapses.
In order to avoid subsidence of the foundation during construction, it is necessary to control its moisture resistance. Very often the negative influence of moisture manifests itself in swellings and cracks on the surface of the base. They can tell you about the presence of moisture on the surface of the foundation and also about poor maintenance before the construction of the building begins.
Piles for fastening
Various piles are used for the foundation. For example, made of steel. They are very heavy and therefore you will not be able to install them yourself; this will require a crane. Steel piles must be treated immediately, otherwise they will corrode. Piles are good to use in places where frost most often prevails - where there is a lot of groundwater, also if the terrain is quite complex and uneven.
Such piles must be installed into the ground using vibrating tools. Everything around the piles needs to be filled with concrete for fastening. It is good to pour a pile foundation where there is a lot of vegetation, peat bog and groundwater. It is better to install piles with a grillage. Then all the piles will unite, and stability will increase noticeably.
To ensure that the surface does not crack or crumble, you need to take into account all the pros and cons of the type and location in advance, before construction, and then everything will be fine.
Columnar foundation and its restoration
Scheme of a columnar foundation.
Columnar foundations were often built from red brick, which is very hygroscopic and deteriorates over time. You can often observe that the supports of the foundation of the house have sunk into the ground over time, the crowns of the house have become excessively moist, and the house itself has become warped. This leads to cracks and jamming of doors and windows. Depending on the degree of destruction of the columnar foundation, the supports are restored or replaced. Typically, columnar concrete supports under the house, the crown of which is located above the ground surface, are replaced.
To make a replacement column from concrete, formwork is made with a cross-section of 20 to 30 cm. It must be equipped with a support beam in the upper part. The depth of the hole should be made with the calculation of a deepening of 30 cm above the depth of soil freezing. The hole is made with a drill so that the support can first pass at an acute angle and then fall into place. After installing the post, the hole is filled up, carefully tamped every 10 cm, and tapped for better soil settlement. You can install the supports using a jack. The column is ready for use 2 weeks after pouring the solution.
Strip foundation and wooden house
The strip foundation is restored depending on the material from which the house is made. If the house is wooden, then it can be raised with jacks and the foundation, which has sunk, can be completely restored. To do this, a monolithic belt is poured, connecting the old and new monolith into a single whole. First, preparatory work is carried out:
Strip foundation diagram.
- remove furniture and belongings;
- disassemble the stove;
- The floors are removed, leaving only the walls and roof.
The house will be lifted using jacks: automobile, mechanical, hydraulic. With a columnar foundation, platforms of 0.5x0.5 m are prepared, on which jacks are installed. With linear, they usually knock out the bricks of the base or hammer out the monolith in order to bring the jack under the house. When lifting a house, the force of the jack must be transmitted through a steel plate with a thickness of at least 5 mm.
To prevent the house from falling apart due to movement and lifting, each log is secured vertically with nailed boards, which create additional rigidity. Raising the house occurs in several stages. At each of them, the house is raised only 1.5 cm. After each lift, the position is additionally fixed with timber supports, and the house is checked for damage. The process of raising a house to the required height takes a long time and requires caution in everything. After raising the house to the required height, it is firmly secured and work begins to update the foundation.
Replacing the bottom crown of a wooden house
Repair work to restore the sagging foundation of an old wooden house also requires replacing the lower crowns. As a rule, a settled foundation leads to the development of wood destruction due to strong moisture. To do this, 2 layers of roofing material are laid on the foundation. Old crowns are removed and replaced with new ones impregnated with antifungal compounds. Then the house is lowered on one side and raised on the other, repeating all the steps.
Features of repairing a linear foundation without raising the house
Foundation strengthening scheme.
A brick or stone house cannot be lifted and requires a careful professional approach.
If the monolith is cracked in several places and this does not lead to a violation of the integrity of the building, and the cracks that appear do not increase in size, then they are rubbed down with cement mortar. If the house is deformed, then the foundation is completely or partially replaced, or it is strengthened - it all depends on the degree of damage.
Diagnostics
So, the foundation and wall are cracked - what to do? First, it is necessary to establish the cause of this phenomenon. It is determined by the appearance of the crack.
We suggest you familiarize yourself with: Drainage device in a bathhouse - All about the bathhouse
If there is a crack:
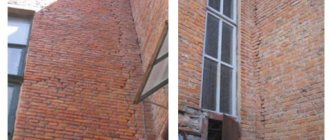
- located vertically, diverging upward - swelling of the soil occurs in this place;
- vertical, diverging downwards - there is subsidence of the soil in the middle of the house, or swelling at the corners of the wall due to lateral freezing;
- inclined, directed from the center to the corner - subsidence of the backfill of the adjacent wall has occurred;
- several cracks converging in the form of an arch - soil subsidence occurred in the central part of the monolithic strip.
Repair of the foundation of a slag-filled house
The main goal of repairing the settled foundation of a stone, brick or slag house is preventive action aimed at preventing further shrinkage of the weakened foundation. Strengthening the foundation is carried out through the creation of a monolithic enclosing and reinforcing belt - an overlay - on the inside and outside. This allows you to correct subsidence of the base, which leads to through cracks in the ceiling, walls, and corners of the building.
Procedure
Strengthening should be done as follows:
Scheme of strengthening the foundation by injection.
- dig a trench around the perimeter 40-50 cm wide, at an angle of 35°. The base of the foundation is not disturbed;
- the monolith cleared of dirt is cleaned of dirt, old plaster, and destroyed parts of the foundation and base are removed;
- the surface is treated with a deep penetration primer;
- drill the entire foundation every 60-120 cm horizontally and in 3-4 rows in height;
- drive in reinforcement 2 mm larger than the drill, total diameter 10-14 mm;
- horizontal reinforcement is secured by welding;
- fill deep cracks and damaged areas with concrete;
- a metal mesh for plastering work with a large cell pitch is attached over the reinforcement;
- if the foundation is generally strong and has just begun to settle, it is plastered;
- if there is significant destruction and sedimentation, then install the formwork at a distance of 5-15 cm from the foundation and fill it with concrete;
- after the concrete has hardened, waterproofing is applied;
- The trench is filled in and each layer of 15-20 cm is carefully compacted.
The entire sequence of these actions leads to an increase in the bearing capacity of the foundation.
Using new technologies to restore brick foundations
Shotcrete concrete is a regular concrete mixture that is applied to the surface of the damaged area by shotcreting with a special installation. It forces the concrete mixture through a nozzle under high air pressure and the concrete is sprayed onto the surface. This increases the strength of the concrete foundation wall. It is used in the repair of brick foundations.
First, a trench 2 m wide is dug. The base is cleaned, the destroyed pieces are removed, notches are applied to the foundation and covered with a mixture under pressure.
The next method is cementation, which is necessary when the monolithicity of the masonry is damaged over the entire thickness of the strip foundation. It is used to remove voids and damage inside the monolith. To do this, holes are made in places of destruction and liquid concrete is poured into the recesses with a syringe under pressure.
To widen the sole, mark out 2-3 m in length at the base. One by one, they open the foundation, clean the surface, dig a trench around the base, which at the end of the work is covered with crushed stone. Pins are inserted through the holes to connect the foundation and the brick wall by welding a metal beam. Formwork is placed in the trench and concrete is poured.
How to understand what the builders of your home saved on?
The long search for a suitable option has finally been crowned with success! You have found a cottage that suits you with its location, layout and price, and the surrounding areas are wonderful. Are you ready to shake hands with the seller? Wait, take your time! Walk around your future home again and try to take a closer look at it!
Attic and attic
Let's start with the attic. Do you know how to get there without removing the roof? Is there access to the attic directly from the house?
If not, demand that such a door be made. Sometimes problems arise in a cottage that can only be eliminated by going into the attic. Typically, such problems are associated with the spring melting of snow, when streams run along the walls of the cottage along with spring streams - this is melting snow brought under the roof by winter snowstorms.
Heating system
Look carefully at the radiators. Do they all have taps? Is it possible to turn off any of them without turning off the heating in the entire house? Just imagine if the battery breaks in winter, and to replace it you have to turn off the heating in the entire cottage!
Don't ignore the gas boiler. It would be better if it was under warranty. Make sure that its power is sufficient to heat the entire area of the cottage.
Window
Take a closer look at the windows. If a beam is placed on top of the window, and not a metal ceiling, then a small gap should be left above the beam, filled with insulation. Otherwise, there is a high risk that when your house shrinks, the window will stop opening (this is at best, and at worst it may even crack).
The gap should be filled with insulation, and not polyurethane foam, if you don’t want the wind to blow freely in your house in a year.
Plumbing system
Next, examine the water supply system. Find out how deep the well or well is, what pump is installed there, what its power is, ask for documents for it. A new pump can serve you for 10 years, but an old one is too unpredictable!
If the well is located outside the house, then make sure that the pipes leading from it to the house are buried to a depth of at least 1.5 meters (if you live in cold areas, then even deeper), otherwise the water in the pipes will freeze in winter.
Where is the septic tank located? It should not be near the well for sanitary and hygienic reasons. The ceiling over the septic tank should also be sufficient so that it does not freeze even in the most severe frosts. Also inquire about the volume of the septic tank.
Technical premises
Does your cottage have a basement? If not, then the builders saved a lot, and this cottage will cost you less, but think, maybe it’s better to find another option? In a cottage, the role of the basement can hardly be overestimated.
How is the boiler room arranged? Is the boiler and boiler powerful enough? Is there ventilation in the room? Voltage protection system, fire sensors?
Where is the garage located? If it is attached directly to the house, or is located in the basement, check the tightness of the garage walls, since all odors will easily penetrate from there directly into the living areas. Such aromas will especially irritate your household in winter, when the car is warmed up in the garage.
Pay attention to detail
Developers most often save on small things: they “forgot” to install handles on double-glazed windows, caps on radiators, hinges on interior doors, sockets for light bulbs, taps on pipes, etc.
Yes, all this may seem like “nonsense,” but you will have to shell out a considerable amount of money to purchase all this in the very first days, and there is no guarantee that you will immediately be able to find the “construction stuff” you need in the store.
