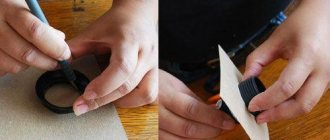
It's hard to find a home or office that doesn't have space for paintings and photographs. But simply attaching a photograph or a masterpiece of art to the wall will be ugly and absurd. It is precisely in order to frame photographs and paintings that frames were invented. With their help, you can refine the interior and add comfort to the premises. Nowadays there are millions of frame options in stores, but it is not always possible to find what suits your home. That is why we will tell you how to make a frame with your own hands, while spending a minimum of money and effort. You need to start by choosing a design for your future craft.
How to make a baguette for a picture with your own hands
A baguette is a modular structure made of wood or polyurethane foam. Let's look at how to make a baguette frame in step-by-step instructions. Polyurethane molding for work can be purchased at any hardware store. The approximate cost of one meter is from 45 to 50 rubles. We will need 2.5 m. In addition, to increase the strength of the frame, you can purchase special steel corners.
| Illustration | Description of action |
| The first stage is measuring the canvas itself or our painting. In our case, this is a pattern embroidered with rhinestones. | |
| We transfer our dimensions to the base, which can be made of plywood or a piece of fiberboard. | |
| We cut the base to our size and sand the edges. | |
| It is best to paint one side in light shades, then the light fabric will not lose its whiteness. In addition, it is also better to use transparent glue. | |
| We apply our canvas, carefully leveling the edges and pressing lightly. You need to wait about 40 minutes for the glue to dry and set. | |
| Next, we cut the molding at an angle according to the size of the canvas. | |
| We fasten the workpiece under the frame with small screws at the corners. | |
| This is the kind of stretcher we got for the baguette. All that remains is to attach the base. | |
| We fix it with special corners - our picture is ready! |
Related article:
Making your own wooden picture frames
The work process is practically no different from making a subframe, with the only difference being that special corners and special elements for fastening are additionally created for the frame.
If you have a miter box on hand, it greatly simplifies the work.
If you purchased a completely finished picture frame, you just need to assemble all the elements.
Wooden frames can be both simple and sophisticated
Making your own picture frames from polyurethane foam
If you want to get a simple, but at the same time beautiful design, you should consider a frame option such as polyurethane. In fact, any ceiling corner will do. The main thing is to cut the corner correctly and beautifully. To do this, the knife must be heated.
Perfectly smooth edges can only be achieved thanks to the high temperature of the blade.
The advantage of such frames is that they are very light; in addition, the choice of ceiling plinths is so diverse that you can create a frame in almost any style - from strict classics to elaborate baroque.
Types of baguettes for paintings
After all the parts are ready, they are glued together with PVA glue.
Today you can make baguettes for photographs and paintings with your own hands. The most popular material for implementing ideas is wood; frames can also be made from plastic and metal. Wood is the most expensive material, but at the same time the highest quality, durable and beautiful. A real classic type baguette is made only from wood. It can be made in a modern minimalist style or more elaborate with intricate carvings that would be great for an antique Renaissance painting.
A wooden frame is a universal option; it can be used in any interior . It is best to take wood from deciduous, tropical, and coniferous species. The ideal option is pine, ramin, exotic ajos. The wood must be dense and not form cracks or chips during processing.
The wood must be selected so that it does not absorb moisture, is not subject to temperature influences, and is durable.
You can make regular classic, reverse, flat, or service profiles from wood. The surface of the frame can be coated with varnish or paint, you can use special oils, silver or gold coating.
After the frame is ready, it needs to be decorated, this can be done by painting it with acrylic, or by gluing beads or shells on it, gilding it or aging it.
Aluminum is a cheaper option for frames, but there are some limitations. Such metal products are not decorated as richly as wooden ones; design options are limited. Stucco molding and other decorative types of decorations are not used for metal frames. Usually they are simply painted or varnished, covered with special films. Aluminum moldings are not always suitable for home use; they are usually used in office premises.
An aluminum baguette is perfect if you need to design posters, large photographs, diplomas, posters, and graphic images. The advantages of aluminum frames are as follows:
- high quality and strength of the frame;
- low profile weight;
- the ability to use special paints that literally saturate the material.
Related article: How to choose a blanket based on filling?
Step-by-step instructions for making it yourself
Now you can proceed directly to production. Let's consider various installation options.
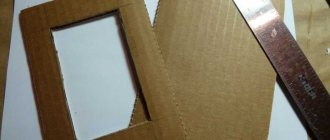
Regular cardboard frame
DIY photo frames made of cardboard can be simple or with complex decor.
First you need to take two sheets of cardboard on which the markings will be made. To do this, you need to attach a photo and use a pencil or pen to draw a diagram.
You need to cut out the front and back of the frame from a piece of cardboard.
Keep in mind that marks should not be made strictly according to the size of the photo, but two to three centimeters larger. And if large-scale decoration is planned, then it is better to retreat 5-7 centimeters. The frame can be rectangular or square.
The craft should be deep enough so that the photograph or painting looks good. To do this, you need to glue the cardboard strip so that it is between the first and second layers.
You should end up with blanks like the one in this photo.
Now you need to start making the legs for the frame. To do this, you need to draw it and then cut it out using a stationery knife. The leg is attached to the back side. If the frame is hung on the wall, you need to attach a thread or a small hook. Done, now you can start decorating.
All that remains is to decorate the photo frame to your taste.
Volumetric frame
Such designs look very attractive and elegant. To make them you will need everything the same as for a simple frame. The manufacturing steps are identical.
Those who have learned how to make simple photo frames can make more voluminous compositions from cardboard, ready-made templates for which can be easily found in any stationery store.
There are only some exceptions: you need to cut the pieces a little larger than necessary, bend the edges and connect the two parts so that you get a three-dimensional structure. Such a voluminous frame will look great if decorated with voluminous flowers or buttons. This method is good for making kindergarten frames for text and pictures.
Using this method, you can make your own chic photo frame-book.
Photo frame made from cardboard egg boxes
The frame can be made from almost any available materials, including an egg carton. It can be used for decoration, but it is not suitable as a base.
Egg trays are an excellent material for creativity.
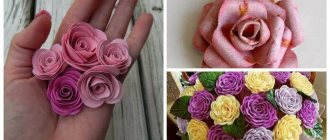
Flowers are made from an egg carton. To do this, cut out the cells so that you get petals. From other cells, cut out smaller petals and fasten the elements together with glue to form a rose. Ready. Now the flowers can be glued to a simple or three-dimensional frame.
Every home has at least one cardboard box and glue with scissors.
Roses will look great if you paint them or cover them with glitter; you can additionally use green ribbons as leaves.
Wooden frame with passe-partout
Any wood can be used for the frame with mat. The product is manufactured in the following sequence:
Using cutters you can make different patterns.
- First, the dimensions are measured with a ruler. If the edges of a photograph or painting are slightly worn, it is best to trim them slightly.
- On thick cardboard, use a pencil to mark the position of the photograph. After marking, the resulting rectangle is carefully cut out. It is allowed to use scissors, a special stationery knife with replaceable blades. A special cutter designed for working with mats is best.
- Using a jigsaw, 4 elements are cut out for the future frame. The internal end corners are made at an angle of 45 degrees. It is necessary to ensure that the edges are even and smooth, otherwise, when gluing, a high-quality connection will not work.
- A small amount of wood glue is carefully applied to the ends, the elements are connected to each other, and clamped with clamps.
- You can use glass for the frame, which will protect the photo or painting from damage. You can cut the glass yourself; for convenience, use a glass cutter. From a specialist you can order not just smooth glass, but glass that is already decorated. This frame will become even more attractive and stylish.
- To install the glass, special grooves are first made on the back side of the profile. The grooves are marked to a depth equal to the thickness of the glass.
- On the front side of the product you can provide original decoration. There are many options, you can use your imagination if you wish. The frame can be painted, gilded or varnished. The simplest option is to varnish the wood. To do this, first polish the surface and remove all dust. After this, the wood is carefully varnished with a brush. You can use both transparent mixtures and those with any shade.
- When everything is ready, you can start assembling the frame. If the product is dry, it must be carefully laid face down. After this, glass and mat are placed on top (it should fit tightly to the wood). A photograph or painting is attached to the back of the passe-partout; a second piece of thick cardboard, thin plywood, or a piece of fiberboard is used to fasten the back part. The backdrop is attached to the product with small galvanized nails. It is necessary to ensure that the nails do not pierce through the frame. You need to attach a loop or hook from the top. If the frame will be used for a shelf or table, then it is best to provide a special stand instead of a loop.
Related article: Shower corner - DIY installation
How to make a photo frame with your own hands for dad on February 23
The product can not only decorate your home, but also become an excellent gift for any holiday. For example, every dad will be touched if on Defender of the Fatherland Day his son or daughter gives him a photograph in a handmade frame. To make the present thematic, you should use appropriate details: camouflage or stars. A good solution would be a combination of the three colors of the flag.
The photo frame will be original if it is made using the origami technique.
Required materials:
- double-sided sheets of red, blue and white;
- pencil;
- scissors;
- ruler;
- glue.
Detailed explanation of how to make a gift:
- Prepare 4 pieces of each color measuring 10x10 cm. You should get 12 squares in total.
- First fold one piece of paper in half, and then fold it in half again.
- For convenience, mark the point of intersection of the fold lines. Fold all corners to this point.
- Fold the resulting square in half again.
- Bend one of the corners, as in the picture.
- Turn the workpiece over to the other side and raise another corner.
- Repeat these steps 12 times to make the required number of modules. Then assemble the circle by inserting the two corners of one element into the two pockets of the other. For reliability, you can lubricate the inserted parts with glue.
- Cut out the photo in the shape of a circle and paste it into the craft. If desired, you can attach more tape.
The size of the product can be adjusted by increasing or decreasing the number of modules.
Small options
If you need small photo frames, then, as mentioned above, they can be made from cardboard or from small slats. To make such frames more cute, fabric that can be used as upholstery and cotton wool, which can be used to fill such a frame, will help. You will also need: pencil, scissors, ruler, heat gun, needle, thread and cardboard. The required dimensions of the slats are cut from the slats.
Article on the topic: We knit for small breed dogs according to patterns with descriptions
They are connected into a frame, and since all this will be decorated with fabric, the type of these slats does not matter at all. Cardboard will replace plywood, and the backing is cut out of it. And from the fabric, strips are cut out that correspond to the size of the slats, but 3 cm are added to each such strip, 1 of which is for seams and 2 for filling with cotton wool. The fabric strips are sewn together and placed on the frame. All voids are filled with cotton wool, this is done evenly. Then all that remains is to insert the photo, secure it with a cardboard wall at the back and start decorating.
Window frame photo frame
Yes, you are reading absolutely correctly - you can make a unique panel in the shabby chic style from an ordinary window frame. To do this, of course, you will need an old window frame, which you don’t even need to paint - cracked paint and chips will become the “highlight” of the product.
The frame needs to be disassembled, one large photograph or several small ones must be inserted, depending on the number of windows. The photographs must first be glued onto a sheet of cardboard or thick paper. It is better to choose black and white photos - they will look harmonious with your “antique” luxurious frame.
Now all that remains is to assemble the product and find it a worthy place on the shelf of the living room or bedroom.
How can you frame a painting?
In general, there are three types of design for paintings:
- simply attach it to a stretcher without any frame;
- can be arranged in a baguette;
- can be issued in a passe-partout.
A painting on a stretcher without a frame looks good only if it is hung in a modern interior. Frankly speaking, without a frame the picture turns out to be a little under-formed. But some people like it - we have to admit it.
Baguette is a classic design for a picture. These frames are made of wood or plastic and can sound both modern and vintage, depending on the type of frame.
A passe-partout is a wide frame made of cardboard, white or colored. It can give a painting one or another mood, depending on the color and width.
Often the frame combines both a baguette and a passe-partout . This looks very interesting:
Where to choose a frame so that it fits in size and at the same time elegantly complements the picture? The ideal option is a custom frame.
Making from cardboard
The most popular material in school labor lessons was cardboard. This is where you can start learning how to make frames. It is better if it is corrugated cardboard - the frame will be of higher quality and more durable.
What you will need besides cardboard:
- stationery knife;
- scissors;
- glue gun;
- selection for the final decor at your discretion (glitter, decorative 3D stickers, buttons, scrap paper, regular acrylic paint, and so on).
The step-by-step instructions are quite simple.
- You need to cut a frame out of cardboard according to the size of the painting or photograph. The width of the frame will be arbitrary - it all depends on the intended result.
- The scrap paper is placed face down on the table, and a cut-out cardboard blank is placed on it.
- Use scissors to delicately cut off the outer corners, and make diagonal cuts inside with a stationery knife.
- You need to fold the outer edges of the paper.
- Cut off all excess around the product and bend the internal borders. This must be done slowly so that there are no defects or irregularities anywhere.
- First, the inner borders must be glued to the frame, then the outer ones.
- This option, which will be obtained after these steps, is already considered a finished frame. But you can also customize the product at your discretion.
The cardboard base can simply be wrapped with thread, covered with natural material (acorns, nut shells) or simply painted in several layers.
Paper frame
These types of frames are the most common and are very popular among both children and adults. They are easy to make, but at the same time very beautiful and original.
By doing this work with your children, you will have fun, and the children will gradually learn something new and interesting.
Here is one way to make photo frames from paper. For the first job you need the following things:
- multi-colored paper;
- glue (hot glue may also work);
- scissors;
- old plain frame;
- toothpick.
Let's get down to business:
- cut sheets of multi-colored paper into strips (they should be about 1-1.5 centimeters long);
- the strips must be folded in half and twisted with a toothpick, but if you don’t have one on hand, you can do without it;
- After you have twisted the strips, glue their edges with glue. There should be a large number of such rolls so that it is enough for the entire frame;
- then randomly glue them all over the frame.
Stretching canvas with a blank painting by numbers on a stretcher
Recently they approached me with a problem: they bought a painting to paint by numbers, but it turned out to be without a stretcher. Just a canvas on a roll.
To begin painting the painting, it was necessary to find a stretcher and stretch the canvas onto it.
The size of the painting is 40x50 cm. It was possible to make a new stretcher, but it would have required waiting several days. Since they asked for the painting to be done urgently, they didn’t want to wait for the stretcher to be made, so we had to take a ready-made industrial canvas on a stretcher, remove the canvas itself, and use the stretcher to stretch the painting.
After removing the canvas, it turned out that the modular industrial canvas stretcher was secured at the corners with double staples. This is one of the reasons why such a subframe cannot use wedges for tensioning!
Subframe on the reverse side:
Now I’ll tell you how canvas is stretched on a stretcher and what is needed for this.
The tools we will need are:
- stapler;
- staples for the stapler;
- hammer;
- spray.
First, let the canvas rest a little and straighten out in its unfolded form:
It is often recommended to dampen the canvas from the reverse side. When moistened and then dried, the canvas itself stretches. But it's worth doing if you're confident that you'll get everything tight quickly.
Otherwise, when drying, the canvas may stretch unevenly.
The next stage: we place the stretcher on the canvas, from the side of the drawing, in the center of the image of the painting:
On the reverse side of the canvas we make marks along the edges of the stretcher.
It turns out something like this:
The marks along which we will place the stretcher look like this on the back of the canvas.
Now place the canvas face down on a flat surface. I had a furniture panel at hand. Still in plastic packaging. I used it.
Using the resulting markings, we will place a stretcher on the canvas. The stretcher should be positioned with its shoulders (protrusions of the profile) to the canvas.
Now you can start attaching the canvas to the stretcher. We fold the canvas onto the stretcher and place the first staple with a stapler in the center of the long side of the stretcher. Without stretching the canvas! If the staple is not driven in completely, we finish it off with a hammer!
The whole thing looks like this.
Then we fold the canvas onto the stretcher from the opposite side and install the second bracket. At the same time, we stretch the canvas with all our strength by hand! Only with your hand! Do not use the tool! To stretch canvas with a special tool, you need skill. Otherwise, you can simply tear the canvas.
When stretched, a fold should appear on the canvas in the form of a stretched strip from one staple to the other:
We turn the stretcher with the canvas over and check what happened.
It is necessary to check: - that the pattern is located in the center of the stretcher, - that the threads of the canvas are perpendicular to the sides of the stretcher (for canvases without a pattern).
If the picture has moved somewhere, then remove the installed staples and repeat the previous operations again. If everything is in order with the drawing, then we also install one bracket on the other two sides of the subframe. What strength do you have when stretching the canvas with your hand?
Again we turn the stretcher with the canvas over and check if the drawing has moved somewhere.
In the center of the canvas you can see a cross from the tension of the canvas between 4 staples.
Then we continue to install the staples one by one. Each specialist puts them in his own familiar sequence. For our canvas size (close to a square), the following is more suitable: - first, on one long side we place one staple to the left and to the right of the initial one, - then we also place staples on the opposite side of the stretcher, - then we also do it on the short sides.
At the same time, do not forget to continue to tightly stretch the canvas with your hands when installing the staples.
We don’t reach the very corner with staples! The result should be this.
Let's check the picture again from the front side.
We checked. Everything is fine.
Now let's move on to decorating the corners of our picture. In the corners, we drive the brackets along one side of the subframe (for example, along the short one) almost to the very corner. And on the other side, not reaching the corner 4-5 cm. This is necessary so that you can bend the canvas at the corners of the picture and tuck it inside.
The canvas can be trimmed at the corners, but I usually try to wrap it entirely without trimming. Sequentially securing the folds of the canvas with a stapler.
At the end, we fasten the canvas at the corners with additional staples.
As a result, we get this angle.
The work is almost finished.
But on the canvas, especially on the inside, tension unevenness is visible. And it's not very tight.
To fix this, you now need to wet the canvas. This only works for pre-primed canvases! To do this we use a spray bottle. I took it from my wife. She sprays flowers with it.
Wet the canvas from the back side with a spray bottle. Not too much, so that there are no water drips! Like this:
As the canvas dries, it straightens and stretches.
All! The painting by numbers is stretched on a stretcher and is ready to go!
This option of stretching canvas on a stretcher is called “gallery” stretching. It allows you to color the side ends of the canvas. Therefore, such a finished painting can be hung on the wall without being framed. There will be no ugly unpainted ends on it. Just like this one:
Master class on making a children's photo frame
When there is a child in the house, you want to fill all the shelves with his photographs. But ordinary store decor is not cheap and does not always look beautiful. This problem can be solved with your own hands and a little imagination.
For example, in just one hour you can make a frame in the shape of a funny animal. The child will like to follow the process and help his mother.
Materials:
- white sheet for templates;
- thick cardboard for the base;
- multi-colored paper;
- ruler;
- glue;
- scissors;
- markers or pencils.
To get a cute teddy bear, you need to repeat these steps:
- Make templates from scrap paper. Their size should be calculated based on the size of the photograph: it is indicated by a rectangle on the template.
- Lay out the parts on cardboard, focusing on the photo. Trace the silhouette of the bear and cut out to create a solid base.
- Cut out parts from paper of the desired color according to templates, not forgetting about the spout.
- Glue the ears and body onto the cardboard cutout.
- Mark the outline of the photo and apply glue to three sides of the frame. Attach the head, leaving a hole for the photo card.
- Using paper and a felt-tip pen, add the remaining details.
- Attach a stand made of thick material to place the photo on a table or shelf.
Master class on making a frame yourself
Let us describe the easiest way to create a photo frame from cardboard with your own hands. Please note that the cardboard used in the work is the most affordable option for creativity.
Even if you don’t find the material at home, you can buy it at any nearby supermarket. So, to work you will need:
- Durable cardboard.
- Stationery knife.
- Glue.
- Felt pen.
- Decorative paper.
- Rhinestones, beads, shells for decoration.
The process of making a paper photo frame with your own hands
We suggest making a basic three-dimensional frame that can be decorated in any way to suit your interior.
What you need to prepare for work
You don't need anything special except scissors, a printed template and thick paper or colored cardboard. Just a little time and accuracy.
Step by step process
To make a good photo frame with your own hands from paper, you need to download and print the template below.
PHOTO frame template: 33-podelki.ru
If for some reason it is impossible to print now, just take a photo, trace it along the outline, and leave stripes 1.5 and 1 cm wide on the sides. It is necessary to make recesses, similar to template ones.
If you have a ready-made template, you need to transfer it to cardboard. We bend all the lines and wrap the sides of the structure, and we do everything clearly and accurately.
We do everything strictly step by step PHOTO: 33-podelki.ru
It is convenient to fold, ironing the folds with a ruler PHOTO: 33-podelki.ru
Let's fold the short sides first, and then proceed to the long ones. You will have to insert the corners of the long sides into the corners of the short sides. PHOTO: 33-podelki.ru
For glossy and overly thick paper, it is better to first insert a photo, and only then begin the process of folding the sides. It is not forbidden to attach the structure with glue or double-sided tape for greater strength.
The frame is ready PHOTO: 33-podelki.ru Related article:
How to decorate a paper photo frame with your own hands
Making a DIY photo frame is not particularly difficult. You can decorate paper with anything, but the decor should not be too heavy. Let it be inscriptions, stamps, glued buttons, paper flowers. When decorating it in a modern style, you can paint the frame with chaotic abstract elements using a regular marker.
How to make a photo frame
The process of creating a photo frame from wood with your own hands is quite creative. Therefore, different methods are used to obtain the final result.
DIY wooden photo frame.
First way
Least labor intensive and easy to use.
- First of all, you need to choose the right fittings from which the future photo frame will be made. To make a wooden frame, you will need wooden slats, glue, paints, sandpaper, and staples for a stapler.
- Of course, it’s also worth paying attention to what size the future frame will be. Next, the same length of all four sides of the future product is correctly measured. After which the edges of the slats are filed at an angle of 45 degrees.
- Then, using staples, the two sides of the frame are connected, so that the joint becomes barely perceptible. But this is not enough; the sides of the future frame should be coated with glue before connecting them with staples.
- After the glue has dried, you can start decorating the frame. In this regard, everything will depend on your own wishes and imagination.
- After decorating the frame and gluing the selected decorative elements to it, you can place a photograph in it. This can be done using a stapler, and the photo must first be laminated. This will allow you to maintain its appearance for as long as possible.
Second way
The next method is more labor-intensive, although the initial principle of operation is the same as in the first case. But this version of the frame requires the presence of a baguette. First of all, wooden blocks of the same size are glued together, then the same bars are glued together, but of smaller sizes, for the second frame. The result is an object that looks like a box.
The decorative elements of a wooden photo frame can be very diverse.
The joint that connects the two frames is glued with a decorative baguette. It is coated with glue twice before use. After drying, the wooden frame can be painted at your discretion. The result is an unusual and original product.
An item made with your own hands always brings more joy and satisfaction than something bought in a store. For example, a picture frame assembled with your own hands will always evoke more positive impressions.
A frame with your own hands can also be made using a special woodworking machine, where you can cut out beautiful patterns and create an unusual ornament. But this is usually done by craftsmen who have experience in this type of work.
Tips for making your own photo frame
To create a special photo frame, almost any objects that surround you are suitable. The design idea, as well as the method for its implementation, can be found on the Internet or come up with yourself.
We offer some tips that may be useful to you:
- First you need to decide on the size and type of frame. To do this, you need to decide where exactly it will be located (on the desktop, wall, mantelpiece, window sill, in the nursery, living room, etc.). This will help you choose a style and size that will allow the photo frame to fit into your decor.
- Choose the execution technique and materials from which an interesting product will be created.
- Find out the features of the things that will become the basis of your masterpiece (how to store, what to combine with, attach, etc.).
- Clear your workspace and prepare everything you need for work so that nothing gets in the way and everything you need is at hand.
- In a creative mood, begin the process of creating your masterpiece.
Handmade Frame Ideas
As mentioned above, the frame can be made of any material and adjusted to any photo size.
Here are the most affordable ideas for DIY frames made from scrap materials:
- Frame of molds made from burlap. These could be, for example, roses.
- Photo frame made of artificial or fresh flowers. The second option, of course, is not practical, but it will be perfect as a gift for a celebration.
- Frame using knitted elements - shapes, colors, patterns and ornaments.
- Frame made of tree bark, for example, birch bark.
- Photo frame made of thin twigs and moss. Such a decorative element will bring naturalness, freshness, and a piece of nature into the room.
- A frame made from large, untreated pieces of tree trunk will also look interesting in the interior.
- Frames made of thick threads or yarn.
- Frame made from boards from a pallet.
- A clock or alarm clock as a photo frame is a very original idea, especially if you have an antique metal watch.
- Frame made from Japanese cuisine chopsticks.
It is worth noting that photo frames made of wood are universal and environmentally friendly; in addition, they will fit perfectly into any interior.
Templates and options for making a do-it-yourself photo frame from cardboard
To bring creative frame design ideas to life, you must first learn the basics. That is, you need to learn how to make a regular rectangular frame from cardboard.
It must be neat and strong in order to please the eye for many years.
After this, you can experiment with materials, shapes and colors, creating a unique decorative item. There are two options for making the base: the first is suitable for small photos, and the second is for large paintings or portraits.
First way
Necessary materials:
- cardboard;
- scissors and stationery knife;
- ruler;
- glue;
- pencil.
Instructions for making a frame:
- Print the template on cardboard or redraw it by hand. Cut along the contour.
- Make folds along all lines. If the cardboard is thick, you should first go through these places with the blunt side of the knife.
- Roll the two short sides into a tube.
- Secure them with glue, spreading only the outer strip of the template.
- Carefully form one long side.
- Insert its corners into the holes of the short strip. This element is also secured with glue, adding it to the bottom edge or to the corners.
- Process the opposite long edge in the same way.
Office paper is also suitable for this craft.
In this case, you can do without glue at all, since the sides of the frame will hold each other.
Second way
List of required items:
- thick cardboard from boxes;
- large scissors or stationery knife;
- PVA glue;
- pencil;
- ruler;
- spray bottle with water;
- scotch.
You can make a strong frame like this:
- Remove the top layer from the cardboard so that the corrugation is visible. To do this, moisten its surface and remove the soaked material after 2 minutes.
- Cut the base to the desired size from the thickest material.
- Make a rectangular hole in the middle for the photo. Attach the door to the back using tape.
- Make several long strips of cardboard 1-1.5 cm thick. Glue them around the perimeter of the photo compartment and around the frame itself.
- Attach another piece with a hole on top, repeating the shape and size of the base, or add decor, as in the picture.
Which plywood to choose
For the photo frame you will need lumber - plywood. When choosing a workpiece, pay attention to common defects - knots, cracks, delamination and other defects. The thickness of the workpiece is determined by the dimensions indicated in the diagram. (the download link is at the end of the article) Before you start transferring the drawing onto plywood, you need to prepare a blank, for this:
- The workpiece must be sanded, starting with coarse grains and ending with finer ones.
- The surface must be smooth; to do this, secure the sandpaper in the sanding tool. Don't have a tool? – An alternative is to choose a flat and not large block wrapped in sandpaper.
- Sanding must be done along the layers of wood.
- Sand until the surface of the workpiece is smooth and smooth to the touch.
You may be interested in the article: Improving the quality of plywood.
Frame made of tree branches
We will need:
- thin branches;
- cardboard;
- glue gun or superglue;
- moss (real or decorative);
- decorative flowers;
- acrylic paints;
- craft varnish (optional).
To make such a frame, you need to take a responsible approach to the choice of material. Try to choose branches of one or two sizes (thicker and thinner). It is better not to take twigs with slippery bark, as over time they will begin to dry out, which will make them not very beautiful. And it’s more difficult to work with slippery bark. Dry branches collected from the ground rather than plucked from trees are best.
The blank for the photo frame needs to be cut out of thick cardboard (and several layers glued together) or plywood. Next, paint the future frame brown or any other color. The main thing is not to leave it white, as it will not look very nice.
Free the branches from excess bark and straighten them. Cut to frame size. Place four thicker branches as the first layer and glue them.
Next, lay out another layer of branches. Increase their mass on the photo frame gradually, gluing each one separately. If you are using superglue, the reliability of which you are not too sure of, fasten the branches together with wire. It is advisable to choose wire of an inconspicuous color or completely cover the finished photo frame with spray paint so that the fastenings are not noticeable.
Glue moss around the edges of the frame. If you don't have anything similar, add leaves or pine cones that can be pre-painted.
Add decorative flowers or beads, painting them with acrylic to decorate them with berries. At the end, the craft can be sealed with non-toxic wood varnish.
We prepare the picture in a passe-partout
The design of a painting in a passe-partout is no different from the design in a baguette. Except one. If you have the desire and skill, you can make a passe-partout with your own hands!
How to make a picture frame by numbers? For this you will need:
- thick cardboard, thin plywood or a piece of hardboard;
- construction gun;
- scrapbooking paper or colored cardboard.
We will make a backing from cardboard, hardboard or plywood. The format of the backing should be larger than the painting in order to create a wide border.
We will fix the picture on it using a construction gun.
On top of the picture on the backing we place a wide frame made of scrapbooking paper or colored cardboard.
Now just wait until it dries and you will have a wonderfully decorated painting.
Making a photo frame from wood
A wooden photo frame looks even more solid. Moreover, you don’t always have to go to the construction market to get the material - the original frames are made from branches. But the processed planks, of course, look great. Materials and tools:
- wooden planks of arbitrary size (to the author’s taste);
- PVA glue (but carpenter's glue will also work);
- hammer, nails;
- glass;
- blowtorch;
- a wooden block wrapped in sandpaper.
Making a wooden photo frame yourself is not difficult.
- You need to prepare 4 strips with notches in the connection areas. These planks must be well sanded.
- Glue is applied to the recesses of two planks, then they are folded into the shape of a frame, and small nails are nailed.
- The joints and end sides should be treated with a blowtorch. This type of work is recommended to be performed in the fresh air.
- The front side of the photo frame is also processed with a blowtorch.
- Now you need to take the glass and make markings on it for the future photo. According to this marking, glass is cut out for an almost finished product. The cuts are secured with sandpaper, which is fixed on a wooden block.
- The glass is secured on the reverse side with self-tapping screws. To ensure that the frame hangs securely on the wall, string is fixed in the right place.
- The finished frame can be coated with stain or varnish.
A frame made of twigs can turn out even more cute. The easiest way to make it is a thick cardboard base, to which the same base will be attached, only with a cut out core (as in the example above). Prepared branches are fixed to the side and horizontal cardboard edges of the frame using hot glue. They should be approximately the same diameter and length. If the making of the frame is timed to coincide with the New Year, the twigs can be made snow-covered (ordinary salt, which is sprinkled on the base of the twigs on the glue, will help).
Wooden frame with glass
It’s worth noting right away that to work with wood you need certain tools; if you don’t have a special machine, then you must have a saw, as well as a hammer and wood glue. After completing the rougher work with wood, you will need materials for its decorative processing - varnish or paint. Varnish will preserve the original appearance of the wood, while paint will add color effects. Well, and of course, those tools that everyone probably has in the house - a pencil, a tape measure, a ruler.
Related article: Weaving lids from newspapers with a colored pattern
The frame is made of wooden slats, its width is selected in a size suitable specifically for your case.
We cut it into four parts, two equal. Please note that for good fastening of the canvas in the frame, 5 mm should be allocated for this on the inner edge. Since we are preparing a frame with glass, we will need glass slightly smaller than the perimeter of the frame, and plywood, which will be the back of the picture. If the picture size is 30/20 cm, the glass will have the same parameters 30*20 cm, and the plywood will be 33*23 cm.
In order for the glass to fit tightly, you need to prepare a recess in the slats. After retreating 3 cm, a small lowland is sawed through. To join all the slats together, you should process the corners, cutting off unnecessary parts diagonally. For clarity, it is better to use an angled ruler. For tight joining, all sections are processed with sandpaper and then glued together. When the glue is completely dry, you can begin decorating the painting, covering it with varnish or paint. After each coated layer it is important to ensure complete drying.
When the frame seems to be completely ready, the last stage remains - sealing. The frame is placed face down on a clean surface, the glass and canvas are placed in their place, everything is clearly aligned. In order for all the elements to settle better, add a small press; ordinary cardboard will do for this. A sheet the size of a painting is placed on the canvas, and plywood is placed on this backing. When everything is combined, the edges of the frame are treated with glue. If you have a furniture stapler, secure all corners or hammer in small nails. Now your picture frame is completely ready. An example of creating a wooden frame can be seen in the video:
Paper photo frame
Paper can be not only the basis of a frame, but also a decorative element that attaches perfectly to almost any surface.
You can twist tubes from newspapers and magazine pages and stack them in a well (weave them or place them side by side). Paper circles of different sizes made using the quilling technique are used for decoration.
Three-dimensional frames, including double ones, will highlight the photograph and fit into the interior. An interesting technique in creating a masterpiece is the use of paper modules or paper with torn edges. If children are involved in the process of making the frame, then use applique.
What kind of frames are there?
There are two types:
- A baguette is a frame of standard formats made of wood or plastic. A correctly selected baguette will not only give the picture completeness, but will also fit perfectly into the interior. You can try to do it yourself - but the process is quite difficult and not everyone can do it.
- Passepartout is a wide frame made of cardboard and is often used in conjunction with a baguette. The mat protects against the negative effects of moisture, direct sunlight and various mechanical damage. It also gives an airiness to the picture, its perception becomes light and unobtrusive. If you choose dark, it will limit and narrow the space of the picture visually.
Wooden frame
Frames made of wood, popsicle sticks, plywood or wooden rods can be interesting, simple and memorable. If you decide to make such a frame, then you need to choose the right material, since a lot depends on it.
Here is one version of a DIY fake made from wood. For this you will need:
- a small piece of plywood left over from construction work;
- ordinary twigs, sticks (preferably they come from the same tree);
- glue (regular or hot);
- ruler;
- saw for cutting plywood;
- knife or scissors;
- plain paper frame template;
- a simple pencil;
- coating varnish.
Progress. Step 1. Preparing the base:
- First you need to select the size of the frame. Here you need to focus on the scale of the photograph itself;
- after you have decided on the size, attach the template to the plywood;
- carefully trace the template around the office with a simple pencil;
- cut the frame with a saw according to the markings.
Step 2. Preparing the decor:
- prepare the rods, saw the large ones and cut the small ones. The main thing here is to maintain the length of the rods (it should be the same) so that the future frame looks beautiful;
- Carefully glue the sawn rods parallel to each one along the entire frame.
- coat with varnish and wait until it dries.
Cardboard frame
Below are instructions on how to make a modest cardboard frame with your own hands:
- A rectangle larger than the picture is cut out of cardboard.
- A cutout is made in the central part, smaller than the picture.
- The frame is decorated by any known method.
- A rectangle is cut out of paper to cover the cutout on the back side.
- The rectangle is glued on all sides except one, through which the picture will be inserted into the frame.
- A loop or cardboard support is attached to the frame for installation on a horizontal surface.
The working process
Even those who have never engaged in such activities can figure out the question of how to make a wooden frame with their own hands. We'll go over the workflow to make your job even easier.
Preparing everything you need and cutting the workpieces
First of all, you need to select photographs, paintings, collages, embroidery and other compositions that you want to arrange in frames, this is necessary in order to take actual dimensions and make exactly the configuration that you need, and not to adjust the elements to a ready-made version , this is a huge advantage of homemade frames.
As for the process, it happens as follows:
If the photo contains mats (frames made of cardboard), then they need to be made in advance and the dimensions of the frames can be taken from them. With the exact parameters, you can move on to choosing the material for manufacturing; both wooden slats and other options are suitable; you can find many blanks on sale , whose price is low, they are perfect in our case;
Wooden unpainted baguette can have various configurations, which makes it an excellent material for making frames
Next, you need to take measurements, it is important to do this carefully so as not to make mistakes, otherwise the finished product will come out crooked. Make sure paired elements are the same size; Cutting workpieces at a precise angle used to be considered a difficult and painstaking job, but these days you can buy a miter box with a saw for little money and cut wooden elements very accurately and very quickly
The most important thing here is to use a saw with a fine tooth so that it provides the best cutting quality; the more perfect the edges, the better the elements will connect and the more attractive the finished product will be;
With the help of this simple device, cutting workpieces at an angle will be carried out very accurately and efficiently.
Lastly, on the back side of the blanks you need to select a groove for the glass; its depth should be 3-4 mm greater than the thickness of the glass so that it can be fixed with small nails.
Product assembly
The instructions for this stage are very simple and clear:
First, you need to connect the two elements and securely fix them, as noted above, the best method of fixation is to use a special corner clamp, with its help you will securely fix the parts in the desired position, and they will not move when dry, the geometry of the connection will be ideal;
This is how two elements are assembled; after drying, such corners are glued together
After gluing, you can begin further work, first of all, this is the decor of the wooden frame, here your imagination is not limited by anything, so the design style and the chosen color scheme depend only on you;
You can stick various pebbles and other elements onto the surface; it all depends on your taste preferences and the desired result.
To mount it on the wall, you can attach special eyes on the back side (they can be purchased at furniture hardware stores) or drill a hole along the diameter of the fastener so that you can simply put the frame on the head of a protruding nail or self-tapping screw.
Skirting frame
The following describes how to make a wooden picture frame at home.
Required tools, materials and supplies
During the work you will need:
- Wooden plinth or oval bars. They can be purchased at specialized construction stores. Costs, due to the short length of the workpieces, will be insignificant.
- A 2-3 mm thick sheet of cardboard or a fiberboard panel.
- Wood glue, varnish, stain, small nails or staples.
- Hammer, hacksaw, miter box, abrasive paper.
- Tape measure, pencil.
- Do-it-yourself dolls made of fabric - 145 photos and video description of how to sew a beautiful doll quickly and easily
- How to sew curtains for the kitchen - a detailed description of how and what to sew curtains for the kitchen from (video + 135 photos)
- Do-it-yourself felt toys: ideas, patterns, templates and felt patterns (135 photos and videos)
Stages of work:
- Measure the dimensions of the painting and mark 4 pieces of plinth according to them.
- Saw the resulting blanks at an angle of 45° so that when gluing, you get a rectangle.
- If there is no miter box, the cutting area is marked using a protractor or square. When sawing, avoid chipping.
- If you don’t have a wood saw, you can use a hacksaw for metal. In this case, the hacksaw blade should be pulled tightly, cut at a lower speed and more carefully to eliminate the risk of a defective cut.
- After sawing, the ends are cleaned with abrasive paper, and the dust is removed with a dampened rag.
Interesting ideas for creating a photo frame from improvised materials
A photo frame is one of those necessary things that can realize almost any idea of the creator. There are many articles and tips on how to make a photo frame with your own hands and what materials to use. Any frame, even the simplest one, will always be unique.
Here are some frame ideas that might interest you.
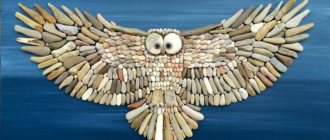
From sea stone
Due to the variety of sizes, shapes and colors, sea pebbles are an original and universal decoration. To decorate the frame, you can choose either different stones or elements of the same size, shape or color.
Pebbles can be decorated, drawings can be applied to them, or other decorative elements can be glued on them. The stones are attached to the base using epoxy glue, moment glue, rhinestone glue (it is odorless) or acrylic gel. But before attaching the material, the surface of the pebbles and the base must be degreased and dried.
If this condition is met, the beautiful stones will not fall off and the photo frame will please the eye for a very long time. Additionally, you can coat the pebbles with a clear varnish.
From tree bark
A frame decorated with bark or made from it will fit perfectly into a rustic and eco-style interior. The indisputable advantage of bark as a decoration is its availability, because it is available at any time of the year.
It is preferable to remove the bark from a growing or freshly cut tree, or you can wet dry wood. It is convenient to decorate a photo frame with small pieces of raw materials. This is creative and interesting work, because no two designs are exactly the same. Large pieces of thin bark can be wrapped around the base of the frame, and the solid material itself can serve as a reliable and original frame.
Dry branches as a decorative element
Dry branches, which many consider to be ordinary garbage, can become a very interesting decorative element. The different size and structure of the sticks will make each frame unique.
The twigs that will be used to make the frame should not be eaten by insects. The collected material must be well dried to avoid rotting and the appearance of various bugs. Before use, branches must be processed - painted or varnished.
Photo frame from a book
If you have an old unwanted book (for example, the pages inside are damaged or torn out), then it can become a beautiful photo frame.
To make such a masterpiece, just cut a hole in the cover that corresponds to the size of the photograph, glue the file on the inside and insert the image into it.
Thread frame
When decorating objects, preference is often given to textiles and threads. A frame wrapped in coarse yarn will fit perfectly into the rustic style of the room, and a combination of colored threads or melange is a great idea for a child's room.
Don't doubt your abilities and don't be afraid to come up with a masterpiece yourself. There are many master classes on the Internet on how to make a photo frame with your own hands. Whatever frame you make, it will be a unique and priceless handicraft made with soul.
Wood photo frame
A wooden frame will always win among others due to its appearance, and plus, environmentally friendly materials. And any photo in it will look harmonious. When the question arises of how to make a frame out of wood, you should understand that, no matter which version of its manufacture is chosen, it is the end result that is important.
Original do-it-yourself wooden photo frame.
Very often, in order to make a frame, they use a simple method of tightening it with a rubber band. That is, a tape tied in a loop glues together wooden blanks that must be sawed at 45 degrees. True, it is not always possible to complete such work the first time, since it requires certain skills.
Another method can be used. It requires a square sheet of plywood, along the edges of which beams are screwed. They should be located at an angle of 90 degrees. With their help, already prepared elements of the future frame are pulled together and glued together. After tightening, you need to check how the corners of the frame are located relative to each other.
Any frames made of wood will always be the best decoration for any photographs or any works of art, since wood is a very elegant and expensive material. It can always be an excellent gift and decoration for any interior.
