What style is suitable for decorating with beams?
Modern designers believe that decorative beams on the ceiling will decorate the interior of any style. They fit perfectly into both classic and trendy designs. It is important to choose the right combination. Decorators give preference to the following styles:
Classic interior. Smooth, solid wood beams on the ceiling will add sophistication, emphasizing the simplicity and austerity of the furniture and flooring. The combination of dark beams on a light ceiling, as well as painting the elements in delicate colors will add elegance.
The luxury of the style will be emphasized by decorating the beams with vignettes, carvings or paintings. Both load-bearing and decorative structures are suitable.
Modern. Modern design involves the use of classic models painted in bright, creative colors. False beams are used more often. The installation of lighting is welcome, allowing you to zone the room.
Country (rustic) involves the use of natural materials (stained wood, stone) or decorative structures designed to look like wood. Often the material is given an aged effect.
Victorian style. The aristocracy of the interior is emphasized by beams made of old-style mahogany.
Provence. Fans of French elegance will appreciate smooth, perfectly white decorative beams.
Loft and hi-tech. Beams imitated as metal in combination with brickwork will emphasize the laconicism and practicality of the style
- Ceiling with wooden beams
Types of suspended ceilings - which one to choose?
Options for finishing the ceiling in an apartment: advantages and disadvantages
Remember that the main factor when choosing a style is the area of the room. A variety of beam structures, creating a visual effect, can both increase and decrease space.
How to decorate a ceiling with beams
Using lamps you can effectively decorate a ceiling with beams. Based on the color and material of the entire structure:
- a wooden ceiling is an accent in itself: it is better to decorate it with the most inconspicuous lamps, but support the texture of the wood with other elements in the interior (for example, decorative animal heads made of plywood or MDF);
Suitable here
×
Sofa Charles Dorian corner
206 359 ₽
206,359 ₽ buy
Wooden ceiling with matching beams
- it is important not to overload a light ceiling with contrasting dark crossbars with details - here it is better to use inconspicuous spotlights;
Ceiling with black contrasting beams
- a black ceiling with black beams can be played up with matching track lights: together they will look like a single structure;
Black ceiling with black beams
- the white ceiling with matching wooden beams looks airy and gentle: this mood will be supported by elegant openwork lamps made of thin metal, wire, rattan or glass (one chandelier in the center will be enough);
Suitable here
×
Milk chair with soft armrests Soho
42 390 ₽
42,390 ₽ buy
White wooden ceiling with matching beams
- brown wooden beams will be complemented by a pair of massive central chandeliers made of crystal, bronze or gilded metal - choose the material based on your style;
Ceiling with wooden brown beams
- designs made of crossbars in bright colors or shades of metal require a laconic design: they are ideally complemented by minimalist LED strips that form a geometric pattern;
Minimalistic ceiling with metal beams
- high ceilings with beams can be decorated with pendant lamps of different lengths (this design will look best in a loft style).
High ceiling with beams
For which rooms are ceiling beams suitable?
Fashionable artists very often in modern interiors give preference to the design of beams on the ceiling, preferring not to hide the load-bearing floors.
This design solution is suitable for any room, be it an apartment, office or country house. They will perfectly decorate the kitchen, add zest to the living room and bedroom, and fit seamlessly into the office and hallway.
How to decorate a beam on the ceiling, what type and how many elements to use, depends directly on the area of the room used. Especially often, the possibilities of beamed ceilings are used for zoning space.
Features of beam installation
Decorative polyurethane beams are easy to install with your own hands. The advantage of installing false structures in the interior is associated with efficiency and ease. The weight of the structure is quite small. For fastening, elements of standard length are used, which is 3 meters. Only three wedge blocks are required for installation.
Related article: Burlap accessories: strength and design
When performing installation, you must adhere to the following sequence of actions:
- First, markings are made on the ceiling.
- Drill a hole in the wedge block with a diameter that is 2 mm smaller than the diameter of the screws.
- Screw the blanks onto the ceiling surface, maintaining a step of up to a meter.
- If you are going to join the elements, you need to secure the wedge at the joint.
- The surface of the wedges is carefully treated using an adhesive composition.
- Then the false beam is attached. For reliability, the false beams can be additionally secured with self-tapping screws.
Attention! If you plan to hide communications behind ceiling beams, make cutouts in the bars. It is through them that the wires are laid. But to ensure safety, you need to place them in corrugated pipes.
What are the benefits of beams in the interior?
Beams on the ceiling can perform not only a decorative function, but also become a useful part of it. This is clearly demonstrated by photos of beams on the ceiling. What are they good for? Let's look at just a few examples:
Visually change the size of the room, ceiling and wall height. To create the effect of a square area, beams and parquet are placed parallel to a short wall. Adding decorative elements to the wall visually makes the ceilings high. The arrangement of the beams in a herringbone and lattice pattern allows you to change the geometry of the ceiling.
Highlights functional areas. In a studio apartment, the dining area can be marked with a lattice of several beams. You can separate the kitchen and living room areas using a bar counter and a beam mounted above it.
Hide communications. Hollow structures help hide electrical wiring and pipes.
They become part of the lighting, acting as boxes for lighting fixtures, as well as chandelier anchors. LED lighting built into the beams looks harmonious in the interior, creating the effect of the structure floating.
Act as fastening elements. You can hang a chair, a curtain on them, or use them as shelves or stands.
Beams on the ceiling are an excellent design solution. The main thing is to decide on reconstruction, and a comfortable and cozy house will become an excellent place to relax from the hustle and bustle of everyday life.
Choosing material
There are various materials that allow you to make ceiling beams. The specific choice is determined by personal preferences and style features in the house. So, you can choose decor in Gothic, country, Provence or ethno style. Modern trends require new finishing materials.
Aluminum profiles are suitable for high-tech or constructivist style. Polyurethane and fiberglass are suitable for any style. They make it possible to imitate natural materials and install them yourself. Wood is suitable for a classic interior. If the room already has ceilings, you can simply decorate or paint them.
Polyurethane
This is one of the lightest materials. Ceiling beams made of polyurethane are resistant to changes in humidity and temperature. And thanks to the use of modern raw materials and new technologies, the result is complete resemblance to wooden structures. Modern manufacturers accurately imitate the texture of walnut, maple, cherry and oak. They are easy to install yourself. You can choose designs made to resemble aged wood with potholes and chips. They can also imitate a metal surface.
Tree
This is a noble and traditional material. Wood beams are often made from oak, alder, pine, larch or cherry. Expensive exotic species are also used, such as meranti wood with a light pink tint. They can be not only solid, but also hollow. In the latter case we are talking about false beams. For finishing, tinting, etching, rubbing and spraying are used. Installation to the ceiling surface is carried out using dowels or self-tapping screws. And elements of small thickness can be fixed using an adhesive composition.
Related article: Do it yourself: original ways to paint walls (+48 photos)
Fiberglass
This material is used where a fairly large profile is needed. This is an ideal solution that allows you to disguise utility lines. Installation of individual elements is possible in such a way that the joints are invisible. For this purpose, the ends are fastened with a special bandage kit. The structure can be fixed using screws or belts.
Aluminum
This is a light and lightweight material. Modern design trends are unthinkable without metal elements. Aluminum is a fairly strong and lightweight material. It can be represented by false beams, which serve a decorative role. But they can act as an overlap.
Options for the location of decorative beams
When it is necessary to visually expand the space, it is necessary to mount the crossbars across the room. If the room needs to be longer, beams should be placed along the walls. The arrangement in the form of a cross visually increases the volume. Attaching a single decorative beam to the ceiling allows you to separate an area for the bar counter, dining room, or kitchen.
The frequency of the links is of particular importance for the interior. If the height of the room is too high (usually on the 1st floors), then closely spaced beams slightly reduce it. At an average height, the crossbars are mounted at large intervals. Decorative timber can also be laid in the form of a Christmas tree. Attics without ceilings look impressive when the beams go through the columns and the ends are fixed in the walls. This creates a hut-shaped structure.
Interior zoning
A functional design solution involves proper zoning of space in the room. Let's try to name the goals that can be achieved in this way:
- Simple zoning is performed by placing one impressive beam between two operational areas in the room;
- Lengthening the room visually becomes possible by placing the beam parallel to a wide wall;
- The expansion of space is visually achieved by placing decorative items across the width of the entire ceiling;
- The ceiling is lowered when the products are fastened to opposing walls;
- Increasing the volume of living space occurs by simply placing a beam right under the ceiling;
- The volume of the ceiling will be given by a textured color to match the ceiling;
- It is possible to organize an original interior design by decorating a pitched ceiling or attic with decorative beams;
- The use of pastel-colored lacquerware with a smooth surface will help in the design of a classic design style;
- A slightly different type of coloring forms a modernist design style. You will need products in contrasting black and white tones;
- To design styles such as Provence, country or shabby chic, a light texture of the material is used. This decor is most popular in the bedroom.
Classification and advantages of false beams
Of course, it is not advisable to use decorative false beams in any interior, but the scope of their application is quite wide. In fact, the only limitation is the height of the ceiling - if it is too low, then it is not worth installing space-eating beams on it. In all other cases, their use will be appropriate.
Ceiling beams are classified according to the material of manufacture, depending on which the following types of parts are distinguished:
- Wooden
. The most expensive beams, but at the same time the most popular. False beams made of wood for ceilings are environmentally friendly, have excellent decorative properties and are practical. - Plasterboard
. Plasterboard beams are best suited for arranging structures of complex shapes - the material is very easy to process. In addition, the cost of plasterboard products is not very high. - Metal
. Metal false beams are relatively inexpensive when compared with products made from natural wood. Installing metal false ceiling beams with your own hands is more difficult than analogues made from other materials. The rest is all advantages, because properly processed metal has a long service life and high mechanical strength. - Polyurethane
. Polyurethane products are the cheapest option for beams. In addition to their low cost, such false beams are distinguished by their ability to well imitate other materials. Resistance to moisture and resistance to the absorption of odors allows the use of polyurethane beams in kitchens and bathrooms.
Installing false beams makes it possible to emphasize the size of the room. Too high ceilings can be lowered with the help of beams, as a result of which the room becomes more comfortable. It will be possible to hide some communications in the internal space of the products so that they are not visible from the outside.
In addition, it is worth noting the following advantages that are common to all types of false beams:
- Reliable and invisible fastening;
- Ease of installation (some types of beams are more difficult to work with, so this point is individual);
- Acceptable cost compared to natural solid beams;
- Versatility.
Wooden and slab false beams
As in the case of massive false beams, the dimensions of the beams are pre-selected based on the size and geometry of the room, and the layout diagram. Unlike timber beams, which can also be used to imitate load-bearing structures below ceiling level, hollow beams are used only for installation directly on the ceiling. This allows you to save lumber and make it in the form of a three-sided box. Like timber, the board for false ceiling beams must be dry; The box will not work, but seams on the product may appear, despite different fits and fasteners. To increase strength, the connection of elements is usually combined - fasteners and glue or a tongue-and-groove system reinforced with glue. Most often, it is a simple joint of elements and a connection to a block, since an angular 45⁰ or tongue-and-groove requires certain carpentry skills and a tool base that is not limited to a jigsaw; you will need a milling cutter and a special attachment.
The connection using bars with screws and glue turns out to be quite reliable, does not require special skills, diligence and accuracy are enough. And the side seams can be “hidden” using putty with painting or decorative overlays, or they can be emphasized by brushing, and they will be lost against the general background, as our craftsmen suggest.
skorohodovFORUMHOUSE Member
If you are sure that the wood for the false beam is dry, feel free to simply join it end-to-end. If you age (brush), even if the seams come apart a little, it won’t be noticeable. Good PVA plus self-tapping screws, place them at equal intervals and cover with a decorative strip (forged) with imitation of forged nail heads. You can look for old, time-worn boards, but be sure to check for the presence of parasites.
To ensure that the joint is even, the sidewalls are adjusted as tightly as possible to the base; if necessary, the bulges are removed with a plane and coarse sandpaper. The process of assembling a false ceiling beam consists of several stages:
- Fastening the mounting bars - screw them with self-tapping screws to the sidewalls in increments of 15-20 cm.
- Drilling for self-tapping screws - holes are drilled perpendicular to the previous fastening line for fastening the sidewalls to the base. The fastener spacing is maintained, but there must be at least 0.5 cm between the screws.
- Apply the glue according to the instructions, but the layer should not be too thin (it will not set properly) and too thick so that it does not leak out.
- Assembly - after the period specified in the instructions for the glue has been met, the sides of the false beams for the ceiling are connected to the base and screws are screwed into the prepared holes.
If you plan to artificially age the resulting box, before processing it is recommended to go over the entire surface with a sharp ax and make chips and nicks. They will add naturalness to the false beam on the ceiling and this, together with brushing, will create the feeling of time-worn wood, and the seams will become almost invisible. One of our forum members even glued the sides together, and it looks very organic.
GOOSEForumHouse Member
I made it from 50x200 mm boards, aged, stained, and varnished for decoration. I even glued the corner beam together to create an imitation of a 200x200 mm beam.
Hollow beams to the ceiling are mounted on a frame beam or plasterboard profile along the entire length or in small fragments. The heads of the self-tapping screws are driven in, covered with putty and tinted; you can also use decorative overlays or fix the beam with transverse brackets - forged or leather. Using the same technology, beams can be made not from wood, but from board materials - plywood, chipboard, MDF.
Benn1FORUMHOUSE Member
According to my plan, I have decorative beam rafters - the beam is narrow and high, I couldn’t find any moldings like that, the solid wood is heavy and doesn’t fit. I ordered 16 mm laminated chipboard from furniture makers, I will assemble a U-shaped beam - from the inside there is a frame made of wooden blocks and installation to the ceiling or on an aluminum frame.
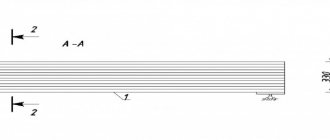
When it comes to slabs, the best option is a grooved connection between the sidewalls and the bottom. This method is shown in the drawing.
Homemade foam ceiling joists
You can make open ceiling beams yourself from polystyrene foam. This material is quite easy to process, light in weight and quite affordable.
The working algorithm here is as follows:
- Sheets of foam plastic are cut into strips of the required length and width;
- The resulting segments are glued together with liquid nails into a U-shaped structure;
- To give the elements a decorative effect, all that remains is to stick a wood-like film or any other texture onto the beam (its front side).
In the same way, you can make false beams from plywood or timber. In the second case, you need to purchase a sanded edged beam (it must be well dried), treat it with stain or varnish, and then cut it into bars of the required size.
Attaching false foam beams to the ceiling is also quite simple. First, the places where the ceiling elements will be located are marked, and then they are primed for better adhesion. Next, the logs are treated with liquid nails and fixed to the ceiling or wall.
