Advantages and disadvantages of a brick house
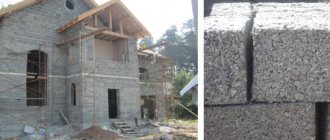
Photo of a sand-lime brick house
The construction of brick houses has been going on for many centuries, but has not lost its relevance today. Such a house will be reliable and cozy, and will also last for many years, which has been time-tested many times. The advantages and disadvantages of brick houses have long been known and have been discussed many times. But it won’t hurt to remember them once again:
- Let's start with the fact that brick is a small-format material. Consequently, its delivery to the construction site will not cause inconvenience. Loading and unloading can be done manually, without the use of special equipment.
- If necessary, construction work can be briefly suspended or frozen for a longer period, without compromising the quality and reliability of the structure.
- It is easy to use for various design solutions and architectural elements when decorating the facade of a building, which will make it individual and distinguish it from other buildings.
- High-quality masonry or brick cladding will significantly reduce the costs of subsequent renovation or repair of the structure.
- Walls built from this material have a very high degree of sound insulation.
Another house project made of sand-lime brick
Shrinkage of brick walls is minimal. This will allow you to preserve the structure without destruction, install gas equipment in the house, and install various utilities without any problems.
- Such a house has a higher degree of fire safety compared to houses made of other materials.
- Due to the long service life and other factors, the costs of constructing such a house will almost completely pay off.
The disadvantages of brick houses include:
- somewhat limited frost resistance;
- low degree of thermal insulation;
- the construction of such a house requires a deep, strong monolithic foundation, which will require quite a lot of money;
- Another unpleasant factor is efflorescence (white stains on the walls). Most often it occurs due to the solution not matching the type of material. But this can be avoided by following the bricklaying technology.
Advantages and disadvantages
Sand-lime brick has a number of advantages over its “brothers” and other materials:
- significantly cheaper than
its analogues - for example, with one strength class, it costs 30% less than ceramic;
- low thermal conductivity
, which makes a house made of such material warmer;
- is good sound insulation
, which is very important in our noisy world;
- thanks to its production technology, sand-lime brick has a more accurate geometry and smooth surface
than its analogues;
- it has a wide palette
, it can be white, colored or black;
- significant strength
;
- environmental friendliness
- the material does not contain any chemical reagents;
- frost resistance
- it surpasses even lightweight concrete in this indicator;
- insensitivity to ultraviolet radiation
, so it does not lose color or deteriorate in the sun;
- durability
- this indicator has already been tested a huge number of times;
- efficiency
- walls made of sand-lime brick can be made thinner than, for example, ceramic ones, but the level of noise and heat insulation will not be affected;
- the surface of the walls made of sand-lime brick does not require further finishing
and has a finished appearance;
- the best choice for the construction of load-bearing walls or partitions
.
Thanks to the precise dimensions of the sand-lime brick, the walls will be smoother. You can also make them immediately in the color you need by choosing the appropriate material.
What is bad about this type of brick:
- Absorbs moisture
too much , which leads to an increase in thermal conductivity and a decrease in strength;
- poor resistance
to aggressive environments;
- cannot be used in places where there is high temperature
- for the construction of fireplaces, stoves, basements;
- considerable weight
.
Under no circumstances should sand-lime brick be used in places of high humidity (swimming pools, wells, plinths, ponds) and temperature (fireplaces, stoves, chimneys), otherwise it will simply fall apart.
Kinds
Depending on the area of use, sand-lime brick can be:
- ordinary
- used for the construction of load-bearing walls and partitions; - front
- used for finishing finished walls.
By format and size:
- single
, dimensions 250x120x65 millimeters; - olutary
, having dimensions 250x120x88 millimeters; - double
- 250x120x138 millimeters (it is also called silicate stone).
The structure is divided into:
- hollow
- lighter in weight and cheaper; - full-bodied
- it comes with a one-sided chip, double-sided, chipped; - porous
.
Characteristics of sand-lime brick
The main parameter is the strength grade. The material can be:
- M100;
- M150;
- M200;
- M250;
- M300.
There are also intermediate options, for example, M75, M125 and so on.
Do not use bricks with a strength lower than M200 on load-bearing walls.
Frost resistance
It is within the following limits: from F15 to F50 in accordance with GOST. Although new developments have made it possible to increase this figure to F100.
Coefficient of thermal conductivity
It is 0.35-0.7 W/mOS. The parameter directly depends on the density of the material.
Density
It ranges from 1400 to 2100 kg/m3 and depends on the structure of the brick and its brand. Thus, a hollow sand-lime brick will have a lower density than a solid brick of the same size.
Moisture absorption
It reaches 8-12%.
Weight
The weight of the material depends on its size, structure and brand. It ranges from 3.5 to 5 kilograms.
Purchasing hollow or porous bricks will help reduce weight and also reduce the load on the foundation. With the same strength, it will be somewhat lighter, but in no case should you take a material of less strength.
Soundproofing
An important parameter that should also be noted in the characteristics of the brick.
Emptiness
This characteristic is relevant only for the hollow and porous type of sand-lime brick.
Color
The color range of the material is extremely diverse. The brick can be white, black, red, yellow, green, blue or any other color.
Video: History of sand-lime brick, its properties and applications
Restrictions on use
- for the construction of a foundation
, load-bearing walls of a basement, a plinth - the material is destroyed under the influence of groundwater and unfavorable environments (for example, acids);
- in rooms where there is a high percentage of moisture
;
- in places of high temperatures
- if the temperature exceeds 800°C, the brick will begin to collapse;
- since the material is quite heavy
, take this into account when calculating the foundation.
Preparatory stages before building a house
Any construction begins with a work plan and drawings. This is an extremely important point, since the quality and durability of your future home will subsequently depend on it. You can use a ready-made project or order it from specialists. It is not recommended to do this yourself; there are too many nuances to take into account.
Calculation of the amount of building material
To avoid any unpleasant situation, for example, construction is still in full swing, but there is already no trace of bricks in the reserves, or, conversely, the house is finished, but there is enough material for another one, you need to make a correct calculation of the amount of bricks.
What should be done:
- calculate the perimeter of the house - the length of the walls (and from the outside);
- determine the surface area of the external walls;
- decide what type of masonry will be used - the thickness and design of the walls depends on this;
- calculate the amount of brick required for the construction of external walls;
- calculate the required amount of material for internal partitions and walls.
When calculating, be sure to make a reserve of 10%, since there is always a brick defect or other unforeseen circumstances.
Required building materials:
- silicate brick;
- insulation;
- fittings;
- cement;
- crushed stone;
- sand;
- roofing felt;
- lime;
- plasticizer;
- beam;
- the rest is the material of your choice for interior or exterior wall decoration, as well as roof construction.
Tool for work:
- Master OK;
- saw;
- hammer;
- level;
- Bulgarian;
- jointing;
- rope;
- plumb line;
- shovel;
- trough or concrete mixer;
- order.
It is highly advisable to purchase a level, this will greatly simplify marking on the ground.
Main stages of work
The construction process itself can be divided into the following stages:
- marking the area, preparing a foundation pit (or trench);
- mixing concrete (although you can always buy a ready-made mixture);
- foundation waterproofing;
- mixing a special mortar for bricks;
- laying brick walls;
- installation of floors;
- roof construction;
- wall insulation work;
- Finishing work.
Marking and foundation
Marking is carried out in accordance with the project. But before you start digging a pit, decide what type of foundation you will use:
- Tape
. It is created as follows: markings are made, trenches of the required width and depth are dug (here you need to take into account the occurrence of groundwater), then formwork is erected, reinforcement is laid and all this is filled with concrete. All fertile soil is removed from the inside of the future house and a cushion of sand and crushed stone is created.
- Monolithic
. To make such a foundation, you must first mark the boundaries of the house, then dig a pit along them, then create a cushion of sand and crushed stone and fill the entire space with concrete. The result is a monolithic base slab.
The issue with a columnar base disappears immediately, since brick is a heavy building material, and therefore creates a significant load on the foundation. In the case of the tape type, you can save a little money, and you won’t have to dig a pit. But it is not suitable for all types of soil.
A monolithic base is the choice of those who value reliability and durability and are not short of money. This type of foundation is suitable for any type of soil, but it is much more expensive than a strip foundation. Therefore, the choice of base depends entirely on your preferences and financial capabilities.
Since sand-lime brick is used, it is extremely important to make the height of the foundation as large as possible, since this material does not like moisture.
When building the foundation, use a level, plumb lines and rope to make it as level as possible.
Waterproofing
After the foundation has dried, you can proceed to waterproofing it. It will protect the base and walls from moisture penetration and subsequent destruction.
Roofing felt works well as waterproofing. It must be glued in two or three layers to the foundation. This is done in the following ways:
- placed on heated bitumen or its mastic;
- laid dry (to prevent the material from flying away under the influence of the wind, it can be pressed down with bricks);
- It is glued by heating it with a torch.
It is better to buy not ordinary roofing felt, but glass roofing felt or rubemast. They are better in their characteristics than the first, but more expensive.
Choosing a masonry method
The choice of masonry method largely depends on the material you choose, as well as on the requirements for thermal insulation.
The following types of masonry can be used:
- solid traditional
- in most cases it is used for solid bricks;
- well masonry (solid)
- well suited for hollow material;
- three-layer masonry
- used for better thermal insulation of a house, it consists of the following layers: hollow brick, thermal insulation material and a facing layer.
In the latter case, the structure can be strengthened using reinforcement, which is placed between the inner and outer layers. This type of masonry is most suitable for our region, as it provides significant thermal insulation and high strength of the walls.
The number of layers of brick in the masonry depends on the purpose of the building and climatic conditions.
We conjure over the solution
Immediately before the brick laying process, it is necessary to prepare a cement-sand mortar.
How to cook and what you need:
- cement - one share (the measure can be a bucket, basin, shovel or weight measure);
- sand - 4 shares;
- plasticizer, liquid soap (Fairy may be suitable here) or lime;
- water - there is no clearly regulated portion, its amount is measured by eye.
The sand-cement ratio may vary depending on the mix requirements. The plasticizer makes the solution more plastic, which increases the degree of comfort of work.
Mixture preparation process:
- Take a trough, concrete mixer or other container suitable for these purposes.
- Four shovels of sand and one shovel of cement are poured there. It all gets mixed up.
- Add water (the amount is determined by your personal eye) to obtain the desired consistency. A plasticizer is added, just a little bit is needed. Everything gets mixed up again.
The mixture should be thick like honey.
Before you start laying bricks, you must lay out the first row of bricks without using mortar. This is necessary in order to create rows of whole bricks and not have to make quarters, halves, and so on. What is meant here is the front masonry, which should have a presentable appearance.
The material should be laid out so that there is a distance of about 10 millimeters between the bricks. As a template, use any available tool, for example, reinforcement.
If the last brick hangs down or does not reach the corner of the base, then change the width of the seam.
After successful distribution of the material, mark the location of the bricks and joints on the foundation.
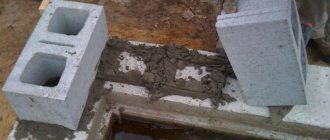
Walling
This process must be carried out strictly according to the rules, since the reliability of the structure and its durability depend on it.
How to lay bricks correctly:
- apply the solution to the surface of the previous layer (base);
- place the brick on the mixture at a distance that is approximately a quarter of its length;
- move the material towards the previously laid brick - this technique allows you to take part of the mortar from the bottom layer and direct it into the seam between the bricks, and the mixture should be so much that it is enough to completely fill the space between the joints;
- remove excess mortar using a trowel;
- lightly strike the brick with a trowel to settle it.
Video: Proper laying of sand-lime bricks with your own hands
Stages of wall construction:
- It is necessary to start laying from a corner. Moreover, 3-4 bricks are laid at once.
- Also lay bricks on the opposite side.
- Pull the cord between them. It will serve as a guide to ensure that the masonry is even.
- Lay the first, previously marked, row of bricks.
- In the next stage, work can be done in two ways: vertically or horizontally. In the first case, several rows (up to five) are laid out on one side at once, and then the beacons are transferred to the other side of the future home. In the second case, bricks are laid out in rows around the entire perimeter. This method allows for greater accuracy, so it is most suitable for beginners.
Avoid deviations and distortions during the construction of walls, otherwise this may have a detrimental effect on the strength characteristics of the house and its durability.
- Before the solution dries, remove the joints. This is done so that the facade acquires a finished and neat appearance. But, if you plan to later finish it with facing material or plaster it, then this step can be omitted.
What mistakes should you avoid:
- you should not skimp on the foundation, otherwise the entire house may quickly collapse;
- the solution must be prepared correctly - the liquid mixture will spread over the masonry and will not be able to create sufficiently strong connections, it will also harden for a long time, and it will be extremely inconvenient to work with a thick one;
- the brick should not be dry, otherwise the mortar will not stick well to it; wet the material before laying;
- avoid weak ligation, as it will reduce the strength and quality of the masonry;
- the seams must be well filled with mortar, otherwise this will also affect the strength of the walls and the degree of their thermal insulation.
Roofing and its installation
It is preferable to make a gable roof. For the “skeleton” of the roof, it is better to use pine beams, the humidity of which does not exceed 20%. Wood must be treated with antiseptics before installation.
Installation process:
- Using beams 150x150 millimeters it is necessary to install the Mauerlat on the walls of the house. Attach them securely, or it is better to provide for fastening during the construction of the walls.
- Mount the roof frame.
- Make the sheathing. A continuous sheathing is made under the tiles.
- Install the underlayment. Its width should not be less than 400 millimeters.
- Install the roof itself, such as tiles.
- Insulate the roof from the inside.
Last words of advice
First of all, choose quality brick. Decide what you want to get in the end. And don’t forget that you can always save money by purchasing hollow material. Although it has a slightly lower density, it is not inferior in strength to solid wood.
A brick house is a durable and warm structure. Such a home is an excellent choice for our climate and is suitable for both northern and southern regions.
How to build a frame-panel house with your own hands?
When choosing a material for building a house, outbuilding, or an aesthetic and reliable fence, be sure to pay attention to sand-lime brick. It has been quite successfully used in construction since the middle of the 20th century and has a number of undeniable advantages.
The main one is the environmental friendliness of the material. It is made from only three components - water, quartz sand and lime. In recent years, various additives and dyes have also been included in this mixture to give the brick better performance properties. Thanks to the latter, you can choose the most suitable color scheme for the future structure. Either solid or hollow products are formed from the mixture, which has a direct impact on their weight. The sizes of silicate can be very different - it depends on the individual requirements of the customer.
The use of the components listed above allows us to make the brick as close as possible to natural limestone. But in comparison with it, silicate has a number of not only advantages, but also disadvantages.
We will consider all the pros and cons of this material in this article.
Composition of sand-lime brick
Based on their purpose, bricks are divided into:
- building;
- facing.
The first is used for the construction of the internal rows of the structure. You can use it for external masonry, but you will need to plaster the finished surface.
Facing bricks are used for finishing or decorative finishing of walls and interiors. It comes in red and white. Red is called ceramic because it is mostly made of clay. White is called silicate, which is also due to its composition (sand, lime). They do not differ in their geometric characteristics.
For its production, lime and quartz sand are used, in proportions according to technological requirements. This mixture is pressed until a material of a given strength and density is obtained.
Features when laying white silicate bricks
Of course, if you trust the craftsmen and professionals who do the work, then there is no point in interfering with their work. But, unfortunately, craftsmen do not always have the necessary qualifications, which means that they can do something wrong. And this small detail will doom the entire construction to failure. Therefore, you need to know some of the nuances of laying white sand-lime bricks so as not to step on a rake. Here are the tips given by experienced craftsmen who have been working with this material for many years.
Expert advice
Laying white sand-lime bricks should start from the corners
Laying sand-lime bricks must begin from the corners.
- To avoid cracks that may appear after some time, you need to leave a ventilation hole. This hole is located between the inner wall and outer brickwork. The width of this gap should not exceed 60 cm.
- Experts do not recommend making the seam thickness more than 1.3 cm.
- When making cement mortar for masonry , you need to make it as thick as possible . White sand-lime brick absorbs water perfectly, remember this. Problems can be avoided by using various hydrophobic additives. But also treat fresh masonry with a solution that is needed to neutralize the effects of moisture on the material.
- Immediately before you start laying bricks, they need to be placed briefly in water . This is necessary so that the bricks stop absorbing moisture from the mortar.
- Experienced masons recommend starting masonry from the corners . The first bricks are laid at an angle of 90 degrees to each other. And then two bricks are placed on them, they serve as a beacon. Next, the cord is pulled between the corners, and a flat wall is laid out along it.
- In order for the masonry to be stronger, do not forget to use dressing of vertical, horizontal and longitudinal seams . Every 2-3 rows of bricks you need to lay a reinforcing element in the form of steel wire.
- Transporting white sand-lime bricks will not be a problem. Because this can be done using any cargo vehicle. Bricks can be loaded and unloaded either manually or automatically. wooden pallets as a basis for transportation . To protect the material from precipitation, cover it with plastic wrap.
Ready-made white sand-lime brick masonry
Main characteristics and properties of sand-lime brick
Sand-lime brick and its colors
Disputes about the advantages and significant disadvantages of sand-lime brick have continued for a long time.
Let's take a closer look at all the pros and cons of sand-lime bricks.
First, we list the disadvantages of sand-lime brick:
- Doesn't hold heat well. The thickness of the walls must be at least 2 m so that the house is warm enough. But you can lay a layer of additional insulation, which will reduce the thickness of the walls, thereby reducing the load on the foundation.
- Low moisture resistance. It absorbs more moisture than any other type. This circumstance does not allow the use of sand-lime brick in the foundation. You should not build a base or foundation from such material.
- The greater weight of silicate than other types creates some difficulties during transportation and laying.
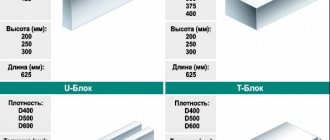
Table of technical characteristics of sand-lime brick
But these disadvantages outweigh the very significant advantages:
- High strength. The greater weight of sand-lime brick allows you to increase its density and strength. Ideal for the construction of load-bearing structures. As the house is used, its strength only increases.
- Higher degree of sound insulation. This property allows the use of silicate for the construction of various partitions (interior, inter-apartment).
- Quite high vapor barrier rates.
- Safe for health, as it is made from natural, clean materials. Due to the presence of lime in the material, the possibility of fungus appearing on the surface of the walls is completely eliminated.
- Environmentally friendly material, does not emit radiation.
- The cost of sand-lime brick is 15-20% lower than that of ceramic brick, due to lower energy costs and lower labor intensity of its production.
- Long service life.
- Wide range of product colors.
We also offer you a video on the properties of sand-lime brick:
What is sand-lime brick and what are its production features?
Before we look in detail at the advantages and disadvantages of sand-lime brick, it is necessary to understand what kind of material it is technologically. Sand-lime brick is almost similar to the natural material limestone, which has been used for thousands of years. But, as is clear, almost always natural stone (including due to delivery costs) is much more expensive than artificial ones.
Lime-sand mortar, from which sand-lime brick is produced, was the most common masonry material before the invention of Portland cement, but it has a huge disadvantage - it is not moisture resistant. Then, after a few years, it becomes resistant to water, but these periods are much longer than those of the now standard concrete.
Experiments with a long-known mixture of lime and sand were started almost simultaneously by the Russian civil engineer Prokhov and the Swede Ridin; they tried to industrially make walls and even entire houses only from it, as it is clear that it was impossible to achieve high quality (especially since concrete based on Portland cement was already widely used) . The German physician (not a builder!!!) Bernardi advanced a little further; he made pressed bricks, which then hardened in the air. But naturally, the finished products did not have decent moisture resistance. The doctor's compatriot (also a doctor, but in the field of chemistry) Michaelis tried to treat a mixture of lime and sand with steam under pressure. This is how sand-lime brick appeared. October 5, 1880 can be considered the date of his birth. Moreover, his invention was not based on calculations (like almost all scientific breakthroughs of that time, take at least the biography of Thomas Alva Edison, who created a light bulb, phonograph, etc.), but the result of trial and error.
The new material gained popularity. Even in the Russian Empire at the beginning of the last century, there were already nine factories producing silicate. But the real widespread use of this material dates back to the 50s (this can be clearly seen from the date of construction of white brick buildings).
Production of sand-lime bricks
The manufacturing process of sand-lime brick is quite simple (unlike the production of other building materials), but requires special equipment. Therefore, silicate is produced only industrially; in small workshops its production is unprofitable.
We list all stages of product manufacturing:
1. Preparation of the mixture - dose the amount of sand and lime, and water if necessary. The necessary additives are introduced (to adjust the composition). The mixture is thoroughly mixed 2. Molding - the composition is pressed. Moreover, unlike ceramic products, it often remains in molds until the last stage (it all depends on the production line). 3. Autoclaving - molded products are sent to sealed chambers for treatment with “hot” steam. For clarification, live steam has a temperature higher than the boiling point of water (100 degrees Celsius) because its pressure is greater than atmospheric pressure
4. The brick is unloaded from the molds, undergoes final control and is sent to the consumer
It should also be noted that the production of sand-lime bricks is very close to the production of foam and gas silicate blocks. Therefore, factories often produce the entire range, and the same autoclaves are used for heat treatment on the lines. Brands and types of sand-lime bricks
In terms of basic characteristics, such as density and frost resistance, sand-lime brick does not differ from the more familiar ceramic brick. The characteristics and properties of sand-lime brick are regulated by GOST 379-79 “Silicate bricks and stones. Technical conditions".
It has the following main characteristics:
- strength grade - M125, M150;
- frost resistance grade - F15, F25, F35;
- thermal conductivity - 0.38-0.70 W/m°C.
Frost resistance is the ability of a material in a water-saturated state to alternately freeze and thaw without changing its characteristics. Frost resistance is measured in cycles and designated as: “Mrz”. or "F".
Strength is the ability of a material to resist internal resistance and deformation. Strength is indicated by the letter “M” and a certain number. The digital value indicates how much load per 1 cm2 a given brick can withstand.
Solid and hollow brick . But here there is already a difference with ceramic bricks, which lies in the fact that the voids in silicate are usually cylindrical in shape and are located in the center of the mass; in ceramics there are more of them, they can be of a wide variety of shapes and more evenly distributed throughout the entire volume of the product. Many companies also offer the production of bricks to customer sizes (medium or large batches), this is due to the fact that they are often formed not with extrusion presses (which are difficult to re-adjust), but in individual molds.
Advantages of sand-lime brick
LOW COST. It is due to the fact that such cheap raw materials as lime and sand are used (though of extremely high quality). Also, for the production of such bricks, you can use live steam from a thermal power plant, which is still cooled in cooling towers. When producing ordinary bricks, the raw materials are more expensive and require preliminary aging (like cognac, the clay must lie in dumps for at least 3 winters), preliminary crushing and drying of the blanks. Energy consumption for silicate production is an order of magnitude less. Almost always, silicate masonry is cheaper than even using lightweight concrete with the same load-bearing capabilities.
GOOD ENVIRONMENTAL FRIENDLY This brick is more environmentally friendly; it does not contain components harmful to health. In terms of the level of radioactive radiation, it is generally distinguished by its minimal background value compared not only with natural but also with artificial building materials.
HIGH COMPATIBILITY WITH MASONRY SOLUTIONS. Excellent compatibility with any masonry mortars from traditional cement-lime to polymer-based adhesives.
GOOD AESTHETIC PROPERTIES. Sand-lime brick has high aesthetic properties. The natural white color is easily changed by introducing pigments that color the material throughout the entire volume, and not just in the surface layers.
EXCELLENT GEOMETRY. Each brick has the same geometry, which makes laying it easier.
HIGH STRENGTH. The strength of sand-lime brick ranges from 75 to 200 kg/cm2.
GOOD SOUND INSULATION. Due to the fact that the material has a high specific strength, it has good sound insulation properties.
HIGH FROST RESISTANCE. The frost resistance of sand-lime brick can reach up to 50 freeze-thaw cycles, which undoubtedly has a positive effect on the durability of the material. But, nevertheless, the main advantage of sand-lime brick is its low cost, with excellent performance properties, which is why it is so widespread.
Tools required for work
Photo of the construction of a sand-lime brick building
If the construction of the house is carried out by professional craftsmen, then there is no need to stock up on tools. But if the construction of walls will be done with your own hands, then you first need to carry out preparatory measures.
Before proceeding directly to the masonry, it is necessary to purchase materials, as well as prepare tools and devices.
- First of all, prepare sand, cement and water. They are used to prepare a solution. The solution requires a container (bucket) in which the solution will be delivered to the workplace.
- A trowel is the main working tool. It fills the seams, smoothes and removes excess mortar.
- Ordering - with its help, the main parameters of the series are determined.
- A plumb line is a special device for checking the verticality of the masonry.
- Level - it is used to control the correctness of the horizontal position of the masonry.
- Hammer-pick - used for leveling already laid material, as well as for trimming or beating bricks.
Other areas of application of SC
Sand-lime brick has rather limited applications:
- construction of residential buildings - walls and partitions, from 1 to 10 floors in height;
- construction of outbuildings of various types, with the exception of structures where high humidity and temperature are expected - saunas and baths, for example;
- construction of decorative and economic fencing;
- facing bricks, especially textured ones, can be used for cladding houses;
- SK allows the construction of some architectural elements: arches, for example, rounded corners, etc.;
- silicates are used for the construction of industrial facilities, where speed of construction and strength are important, not.
Buildings made of sand-lime brick are very durable and reliable. At the same time, such houses almost always need insulation, since the thermal insulation qualities of the insulating material are insufficient.
This video will tell you how to make a column from sand-lime brick:
The article describes the technology of building a house from the most common type of brick on the domestic market - silicate. The properties of this building material, its advantages, disadvantages, scope of application, types and main characteristics will also be described.
Since sand-lime brick is quite common throughout the country, it is the cheapest type of building material among bricks. The main share in its composition, about 90%, is quartz sand and only a small remaining part (10%) is lime and additives.
How colored sand-lime brick is made
A mixture of sand and lime produces a white-gray brick. According to the technology, such bricks are not fired, so they do not darken. To achieve a white color, bleaches and clarifiers are added to the composition when mixing.
To obtain colored sand-lime brick, chemically resistant coloring pigments are added to the main ingredients. Volumetric coloring is different in that the color on the edges and inside the product is the same. With surface painting, the thickness of the color layer is only 2-3 mm.
Three-dimensionally painted bricks are more practical, since even with chips or scratches they will retain their color. During the production process, you can obtain products of any color: from yellow-red to blue-green shades.
Brands and types of sand-lime bricks
In terms of basic characteristics, such as density and frost resistance, sand-lime brick does not differ from the more familiar ceramic brick. The characteristics and properties of sand-lime brick are regulated by GOST 379-79 “Silicate bricks and stones. Technical conditions".
It has the following main characteristics:
- strength grade - M125, M150;
- frost resistance grade - F15, F25, F35;
- thermal conductivity - 0.38-0.70 W/m°C.
Frost resistance is the ability of a material in a water-saturated state to alternately freeze and thaw without changing its characteristics. Frost resistance is measured in cycles and designated as: “Mrz”. or "F".
Strength is the ability of a material to resist internal resistance and deformation. Strength is indicated by the letter “M” and a certain number. The digital value indicates how much load per 1 cm2 a given brick can withstand.
Solid and hollow brick . But here there is a difference with ceramic bricks, which lies in the fact that the voids in silicate are usually cylindrical in shape and are located in the center of the mass; in ceramics there are more of them, they can be of a wide variety of shapes and more evenly distributed throughout the entire volume of the product. Many companies also offer the production of bricks to customer sizes (medium or large batches), this is due to the fact that they are often formed not with extrusion presses (which are difficult to re-adjust), but in individual molds.
Pouring the foundation
A trench with the required dimensions is dug under the foundation in a marked area. Then a sand-crushed stone cushion is poured onto the bottom and thoroughly compacted with water poured over it. After this, the formwork with the laid waterproofing film is inserted.
Figure 3. Installation of formwork and reinforcing lattice for pouring concrete.
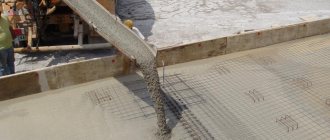
To obtain the strongest possible foundation, choose concrete grade M400 or better, which must be poured at one time. It is almost impossible to manually knead such a quantity of solution, so it is ordered from the factory.
Pour the entire volume into the trench with installed reinforcement layers at once. To obtain a homogeneous structure, use a mixing attachment on a drill to mix the poured solution in order to remove air bubbles.
Figure 4. Concrete pouring completed.
The period for partial hardening of concrete, depending on environmental conditions, ranges from a week to two. During this period, you need to remove the formwork and ensure that the top layer of the base does not dry out or become waterlogged. Complete hardening occurs after 29 days, but it is necessary to build a house from sand-lime brick only after six months to a year, when complete shrinkage occurs. Then, before making brickwork, the base is waterproofed and insulated.
