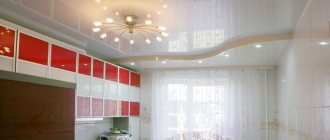
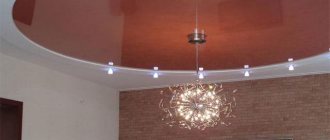
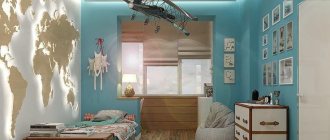
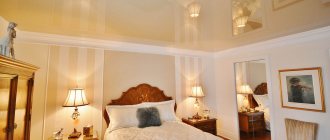
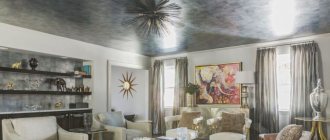
A stretch ceiling is a design that allows you to hide surface defects, avoid additional “dirt” during repairs and a chance to transform any (even the most unattractive) interior. Unfortunately, many limit themselves to only installing a tension structure. But if you wish, you can achieve a better result. What are we talking about? In fact, everything is simple - we are talking about installing lighting fixtures (backlights), which changes the appearance and allows the owner to show his imagination. Changing the color, shape, direction of the rays and the location of the lighting - all this guarantees an incredible effect. There is little left to do - organize the installation correctly and follow the recommendations in the article.
How to make backlighting: materials and options
Lighting for a suspended ceiling, which is installed in 95% of cases, is a chandelier or lamps, the selection of which takes into account a number of parameters (lamp power, type of PVC film, etc.). But that’s not all – there are many more options for organizing lighting.
Illumination under a suspended ceiling is made using the following materials: 1. Diode lamp - a device that is small in size and is used when decorating a ceiling structure in the form of a starry sky. A special feature of LEDs is the presence of special diffusers that guarantee an optical effect. The device is installed together with an optical fiber cable and the use of a step-down transformer device. The diode lamp is installed in a special circuit, which imitates the glow of stars of various sizes.
2. Fiber optic cable. Such a conductor is a group of filaments made of plastic or glass, which are framed in a special sheath. The peculiarity of the cable is that it does not allow light to be distributed beyond the boundaries of the fiber. The product is fastened using the fan method. The process is complex, but the end result is amazing. To improve the effect, a projector is placed on the main structure, a cable and LEDs are attached. Afterwards the “star” ceiling canvas is stretched. Next, 2 mm holes are made in the surface, where the light guides are mounted.
3. LED strip. Illumination under a suspended ceiling is often created using LED strip. Essentially, it is a printed circuit board in which light sources are installed at certain intervals. Built-in LEDs can have a single-color or multi-color glow (here it all depends on the crystals used in the devices). The main advantage is ease of installation. Modern tapes have a sticky layer that securely fixes the product to a hard surface.
4. Neon cord. The essence of the product is to supply current to a pair of copper wires, after which the phosphor located between them emits a glow. Power source - batteries or converted direct current (the role of the converter is played by the inverter). Neon cord is in demand when organizing the illumination of the boundaries of a stretch ceiling, as well as when organizing lighting from the inside. Now let's look at how to make lighting under a suspended ceiling. Let us immediately note that the installation of the lighting device is carried out in a special box with a recess.
[custom_ads_shortcode1]
Manufacturing and installation of a box with a niche
The design option using a plasterboard box with a niche is the most popular and assumes that the structure is directed towards the center of the ceiling surface.
In this case, the suspended ceiling with lighting has the following features:
- The structure is installed around the perimeter of the room and its width should not be more than half a meter, while the height should vary from 15 to 20 centimeters.
- The lower part of the element should protrude slightly and as a complement, a small branch is used to form a niche.
- The vertical surface of the box is equipped with a baguette, the role of which is played by a profile for fastening.
- The bottom of the created niche is decorated with LED strip and lighting fixtures, followed by connection to the electrical network.
Watch the video: Translucent stretch ceiling with LED lighting
Main requirements when installing the box:
- the installation step of the box frame is no more than 0.6 meters;
- plasterboard sheets are attached to the top of the box;
- the joints of the plasterboard product are closed with putty and special tape;
- At the point where the profile of the tension structure is fixed and the box is fastened, it is worth mounting a mortgage using a profile. The main purpose of the mortgage is to strengthen the structure (on completion of installation, the pull-off force is 55-60 kg).
[custom_ads_shortcode2]
How is lighting installed under a suspended ceiling?
Decorating the ceiling surface with lighting elements is one of the most popular design options. It encourages zoning of space, emphasizing certain elements and placing iconic accents. To install the lighting, create a plasterboard box that meets the following parameters:
- The frame is installed at a distance of sixty centimeters;
- Sheathing occurs using plasterboard sheets;
- Bandage tape and putty are used to form joints;
- The place of attachment to the main ceiling must be decorated with embedded material, which is required to strengthen the structure and increase the strength of the object’s fixation.
Illumination of suspended ceilings allows for independent installation. There are several design options that you can choose depending on the characteristics of the room and your own wishes.
With a plasterboard box
When installing a box with a protruding niche, the rules are as follows:
- a box made of plasterboard construction is installed around the perimeter of the room;
- The height of the box is 15-20 cm in relation to the ceiling (here you should focus on the installation level of the tension structure). Width – 40-50 cm;
- the lower part of the box protrudes slightly towards the central part of the room by 6-8 cm. At the edge there is a vertical edge six centimeters high. But during installation, make sure that there is 11 cm or more from the ceiling to the edge of the rib (this allows you to comfortably mount the ceiling);
- a ceiling structure molding is attached to the box, after which the ceiling itself is installed; light sources are attached to the bottom of the niche, and then connected to the power supply.
The second version is a plasterboard box with lighting for a suspended ceiling, but with a hidden niche. This option is suitable for glossy (mirror) tension structures, in which the open niche is reflected and spoils the view. Externally, the structure has the shape of a box, with a hole inside. The main task during installation is to install the structure within the plasterboard frame so that the light appears to be emitted from inside the box. Due to the fact that light is emitted from a special hole, it is not visible in the mirror surface of the box.
[custom_ads_shortcode1]
The main advantages of a niche with LED lighting
Illuminated niches have a number of undeniable advantages:
- non-standard appearance;
- modern design;
- simplicity and efficiency of installation;
- variety of stylistic solutions.
It is not necessary to install only white LEDs in the niche. Colored LED strips look very good, especially if you choose LEDs that match the color of the room. Specialists can install lighting in different colors in the niche, lighting that can be easily changed using the remote control. Niches with smooth shade transitions look very stylish.
LED lighting in the niche harmonizes well with other decorative elements. It can become not only part of the ceiling, but also an element of room lighting, an excellent alternative to numerous pendant lamps. To make the lighting brighter and more effective, it is enough to paint the walls of the niche with matte white paint before installing the LEDs. This will avoid glare and achieve uniform illumination of the niche.
You can order a niche with LED lighting from many companies in our country. It is important to find the optimal combination of price and installation quality, as well as a wide selection of design solutions. You should not save money and choose low-quality, cheap strips with LEDs for niche equipment. Such one-time savings can lead to significant costs for repairs or replacement of LED lamps. It is important to pay attention to the strength of the LED strip, the distance between the diodes and other points. There is no point in installing a niche yourself; it is better to entrust this task to professionals.
Ordering LED lighting in a niche in Tula and the region is an excellent opportunity to realize an original idea and quickly equip a niche with lighting of any kind.
Without plasterboard box
Experienced craftsmen often use another method of organizing the ceiling system - without installing a plasterboard box. The following installation options are popular:
- installation of lighting behind a suspended ceiling. Despite the sufficient thickness of the structure, light passes through it and creates a bright visual effect. To organize such lighting, you will need fluorescent lamps (LEDs), which are mounted between the main ceiling and the tension structure (this method is discussed in detail below);
- installation of lighting using several ceiling levels. In this case, the lighting from below should be decorated with a decorative protrusion or a special plinth that can hide the light source.
[custom_ads_shortcode2]
LED lighting of a stretch ceiling from the inside: types and installation
Stretch ceilings illuminated from the inside are available in several versions - with one or several levels. The principle is based on illuminating the surface of the ceiling from the inside due to the correct location of the light source in the gap between the tension structure and the main ceiling. In systems with one level, the lighting devices are fixed directly to the ceiling or beam that is attached to it. In the case of a multi-level ceiling, the principle is the same. The only difference is that the installation of lighting structures is carried out above the upper level (above the one closer to the main ceiling).
Structurally, backlit products come in several types:
- products that are installed around the perimeter of the room;
- designs with uniform luminescence distribution;
- figured lighting. In this case, the main LED is fixed on the main ceiling and displays an original figure, flowers, stars and others on the surface of the tension structure.
To organize lighting from the inside, the following are used:
- duralight lamps;
- LEDs;
- fluorescent lamps.
The best option is to use LED strip. Its advantages:
- no heating, which guarantees the integrity of the ceiling structure;
- uniformity of light distribution;
- minimum power, which guarantees savings on electricity;
- the ability to organize various lighting options;
- high resource. Thanks to this quality, the LED strip rarely has to be replaced. This is important given the complexity and high cost of installing (dismantling) a stretch ceiling.
Additional devices are sold complete with LED strips - a remote control, a control system and a power supply (transformer). The use of fluorescent lamps is also allowed, but they have a number of disadvantages:
- the possibility of organizing lighting only around the perimeter of the room;
- minimal service life, which leads to the need for frequent replacement (this means that the ceiling will have to be removed and re-stretched).
Duralight cords are easy to install, but consume a lot of electricity and require frequent replacement. In addition, such cords are inferior in lighting quality to LEDs.
[custom_ads_shortcode1]
Illumination of a stretch ceiling with LED strip from the inside
3 years have already passed since the new building was put into operation. First, I did some simple DIY repairs. Now the house has shrunk, the walls have warmed up and some defects have appeared. Two large cracks, 6 meters long, appeared on the ceiling at the junction of the plates along the entire room.
The wife began to demand repairs, but there were many modern and interesting finishing options and she could not decide. I decided to make the ceiling lighting with LED strip with my own hands.
I read about editing on other sites, but there is useless rubbish written there, because they are written by authors who do not understand this and have never done it. You will still have to explain the subtleties and advantages to your wife, so I decided to do it in writing, you will also be interested.
I recommend reading first:
1. preparation for installation
2. how to choose a 12V power supply
3. connecting the LED strip to 220V according to the diagram
Types of ceilings
Let's look at the main popular types for the home:
tension; suspended plasterboard, slatted, cassette; suspended-tension, a hybrid of plasterboard and tension; single-level and two-level.
Tension - a modern and practical look, quickly installed. A big plus is the glossy surface and transparency of the film; gloss better reflects the light flux.
Photo, light from within
The use of an LED strip to illuminate the ceiling from the inside looks great. If your imagination runs wild, then for example you can do:
starry sky, looks gorgeous at night; logo of your sports team or car; at least a simple drawing with palm trees and the sea.
Starry sky, photo
Of all the types, I chose tension, with preliminary fastening of sound insulation under the film.
Plasterboard and suspended-tension will be quite optimal for a single-level project. In my apartment I can hear my neighbors upstairs very well, especially since they have 2 small children, they can knock on the floor at 3 am, it sounds like a drum. It will be possible to place soundproofing mats under the drywall, which cannot be done with tension mats without gluing.
Two-level ceilings look interesting from a design point of view, but they have a much higher complexity of execution and a large amount of drywall work. I can afford them without much damage, my height is 280 cm, which is higher than the usual 250 cm. They look beautiful, but from a practicality point of view, there will simply be additional costs. In a couple of weeks you won't pay attention to him anymore. I can spend this amount more usefully than on useless design.
Types of lighting and backlighting
Functions that can be performed when placed on the ceiling or the top of the walls.
decorative white; decorative single color or RGB color; basic lighting; auxiliary, complementing the main one, such as low beam in a car;
I wanted a combination type. Good and beautiful chandeliers are expensive, and they no longer fit into modern design and look outdated. Classic, these are built-in lamps and light around the perimeter of the room.
Solid fill inside the second level, photo of a house room
In order not to lay a powerful diode strip and an expensive aluminum profile around the perimeter, I’m thinking of placing medium-power LEDs to perform the function of low-bright lighting. For bright light in the center of the room, install a built-in ceiling LED panel under Armstrong, which, with dimensions of 60 by 60 cm, shines at 3600 lumens, has a thickness of only 1 cm. For me, the cost of such an LED panel will be about 1000 rubles.
Why exactly the panel? – in fact, I don’t need bright lighting in every corner, besides, my walls are light-colored, the light will be reflected. It will shine as efficiently as possible only downwards; there will be a lot of light on the floor for children to play.
Choosing a diode strip
Most popular models
For illumination, it is better to use LED strip 3528 or 5050, which does not require an aluminum profile for cooling. Its power should not exceed 10 W/m.
For white, the optimal density for SMD 5050 is 60 diodes per meter. The actual power may differ in one direction or another; it can only be determined by measuring the current consumed. LEDs 5050 can be inexpensive at 13 lm, and high brightness at 19 lm, labeled as LUX (High class). It already has a consumption of 14-15 W.
The average brightness with 13Lm diodes will be 800 Lm/m. which corresponds to a 60-75W incandescent lamp. With 19Lm LED diodes. brightness per 1 m. 1150 lm., this is the equivalent of a regular 90W light bulb.
We recommend: Do-it-yourself installation of a suspended ceiling step by step. Video
Hybrid views, RGB + regular
| Brightness of one 5050 | Brightness Lm. at 1m. | Incandescent lamp equivalent |
| 13 lm. ordinary | 800 | 75 |
| 19 lm, luxury | 1150 | 90 |
Do not buy the less popular SMD 3014, 7020, 3020 LEDs. There is a high probability of purchasing components of low quality and with inflated technical characteristics.
There is also a 220V LED strip, which is connected directly to the outlet using a simple rectifier. It is also called street and cannot be used in residential premises.
If the power is large or does not fit into 10W/m. then it can be lowered with the regulator on the power supply. There will simply be a power reserve and it will last longer. To avoid installation on a special LED aluminum profile, buy double width. Then you will need a radiator for cooling only at a power of more than 20W/m.
LED Density
LED Density
Let's consider the density of LEDs; the uniformity of diode lighting depends on this. Instead of the usual uniform pattern, in some places you can make it intermittent. The smallest number of LEDs is 30 pcs/m, the strip of light will be wavy along the edge.
Colored backlight
Single-color and three-color
colors Colored can be made in several types:
single color, red, blue, green; three-color RGB, red, blue, green; multicolor RGB, 16 colors, controller required; hybrid, alternating RGB and white.
The difference between LED diodes. The 5050 LED consists of, respectively, 3 times more powerful. Don't confuse 3528 and 2835, they are the same size, but 3528 is 0.06W and 2835 is usually 0.2W.
How to install LED strip on the ceiling
Installation on a suspended ceiling is done in two ways:
installation on cornice, box, ceiling plinth; installation from the inside around the perimeter, light passes through the film.
The process is described in detail in a separate article.
How to install LED strip with your own hands
The figures show the most common installation distances. There are no special requirements for installation, you can safely experiment until a satisfactory result is obtained. The laid light source can be left unattached, which will allow it to be moved in the future.
Var. No. 1 provides more intense illumination not only of the stretch ceiling, but also of the room. By moving the bookmark inside the box you can adjust the width of the lighting in the room.
Var. No. 2, creates the effect of a floating ceiling, looks especially good with a light blue sky.
Var. No. 3, used to create light stripes from the inside. You can post, for example, a simple drawing or a Volkswagen logo.
Var. No. 4, illuminates the entire area inside the tensioner. A small box on the sides will visually enlarge the illuminated surface. A simpler and more practical way is to mount it directly on the wall; it also looks decent, but it’s a matter of taste.
Additional methods
Var. No. 5, suitable for the main LED lighting of the room.
Var. No. 6, the lower profile is mounted overhead in the form of an LED lamp on a plasterboard surface. Can be replaced with a ceiling plinth.
Var. No. 7, due to the complex shape of the cornices, ice is usually placed on the wall.
Var. No. 8, the plinth is attached 50 -70 mm lower. and a light source is placed on it. This is a budget installation; any cheap baseboard will do, not necessarily polyurethane. The luminous angle of the LED is 120 degrees, so with this placement it will not dazzle and will be practically invisible.
Var. No. 9, plasterboard box of two-level tension
Var. No. 10, visually increases the height by illuminating the wall.
Suspended ceiling lighting, video
The installation of the light source is closely related to the installation of the entire structure. In the video, experts will show in detail the sequence of installing a two-level suspended ceiling from the very beginning. The main lighting will be done using built-in lamps; a strip source will be used for decorative lighting.
Components and connection
Preparation for installation and the installation process itself are described in separate articles,
DIY LED strip installation
List of required materials for installation:
ceiling plinth, polyurethane cornice, plasterboard; power unit; dimmer or RGB controller, with or without remote control; connectors for connection; cable for 220V network.
Polyurethane cornices
Luxury designer cornices
The optimal and simple way to illuminate a stretch ceiling is to use polyurethane cornices, moldings, fillets, and baseboards. Cornices are quite expensive, sold in pieces of 2 meters and have many types of finishes, stucco moldings, patterns, and are suitable for painting.
Polyurethane ceiling cornices
For complex design forms it is produced in a flexible form, but costs 2 times more, and is labeled as FLEX plinth. The cost of Russian Europlast ranges from 350 to 900 rubles/m.
Chinese-made products, profile photo
Chinese manufacturers have a more affordable price, the length of the products is 240 cm. To compare, you will need to calculate the price per meter. On average 400 r/m. for flexible, and 200-250 rub. for ordinary.
If the power consumption is large, and you want to hide the power supply behind the eaves, then use several smaller power supplies.
Watch the video: Glowing stretch ceiling
Installation is carried out according to the following algorithm:
- develop and draw a diagram according to which the installation will be carried out;
- calculate the cross-section and length of the cable products to be used;
- buy a tape of the required length, buy a remote control and a unit. You will also need a step-down transformer, junction boxes and elements for fixing the box;
- prepare tools and equipment for work - level, tape measure, wires, heat gun, clamps, cord fasteners and others;
- install the lighting strip on the main ceiling, connect and check for correct operation;
- make markings and attach baguettes around the perimeter of the room;
- hang the canvas in the corners of the room and heat the ceiling with a heat gun;
- after heating the canvas to 60 degrees, complete the installation;
- install decorative tape on the cracks.
[custom_ads_shortcode2]
Types of profiles for stretch ceilings
Installation of the structure begins with the installation of baguettes around the perimeter of the room, after which the PVC film is stretched and secured. The baguette device allows the web to be pinched when the desired tension is achieved. This design allows the floor to withstand loads of up to 20 kilograms per square meter, and in some cases up to 100 kg. This allows the suspended ceiling to also be used as protection against leaks from above, which is impossible for a suspended structure.
Profiles for suspended ceilings are:
- Ceiling-mounted, installed with fastening to ceilings.
- Wall-mounted, which are used when it is impossible to install previous structures.
- Dividing. They are used as an additional stiffener to prevent sagging of large film on ceilings.
- Special. They are used in structures of increased complexity to perform a certain type of connection.
Mechanics of using a ceiling profile.
Lighting under a suspended ceiling: how to install?
When organizing lighting, it is worth considering the methods of installing the ceiling structure. There are three options here: 1. Cam mount. The lock consists of a pair of cams, one of which is fixed permanently, and the second plays a pressing function. The canvas is pushed through the clamps using a special spatula.
2. Wedge fastening. Most often, lighting using LEDs is mounted on shelves installed in a wedge manner.
Fixation is carried out by pushing the PVC film into a special groove of the baguette, followed by fixation with a special strip. 3. Harpoon mount.
The peculiarity of the design is that the harpoon is welded to PVC at the factory, so problems with organizing LED lighting are possible. The material is fastened according to the harpoon principle, using a special clamp.
When installing the LED strip, consider the following points:
- If you want to organize several colors, you will need a controller. With its help it is possible to change the brightness;
- The tapes are connected in series (with a length of up to 12 meters);
- fastening is done by removing a special film and gluing the LEDs to the main ceiling. Please note that degreasing or coating the surface with a primer is mandatory. Otherwise, the tape will not fix;
- It is forbidden to break the tape during installation. It is allowed to use a connector for connection;
- All that remains is to connect the product to the power supply.
It turns out that light sources can be mounted in two ways:
- in a special plasterboard box (closed or open). This option is discussed in detail above;
- using adhesive tape. This method is most in demand for LED strips, as well as neon cords. It is used when installing lighting devices from inside the ceiling structure.
[custom_ads_shortcode3]
What types of suspended ceiling lighting are there?
Depending on the height of the room and the ability to bite off 10 cm from the height of the room, you can make several types of suspended ceilings and lighting for them.
Some types of lighting that will provide good, but not sufficient lighting:
- LED strip along the perimeter of a single-level stretch ceiling;
- Two-level ceiling with a gypsum plasterboard box around the perimeter with lighting;
- LED strip under a suspended ceiling - simple shapes;
- Designer suspended ceilings with lighting in accordance with the overall design.
When installing any of the structures, the question arises about changing the lighting, or rather the LED strips inside the ceiling.
But the manufacturers of the tapes themselves promise uninterrupted operation of their lighting equipment for ten years.
During this period, something can even happen to the ceiling, so installing LED strips under the entire stretch ceiling structure is a safe and long-lasting installation.
But if there are concerns about the durability of the LED strips inside the ceiling, then it is possible to place them around the perimeter, hiding them in a plasterboard box or just below the stretch ceiling, covered with a special plinth.
Photo of the backlight - a real help in completing the work
None To complete the work you will need the following photos:
- boxes for mounting lighting devices (closed and open type);
- examples of ceiling lighting from the outside and inside;
- diagrams for fastening suspended ceilings;
- features of installing curtains under a suspended ceiling with lighting.
the result of surface illumination using LEDs, fluorescent lamps or duralight lamps;
The more photos you have at hand, the higher the speed and quality of the work performed. An additional plus is the presence of a photo or step-by-step installation of the lighting, which can always be found on the Internet.
Illuminating a stretch ceiling with an LED strip from the inside with your own hands is not as difficult as it seems at first glance. In this article we will tell you about the installation features and design options that result.
[custom_ads_shortcode2]
Options for using tape in ceiling lighting
Installing LED lighting under a suspended ceiling is possible in several basic ways. The choice depends on the initial design idea of the room owners, as well as the height of the room and the distance by which it can be reduced to install a lighting system.
Single-level stretch ceiling with LED lighting around the perimeter
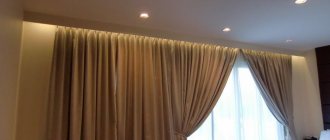
A single-level stretch ceiling with LED lighting around the perimeter is the most popular way to use the tape. Visually, it seems that the ceiling is floating in the air. The soft glow helps to set the mood for relaxation and creates an atmosphere of calm and comfort. The brightness of the backlight can be adjusted. The LED strip is attached behind a special ceiling plinth slightly below the ceiling level, and the tension fabric is suitable both glossy and matte.
Stretch ceiling with LED strip
A stretch ceiling with an LED strip laid inside allows you to create a unique light pattern. With one touch of a switch, you can turn a room into a disco hall, light up the starry sky, or delight children with images of your favorite cartoon characters. For patterned lighting, it is necessary to use a stretch fabric that transmits rays of light. Glossy film will not work in this case, since it is completely opaque. It is better to opt for matte canvases.
Two-level lighting
Illumination of a stretch ceiling with LED strip is also possible when creating two-level structures, the perimeter of which is made of gypsum board. With this installation method, the tape is hidden in the resulting plasterboard box. You can also place the power supply and other necessary equipment there. It is not recommended to use glossy stretch fabric: the tape and all accessories will be reflected in it, like in a mirror.
Video:
Translucent stretch ceiling
Another interesting way to install lighting under a suspended ceiling is to use a special translucent stretch fabric. It is produced, for example, by the French company Clipso. Such canvases are thinner than fabric or PVC models and transmit light well, which allows LED lighting to play the role of the main lighting in the room. Unfortunately, this type of ceiling will be quite expensive.
Try using different types of LED strips in the ceiling design, differing in color and number of LEDs per square meter. This will allow you to create several lighting zones in the room and diversify the interior.
Types of backlight
There are several types of lighting - the choice depends on the desired interior and your taste. Let's take a closer look?
- The effect of floating suspended ceilings is achieved, firstly, due to their installation in a box, and secondly, due to the direction of lighting at certain angles. Hidden lighting directly under the canvas helps to enhance it.
- By the way, the latter is often used as a separate decorative element under a printed fabric. At the same time, it can replace lamps in small rooms that should not be overloaded with chandeliers.
- Illumination around the perimeter is a good way to emphasize the relief of multi-level structures.
As you can see, LED strips are used for different purposes - from decorative to purely utilitarian, for example, to save space.
[custom_ads_shortcode3]
LED strip installation methods
Photo of the lighting around the perimeter inside.
You can install duralight in the following ways:
- in a decorative niche made of plasterboard. First, a gypsum board box is mounted (along the perimeter of the room, in the center), and the device is placed in it;
- hidden ceiling lighting, when the tape is located under the ceiling, covered on top with a stretched decorative fabric;
- under the ceiling plinth. Then the frieze is attached to the surface of the wall, and an LED strip is installed on the inside of the cornice.
When choosing a plinth, you need to pay attention to the material from which it is made.
Friezes are installed for illumination:
- made of polystyrene foam or expanded polystyrene;
- polyurethane;
- special ceiling plinths with ready-made holes for LED strip or neon lighting;
- polyurethane friezes for the ceiling in the form of a metal profile. Such cornices will allow you to install LEDs on the inside or install other lighting sources;
- skirting boards with corner polyurethane profiles.
Installation of LED strips
Installing such lighting yourself is not as difficult as you think. Just watch a couple of training videos and take into account some of the nuances.
1. Calculate the required amount of materials. Diodes are most often sold in neon tubes 5 meters long - take this into account when purchasing and ask to cut off the missing quantity separately. 2. Select a transformer. Read about how to do this here. If you are not sure about your decision, contact a consultant in the store. 3. Connect the transformer to the cable whose phase wire passes through the switch. Follow the diagram drawn on the packaging - there is no universal option, it all depends on the model. 4. Place it in a niche on the ceiling, then remove the braid from the cable and strip it about half a centimeter. 5. Connect the wires from the transformer marked “ACL” on the housing to the phase wire of the supply cable, and the blue ones marked “ACN” to the working zero. Then connect the LED strip, strictly according to the color marking of the wires, red (+) from the transformer to the red wire from the LED strip, and black (-) to black. Please remember that these are general recommendations - individual cases may vary, so read the instructions carefully.
6. Now you can check whether the circuit works - just turn on the electricity (we hope you understand that all work must begin after making sure that there is no current supply). If the tape turns on, half the job is done - all that remains is to secure it in such a way as to achieve the desired result.
7. It doesn’t matter what design you choose, you will have to act according to approximately the same plan. Look for more specific recommendations in the corresponding section of our website.
8. Most LED strips have an adhesive mixture on the back. Remove the protective film and lay the tape according to the plan diagram you developed. Keep in mind that you need to ensure clean lines and a tight fit if you plan to have beautiful lighting. Important: Do not remove the protective layer immediately, but gradually, to prevent it from deteriorating and the tape sticking to the wrong place.
9. Most often, the standard length is not enough: unless you plan to highlight a small area. Therefore, you will have to connect the strips together for a complete structure. Of course, you can try to reinvent the wheel and come up with something yourself. But we strongly recommend that you buy special connectors - they are easy to use and safe. Simply place the edges of the two strips so that their contact pads are under the contacts of the connector and snap into place. It is done!
Important: Under no circumstances connect two tapes from different transformers. This is fraught with fire. As you can see, there is nothing complicated in installing LED strips - the main thing is to carefully study the instructions. However, keep in mind that each type of design has its own characteristics - it is better to study them separately.
[custom_ads_shortcode1]
LED strip installation under a suspended ceiling
Installing a stretch ceiling, especially if it is two-level, requires certain skills, so not everyone can do it, but many can create an original light pattern. Since a single-level suspended ceiling with LED lighting is installed and secured exclusively to the guides located along the edges of the room, the space between them, or rather the entire rough ceiling, is a field of activity and a blank sheet of paper.
To create a unique light pattern, first of all you need to draw the location of the strips on the ceiling. The LED strip for the ceiling is selected depending on the planned pattern and the color of the ceiling material. They can be white or colored.
Based on your drawing, you need to measure the footage of the tape, add a little to the resulting value, taking into account unexpected changes, and buy the material - an LED strip, as well as connectors connecting its individual parts, and wires connecting this tape to the room’s energy system. You will also need to purchase a relay that changes the color intensity.
How to attach the LED strip:
- This tape is made on an adhesive basis, so it is easily attached to the ceiling. The only condition is that the ceiling is completely ready for this action. Its surface must first be degreased, primed, sanded, and puttied.
- The adhesive layer sticks well, so you need to act slowly, carefully, very precisely.
- Cutting of the tape is possible only in places specially marked for this purpose, and connection is possible with special connectors. Strong bends also affect the lifespan of the LEDs, forming a pattern.
- After finally gluing all the parts that are on the ceiling and connecting them to each other, you need to connect the lighting to the network. However, it would be wrong to think that the wires from the tape can simply be plugged into a socket. This requires a special converter and power supply.
- For tapes of different lengths, there are different power supplies, the power of which must be calculated taking into account the length and number of tapes. Also, their power depends on the level of energy consumption, which is indicated in the certificate of the LED strip and in the instructions issued when purchasing even 1 m of this strip.
The power consumption is indicated per 1 meter of length, so when installing, you need to multiply the length of the tape by the power of one meter.
Having calculated the result, you should select the power supply closest to it. After studying the instructions and connecting the entire picture to the common network, you need to check the operation of the lighting. Once the assembly is complete, you need to install the suspended ceiling, after which you can enjoy the result.
In the interior
The use of diodes in ceiling decoration is a popular technique. First of all, because it allows you to emphasize the advantages of the stretched fabric and create amazing visual effects. Let's look at some examples? Even simple lighting around the perimeter can significantly change the perception of a room: make it taller and more spacious, add air and volume.
By the way, we recommend that you experiment with the color of the LEDs. No, we do not urge you to make repairs every month - it is enough to purchase an RGB strip, the lighting mode of which can be adjusted using a remote control. This way you can find the perfect option for you.
Embossed stretch ceilings will look amazing if you illuminate them from the inside. Thanks to the flexibility of silicone pipes, the LED strip can easily take any shape - use this to create volumetric and non-standard lighting.
None Shaped lighting of a stretch ceiling with LED strip is not difficult. It is enough to use a detailed plan diagram and be careful during installation - the slightest carelessness will ruin the entire appearance of the canvas.
A translucent stretch ceiling illuminated by diodes is another fashionable technique that is easy to implement. Thanks to the texture of the coating, light passes through it beautifully, creating a truly fantastic impression. However, you need to take into account that the installation of the tapes must be done extremely carefully - the lighting elements should not extend beyond the boundaries of the planned area.
By the way, pay attention to how the same room changes with different lighting - it is the translucent canvas that fully reveals the capabilities of LED strips, adjustable by remote control. Do you like printed fabric? Lighting around the perimeter will help make it more expressive.
Important nuance: Do not put LED strips outside under any circumstances. Otherwise you will ruin the effect.
Using diodes, you can create a variety of patterns - don’t be afraid to experiment. If this lighting is not enough for you, install spotlights.
By the way, combining LED strips of different colors looks interesting - a good technique for a bedroom or nursery. Try playing with color contrasts - it looks very interesting and is easy to implement.
We hope we were able to convince you that installing hidden lighting is not particularly difficult, and the result will suit almost any type of interior. The main thing is to show your imagination, then LED strips will help you create the room of your dreams.
None LED strips are being used more and more for decorative ceiling lighting and local lighting, and I don’t need to tell you about it - the RuNet is full of advertising sites. My article is also on this topic - illumination of a commercial glass display case.
I recently did decorative and intimate lighting for a stretch ceiling with an LED strip, I really liked it – it was absolutely breathtaking! An LED strip installed into the ceiling from the inside is a fashionable and popular trend today, and with this article I will try to present all the information on the topic.
Initially we have a loggia with a perimeter of 10 meters, and a suspended ceiling is stretched over the main ceiling (sorry for the tautological expression).
The designer’s idea is simple and beautiful - what if the ceiling is made with a print of the starry sky, and a lighting source is installed in the ceiling - an LED strip? The black areas of the stretch ceiling (sky) do not shine through, but the stars and other luminaries begin to glow when the backlight is turned on. About the same as in the title photo.
Of course, it’s difficult to call this lighting; here we are talking about decorative lighting. Such a ceiling would be good especially in the bedroom...
There are such solutions on the Internet, but light guides and even crystals are increasingly used there. Yes, the stars are probably brighter and clearer this way, but the price...
[custom_ads_shortcode2]
LED lighting of a stretch ceiling from the inside: ideas for use in a home interior
The ceiling, illuminated from the inside by LEDs, takes on an original appearance: it looks weightless and seems to float above the entire space, creating a feeling of lightness and spaciousness. And with a change in the intensity and color scheme of lighting, the mood and character of the entire interior changes.
LED lighting of a stretch ceiling from the inside (or LED lighting) performs well as the main lighting, while it is not boring and, moreover, multifunctional. LED crystals tightly placed on the strip serve as a source of uniform, bright illumination. The mode of the light flux can be adjusted - dimmed or increased its power, adjusting it to the desires and needs of the owner.
Even without any design flourishes, a continuous strip of white light can completely transform a familiar interior. By the way, the white color in LEDs has several shades of glow: warm, cold, neutral - which one is more pleasing to the eye.
Most often, a strip with LEDs is used in single-level stretch ceilings, but it can give a completely new sound to a two-level ceiling structure. The LED strip, along with the power supply and regulator, is hidden behind a plasterboard plinth, and from there, glowing lights cast colored highlights on both adjacent planes of the ceiling - the result is elegant and beautiful.
Using LED lighting, it's easy to create the illusion of a night sky in your room. To do this, you need to install a “starry sky” stretch fabric and highlight its outline with blue or cold-white LEDs.
Sky stretch ceilings have remained at the peak of fashion for many years. Its attractive idea appeals to adults and children alike. The canvas with flying clouds creates a feeling of height, flight and endless space. And LED lighting can double this effect.
With its help, you can visually adjust the geometry of the room, highlight zones, highlight the most advantageous design elements, create light paintings and even completely change the color scheme of the interior. In order to achieve a truly amazing effect, it is important to choose the right type of LED strip.
Installation of LED strip under a suspended ceiling
The implementation of the idea of illuminating the ceiling with LED strip began with the connection with the ceiling makers and finishers. They pre-fixed their fasteners for the stretch ceiling. So, after that, I glued two 5-meter pieces of LED strip directly to this fastener (this is a plastic frame). It turned out just right, no soldering and no cutting.
Installation of LED strip in a suspended ceiling.
It is worth paying attention that the tape may have a poor-quality adhesive part, and the tape may come off after a month. Therefore, before installation, it is necessary to degrease the surface, or better yet, use your own glue, for example Dragon for plastic, or liquid nails.
[custom_ads_shortcode3]
Stretch ceilings in the bathroom
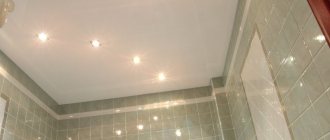
PVC film is used for their production. You can choose any color, but light pastel colors are most often used for the bathroom. LED strips are usually used for lighting. An important function of films is protective (against leaks from upper floors). Additional lighting is installed near the mirror.
Stretch ceilings with LED strip in the apartment.
Connecting the tape
A wire (more precisely, a cord) ShVVP-2x0.75 goes down the cable channel to the power supply. The connection of the wires must be reliable, otherwise getting to this place later will be problematic. It is clear that it is better to tighten the supply wire under the plaster, but here the client came up with the idea (as often happens during the renovation process) afterward.
It is better to choose a thicker wire here, for example 1 or one and a half squares. The installation, connection and power supply of the LED strip are described in detail on SamElectrika in the article Design and connection of the LED strip.
In this place there will be a cabinet covering the entire wall, which will cover both the cable channel and the power supply. Under no circumstances should the power supply be mounted in the ceiling, as...
This is a serviceable unit, in other words, it can burn out and will have to be replaced. In this case, the power supply for the LED strip is attached to the wall above the baseboard.
Here is the connection between the power wire and the two tapes closer:
Installation of LED strip for illuminating a stretch ceiling - connection point. The power supply is installed at a level “above the baseboard”, behind the cabinet, where no one can reach it. This is also important for security reasons. More details can be found on SamElectric in the article about connecting LED strips, the link was above.
If the power supply has an output voltage adjustment, then in our case, to increase reliability, it is better to set the voltage at the power supply terminals to about 11.5 - 12.0 V. Another couple of tenths of a volt will be lost on the wires. This project uses a 60 W power supply, Gauss Led LED strip, 2 reels of 5 meters, 12 V power supply, 60 3528 LEDs per meter, 4.8 W per meter, without moisture protection.
It is important that in order not to experience a feeling of deep disappointment in a year, you need to glue the tape to the base with superglue every meter or more often.
For a stretch ceiling, I do not recommend installing brighter (more powerful) LED strips (for example, on 505 diodes) - overheating is possible. The temperature inside the ceiling depends not only on the power and number of LEDs, but also on the cooling and volume of the ceiling (interceiling space). If the gap between the suspended ceiling and the floor slab is very small (1-2 cm), it is better not to use tape - overheating is possible...
Power is supplied to the LED strip.
LED strip before installing a stretch ceiling.
None Then the concrete slab was painted with white paint, and after a couple of days the stretch ceiling film was stretched.
[custom_ads_shortcode1]
What's new in the VK SamElectric.ru group?
Unfortunately, it was not possible to take the final photo, but I can assure you that the stars and other celestial bodies on the stretch ceiling glow quite naturally. And black remains bottomlessly black. If you look closely, there is a little flare around the edges. It would be better to raise the tape higher, to the concrete slab, then the dispersion would be ideal.
This is where I end the article. If you have any questions about lighting a stretch ceiling with LED strip, ask them in the comments.
[custom_ads_shortcode2]
Illumination from within
This method of decoration is no less popular. Most often, this option of highlighting is carried out through some object. The light diffuser can be an acrylic shaped box, glass, fabric and other types of materials. To create a light source in such a ceiling, it is better to use a strip of LEDs. The light from the LEDs passing through the diffuser is dim and plays more of a decorative role. Craftsmen widely use several basic options for organizing the illumination of a stretch ceiling with LED strip:
- contour lighting (the presence of uniform soft light that spreads over the entire area);
- directional lighting (LEDs attached to the slope produce light that spreads in the horizontal plane and creates directional rays);
- shaped lighting (the LED strip is hidden behind a translucent base that forms scattered rays of light of a certain direction);
- “starry skies” (individual LEDs installed in random order).
It is not recommended to install a suspended ceiling very close to the LED strip due to the fact that the light-emitting elements emit heat, which can have a detrimental effect on the material.
Did you like the article? Add it to your social network and rate it!
ratings, average:
from 5).
Loading…
Home / Ceiling design / Illumination of a stretch ceiling with LED strip from the inside - what does it look like?
A stretch ceiling can be decorated in a variety of ways. Starting from the installation of additional backlit levels and ending with various paintings printed on the canvas. However, there is another original way that will decorate the surface much more effectively. This is illumination of a stretch ceiling with LED strip from the inside.
[custom_ads_shortcode3]
Behind the eaves lighting
One of the best ways to illuminate a stretch ceiling with LEDs, helping to highlight its beauty. By placing an LED strip in a cornice or on a wall, you can achieve various effects of LED illumination of a stretch ceiling. This lighting option provides uniform light.
The main advantages of eaves lighting for a room are:
- attractive design;
- functionality;
- secrecy of design;
- ease of fastening.
What does it look like
This design looks very beautiful. One of the advantages of such decor is that when turned off it is invisible, but as soon as you turn on additional lighting, the room is completely transformed. The photo below shows what the suspended ceiling lighting with LED strip looks like from the inside when turned on.
The picture is simply amazing. By placing the tape in different places, you can create entire light paintings on the canvas. If you connect several modules separately, you can set your own color for each of the elements that make up the decor.
A combination of neon and regular light will beautifully highlight individual areas of the coating.
[custom_ads_shortcode1]
Advantages of LED lighting
Recently, when advanced technologies are actively being introduced into everyday life, LED lighting can be used in almost any room. It can cover large areas, and if an LED strip is used, due to its flexibility, the backlight can have different shapes, which will allow you to create a unique masterpiece.
It is very difficult to overestimate the advantages of using LEDs in organizing light. Illumination of a stretch ceiling with LED strip has a number of significant positive qualities:
- It operates using low voltage voltage.
- Has a high level of fire safety.
- Occupies little space.
- It is compact.
- It has no radiation harmful to humans.
- It has a significant service life (about ten years).
- The LED strip is quite flexible and easy to install.
You should not buy an LED strip with frequently located LEDs. This version of the tape is used to organize direct lighting, and in the case of a stretch ceiling, decorative (contour) lighting is considered.
There are countless options for organizing lighting in a room. Using different types of ceiling lamps, as well as combining them, it is easy to create a unique interior. But there must be moderation in everything.
You should not oversaturate the room with light, stick to one style, and properly executed stretch ceiling lighting using LEDs will become the main highlight of the house.
