Features of the concept
As shown in the photo of the vibrating screed, it is a standard rule with a slider attached to it. Usually, an asynchronous type motor with eccentrics is used as the latter. The movements of the shaft create vibrations of a mechanical nature, which are transmitted to the rule in the form of vibrations.
The rule has the form of a steel frame structure equipped with handles and handles designed for control and carrying.
Method of working with a vibrating screed
- Before pouring concrete, it is necessary to set the horizontal guides.
- The vibrating screed is lined up along the guides.
- The concrete mixture begins to be poured, which should slightly cover the vibrating screed.
- Next comes the compaction process by vibration of the tool.
- The rail is pulled along the aligned guides.
- During operation, the vibrating screed makes unpleasant noises, and due to vibration, calluses can form, so use personal protective equipment.
All of the above methods will help to avoid difficulties when laying concrete pavement.
Types of rack vibration compactors
Depending on the type of engine, the following types of vibrating racks are distinguished:
Gasoline. The advantages of a petrol vibratory screed include a high level of performance, autonomy, financial accessibility, ease of operation, and reliability. The downside is that harmful gasoline fumes are released during operation. Used on large-scale objects.
Electrical. The advantages of electric vibrating screeds are environmental safety, noiselessness, maneuverability, relatively low weight, and efficiency. Disadvantages include high cost and network dependence. Used in small enclosed spaces.
According to their design, tools for vibration processing are divided into:
Floating. The floating vibrating screed is a lightweight device that operates without guides. Purpose – thin-layer finishing leveling of a concrete surface.
Surface-reversible. Equipped with a reversible forward motion device and a rounded profile. The tool can move in any direction.
Double telescopic. Used on large construction sites. Made from steel or aluminum. Installation power – 250 W. The difference is significant weight and work exclusively on guides.
Sectional. They are assembled at the work site from separate sections. Pros: efficiency, versatility, cost-effectiveness.
Devices with guides. Allows to process concrete at a depth of up to 0.3 m. Equipped with a system of profiles. They are characterized by high productivity.
DIY vibration screed
For small jobs, you can use a homemade vibrating screed.
Manufacturing
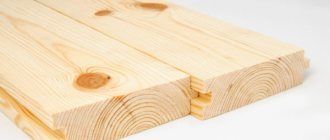
The simplest option is to assemble a vibrating screed from a board, timber and drill.
- First, the surface of the board must be sanded, all irregularities must be removed. It is this material that will serve as the basis.
- Next, a drill is attached to the board, about 25 cm wide and about 30 mm thick, with self-tapping screws. The drill should lie lengthwise on one of the sides.
- Also, a meter-long beam is attached to the board using self-tapping screws.
The vibration screed is ready.
Usage
It is easy to use.
You insert a curved drill into the chuck of an electric drill and connect it to the mains, thereby creating vibration movements of your board.
Don't forget about safety rules! Wet concrete can be a good conductor of electrical current. Wear gloves and boots.
Flaws
There are no shortcomings in a homemade vibrating screed. They are as follows:
- No matter how you sand the board, it will not have the same smooth surface as an aluminum screed.
- The power of the drill is not sufficient to work with a larger board, and accordingly, the work will be performed in small sections.
- Disposable vibration screed, because After the first use, the board will become unusable.
- It is impossible to regulate the speed.
Vibrating screed option with aluminum profile
It will be more difficult to make a vibrating screed with a metal lath with your own hands. In addition to the monetary costs, you also need to have technical knowledge.
Instead of a board, in this version an aluminum profile will be used. This design will last you longer. The function of the handle will be performed by a pipe, and, of course, a vibration motor.
We do not recommend using welding in this option. For safety reasons, cover the handle of such equipment with insulating material.
Adviсe
- Your homemade design will be reliable if you secure all its components properly . The bolts must be tightly screwed. The wire should not dangle.
- After you have made a vibrating screed with your own hands, test it . To begin with, a small surface will suit you. Test your homemade tool first, otherwise you may ruin the entire screed. Do the work without rushing.
Recommendations for using vibrating screeds
There is nothing complicated in using vibrating screeds; the main thing is to follow the following rules:
- Checking the serviceability of the tool before turning it on is mandatory.
- The work requires the use of personal protective equipment such as rubber boots and gloves.
- The equipment must be installed correctly.
- The guides must be set strictly horizontally, taking as the reference point the zero mark corresponding to the level of the finished floor.
- After laying the concrete, you need to turn on the vibrating device and pull it along the guides using cables. Areas of mortar subsidence must be filled with small portions of the mixture until leveled to the required level.
- Upon completion of work, you must thoroughly clean the device, paying special attention to the bolted parts of the frame.
- Small irregularities in the concrete surface can be removed with a grinding machine.
Vibrating screed rental
Professional vibrating screeds cost from 20,000 rubles (electric) and from 40,000 rubles (gasoline). Not everyone can afford this.
Also, many developers do not see the point in spending that kind of money, and when screeding the floor and foundation, they cannot do without this tool.
Therefore, the best option would be to rent a vibrating screed for concrete. Almost all large stores offer rental services for tools and equipment.
You can rent a vibratory screed for a certain number of hours or several days, leaving a certain deposit, which is provided for by the store’s policy.
Conclusion
As you can see, this hand tool is multifaceted and you need to clearly understand what kind of work you want to do and what type of equipment will be more effective in different cases.
But the most important thing is that you understand what an advantage concrete surfaces have, the solution for which was mixed using vibrators, even if it is a homemade vibrating screed for concrete.
In the selected video in this article you will find additional information on this topic.
Last stage of assembly
A homemade vibrating screed, unlike a factory one, is reliable , because the parts are assembled with your own hands and, accordingly, possible defects are eliminated during the work process. But when assembling, you should take into account the main nuances. It is necessary to place a vibration installation on the handles and profile in such a way that it is possible to firmly fasten the part.
A three-phase wire is connected to the installation and the electric motor. The starter is mounted on the engine; for better convenience, it must be secured to the handle. In this case, screwdrivers are used. The exposed connection points on the wire are insulated with ordinary insulating tape. In order for the structure to last much longer, it should be covered with high-quality paint, because the metal will constantly encounter moisture, and the consequences may come in the form of corrosion.
How does the device work?
Despite the difference in models, the operation scheme is the same: torque from the engine is transmitted to the vibrator. The eccentrics create vibrations that are transmitted to the concrete through the frame (profile). A vibration screed actually consists of two basic components: a frame and a power unit.
The design of the unit is quite simple, so it is often assembled independently. Of course, self-made devices do not have ideal external characteristics, but they cope with the job of compacting concrete. Considering the high prices for new professional equipment, design can be sacrificed for the sake of real financial savings, which will certainly come if you make the instrument yourself.
DIY assembly
First, you should list the necessary components for the vibration rack. The list includes:
1. channel (to create the frame frame);
4. electric motor;
6. insulating rubber;
7. three-phase cable;
8. starter for the electric motor, regulating the speed;
With a diagram of a homemade vibrating screed, you can go to a specialized store to purchase all the materials on the list. But it is quite possible that some of the components can be found in your own garage or workshop.
To make a vibrating screed, you will need the following tools and equipment:
- welding machine with protective mask and gloves;
- drill, metal drills;
- screwdriver
You can rent a welder or invite a specialist. It will cost more, but there will be a 100% guarantee of high quality seams and fastenings. The durability and operational parameters of the equipment being created depend on how correctly the welding work is performed.
Those who still decide to make a vibrating screed with their own hands without outside help need certain skills, namely:
- Experience working with a welding machine;
- electrical knowledge;
- General accuracy, ability to follow instructions and read diagrams.
Sometimes for an amateur craftsman the main obstacle is his own “creativity”. Instead of correctly following the recommendations, a person wants to make “unique equipment,” but in the end he gets a completely different result. In order for the vibrating screed for screeding a concrete floor to turn out the way it should be, it is important to follow all points of the instructions.
The process of assembling the electric rail is carried out on a flat surface (table, workbench) in the following sequence:
1. Making handles.
2 curved handles are formed from a piece of reinforcement. They are attached to the profile by welding. You can strengthen the reliability of the connection with self-tapping screws; the handles are insulated with rubber.
2. Engine installation.
The motor is placed in the center of the frame. This ensures uniform transmission of vibration throughout the frame. The engine is attached to the frame using two corners. Self-tapping screws or welding are used, the sequence varies. The first option assumes that the corners are attached to the motor, after which this structure is mounted on the profile. In the second case, the corners are fixed to the frame, and then the engine is installed on them. The methods are essentially equivalent. The master can do what is convenient for him.
Tools and materials
Construction stores sell all the necessary parts for assembling a vibrating screed. You can avoid shopping if you have your own workshop with the necessary material. For manufacturing you will need the following elements:
- if the vibrating screed is intended for home use, it is enough to purchase an electric motor with a power of 1.2 kW;
- a steel channel is suitable as the main frame;
- bolts and nuts;
- metal or aluminum corners;
- vibration installation;
- For insulation, ordinary rubber is suitable;
- starter for an electric motor with adjustment of the required rotations;
- three-phase electric wire;
- To construct the handles you will need several pieces of fittings.
