How to decorate a bottle
You can make your own bottle decor using various materials. The following is often used as a basis:
- - leg-split;
- - ropes;
- - tapes;
- - paper;
- - skin;
- - eggshells;
- - salty dough;
- - pasta;
- - cereals.
You can also use beads, decorative stones, sea salt, paint for decoration...
Popular exterior design methods
The simplest way to decorate a bottle is to paste it or paint it on the outside. For this, almost anything is used: from sand, cereals to shells and fabrics. The main advantage of this design is its ease. You can create a unique design even with your child.
For the external decoration of bottles the following are often used:
- salt;
- cereals and pasta;
- decoupage;
- twine;
- ribbons;
- eggshell;
- salty dough;
- beads;
- threads;
- leather;
- lace.
Salt
Coarse salt resembles artificial snow, which is why it is usually used when decorating bottles for the New Year and Christmas. It is covered with white paint, after which it has completely dried, the surface is coated with glue. It is recommended to place the bottle horizontally and slowly scroll it, holding it by the neck. While scrolling, you need to gradually add salt, it is better to do this by hand. After the glue has completely dried, the excess “artificial snow” will fall off on its own. You can add sparkles or small beads on top.
Cereals and pasta
Peas, lentils, beans, millet - for decoration it is better to select seeds and grains of the correct shape that will look neat. Large seeds can be laid out in the shape of a star, heart or numbers. It’s worth playing with a variety of sizes and shapes, gradually creating a subtle pattern.
Having come up with a future pattern, you should choose pasta of an interesting shape that suits the style. Often, pasta is coated with gold paint on top, creating a visually expensive decoration in the Rococo style. It is recommended to draw shadows after the paint has dried with a thin brush with black and gray paint. This way the composition will gain greater attractiveness and additional volume.
Napkins
Convex parts are created from napkins, they are glued individually, painted, then attached to the bottle and covered with several layers of varnish. Most often, roses, curls and other three-dimensional shapes are made in this way. Also, using napkins with a beautiful pattern, you can make an original bottle decoupage.
Twine
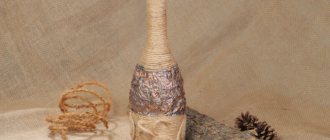
Decorating with twine or coarse craft thread is quite popular. The thread is secured at the bottom of the bottle and wound tightly round and round. Sometimes the coarse thread is tied in patterns like sea knots. This design is perfect for a fashionable loft-style interior or as a gift for a sailor. Also, in combination with thin lace, this design of bottles is often used at weddings in natural and rustic styles.
Ribbons
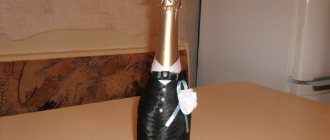
Multi-colored or plain satin ribbons are wrapped around the base of the bottle, starting from the bottom. A large bow is tied at the neck level. In this case, there are as many color variations as there are ways to tie a bow. Artificial pearls, rhinestones, and flowers are glued on top. On wedding champagne, ribbons form a pattern in the form of the groom’s suit and the bride’s dress; this fashion was even called “He and She.”
eggshell
To begin with, the eggshells are thoroughly washed and broken into small, almost flat pieces. The antique or ethnic design looks incredibly elegant. The glass is painted or chosen in a dark color, preferably brown or black. The shell is used as a mosaic. It is pre-painted in the chosen color, in this case gold or sandy orange. It is necessary to leave gaps between the pieces of shell in which the background will be visible. It is not necessary to cover the entire surface with mosaics; it is better to leave a few empty spaces. If desired, they can be decorated with a pattern or using the decoupage technique.
Salt dough
Salt dough allows you to create a whole work of art from an ordinary bottle. A three-dimensional sculptural image is gradually molded on top of the glass form: houses, flowers, fairy tale characters. At the very end, the dough is painted with a thin brush, drawing the smallest details.
Beads
Decorating bottles with beads is an incredibly labor-intensive and delicate task that requires great patience and accuracy. Starting from the bottom row, the beads are glued onto the glass with tweezers in accordance with the intended pattern. It is quite difficult to learn such a delicate task on your own, so before starting work it is better to attend a professional master class.
Threads
This method is suitable for home interiors. A variety of threads are chosen: from wool to floss. The most beautiful variations are obtained when using plain, bright threads with a slight sheen.
Threads can cover the entire surface of the bottle or be placed on individual parts of it. The free space can be painted over with paint to match the threads.
Skin
The bottle is covered with leather, stitched around the edges or wrapped with a leather strap. The result is decor with an oriental flavor. This is the most suitable way to decorate a bottle of cognac for a man older than middle age or a boss.
Decoupage
The decoupage technique is simple, does not take much time and is very beautiful. Pictures in a certain style are cut out of napkins, soaked a little with glue and glued to a pre-painted bottle. After drying, the product is varnished.
Lace
The decor of the bottle with lace creates a feeling of airiness and tenderness. This option will be a cute detail for Valentine's Day or a romantic date. The decoration of the bottles is first done with fabric, mostly satin, with pieces of elegant lace attached on top of the fabric. It is important that no traces of glue are visible under the lace.
Coffee bottle made of twine
For this bottle decor you will need:
- - Glass bottle;
- - leg-split;
- - glue gun and sticks for it;
- - coffee beans.
Progress:
- 1. It is necessary to wash the bottle well and degrease it, using alcohol.
- 2. Using a glue gun, wrap the bottle from the neck to the bottom with twine.
- 3. Repeat another layer with twine, there should be no show-through, each roll of twine should be pressed tightly against each other.
- 4. Glue the coffee beans in a fairly orderly manner, with the convex side.
This bottle will fit very well into almost any interior, both in the kitchen and in the living room.
Bottle decor with paper or napkins
Bottles decorated with paper or napkins look very interesting. Very often, this is the method used to make New Year’s bottle decorations with your own hands. This technique of decorating bottles is not too complicated and does not require special skills or a significant amount of time.
The main thing is to choose good quality napkins for use, preferably they consist of 3 balls. Decorating a bottle with napkins or paper is called decoupage.
Kitchen decor made from cereals, pasta and eggshells
For those who don’t know how to decorate a bottle for the kitchen with their own hands, there is another simple solution - pasting it with pasta. Today there are a lot of original pasta on sale, ranging from small noodles to large shells. Some craftsmen use PVA glue to glue individual hexagonal figures together, making delightful lace souvenirs in the form of kitchen utensils. The finished “service” is painted with gold plating or another color.
External surface decoration with bulk materials is another simple technique. It's easy to turn ordinary beer bottles into designer bottles by transforming the outer surface. An original mosaic base can be easily obtained by gluing pieces of shell onto glass and covering it with paint. Then you can use any other technique.
Beautiful bottle design
Decorating bottles for the interior
Drops of glue, resin, paint, or any quick-drying liquid are applied to the surface of the container. After drying, decorate the bottle by opening it with an aerosol. The design of a beer bottle sprinkled with cereal or salt on top of the adhesive surface will look no less interesting. You can apply layers of bulk materials of large and small fractions, for example, semolina and buckwheat, interspersing them with millet. Under white or golden paint they will be evened out, playing in the decor with contrasting textures.
In a similar way, you can decorate a bottle of wine that has not yet been opened, and after a memorable event, use the container as a memory. To decorate wine bottles with your own hands, you can use traditional handicraft techniques - macrame, crocheting and knitting, beading.
As a good example, we offer a master class on decorating wedding bottles.
See alsoFlowers on the balcony: design, new ideas and photos
Decoupage bottles
To decorate a bottle using decoupage technique you will need:
- - bottle;
- — three-layer napkins with the desired pattern;
- - white acrylic paint;
- - acrylic transparent varnish;
- - scissors.
Progress:
- 1. It is necessary to wash and degrease the bottle well.
- 2. Paint the entire bottle with white acrylic paint and let dry.
- 3. Divide the napkins into layers.
- 4. Cut out the desired piece of the napkin or you can use it entirely.
- 5. Carefully apply the napkin to the bottle and cover with acrylic varnish.
- 6. Let the bottle sit and dry.
When covering a napkin with acrylic varnish, you should act carefully but quickly so that bubbles do not form on the surface. You can also use various ribbons, lace, sparkles for additional decoration...
Bottle painting
Necessary materials:
- Glass bottles
- Acrylic paint
Pour a small amount of paint into the bottle so that the bottle is painted from the inside, and turn it over several times. In order for the paint to dry, the bottle must be turned over and secured to the surface, excess paint will drain off. If there are gaps or insufficient brightness, repeat coloring. This is the easiest way to decorate bottles.
To create a composition, you can paint the bottles one color, or stick to one shade. The finished bottles, despite the simple method, look interesting. You can insert artificial or real flowers into them. It is not recommended to pour water into a painted bottle.
Candy bottle decor
Decorating a bottle with candies is one of the most popular options for decorating a bottle of champagne or wine. This method requires a minimum amount of materials and little time.
It is worth preparing:
- - a bottle of alcohol;
- — candies in a wrapper, preferably round;
- - glue gun and sticks for it;
- - thin decorative tape.
Using a glue gun, you need to glue the candies over the entire area of the bottle. Apply a minimal amount of glue so that it does not leak outside the wrapper.
It is necessary to glue the candies in such a way that there is no translucence, and to place them close to each other. Tie a bow of decorative ribbon near the neck.
If desired, you can use double-sided tape instead of a glue gun.
How to decorate a bottle of champagne with ribbons
For a wedding or anniversary, the following champagne bottle decor will also suit you.
You will need:
- satin ribbon (3.5 m)
– gold brocade ribbon (1.5 m)
- glue (preferably instant)
- scissors
- a bottle of champagne with gold foil
1.
Prepare a bottle and tape and measure its approximate length for the first layer. To do this, attach the tape to the neck of the bottle.
2.
When you have measured the length, cut the desired piece of tape and mark several points on it with glue.
3.
Next, wrap this piece of tape around the bottle to cover the champagne wrapper. It is advisable to tighten the tape well, thereby preventing unevenness.
4.
Measure out the second piece of tape. It will be longer.
5.
Proceed with the second piece as with the first piece of tape, i.e. Mark the dots with glue and glue. It is advisable that the ends of the ribbons be positioned equally, this will ensure a beautiful and neat pattern.
6.
Continue gluing the next two layers (3rd and 4th) in a similar manner.
7.
Now prepare the gold ribbon. It also needs to be measured and glued. Make 2 rows (see picture).
8.
Another piece of gold tape needs to be glued to the bottom of the bottle.
9.
Prepare the blue ribbon again. Measure and glue to the bottom of the bottle so that the seam is at the back.
10.
Now we cut 7-8 blue ribbons of the same length and glue them in the same way - so that the seam is at the back.
11.
Here's the rear view. A not very neat seam has formed that can be easily closed. To do this, prepare a stationery knife and use it to make a slot for the end of the tape, which needs to be inserted there.
12.
Apply a little glue to the tip of the blue tape and push it through the gap.
13.
Next, you need to apply glue to the entire tape and press it tightly to the bottle.
14.
Pay attention to the middle of the bottle, there is an open space there. This is where we attach another piece of golden ribbon. The corners that stick out from the front need to be cut off.
15.
Now you can decorate the front of the bottle - add bows, lace, beads, etc.
Bottle decor with salt
You can decorate a bottle with salt in several ways: internal and external decoration. Each method is quite interesting and exciting to work with.
For the first method of decorating a bottle with salt you will need: acrylic paint of different colors and salt. It is necessary to place the salt in a heat-resistant bowl, mix with the desired color of acrylic paint to obtain a homogeneous consistency. Place in a preheated oven and bake for 1 hour at 100 degrees.
Take out the mixture, mash with a fork and sift through a sieve. The glass bottle must be completely dry and clean in appearance. Pour sand into the bottle using different colors and pour them in layers.
In order to decorate the outside of a bottle with salt, you need to prepare: an elastic band about 5-8 mm, white paint, glue, salt. Before you start decorating, you should wash the bottle well, remove all paper labels from it, and degrease it with alcohol. Place a rubber band on the bottle in the form of a spiral or other desired shape.
Cover the bottle with an even layer of white paint and let dry. Apply glue and dip the bottle in salt, let dry. Remove the rubber bands from the bottle. This simple method produces a rather original bottle. You can use various sparkles, rhinestones, and decorative stones as decoration.
DIY bottle decor - turning unnecessary containers into decor
Originally shaped bottles can be turned into chic home decor using one of the techniques or combining them with each other.
If you don’t feel like throwing away empty glass bottles, then give them a second life by turning them into beautiful and fashionable decorations. There are many accessible and inexpensive techniques that make it easy to decorate bottles with your own hands. Ready-made crafts can be used in the interior of your home, for gifts and even for sale, providing yourself with a good additional income. Choose your decorating method, or even better, try several options!
- Filling a bottle with colorful salt
- Decorative canning - kitchen decoration
- Decoration with cereals and legumes
- Decoration with fabric and leather
- Twine for transformation
- Decoupage - new from old
- Napkin technology for unusual textures
- Coloring for a new life
- Unusual eggshell effect
- Pasta and buttons - budget luxury
- Candy bottle - a delicious gift
- Step-by-step master classes on decorating
Filling a bottle with colorful salt
Simple decor of bottles with salt is ideal for joint creativity with children and does not require special artistic talents and skills, so it is worth considering first. The principle of decoration is simple: a beautifully shaped transparent bottle is well washed from the label and dried. Then prepare multi-colored salt - you can color it with chalk or gouache.
Gouache is added to dry salt and mixed well, and then dried. To speed up the process, a baking sheet with salt can be placed in the oven for about an hour. In the case of chalk, small portions of salt are poured onto a sheet of thick paper and rubbed with colored crayons. This method is convenient for small batches. It is better to take coarse salt, you can use sea or Himalayan salt.
Next comes the most important process - you need to pour colored salt into containers as carefully as possible, using sheets of paper to direct the stream. You cannot shake the dishes, otherwise you will get crooked contours. To get beautiful stains, you need to tilt the container in different directions. Beginners can try with parallel strips - although it will not be as impressive, but it will be neat.
Decorative canning - kitchen decoration
This method cannot be called simple, but the result is worth the effort. Decorating bottles with canned vegetables is somewhat similar to winter preparations, but the difference is that stronger substances are used for canning. Please note right away that you cannot eat such canned food - they are suitable only for decorative purposes.
You can preserve red peppers, dwarf tomatoes and cucumbers, carrots, zucchini, and capers. Acetic acid, glycerin or other embalming solutions are used as preservatives. We have already talked in more detail about this technique of decorating bottles with your own hands - read on if you are interested.
Decoration with cereals and legumes
This method of decoratively filling bottles is somewhat similar to decorating with salt, but beans, peas, dried corn, colorful cereals, coffee, and dry unground spices are used as decoration. In appearance, such decorations resemble decorative canned food, but they are much easier to make, since they do not require filling, and can be stored at any temperature without fear of “explosions.”
Separately, it is worth mentioning the filling of containers with semolina - it is glued to the surface, creating elegant patterns that look like delicate lace. To obtain the perfect design, stencils are used to help apply glue to the dishes with high precision. Beginners can use double-sided adhesive bases.
Decoration with fabric and leather
Out-of-fashion dresses, worn jeans, knitted items, and jackets are suitable for decorating bottles with fabric. The fabric is either glued, tightly covering the container, or beautiful reliefs are created from it. The second method is more popular because it allows you to get original textures. In addition, it does not require beautiful materials - even old pillowcases will do.
Thin fabric is cut into strips, soaked in PVA glue diluted in different proportions with water, then lightly wrung out and glued to a glass container, giving the desired relief. After the glue has dried well, the surface is painted with water-based paint in the desired color.
Burlap is ideal for country style - a rough material that in the hands of needlewomen becomes elegant and delicate. The bottles are covered with burlap, and then the craft is decorated with lace, braid, and flowers, which are also made from burlap. Read more about the capabilities of this material here.
A budget solution is to decorate bottles with tights. The bottom part of the tights is cut off, moistened in PVA and a glass container is decorated with wet nylon, creating volume. First, the bottle is threaded inside the stocking, and then reliefs are created. You can additionally make knots, bows, and flowers. The finished vase is painted and varnished for durability.
Leather is a luxurious raw material that turns bottles into interior vases and substantial gifts. For work, they use not only natural, but also artificial leather, but natural raw materials are more convenient to work with. Go through the things in your closet; most likely, there are unnecessary jackets and skirts taking up space there, which are ideal for creating beautiful leather crafts. Below you can find links to step-by-step lessons.
Twine for transformation
It’s quite simple to decorate bottles with twine, but such a vessel looks very impressive and is suitable as a gift not only for women, but also for men. This technique pairs perfectly with coffee bean jewelry, so it's worth combining these two hobbies to enhance the excitement of the result. Instead of twine, linen threads or braid are used - this creates decor in an ethnic style.
The easiest way is to wrap a rope around the base, soaking it in PVA glue. You can decorate the resulting vase with flowers made of leather, plastic suede, burlap, ribbons, as well as buttons, coffee beans, and shells. This technique does not require careful preparation of the surface of the bottle, but it is better to remove the label.
Instead of glue, it is convenient to use tape; for more information about this technique, see our master class on creating a vase.
Decoupage - new from old
The decoupage technique is almost universal; with its help, old and unsightly things are turned into unusual decor. For decoupage, containers of any colors from any materials are suitable, including dark glass, ceramics, and plastic. The base is first leveled with a primer, then covered with acrylic paint and the decorations are prepared.
Decoupage napkins, cards or printed images are used as decoration. To protect the design, the product is coated with varnish. Read more about techniques in our master classes on decoupage of a cutting board and glass plate. These MKs are quite suitable for decorating bottles.
Napkin technology for unusual textures
Decorating bottles with napkins using the paper art technique allows you to get an attractive vase in which it is difficult to guess the source material. The surface of the bottle must be cleaned of sealing wax, but in this case it is not necessary to remove the paper labels. White napkins should be cut into strips, which should be used to cover the surface of the container with PVA, slightly stretching the paper.
It is recommended to cover half of the container, let it dry by placing it on the non-glued side, and then finish the job. The dry surface is painted, decorated with decoupage, flowers or figures made of cold porcelain or polymer clay. Then painted in the desired color.
If you don’t want to use additional decor, you can stick napkins without stretching, but, on the contrary, with drapery, imitating reliefs. The result will be a spectacular texture reminiscent of modeling. It is convenient to decorate bottles with toilet paper or paper towels - they are more durable and easier to drape.
The surface should be painted and patterns applied with acrylic paints, and the decoration should be secured with acrylic varnish. It is recommended to work with a textured surface not with a brush, but with a sponge. Read more about this technique.
Coloring for a new life
Fans of drawing will love the decor of bottles using the painting technique, and novice artists will love turning unnecessary containers into an original vase. To begin with, the glass container is washed well, wiped and degreased with acetone, nail polish remover or alcohol. If it is not necessary to paint the entire surface, but to create the effect of stripes, then cover everything that should remain transparent with masking tape. The same principle is used for a multi-color pattern.
Next, acrylic paints or spray cans are used - matte ones look impressive, but for those who like gloss, there are varnishes. You can decorate a painted surface using stencils, brushes, volumetric elements, and glitter. To get spectacular water droplets, the bottle is wetted and spray paint is quickly applied to the surface covered with droplets.
Dishes with a textured surface are difficult to paint with a brush, but there is one secret - textured containers need to be painted from the inside. This is very simple to do - pour paint into a bottle and shake it well. The product should be dried with the neck down. You will likely need to repeat the process to ensure the second coat perfectly covers all the gaps.
Unusual eggshell effect
Eggshell is a valuable material with which it is easy to obtain items in an aged style or imitation snakeskin. To decorate a bottle, its surface is first primed with PVA glue, and the shell is crushed into pieces of the desired size, but it should not be crushed. It is important to free the inner surface of the shell from the film.
The technique of decorating bottles with eggshells is simple - the glass is smeared with PVA glue, a piece of the shell is applied and pressed. In this case, the material still cracks and, if desired, these elements can be moved apart with a needle. After drying, the work is inspected and too large gaps are filled with small parts.
The finished product is painted with acrylic interior dyes of the desired tone and varnished. The result is a very beautiful vase with a fashionable crackle effect. Read about other possibilities of eggshells in another article on our website “Women’s Hobbies”.
Pasta and buttons - budget luxury
For those who prefer a hobby with minimal costs, decorating bottles with pasta is suitable. Don’t rush to abandon this technique, it just seems simple, but with the help of dyes you can get luxury interior items sparkling with glamorous gold or noble gilding.
Durum wheat pasta is glued with the same PVA glue - it leaves no marks and connects different materials well. You can use buttons, washers, and other small parts with pasta.
It is convenient to paint a craft from a spray can, but this can only be done outdoors. In other cases, acrylic interior paint or from an art store will do. In this technique, it is recommended to use blackening, gilding, and silvering - this will make the pasta look like metal.
Candy bottle - a delicious gift
In this technique, unlike all those described above, you only need to decorate full bottles, not empty ones. The result will be a unique bouquet of sweets that you wouldn’t be ashamed to present not only to your loved one, but also to a respected man, for example, a doctor or teacher. Such a gift can hardly be called a bribe, because it is made with your own hands.
It is advisable to choose candies that are packed in foil - this way the contents will not be damaged by glue. You need to glue the elements using a glue gun, you don’t need to overdo it - a small drop is enough.
Step-by-step master classes on decorating
There are many more techniques for decorating bottles with your own hands, because this hobby stems from other types of needlework and creativity. Use our step-by-step master classes to get guaranteed results. But don’t be afraid to add your own twist to your creativity!
Marine style bottle
Bottle decor with leather
Flask made of bottle and leather
Flask with polymer clay decor
Knitted cover
Marine style photo frame
Decoupage in masculine style with themed decor
As you can see, turning bottles into masterpieces is simple and fun. As a result, gifts and decorative items appear.
Perhaps you have already used something that we did not have time to talk about in this publication. Share your secretaries with readers of the online magazine “Women’s Hobbies” in the comments.
Bottle decor with shells.
Decorating a bottle with shells is a great idea for nautical-themed decor. On the Internet you can find master classes on decorating bottles from this material.
Bottles decorated with shells, sea pebbles, and sand are very stylish and add additional coziness to the room in which they are placed.
One of the easiest ways to decorate a bottle with shells.
You need to prepare:
- - glass bottle;
- - shells of various sizes;
- - acrylic paints;
- - glue gun and sticks for it.
Progress:
- 1. Wash and degrease the bottle with alcohol.
- 2. Paint the bottle with acrylic paint of the desired color and let dry.
- 3. Apply another layer evenly and let dry.
- 4. Using a glue gun, glue the shells around the bottle in a fairly orderly manner.
You can also decorate a bottle with shells if the base is made of twine, salt, sand...
Interior decor
For the kitchen or dining room, it is better to choose interior bottle decoration. This way they can be easily cleaned of dust during wet cleaning. This will not affect the beauty of the product in any way. Let's look at interior design methods.
See also DIY kitchen panels - 9 original ideas.
Vegetables and fruits
At first glance, it may seem that the original glass bottles contain a variety of vegetable pickles. Cherries of any color, beans, small peppers, and mushrooms are suitable here. Vegetables that are too bulky can be cut and given an interesting shape.
An empty bottle can be filled with anything
You can make a collection from several bottles
Bottles wrapped in fabric will look very nice
Once the bottle has been prepared and sterilized, you can begin selecting the filling. Fruits and vegetables should not have any damage or rotten spots that will spoil the entire appearance of a beautiful product. After all the fruits are placed in the container, a preservative is poured. There are several recipes for it:
- Vinegar 9%. It is worth clarifying that it noticeably discolors the fruits, giving the vegetables brown and mustard shades.
- Ethyl alcohol also has the ability to lighten the filling.
- Vegetable oil is suitable for preserving herbs.
- A solution of gelatin and sugar is ideal for fruits and flowers.
- Medical formaldehyde. It is considered poisonous and cannot be used for food. At the same time, vegetables and fruits retain their rich colors.
You definitely need to think about which preservative to make better, it depends on what the result will look like. The composition should not fade over time.
Decoration option for glass bottles
Bottles with flowers will very harmoniously complement the interior of the room
When pouring liquid, the vessel is slowly tilted to the sides to distribute it evenly among the vegetables and fruits. Then close it with a lid or stopper (it is recommended to cover it with liquid paraffin to increase the tightness). You can use these decorative bottles for the kitchen or dining room.
See alsoWedding table decoration
Flowers
The rules for decorating with flowers are practically no different from the previous method. When choosing a preservative, it is better to give preference to a gelatin base.
Flower buds do not need to be packed tightly. Sometimes just one plant is enough. The composition can be supplemented with stones and shells.
You can decorate the bottles however you like.
You can stick a photo on the bottles
Butterflies on the bottle will perfectly complement the overall picture
See also: Wall decor - DIY paper fan
Cereals, pasta
Decorating glass bottles with cereals and pasta is quick and easy. This is accessible even for small children. Suitable items include: peas, beans, spices, seeds, rice, buckwheat, dried berries, pasta of various shapes and colors. The main advantage is that there is no need for preservative liquid.
Using bulk materials, you can easily create original patterns inside the bottle, for example, by laying out seeds or cereals in layers.
Pasta deserves a special place in bottle decor. They can have the brightest saturated color. They are also easy to paint. You can add color using ordinary gouache. The number of shades depends only on the idea of the composition.
You can use any form of pasta for decoration. The only exception is spaghetti - they look ridiculous inside glass.
The bottle can be decorated with one color and flowers can be placed in it.
You can not only decorate the bottles, but also stick flowers on them
See alsoUsing stencils in the interior: photos, varieties
Salt
A decorative bottle filled with colored salt is not only an original interior decoration, but also a wonderful surprise for any occasion. Its production does not require large expenses or any special skills. All you need is a good mood and a little imagination.
To decorate a bottle with salt, you need to complete several steps described in the table:
| No. | Actions | Materials |
| 1 | Clean the bottle from any remaining liquid and labels. Degrease the surface and dry thoroughly. The glue is easily removed with nail polish remover. | Brush, household chemicals intended for washing dishes, hot water, degreaser. |
| 2 | Prepare the filler. To color the salt, gouache is added to small jars and water is poured. The mixture should not be pale. Then salt (coarser) is placed here and kneaded to a uniform consistency. Each color is prepared separately. | Salt, gouache, water. |
| 3 | Dry the colored salt in the oven. The bottle can also be put in order using the indicated method. | |
| 4 | The container is filled using a funnel. You can add multi-colored layers or create some special pattern. | Salt, bottle, funnel. |
| 5 | Decorating the neck is the final stage. | Braid, satin ribbons, threads, bottle caps. |
After the oven, most likely, the salt will turn into one lump; it will need to be broken with a rolling pin or a kitchen hammer, and then sifted. If you don’t want to bother with coloring, you can purchase multi-colored sea salt.
You can make a collection from these bottles
To decorate a bottle on New Year's Eve, just put it in a bag like this
You can make anything from glass bottles, even a mill
See also: Decorating a chest of drawers with your own hands
Tips for decorating a bottle
1. Regardless of how the bottle will be decorated, it must first be degreased.
2. The bottle must be completely clean, dry and without any labels.
3. It is best to use acrylic paints to decorate the bottle.
4. It is best to start wrapping the bottle with twine or thread from the neck to the bottom.
