The canopy came to us from the Middle East. And the Arabs adopted the idea of how to organize protection from heat, wind and rain from ancient Babylonian antiquity. Silk fabric from Baghdad appealed to the Italians, who were reputed to be the trendsetters of education, fashion and taste. They gave it the name “baldacchino”.
For many centuries in a row, the canopy served as a symbol of power, framed the thrones of emperors and the royal bed, covered and protected from heat, drafts, prying eyes and from insects at the same time. In religion, a similar canopy is also present - it is a canopy, designating a particularly holy and revered place in the temple. Such canopies are made of stone or wood, richly decorated with carvings and gilding.
Finally, the canopy ended up in the children's room and happily remains there, guarding the safe peace of the little princes and princesses, still indicating who has the true full power in the house.
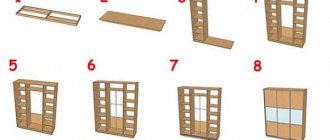
Photo design ideas
Advantages and disadvantages of a canopy over a baby's crib
Any mother dreams of a cozy and beautiful bed for her baby. But is a canopy over a crib really necessary? You can do without it, after all. Let's look at the advantages and disadvantages of a canopy for a children's bed.
- The canopy behind which the crib is hidden protects the child from the large and not yet safe outside world - it does not allow wind, noise, dust, light to pass through.
- The newborn falls asleep better and feels calmer in a confined space.
- Nothing beautiful is alien even to the eyes of a child. As soon as a child begins to see, he needs to be surrounded by beautiful things. In such an environment, children's intelligence and emotional background will develop better.
- Even older children will not refuse a beautiful tent over their heads. This will be their small, but personal space.
- A canopy creates coziness and gives rise to many additional design ideas for a children's room or parents' bedroom if the cradle is next to their bed.
Now about those “ifs” that can lead to reality not meeting expectations:
- If the room is very hot and stuffy, the canopy will interfere with, rather than help, the child's fresh breath. The baby will sweat and diaper rash will appear. The lack of oxygen will be indicated by redness of the skin and anxiety of the baby.
- If the materials are of poor quality, unnatural, children's allergic reactions, irritation of mucous membranes, dry skin, and then asthma may follow.
- If you choose the wrong color, design, size, then this strong accent element of space will look alien, bulky and inappropriate.
There are no categorical contraindications for why a canopy is needed. There are only conditions by observing which you can get a beautiful, cozy interior at home. You will admire the photographs of the nursery from this period of your family’s life for a long time and look through the moments dear to your heart in your memory.
Choosing the type and method of fastening
A nursery with a canopy looks completely different. And achieving comfort and peace is so easy. It is important to secure it correctly and securely. All fastening methods can be divided into three typical ones:
- Central fastener. The material is held in place by a holder stand, with a round or oval frame located at the top. You need to put a baby canopy on it and distribute the fabric along the outer edge of the crib. This type of fastener is very suitable for a round or oval cradle.
- For a classic rectangular children's canopy, the fasteners are pulled along the ceiling or installed on brackets mounted on the wall. The principle of operation is similar to curtain rods: the canopy on hooks or rings can be moved and pulled apart like a regular curtain. This method is stationary for rectangular cribs; it will no longer be possible to move the bed from place to place. Most often used for older children - ages 1.5 - 3 years.
- Partial cover, when the holder is placed at the head of the bed and covers only part of the crib. It is purely aesthetic in nature, serves for beauty in the nursery and does not particularly protect against anything.
There is a very simple way to hang a canopy. The fabric is draped in gathers, secured, sewn on a loop and hung on a hook or nail in the wall. The wall-mounted option is good as a temporary one when you need darkening or protection during ventilation. You can take such a canopy with you to the dacha, on a trip, or place it anywhere.
Choosing fabric for a children's canopy
The choice of fabric for a canopy for newborns, infants and small children is subject to increased requirements. The main thing is that it is a safe material:
- hypoallergenic;
- hygroscopic;
- easy to hygienically process;
- air permeable;
- has noise-proofing properties;
- mosquito.
Which of these qualities to pay attention to in the first place, and which will be of secondary importance, is decided by parents, based on individual requirements, the characteristics of the cradle, children's room, the age of the child and his state of health. Last but not least, you need to pay attention to the beauty of the canopy, design and fashion trends.
Chintz
From the point of view of safety for the baby's health, the material is suitable. It contains one hundred percent cotton. It does not cause skin irritation, has good air permeability, is easy to wash, and is not expensive. The downside is that the material shrinks during the first wash, can fade and is very wrinkled.
Confirmation of the listed advantages is the fact that bed linen, home and children's clothing are sewn from chintz. In general, lightweight natural chintz in cute colors works well as a canopy over a crib.
Fine linen
It is also a completely natural fabric with a rich history, the most common among the Slavic peoples, more durable and wear-resistant than cotton. Linen has bactericidal properties, high absorption capacity, and creates “temperature comfort.” This means that under the flax canopy it will not be hot in summer and cold in winter.
If necessary, a linen canopy of natural monochromatic dyeing (beige, white, straw color, blue, pink, etc.) can be washed at high temperatures and even boiled. It is better to dry it straightened out, as the material wrinkles a lot and creases remain on it even after ironing.
To decorate a nursery, you need to choose a loose, sparse plain weave, since very dense linen is stiff and unsightly bulges in the folds.
Flannel
Fluffy, soft flannel has been dear to all of us since early childhood. The fabric is dense, with a small pile, and quite warm. Printed flannel is used to make diapers for newborns, caps, baby vests, rompers and much more. The underside of the flannel is not dyed, which means it is absolutely harmless to the skin of babies. Flannel has all the advantages of natural materials: wear resistance, hypoallergenicity, thermal conductivity.
You can decorate a flannel canopy bed very elegantly if you sew it yourself from the same simple fabric or order covers for the sides of the cradle, an envelope for a newborn, a children's bedding set, a hanging panel with pockets for small items and toys.
Silk
This is a unique material that consists of 97% protein compounds. According to its physical and chemical characteristics, it is close to human hair and animal fur.
Natural silk prevents the development of bacteria, absorbs unpleasant odors and does not cause an allergic reaction to the skin, mucous membranes and respiratory tract. The smooth material does not accumulate dust, does not become electrified, absorbs moisture, flows in soft folds, shines and shimmers pleasantly. It looks luxurious.
But it costs so much that not every family can afford a canopy made of natural silk. And the composition of all substitutes no longer has such outstanding practicality, hygiene and durability.
Organza
A beautiful transparent fabric of different colors, light and elastic, often used for canopies. It does not wrinkle and holds its shape perfectly, is easy to wash, and dries quickly. Depending on the production technology, it can be matte or glossy; upon tactile contact it creates a feeling of coolness.
But in processing - sewing and cutting organza is very difficult, the fabric slips and frays. It also does not allow air to pass through well and transmits light well. So organza will not help against sun rays.
Making a children's canopy with your own hands
If you don’t find what you want on sale, or you’re not happy with the price, this also happens; you don’t need to give up the cradle of your dreams. You can make a canopy with your own hands. Nothing complicated, the thing will definitely turn out to be exclusive, no one else will ever have such a crib.
From the hoop
For the frame on which the curtain will be attached, any available materials are suitable, sometimes not very necessary in everyday life. For the base of the canopy it is very convenient to use the detachable part of the embroidery hoop. It will not be good for her to wear a piece gathered at the drawstring of a suitable size. The shape of this design resembles a crown, wreath or bridal veil.
Design and decoration are created according to your wishes. The entire structure will be hung from the ceiling or mounted on a bracket, the role of which will be played by a stick attached to a clamp.
On a frame
A reliable canopy on a frame mount covers the entire crib from ceiling to floor. It is suspended on guides along the perimeter of the bed, fixed to the ceiling or on racks made of aluminum, plastic, or wood. Be sure to check the design for strength.
Sewing a canopy is very easy, because it is an ordinary curtain. The height is measured from the attachment point to the floor, seam allowance and hem allowance is made. And the width, taking into account the fact that it will be necessary to lay down soft cozy folds, should be 1.5-2 times larger than the perimeter.
Arc-shaped
The base looks like half a circle. It will require a plastic frame or one welded from metal rods. The last option is more reliable. The flat part is attached to the wall at the head of the child's bed at a given height. The main thing is that parents and children do not hit their heads on it.
The most beautiful is the forged frame, it looks very stylish. At minimal cost, you can adapt an old wall lamp as a base, giving it a second life.
The canopy consists of two panels. They can be secured with wide Velcro loops, made into garters with ribbon bows, or hung with clips like a regular curtain. The canopy on the arch will cover the crib up to half or simply serve as decoration.
On a horizontal bar
A very simple method taken from life. This type of fastening can be found on towel racks that are placed in the bathroom or kitchen. A round bar is attached perpendicular to the wall, in the center above the headboard; you can use a piece of plastic pipe or a hollow metal one. If only it wasn't heavy.
Take a piece of double length and stitch it with a margin of 3-5 cm exactly in the middle. A holder is threaded through this loop and the fabric is distributed on both sides of the bed. To get a beautiful drapery, the width can be taken a little larger than the supporting mount.
Provide a plug to prevent the fabric from slipping during use.
With the birds
The idea of a children's canopy with birds is not difficult to bring to life yourself. The result will be a truly designer item. From the outside it will seem that birds of paradise have flown to the baby’s bed and are covering him with the thinnest cover.
The birds are sewn using a simple pattern that can be drawn by hand. You only need six parts: 2 for the body and 4 for the wings. Everything is sewn together separately and turned inside out. The body of the bird is stuffed with padding poly for volume, the wings are sewn on, and the finished eyes and beak are embroidered or secured. Make at least 4 of these birds, but it’s better to make 6-8 pieces.
They take thin, transparent, light material onto the bedspread, trim the edges, and decorate it according to their imagination. All that remains is to hang the birds by the back using strong threads from the ceiling, and sew a canopy to the belly or beaks, secure it with rings and pins.
If you use transparent fishing line for fastening, hang the birds at different distances and different levels, the effect will be very naturalistic, the birds will flutter in the air.
From a hula hoop for a crib or chair
A beautiful canopy tent is made from a hula hoop. They can be used to securely cover a baby's cradle or build a tent over an armchair, turning it into a secluded playhouse for children. It can be played in an exotic, folk, maritime or oriental style.
First you need to firmly hang the hoop on ropes from the ceiling so that it is in a horizontal position. The length of the main fabric should be equal to the height from the ring to the floor, plus 30-50 cm, plus 5-10 cm for the hem.
Finish the edges or take a finished curtain. Make a larger hem along the top edge and thread a cord, ribbon or braid into it. Put the cloth on the hoop and pull the edges of the rope, tie it, straighten the fabric.
Materials, working tools
In order for the work to proceed without failures, it is necessary to prepare all the tools. The list of required products is as follows:
- Long tape measure.
- Pencil
- Threads, needles
- Pattern
- Material for decoration, basic tailoring.
- Sewing machine.
The design is based on ordinary embroidery fingers. You can purchase the product in a store or make it yourself. To make the model beautiful, use bows, ruffles, lace and embroidery to decorate it. To do this you will need to stock up on:
- thick ribbons;
- colored threads;
- lace ribbons, bows.
Vintage style master class
If there is a beautiful piece of fabric in the house that you really like, but have not yet found a use for, perhaps it was created to become a vintage-style canopy that will decorate and update a child’s room, and at the same time cover a cold wall instead of a carpet.
- Hang two round cornices, two sticks or pipes from the ceiling. The latter will need to be first cleaned of roughness and painted. One of them should be located parallel to the junction of the wall and ceiling, 3-5 cm from it. The distance to the second is 50 – 70 cm.
- Measure the length of the canvas so that it goes behind the headboard, runs along the wall, stretches, bending slightly, and hangs from the second fastening no more than a third of the ceiling height.
- It’s good if the fabric is double-sided and beautiful from the front to the back. If not, you will need to cut out an elegant lining for at least the hanging top part.
- The free edge is made rounded.
- The edges (except for the bottom) are trimmed with beautiful tassels, fringe, and wide braid.
- Iron the finished product and hang the canopy.
Copper corners
Here, as in the previous idea, the curtains are placed at the corners of the bed, but the fasteners are very interesting.
You will need copper water pipe angles (4 pcs.), T-shaped pipe pieces (4 pcs.), copper U-shaped fasteners (12 pcs.) and plugs (8 pcs.), as well as 8 narrow lightweight curtains and 8 wooden sticks of such a diameter that they fit tightly into the corners. If you can't find copper pipes, you can take regular pipes and paint them with copper paint.
Glue the copper pieces to the sticks as in the photo below.
Then put the curtains with a drawstring on the sticks and assemble the structure. Attach the resulting cornices to the ceiling using fasteners - the canopy is ready. The only negative: to wash the curtains, you have to unscrew the curtain rod. You can make cleaning easier by taking curtains with rings rather than drawstrings, but then it’s better to paint the wooden sticks copper so that they don’t stand out too much, or take pipes instead.
Master class in a romantic style
Installing a children's canopy in a romantic style is no more difficult than a regular one. It is made from transparent tulle, chiffon, shiny or matte organza in the most delicate colors. You will also need hooks for fastening, two round sticks the width of the future product and ordinary sewing supplies. No pattern is required for this easy-to-make canopy. Finishing is optional and possible.
- Make markings on the ceiling and secure 4 hooks. They will hold the planks.
- Measure the required length of fabric, taking into account the hem and free hanging.
- The width should be 1.5-2 times greater than that of the mount.
- The edges of thin fabric fray a lot, so it must be folded.
- Mark the places for the folds into which the guide strips will be inserted. They can be done at the same distance from the edge or at different distances, then the canopy will be asymmetrical.
- Sew up the folds and thread the strips through them.
- Place caps on the ends to prevent the fabric from moving out.
- Attach thin ribbons or a beautiful cord along the edges.
- Tie the ends of the ribbons to the hooks at the required height.
Fixation
It is very important how you secure the structure, because the safety of the child depends on it. The fastening must be rigid and not loosen.
- If this is a floor bracket, then it must be stable and attached to the bottom of the crib; if it is attached to one of its walls, then the tightness of the fit to the surface should be maximum, and several clamps should be used.
- The hook on the ceiling must also withstand a heavy load (a child can pull the edge of the canopy).
From a hoop master class
You can make a canopy for older children from an ordinary hoop and one or two types of material. Small scraps will be used, they are combined by color. It is important that the fabric is not too heavy and does not bend the lightweight plastic hula hoop.
Step by step instructions:
- Measure the fabric to the required length and width and cut it. Sew the pieces into a common fabric.
- Finish the side edges, top and bottom with bias tape, braid or lace. You can cut off the right corners and make the sides rounded.
- Insert a detachable hoop into the drawstring and distribute the folds evenly.
- The top of the hoop will be crowned with a tent made of fabric segments.
- To do this, cut isosceles triangles of the same size from the remaining fabric. The height of the triangle should be 15-30 cm greater than the radius of the ring. A total of 8 of them will be required.
- Sew the triangles along the edges to each other. Leave a small hole in the middle (do not sew the tops all the way through).
- Make a secure loop from the cord and attach it to opposite points on the circumference of the hoop.
- Place a cone sewn from segments on top, align the edges at the bottom, and make an even hole on top above the fastening ropes.
- Finish the top and bottom of the cone with a simple hem or trim.
- Secure the panel to the hoop with split rings, bathroom curtain clips, and sewn ties. The method of fastening does not matter, since from above it will be covered with a cone from the tent.
- Put on the cone.
- Hang from a hook in the ceiling or a removable bracket above the crib.
If desired, the hoop and canopy fabric can be decorated with bows, appliques, iron-on stickers, beads, etc.
How to sew a canopy for a crib with your own hands patterns
Not only a baby will be happy with a beautiful canopy. An older child will also like it and will be a real surprise, for example for New Year or a birthday. To bring a lot of joy, you will need very little time and materials.
Cutting and sewing tools
No special devices or complex tools are required for work. We need the most common ones, those that are in every home:
- scissors;
- threads;
- pins;
- needles.
It’s faster to sew on a machine, but you can make neat seams on your hands. Sometimes a glue suitable for the fabric is sufficient.
We cut and sew
The canopy does not require a complex pattern. Usually it consists of one or two straight or rounded panels, and all the beauty is created by the material and interesting finishing. You only need to think about how to correctly calculate the dimensions. The standard width and length of the panel is 1.5 by 2.5 or 2 by 3 meters.
The height of the future product is important. If the canopy is needed for beauty, it can be made short. And to fulfill
The main task for protection is to hang the canopy on the crib, taking into account that the edges should extend beyond the level of the bed. Modern models usually have a lifting and lowering bottom with different levels. This nuance will also have to be taken into account.
Panels that are too long to the floor will make it difficult to pick up the baby and will make it difficult for the child to handle it when he grows up.
We sew a royal canopy
The royal canopy consists of a crown (the upper decorative gathered part) and a skirt (the lower long piece), which can also be gathered into folds.
First of all, you do the processing of the edges, sew on the flounces and lace, and then start making the folds and assembling the parts of the canopy. In a different order, it will be very difficult to sew the trim neatly and evenly.
The top, that is, the crown, is placed on a ring, and you can install a royal canopy over the crib.
Hint of canopy
This option can be implemented if you have a suspended ceiling or a wooden one, for example, that is, made of material that can actually be pierced with buttons. You will need two lightweight wooden knitting needles or hard plastic tubes. Light curtains with a drawstring are put on them, and then the sticks are pinned to the ceiling with large buttons closer to the head of the bed. The curtains themselves can be left hanging freely or gathered with ribbons. The canopy turns out to be very unobtrusive and light, so it can be coordinated even with a man who considers this decoration appropriate only over the bed of a young princess.
Win-win ideas for use in the nursery
A room where a crib canopy is hung always wins in design. It is very difficult to spoil it with such an atmospheric object.
Above the bed
The most beautiful canopy over a bed made of tulle with lace. As decorations you can use small rattles, soft toys Teddy bears, amigurumi, bells, felt hearts, fabric stars. In short, everything that will entertain the baby while he is awake.
A canopy over a child's bed will accumulate dust, and this is one of its purposes. You need to wash your bed linen frequently. It is very important that its installation/disassembly is easy, and that the decorations are removable.
Nook
A child's imagination knows no bounds. She is able to turn everything around into a game, especially such an unusual piece of furniture as a canopy. Give him this opportunity, and at some point a children's house, tent or tent will appear in the room. The canopy can be opaque, made of thick fabric, but not too dark.
Above a sofa or armchair
Not only the bed, but also other children's furniture can be decorated with a canopy, such as a sofa or chair. Most likely it will be a decorative canopy attached to the wall. But such a decoration element looks very stylish, elegant, and magical.
Decoration
It is not enough to simply sew a canopy. It will be functional, but will not give the desired decorative effect to the room. For decoration, various decorations are used, some of which are made by hand. How to sew a canopy so that it gives the room the desired effect? To do this, the finished product can be decorated with one of the following elements:
- Bows made of thick material and lace;
- Flags and boats;
- Flowers and butterflies;
- Ruffles made of fabric and ribbons;
- Beads of different colors and sizes;
- Small soft toys;
- Dolls made of fabric;
- Hearts made of cardboard or fabric;
- Pom-poms made of colored threads;
- White plastic chains with beads or clear stones.
Whatever decor you choose, the main thing is that it does not weigh down the light fabric. Otherwise it may be damaged. This way, you can sew your own canopy and place it over your baby's crib. The nursery will acquire a finished look and a cozy atmosphere.