Making furniture with your own hands can only be done by real craftsmen, each of whose products is a real work of art. But, sooner or later, the service life of a table, cabinet or bedside table expires: the furniture becomes unusable and loses its appearance. There are other situations: the furniture is still in good condition, but is tired: you want brightness, a holiday, so that the apartment is decorated with original things, and not a dull standard wardrobe, table or chest of drawers. And here a wide field of activity opens up for those who can and want to make things with their own hands.
Self-improvement and restoration of furniture at home has a number of advantages.
The benefits of decorating furniture with your own hands
Self-improvement and restoration of furniture at home has a number of advantages:
- you can choose the most suitable decor that meets your beauty requirements;
- purchasing materials is much cheaper;
- there are no restrictions on the timing of work;
- savings on purchasing new furniture.
Making furniture with your own hands can only be done by real craftsmen, each of whose products is a real work of art.
Work process
Looking at photos of furniture decor will give you an idea of the variety of techniques. There are many options for decorating items with your own hands.
For work, self-adhesive films, paint, stencils, various moldings, paper, fabric, and other available materials are used.
Deciding on the design
Restoration of old furniture will inevitably entail a change in the design of the room, and here you cannot “just like that” introduce new forms or unusual furniture decorations into the established interior of the apartment, which will stand out from the overall harmony. It is worth noting that there are design techniques that allow you to “fit” a product of another decor into the overall picture of the room’s design.
It is worth noting that there are design techniques that allow you to “fit” a product of another decor into the overall picture of the room’s design.
Before you start decorating, you need to decide on the design and elements of its renovation. For this you can use:
- decoupage;
- glisal;
- fabric, including tulle;
- painting;
- artificial aging using craquelure;
- stencils;
- mosaic;
- self-adhesive film;
- other methods.
Aging is one of the ways to restore furniture in a vintage style.
Each of them has its own advantages, but the home master will decide which one to choose.
There are no restrictions on the timing of work.
Vintage furniture doesn’t fit well with the current decor of most apartments, and this is something that home crafters need to take into account.
Decoupage of old furniture
One of the most interesting decoration options is decoupage. It makes it possible to decorate household items with a variety of images, photographs, and drawings. But most often special decoupage napkins are used for this.
Before you start decorating, you need to decide on the design and elements of its renovation.
The decoupage technique is not complicated, but it requires attention and accuracy, just like any other work. To decorate a product using it you need:
- free the furniture surface from varnish, old paint, drawings, pasted pictures;
- clean it until it is perfectly smooth;
- prime with acrylic paint;
- dry completely;
- then apply PVA glue to the surface;
- carefully place the napkin or other material chosen for decoration;
- To make the furniture shine, the decoupage image and the rest of the surface can be varnished;
- dry completely.
Restoring old furniture will inevitably entail changing the design of the room.
Unfortunately, not everyone can refine furniture by decorating it with original drawings.
Stencil
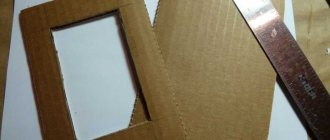
With a wide choice of designs for old wooden structures, you can come across the so-called applied decor for furniture or simply a stencil. This is one of the most common types of furniture decoration, since there is no need to have artistic skills to perform it.
NOTE!
Antique items for use in a modern interiorThe best models of chair covers with a back: useful tips, patterns and photos
Decor ideas - the best ideas and tips for choosing a handmade decoration style (105 photos)
Stencils can be purchased at any construction market. It is also recommended to buy special aerosol paint there.
It is best to use stencils on flat surfaces, because unlike film, you cannot hide any imperfections. Here we are talking only about giving the furniture a new breath.
Using stencils is very easy. Simply place it on the desired surface and spray a can of paint. It is recommended to open the furniture with varnish before applying it, then its area will become more uniform.
Restoring a closet using wallpaper
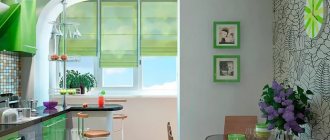
Many people will find the method of decorating old furniture with wallpaper unacceptable, but this is not so. Today the market offers the widest selection of these products, made in various colors and textures, providing the opportunity for flights of fancy to decorate furniture with your own hands. Wallpaper can be used to update any piece of furniture, depending on this, using different materials and patterns. But the most impressive look are cabinets, a large surface of which can be decorated with wallpaper with a spectacular bright pattern.
One of the most interesting decoration options is decoupage.
Surface decor with glissal
Some people consider coating products with translucent paint, which is called glisal, glaze, or azure, as a special chic when decorating. With its help you can decorate any surface, including furniture, regardless of whether it is made of wood or glass.
But most often special decoupage napkins are used for this.
It easily “lays” on the material, has no odor, but is distinguished by many color shades. It can be applied with a roller, brush or sponge, just like regular paint. The procedure for using paint is as follows:
- first you need to treat the surface: clean, remove dirt, degrease;
- then apply a primer: on wooden surfaces of furniture - one or two layers, on glass - four to five layers of primer, which creates the effect of frosted glass.
Before use, glisal is diluted with water in the proportions corresponding to the instructions. You can create a drawing within half an hour after applying the mixture; otherwise, it will freeze and it will be impossible to “draw”.
The decoupage technique is not complicated, but it requires attention and accuracy, just like any other work.
Furniture painted with plain paint with a white openwork pattern applied to it using a stencil will look impressive.
Furniture finishing. Work order
Tools for finishing furniture After you have decided on the paint and varnish materials with which you will finish the furniture you have made, you need to clarify the technology for finishing work with wooden furniture.
In order for your product to decorate your home, all its parts must be carefully prepared for finishing. The varnish will reveal every speck of dust remaining on the parts. You can remove dust from surfaces with a sticky rag and wipe the surfaces of all parts. It is done by dipping a clean, lint-free cloth into polyurethane varnish diluted with white spirit or into boiled drying oil. Water-based varnish is not suitable for this. Transparent finishing of furniture involves the following sequence of processes: sanding, changing color and revealing the wood texture with mordants and stains (if necessary), filling and priming, varnishing or polishing. For opaque finishing of furniture, the following sequence of processes is provided: sanding, priming, puttying, painting.
With all methods of finishing furniture, the very first stage is grinding, which ensures the elimination of cladding defects (irregularities, surface roughness, cracks) to properly prepare the surfaces of the part for paint and varnish coatings, thereby determining the final appearance of the finished product. Without proper preparation of the surface for a transparent finish, it becomes meaningless. Sanding is done with sandpaper. Sand the wood with waterproof glass sandpaper. The lower the number of the sandpaper, the finer its grain size and the better the quality of sanding.
Mordants and stains are carefully applied to the surface of the parts, depending on the size of the part, using a cotton swab, a wide brush or a sponge. They are quickly absorbed and dry, and often change color. Therefore, in order not to get such a surprise, it is better to test the effect of stains on a small piece of wood that you are going to finish. Keep in mind that the end surfaces of the part absorb paint more intensely than the side surfaces, and therefore they acquire a darker color. So that they do not stand out in color in the product, they should be moistened with water before painting. It should also be taken into account that water-based paints become lighter as they dry. The etched surface must dry for at least 4 hours, after which it is finally sanded with the finest sandpaper and pumice. Please note that the stains used must match the varnishes used.
Priming the surface to be finished is necessary to partially fill the pores and better bond the finishing material with the wood. Primers are applied to the surface with a brush along the fibers and after 20-30 minutes the excess mass is removed using a spatula or a rag made of coarse fabric with movements across the fibers. The remaining primer is rubbed across the fibers with a stopper. After the primer has dried, the surface is finally sanded with fine sandpaper and thoroughly cleaned of dust.
The painted or primed surface is varnished or polished . The first layer of varnish should be rubbed into the surface of the wood with a clean, lint-free cloth (a brush is not suitable for this).
Before starting varnishing, do not shake the jar of varnish, but stir the varnish with a clean bar so that air bubbles appear in it, which will spoil the polishing. The varnish should not drip from the brush, so you need to put a little bit on the brush. To ensure that there are no bubbles on the surface, you need to remove them from the brush by lowering it into a container with varnish and pressing it against its wall. If water-based varnish is used to polish wood, its fibers swell, which makes the surface rough. To avoid this, you can first moisten the wooden surface with water, the fibers will expand, they can be cleaned with sandpaper and varnished. You can simply sand the surface after the first coat of varnish. The surface should be covered with long and even strokes, in a thin layer, so as not to paint over the same area twice. Shading of the varnish is not allowed. It is necessary to ensure that the brush is always “filled” with varnish, then it will spread over the surface on its own without additional shading. An unsuccessfully applied layer of varnish can be removed by wiping the surface with a solvent.
A little about the features of varnishing using cold-curing varnish. It is significantly different from regular varnish. It is not difficult to apply if you follow all the rules for its preparation. Mixing the hardener and varnish must be done in a glass container. The mixture remains in working condition for up to three days. To increase shelf life, it is necessary to seal the container. The color coating and primer must comply with the manufacturer's requirements. Carry out work in a warm and well-ventilated room. You can apply the varnish in a thick layer, avoiding smudges. The varnish dries “touch” in 15 minutes. A second coat can be applied after 1 hour. Apply the third layer, if necessary, the next day. If there are no defects, then grinding is not carried out. Carry out the necessary grinding with lubricant in the form of washing powder. Once completed, wipe the sanded surface with varnish thinner. Works to obtain a perfect gloss several days after applying the last layer. Sand the surface with sandpaper and water until the entire surface becomes matte (shiny areas will remain only in the depressions). Polish the surface with polishing paste on a slightly damp cloth, then wipe with a cloth to remove dust. If you want to get a semi-matte (satin) surface, rub it with an ultra-fine wire wool coated with polishing wax. When finished, polish the surface with a dust cloth. A matte surface is obtained by using a larger sponge.
Polishing is the highest quality and most labor intensive type of clear finish. Only completely dry wood is polished, preventing moisture from entering the product and materials during the work. The first sign of moisture penetration is the appearance of whitish spots on the polished surface. Only finely porous wood species are polished well: walnut, maple, birch, alder, linden, etc. Oak and ash are species with large pores, and they are usually finished in some other way. When polishing, a very large number of very thin layers of polish are applied to the surface of the part. The more layers and the better each of them is dried, the higher the quality of the coating. When applying the polish, it is carried out using tampons and the surface to be finished must be in a stable horizontal position. You need to hold the tampon with your entire hand or just your fingers, but so that the entire working surface of the tampon is fully involved. To protect the hand holding the tampon from varnish sticking, it is recommended to wear a rubber glove. Please observe the following important rules. You cannot place a tampon on top of the surface to be finished, interrupt the movement of the tampon, or tear the tampon off the surface by lifting it up. Because in this case, excess varnish or polish is released from the tampon, which can dissolve the already hardened film and leave irremovable faded spots on the surface - burns. The tampon can be used to enter and leave the surface to be finished only from the edges using lateral sliding movements. In this case, the work is carried out in the following sequence. A layer of shellac polish is applied and rubbed thoroughly in a circular motion. To fill the pores during this operation, the surface is sprinkled with pumice by rubbing two pieces of pumice against each other just above the surface. Repeated polishing with vegetable oil is carried out after two days, when the first layer has dried. After soaking for two days with a more liquid polish, the surface is again polished with oil. Before applying the last layer, the surface is dried for at least 6 days. To obtain a mirror shine, wipe it with a swab moistened with alcohol. Polish with a woolen swab. This swab is similar to a cotton swab, but instead of cotton wool, they use a piece of clean woolen cloth wrapped in linen, which is moistened with polish. The polish is applied to the product in thin layers with light pressure, which you increase as the polish is used up, using circular overlapping movements. The tampon should not be torn off from the surface until the entire supply of polish in it has been used up. Work with the newly moistened tampon begins from the edge of the product, and finish rubbing the surface with a sliding motion to the side. After each filling of the tampon with polish, you need to drop one or two drops of linseed or sunflower oil onto its working surface - the tampon will easily slide over the surface. After finishing polishing, your product will look so “real” that you will get great pleasure from the difficult work done.
The question of what to varnish and what to polish in your product is up to you to decide. Usually, only the doors and lids that are in plain view are polished, and the edges can be given a glossy shine, and the doors a matte finish. The remaining surfaces are usually varnished.
Now about the opaque finishing of furniture. After sanding the furniture parts, it is necessary to prime . Its goal is to create a thin film that provides the necessary adhesion of wood to putty and paint. This must be done to prevent the paint from peeling off. The type of primer must match the coloring materials. The primer is applied using hand brushes. The primer must be applied without gaps. The primed surface must dry for at least 24 hours to prevent cracks from appearing on the painted surface. After drying, sand the surface along the grain with medium-grain sandpaper and begin filling.
Puttying is carried out with the aim of completely eliminating all defects present on the surface to be finished and creating a completely smooth base for subsequent painting. To eliminate minor defects and damage, local putty is used, and to completely level the entire surface, continuous putty is used. Naturally, you need to start with local putty. Apply the putty in local compounds with a spatula. Once you have finished greasing all problem areas, dry the product for 24 hours, then sand the putty areas first with coarse-grained sandpaper and then with medium-grained sandpaper. For better adhesion of the continuous layer with local putties, additionally prime the greased areas, dry the part again, and only then proceed with continuous puttying. Apply the putty with a spatula in one direction and level it in the other. Try to lay it in as thin a layer as possible. After drying for 24 hours, carefully sand the surface with medium- and fine-grain sandpaper. The quality of the paint depends on the thoroughness of sanding. Once sanding is complete, apply a primer that dries and you can begin painting.
Good luck finishing your own furniture!
There's more to read
- How to insulate a residential wooden house with your own hands (0) The desire to build a country wooden house is quite possible. Moreover, companies selling wooden houses convince that they offer [...]
- Building a house: about floor slabs (0) Building a house is a serious process that should be approached intelligently. When there is a foundation, it is worth thinking about the walls and roof. If […]
- The smallest house in Sweden with an area of 12 sq.m (0) I dragged it to my blog. I liked the layout. Even 12 square meters can be made cozy and completely habitable. I have an old […]
- Interior design styles. A short guide from A to Z (0) Choosing a design style is the basis of an interior design project that will ensure the creation of a cozy apartment, country house, cottage, or any […]
- Nettle fertilizer! Even a weed can be useful. (0) Nothing is simpler. Chop the nettles, add water and let it brew. But for those who need details, I grabbed a very detailed text, like [...]
- How to make a fighter plane from the Star Wars movie out of paper (1) Any boy would love this handmade toy. You can watch a video or pictures where everything is laid out [...]
Sovrn
Decorating facades with acrylic paints
Using paint is one of the ways to decorate furniture. This is not just “refresh”, as some put it, but an opportunity to ennoble it and breathe new life. In this case, you can not just paint the surface with a single color paint, but paint it with different patterns and apply any ornament. If a home master has the skills of an artist, then his creative imagination will turn an ordinary cabinet or table into a work of art.
Many people will find the method of decorating old furniture with wallpaper unacceptable, but this is not so.
Typically, acrylic paints are used to decorate furniture, which are absolutely harmless to health, bright and rich. But you can also use plain paint so that any piece of furniture will look elegant and impressive. To do this, you can take several colors and decorate the facade in the form of multi-colored stripes of different sizes, squares, triangles, circles, ovals - this does not require much skill. And even if the figures turn out to be not entirely geometrically accurate, they will look very perky.
Many home craftsmen use craquelure to help achieve a cracking effect.
The procedure for decorating with acrylic paints using templates is as follows:
- the surface of the furniture must be cleaned to a perfectly smooth state; if there are any irregularities, sand them;
- paint and let it dry completely;
- attach a stencil and paint it in the appropriate colors;
- carefully remove it and let it dry completely;
- To make the surface of the furniture shine, it needs to be varnished.
But the most impressive look are cabinets, a large surface of which can be decorated with wallpaper with a spectacular bright pattern.
Decorating old furniture is a great chance for a home craftsman to show his creativity and save the family budget.
Aging as a furniture decorating process
Recently, it has become fashionable to use aged furniture in many interiors. But buying it in an antique salon is very expensive, so you can use aging furniture yourself.
To create the effect of old age on the surface of furniture you will need stain, water-based paint, craquelure varnish, sandpaper, brush, acrylic paint, most often silver or gold is used.
There are three techniques for creating the right aged effect on furniture. The first is aging with stain. This method is perfect for decorating furniture made of light wood. It looks very natural. The technique of work is as follows:
- Applying a layer of stain to the product with careful processing of the edges, joints and crevices.
- Wash off the stain from the center of the surface, leaving the edges untouched.
- Rubbing antique wax into the dried product.
There is a method of aging using craquelure varnish and paints. This option will help create the most aged effect in the shortest possible time. This method is used using the following algorithm:
- Choosing two shades of paint of the same color, one of which is darker than the other.
- Painting furniture dark.
- Applying light paint to a dry dark layer.
- Allow both layers of paint to dry.
- Cleaning with sandpaper those areas where it is necessary to make dark paint visible.
- Coating the product with varnish.
To give the interior more pomp and charm, you can use aging with gold paint. To do this, the item to be decorated is painted in any color. After the paint has dried, use a sponge to apply metallic paint with chaotic movements. After the work has dried, it needs to be varnished.
Coating furniture with craquelure
Many home craftsmen use craquelure to help achieve a cracking effect. It is achieved as follows:
- You need to carefully apply craquelure varnish to the paint that has not yet dried;
- it is prepared from egg white or PVA glue; sometimes vinegar or gelatin is used.
- for the cracking effect to be most vivid, the paint must be applied twice;
- The second layer is applied immediately after the first has dried: then the “cracks” that appear will be visible through the top one.
Some people consider coating products with translucent paint, which is called glisal, glaze, or azure, as a special chic when decorating.
Decorating furniture by aging
Aging is one of the ways to restore furniture in a vintage style. If you plan to decorate it in this way, you need to prepare the furniture as follows:
- sand: first with coarse-grained sandpaper, and then with fine-grained sandpaper;
- You can even not completely wash off the paint on certain areas of the surface, which will enhance the aging effect.
Using paint, you can decorate any surface, including furniture, regardless of whether it is made of wood or glass.
Vintage furniture doesn’t fit well with the current decor of most apartments, and this is something that home crafters need to take into account. Therefore, modern design finds can be included in its design, which will allow it to harmoniously fit into the existing interior.
You can create a drawing within half an hour after applying the mixture; otherwise, it will freeze and it will be impossible to “draw”.
New furniture upholstery
Do not throw away a chair or sofa due to scuffs or stubborn stains. Upholstered furniture can be covered with new fabric.
- First you need to remove the old upholstery.
- Then proceed to cutting out the parts, taking accurate measurements.
- The fabric is attached to the furniture using a construction stapler.
- You can cover not only upholstered furniture with fabric, but also chairs or stools, as well as an old chest of drawers or wardrobe.
- First you need to clean the surface of old varnish; this can be done with sandpaper. Remove the fittings, if any.
The fabric must be soaked in PVA for half an hour, then applied to the surface. Cover the surface with varnish.
Stencils for furniture decor
Unfortunately, not everyone can decorate furniture by decorating it with original drawings: not everyone is given the gift of being an artist - not all home craftsmen know how to draw, but there is no reason to be sad: drawings can be applied using ready-made or homemade stencils with various ornaments. The patterns are applied with paint using a template, and they can be fixed with a special varnish.
Using paint is one of the ways to decorate furniture.
Templates can be made:
- from thin plywood, having first applied a pattern to them, and then cut them out with a jigsaw, manual or electric;
- thick paper;
- plain film.
If a home master has the skills of an artist, then his creative imagination will turn an ordinary cabinet or table into a work of art.
In addition, you can use self-adhesive film on which a pattern is applied. It can be cut out along the contour and outlined with a pencil, and then carefully painted. Furniture painted with plain paint with a white openwork pattern applied to it using a stencil will look impressive.
Typically, acrylic paints are used to decorate furniture, which are absolutely harmless to health, bright and rich.
The procedure for decorating using a stencil is as follows:
- the surface of the product is cleaned; if there are irregularities, it is polished;
- all elements are painted over, after which they need to dry completely;
- make a stencil, carefully attach it and paint it with the appropriate color or several colors;
- Carefully remove the template and let the furniture dry completely;
- To ensure that the restored product retains its appearance for as long as possible, it can be varnished.
And even if the figures turn out to be not entirely geometrically accurate, they will look very perky.
Decorating old furniture is a great chance for a home craftsman to show his creativity and save the family budget.
You can take several colors and decorate the facade in the form of multi-colored stripes of different sizes, squares, triangles, circles, ovals - this does not require much skill.