Types and principle of operation
When choosing a material for construction, you should proceed from the tasks being solved and take into account the size of the budget.
The wire for heating concrete PNSV comes in two types:
- with galvanized conductor;
- with non-galvanized conductor.
In galvanized models, the wire components are protected from the aggressive effects of building mixtures. Non-galvanized models are often subject to corrosion and have a shorter service life, but also a lower price.
The technology of heating concrete with a heating wire using PNSV wires makes it possible to obtain strong and reliable structures. Before you start pouring, you must select a cable taking into account the required characteristics and lay it out correctly, and after pouring, plug it into the network. High temperatures affecting concrete will not change its quality; the structure will be strong and reliable when carrying out work even in the cold season.
The principle of operation is quite simple. After applying voltage, the wire is heated, and then the concrete mixture is heated. The recommended voltage limit is 70 V, so a transformer of appropriate power is used in this process.
Specifications
The characteristics of the heating wire differ significantly from the parameters of conventional conductors, since completely different requirements are placed on it. In this type of wire, the most important are not the properties of the insulation and conductor, but the amount of heat transfer and temperature properties.
Technical indicator of the product
If we consider temperature parameters, then for the PNSV wire they usually indicate the maximum permissible temperature, the value of which is 80 ° C. At higher temperatures, the insulation begins to deteriorate.
Note! The operating temperature for this type of conductor is in the range of −60 °C - 50 °C.
Another important characteristic is the installation temperature. The operation of the wire is permitted in frosts down to −60 °C, but its installation should not be carried out if the street temperature is below −15 °C.
An equally important parameter is the specific heat generation power. For conductors designed to transmit electricity, this characteristic is very low. For a heating wire, manufacturers indicate a heat generation power of about 20 W/m. Sometimes manufacturers declare this parameter with a value of up to 40 W/m, but the design temperature plays a big role here, as well as the presence of surface reinforcement, which significantly increases this parameter.
The next parameter of the heating wire is its resistivity, which directly depends on the cross-section of the current-carrying wire. For example, the calculation of a heating wire of the PNSV brand with a cross section of 1.2 mm² has a resistivity of 0.12 Ohm/m, and a wire of 2 mm² has a resistivity of 0.044 Ohm/m.
You may be interested in this Features of wires for electrical wiring
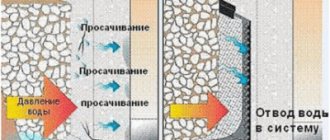
Considering that this type of conductor is laid in a concrete solution, its important property is resistance to the penetration of water, as well as salt and acidic environments, which is especially important for solutions that are poured at subzero temperatures.
Important! Various additives are usually added to such concrete to achieve the required viscosity.
Laying and installation
Heating of concrete must be carried out at low voltage and high current in the heating elements. When installing the cable, take into account the uniform heating of the concrete solution in the structure. Laying is carried out at air temperatures down to -15 ° C. Without tension, the conductor is attached to the reinforcement. Fastening is carried out using special clamps. Bends with a radius of less than 25 cm, as well as overlaps of current-carrying conductors, are unacceptable.
A frequently used pattern when laying PNSV is called a “snake”. It resembles a “warm floor” system.
When purchasing a PNSV wire, you must study the instructions supplied with it.
To increase operational efficiency, sections of the PNSV are produced in the form of a spiral.
You can use the quick installation guide using the standard method:
- Selecting the diameter according to the technical map. For heating reinforced structures, it is better to use durable PVC insulation, and for non-reinforced structures, it is better to use a polypropylene coating.
- Cut into equal lengths and then roll them into a spiral.
- Place in a reinforced frame or formwork.
- Connection to the network - after the concrete mixture begins to set. The transformer substation helps regulate the temperature by changing the voltage.
- Before installation, the volume of the concrete mixture, the length of the heating cable are calculated, its characteristic properties and ambient temperature are taken into account.
When calculating the length, the following are taken into account:
- design form;
- air temperature;
- concrete grade;
- thermal insulation;
- wind strength and direction.
To calculate the required amount of conductor, use special tables.
Preparatory work includes installation of formwork and reinforcement according to the rules. There should be no ice on them when working.
For installation, use clamps or paper clips. During the installation process, conductors are not allowed to intersect or touch. Particular care must be taken after switching on, since voltage surges must be eliminated as much as possible, otherwise the conductor will burn out and it will not be possible to remove it.
Installation recommendations
Preliminary calculations
Calculating the cable for heating concrete is quite simple:
- According to standards, it is necessary to provide from 0.5 to 1.5 kW of power to heat one cubic meter of solution.
- To save energy, you can add anti-frost additives to the concrete, as well as install insulated formwork. The cost of additional materials will be offset by a reduction in electricity costs.
- When pouring floors of standard thickness, up to 4 linear meters of heating wire are usually laid per square meter of area.
- When pouring a volumetric monolith, the conductors are laid in layers, with a gap of at least 30-40 cm.
Laying heating circuits
Recommended bookmark layout
Assembling a heating system with your own hands is quite simple:
- First, we erect the formwork and install the reinforcement cage.
- Then we evaluate where heating of the concrete will be most important, and select cable products from sections of the appropriate length.
- Most often, the surface of the material, the junction of horizontal and vertical planes, etc. are heated..
Cutting reinforced concrete with diamond wheels can damage the heating elements
Note! It is undesirable to cross expansion joints, as well as areas where diamond drilling of holes in concrete will subsequently be carried out.
- We lay the cables inside the formwork in such a way that all conductors lie at least 20 cm from the surface of the hardened concrete.
- To avoid the appearance of cracks and creases in the polymer insulation, turns must be made smoothly . The bending radius will be different for different models, but in most cases experts make it equal to 40-50 mm - with a margin.
- To ensure uniform temperature distribution throughout the concrete, it is advisable to place the conductors at an equal distance from each other . Crossing of wires is not allowed, and the minimum distance between two heating circuits is 40 mm.
Photo of the fixed conductor
After laying out, we fix the conductors on the fittings. To do this, we use ordinary wire, tying it without unnecessary effort or deformation of the insulation. You can also use plastic clamps.
Then we fill the formwork with concrete, being careful not to disturb the placement of the thermoelements. VET and KDBS cables allow vibration, so concrete can be compacted.
We connect all laid elements into a system with contact wires, and then connect them to a power source.
Design
PNSV has a conductive steel core. The diameter of such galvanized wire is 1.2 mm. The insulating layer is made of PVC plastic or polyethylene. It is not afraid of kinks, abrasion, aggressive environments, is durable and has a high resistivity.
The temperature range for operation is from - 60 to 50 ° C above zero. Quite a long service life - minimum 16 years. The wires operate in intermittent and long-term modes. The metal foil recommended for covering them helps to achieve uniform heating of the thermal field. Typically, foil is used for such purposes, the thickness of which is from 0.2 to 0.5 mm.
Explanation of the name
The first character “P” in the abbreviation stands for the product itself – the wire. The letter “H” is the most informative symbol, indicating the function, that is, the heating wire. Data on the material of manufacture is encrypted in the third letter of the modification “C” - steel conductor. The last symbol in the abbreviation “B” indicates that the insulation material of the product is polyvinyl chloride.
After the letters in the modification, the wire cross-section is indicated. The most common models are with a cross section of 1; 1.2; 1.4 mm², but also found with 6 mm².
Why is it needed?
The process that occurs in concrete during its hardening period directly depends on the temperature regime. In winter, when the temperature drops significantly, the water naturally freezes. This can lead to problems with hydration of the concrete. Thus, the raster does not harden completely, since it freezes in some areas.
For what purposes is the cable used?
With the arrival of spring, the temperature gradually rises, the water melts, and the integrity of the solution is compromised. This phenomenon has a negative impact on the integrity of the structure. In this regard, its durability is significantly reduced.
Note! To prevent adverse consequences, it is necessary to provide electrical heating of the concrete using wires of various types.
It is important to note that no foreign process occurs in the solution itself. This indicates that the structure is homogeneous. This phenomenon has a beneficial effect on the durability and strength of concrete.
You may be interested in Heating wire for pipes
Advantages and disadvantages of PNSV
Heating concrete with PNSV wire is a fairly profitable method. The benefit is obvious, since the cost of the conductor is low and the electricity consumption is relatively low. Another important advantage is that the wire is resistant to alkali and acid. This fact makes it possible to use this method of heating concrete with PNSV wire even if various additives are added to the concrete mixture.
The main disadvantages include:
- complex calculation of wire length;
- use of additional equipment.
Connecting the PNSV wire
If you are planning to install the PNSV wire yourself, then we will give you the basic installation rules. After all, to obtain the required indicators, it should not be done by eye, but a special calculation should be used.
This calculation should take into account the area of the proposed work, the volume of concrete, the wind speed at the work site, temperature indicators, the required heating time for the concrete, and even the wire connection diagram. In order to consider all these issues, we will need more than one article, so we will focus only on the basic rules.
Calculation of the length of PNSV wires for warming up | At the very first stage, the required amount of wire is calculated. It depends on the volume of concrete, connection diagram and external temperatures. You cannot connect the entire wire in one piece, as this will not have any effect. Usually the connection is made in separate sections, each 17 or 28 meters long. |
Three-phase connection diagrams | The connection can be made two-phase or three-phase. With this three-phase connection, the connection can be made according to a star circuit or a delta circuit. As you can see in the video, the choice of connection diagram is made based on local conditions. |
Load of individual sections of the LPSV | Another important condition for choosing the wire length is compliance with current loads. So in each section of the wire the current should be approximately 15A. |
Heating wire connection diagram | In order for the PNSV current and wire temperature to meet the requirements, a voltage of 70 - 100V is usually applied to it. For this, a special step-down transformer is used. One of the most common models for this is the KTPTO-80 transformer. |
Rules for installing PNSV wires | Now you can go directly to the rules for laying the wire. It should be laid evenly over the entire heated area. A distance of at least 5 cm should be maintained between individual wires. In this case, the wire itself should not touch each other in any case. Contact with reinforcement is not recommended, but this rule is usually neglected. To improve the heating of concrete, it is recommended to cover the cable with a layer of foil. Its thickness should be between 2 – 2.5 mm. |
The photo shows a block diagram of connecting the NSSV wires | The connection of the PNSV wire to the transformer must be done with a regular wire. Often, PV1 wire is used for this, which, as we know, is the prototype of our heating wire. |
Note! Wires PNSV and PV1 or any other ordinary wire must be connected directly in concrete. There are no special requirements for the quality of the connection; it must be any high-quality connection that complies with the rules of the PUE and can provide proper moisture protection.