The patchwork technique is a real treasure trove for creativity and imagination. It works equally well for experienced craftswomen and novice needlewomen. Always bright, elegant and exclusive products made from scraps will become the highlight of the interior.
One of the main textile elements in a room is curtains. They set the mood and can radically change the atmosphere. Patchwork style curtains are a simple and original solution for the bedroom, living room, dining room, kitchen and even bathroom. Multi-colored scraps and their combination will find new life on the windows of any room in your home.
From antiquity to the modern world
The first mention of this technique dates back to the times of Ancient Egypt - products made from pieces of animal skins. In Western Europe and Rus', rugs, bedspreads and curtains were made from pieces of fabric.
Patchwork has always been considered an economical option for making textiles. Poverty and scarcity forced people to save and create finished products from scraps and scraps of various fabrics, as well as sew pieces of fabric onto frayed and torn items.
In today's design world, patchwork is a fashion trend. It harmoniously complements modern and classic interiors. So patchwork curtains are not only inexpensive, but also fashionable.
Almost any fabric is suitable for sewing curtains using the patchwork technique. Cotton, organza, linen, chintz, tapestry and velvet will be excellent decorations for windows.
It is not necessary to use new material; cuts from old fabric will also work. You can bring it into a suitable form by washing, starching and steaming with an iron. After such procedures, the fabric will not lose color and will not shrink during further washing.
If you have already decided on the choice of fabric, then pay attention to its features and service life. Some material is too soft and prone to deformation or, conversely, not elastic. For example, when cutting rags from an old coat, the fabric may “bubble”, and a curtain made from silk rags will not last long.
The optimal material for curtains is linen and cotton. They are easy to care for and retain their appearance for a long time.
This is interesting: Metlakh tiles: pattern perfection (24 photos)
Patchwork and its types
What is patchwork? Patchwork translated from English is a product made from multi-colored patches (blanket, bedspread). This is a patchwork technique, textile mosaic. Patchwork is a type of needlework where a single piece of fabric is obtained by sewing together different pieces of fabric, like a mosaic or puzzle.
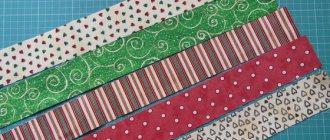
The essence of patchwork sewing is to sew together pieces of fabric that differ in:
- Colors - multi-colored and monochromatic.
- The texture is dense and thin.
- Size - large and small.
- Shape - square, triangular, rhombic, rectangular.
There are also several styles in the patchwork technique:
- Classic - aka English.
- Chaotic - inherent in the fusion or boho style.
- Japanese is oriental.
- Knitted - from napkins, scarves.
The English style is a classic, it is the most popular. In this style, the main thing is the selection of scraps of the same shape and size. During the work process, a template is used; cotton fabrics are usually used. Everything happens quite simply and neatly.
The chaotic style is the exact opposite method. In this case, pieces of different sizes and colors are used.
The Japanese style is characterized by soft shades of fabrics and small shreds.
The knitted style is characterized by decorated patches that are created using a hook, knitting needles or a knitting machine.
Patchwork curtain sewing style
Over its long history, patchwork has formed its own rules and design styles. They are directly related to the use of the product and its connection to a specific area. Among all the styles of this technique, three main ones can be distinguished.
It is the easiest to make, which is why novice needlewomen most often choose it. The product is assembled from scraps with the correct geometry. The shape of the parts can be different or the same; the more options, the more interesting the final result.
Tools and materials
A smooth creative process largely depends on proper preparation of the workplace. Tools and materials should be literally at hand. It is better to place fragments of fabrics of different colors and textures in containers so that they can be quickly found. Everything you need for work should be prepared in advance:
- sharp scissors and a knife for cutting fabrics;
- ruler for sketches;
- a sewing machine equipped with needles and threads in accordance with the type of material;
- iron;
- pins for fixing fragments;
- pre-made templates;
- fabric scraps of compatible texture;
- lining fabric;
- weight tape for the bottom of curtains;
- gathering tape for the top of the curtains.
Sewing technique
These can be completely different materials, which depend on the style and design of the room. Before starting work, be sure to take measurements from the window and decide on the size of the curtains. Then make patterns of parts. It is not at all necessary to cut out identical flaps; you can have several templates. It is preferable to cut the parts larger, since due to the many seams they will become heavy. Most often, squares and triangles are used for sewing curtains.
If used shreds are used for the product, they must first be washed and starched, then ironed. This is done in order to prevent deformation in the finished product. It would be better, of course, if the curtain was made from cotton pieces. Because it is more durable and practical. For example, silk wears out faster because after washing, the seam joints often begin to unravel. When sewing curtains from dense and heavy fabrics, this must be taken into account, because such products are prone to stretching due to weight.
First you need to prepare your workplace and all the tools: these are scissors, a measuring tape, a chalk or pencil, threads, needles, pins, a sewing machine, an iron and ironing board, pieces of fabric and a veil of the same size as the future curtain.
A curtain made from patches is created according to the following scheme:
- Squares of the required size are cut out of the prepared fabric, strips 10 cm wide are cut out of the veil. The most suitable side size of the square is 15-20 cm. If the curtain is being prepared for a nursery, then there is no need to make the flaps too small. This is harmful to children's vision and psycho-emotional state. Be sure to remember about allowances, which can be 0.5-1 cm.
- The first 2 samples need to be pinned together with a pin. Next they are stitched to each other, remembering to process the edges of the seam allowance with a zigzag. Such manipulations are performed with all prepared squares. The result should be a strip of squares of the required length.
- The reverse side should be ironed. The main thing is to iron the seam allowances correctly so that they point in one direction and do not puff up.
- Then you should sew 1 more strip and also iron it.
- Stripes of squares must be connected to each other using a strip of veil.
- Work continues in the same manner until the intended size is achieved.
- Then a curtain tape is attached on top, and the product is folded underneath.
- Sew on loops or attach hooks.
If the curtain made from patches has a complex pattern, then before starting work, create a template for the location of the segments. To make it more convenient, each element is numbered.
There are several methods for assembling elements: quick curtains, stripe to stripe, watercolor, magic triangles, log cabin.
Patchwork curtains
Sewing patchwork curtains for the kitchen at home or in the country is a great idea.
You can sew patchwork curtains or curtains with your own hands. The sewing principle is the same for both, they differ only in functionality. Curtains are made from thick fabric, while curtains serve more decorative purposes.
There are several styles in the patchwork technique:
- Classic (English).Chaotic.Japanese (Oriental).Knitted.
The English style is the most popular; it involves selecting scraps of the same shape and size.
The work uses a template, the fabrics are usually cotton, everything is simple and neat. Completely unlike the English one - a chaotic style, it uses shreds of completely different sizes and colors. The Japanese style is characterized by dim colors and small details.
To sew curtains and drapes, you can safely use any type of fabric.
These can be either new or old flaps. At the beginning of work, you need to measure the window, decide on the size of the curtains, and make a pattern of parts. It is not necessary that all parts be the same size; there may be several different patterns.
We give preference to large details so that the curtains are not too heavy due to the many seams.
Most often, rectangles or squares are used for sewing curtains.
We attach the pattern of the part made of cardboard to the wrong side of the fabric. We outline them with soap or chalk. Don't forget to leave a 0.5cm seam allowance before cutting out the flap.
We connect the parts by placing them right side together. The seam is finished with a zigzag stitch. Next, we sew the second square or rectangle to the first one, also folding it with the right sides inward, and process it with a zigzag.
We continue working until we get the length we need. At the end of the work, all seams are ironed in one direction. In order for the curtains to look neat, it is better to edge them with a beautiful braid or ribbon.
02. Patchwork. Four squares
Such cute things as oven mitts, napkins, hot pads made using the patchwork technique, sewn by yourself, will decorate any kitchen.
In addition, these little things you have sewn will be suitable as a touching gift for family and friends. Decorative products serve not only as decorative, but also as useful decoration for the kitchen. Any housewife will have something from which to cut shreds for such products.
Manufacturing
Having prepared the necessary tools and materials, you can proceed to the work process. We offer a master class for sewing curtains yourself.
Preparation
Before you start work, you need to know in advance where the curtains will be located - in the living room, bedroom, children's room or kitchen.
The type of fabric and size of the fabric depends on the destination.
Pay attention to the prepared pieces of material to see if they are all compatible. Dense flaps cannot be combined with plastic knitwear; such fabric may become deformed after washing. For the same reason, before sewing, all fabric fragments are soaked in water, dried and smoothed well. Then not a single flap will shrink during washing of the finished product.
Before ironing, fragments of cotton fabric can be sprayed with a starch solution, this will improve their appearance.
Then you should measure the window opening and calculate the parameters of the canvas. It is necessary to choose a sewing technique and the shape of the flap. It is easier to assemble the canvas from square or rectangular scraps.
Next, a template is made with which the fabric fragments will be cut out. At the next stage, the number of flaps on the canvas is calculated:
- to do this, the length of the curtain must be divided by the length of the template;
- divide the height of the canvas by the height of the workpiece;
- Multiply both results obtained.
Simple calculations will allow you to determine the number of flaps that will make up the curtain and prepare them in advance.
The preparatory stage includes the creation of sketches and a template. In the sketch, not only the shape of the part is drawn, but also the general drawing, if it carries a semantic meaning. The color scheme is calculated. Most often, its dominant colors coincide with the shades of the interior or the rest of the textiles in the room. The template is drawn and cut out of cardboard; if the fragment is complex, use a patchwork ruler.
Uncover
Only neat, clear cutting will help numerous parts fit together perfectly, and the entire curtain will look great. Cutting out occurs according to certain rules.
- Using a template and a piece of chalk (or dry soap), details are drawn on the fabric. It should be remembered that all fragments are cut out taking into account the shared thread, otherwise the future product will quickly lose its shape.
- It is better for beginning craftswomen to use two templates, one of which is prepared taking into account allowances (a few centimeters more).
- For convenient cutting, and later sewing, safety pins are used to secure the flaps.
- The fabric is cut using sharp scissors. A roller knife is also used.
If the block method is used, each element included in the block is cut out and numbered.
But for beginning needlewomen, it is more convenient to choose a large square as a base and simply carefully cut the required number of flaps.
Assembly
When all the elements are cut out, you can start assembling. It is important not to forget about the direction of the shared thread.
- First, according to the scheme, blocks are assembled from small fragments.
- Then they are lined up in lines equal to the width of the curtain.
- The resulting long parts are sewn together and a finished patchwork fabric is obtained, which is the basis of the curtain.
- A lining is cut from a single piece of fabric, matching the dimensions of the patchwork fabric.
- The lining material and the patchwork curtain are folded face to face and must be sewn on three sides.
- Then the product is turned right side out and the fourth side is sewn with a hidden seam. The seams are smoothed out and the curtain is ready.
- You can sew a weighting tape down, but this is not necessary for a massive curtain. A curtain tape is sewn along the upper inner line of the curtain, with its help the product is attached to the rings of the cornice. The same tape can give a beautiful gather on the canvas.
An important point: during the assembly of the patchwork fabric, every detail is ironed, then the elements easily match each other, and the finished product looks perfect.
This is interesting: Plastic window sills: familiar design (22 photos)
Patchwork curtains - examples and photographs
Below are some very successful examples of patchwork curtains.
Beautiful examples
Patchwork curtains are ideal for creating beautiful and homely interiors:
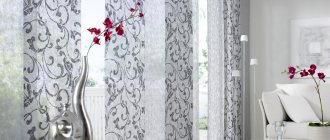
- a patchwork-style sliding curtain divides the room into zones;
- an unusual curtain decorates the bathroom;
- delicate textile set for the dining room;
- crocheted patchwork;
- Roman blinds made from strips of fabric;
- rustic flavor.
Patchwork curtains in any room will make the interior unique.
Master class on sewing curtains in patchwork style in the video below.
What interior style can it be combined with?
The main advantage of patchwork textiles is its versatility.
It conquers classics and modernity, adding its own special flavor to every interior. A Provas style room becomes cozier with a patchwork cotton curtain on the window. You can use floral motifs or household items as a design.
A vintage living room will take on a special character with the appearance of curtains made from pieces of velvet or satin.
Abstraction and ornament are an excellent choice for a room in an ethnic style. Asymmetry and unexpected combinations of textures will emphasize the confident and sharp character of modernity. For fans of everything unusual, you can create a patchwork curtain in an avant-garde style, choosing details in characteristic colors and patterns.
Preparation
Before you start cutting, the material needs to be prepared: washed, dried, starched and ironed. This is necessary so that the finished product retains its shape and does not shrink after washing.
Next, you should measure the height and width of the window opening to determine the optimal curtain size. After this, draw a template. The easiest way is to make curtains from a rectangular or square piece, the sides of which are 10-20 cm.
The next step is to determine the number of elements required to create the canvas. The calculation is simple: the width of the curtain is divided by the width of the template, and the height of the future canvas is divided by the length of the workpiece. The resulting data is multiplied by each other. For example, to make a patchwork curtain measuring 180*100 cm, you will need 120 rectangles 15*10 cm.
Let's start work
You can make patchwork style curtains with your own hands
You can sew patchwork curtains from any fabric. However, it is easiest to work with cotton fabrics. If the craftswoman's goal is light, airy curtains, she should use silk. Any fabric must be washed, dried and ironed before cutting into fragments. This way the finished products are protected from shrinkage.
It is possible to use flaps of different sizes in one product, which requires the preparation of several templates. First you need to measure the window opening and determine the size of the future canvas. It will allow you to calculate the number of parts needed.
Marking blanks
The shape of the blanks can be almost any
It is much easier to work if all the pieces of fabric are rectangular or square. Prepared templates made of thick paper are applied to the wrong side of a solid canvas or large scraps and outlined with chalk. Templates should be made taking into account seam allowances.
The cut-out blanks are placed right sides together and sewn with a zigzag on a sewing machine. First, strips are formed, which will subsequently be assembled into a whole canvas. The finished curtain must be lined.
Arrangement of elements for future curtains in patchwork style
At first glance, the work may seem simple. It seems that there is something wrong with this, cut pieces of fabric and sew them into a single whole. In fact, you can’t do this without some experience and imagination. Therefore, when planning to work in the patchwork technique for the first time, you first need to carefully study several master classes and look through a huge number of photos on this topic posted on the Internet for everyone to see.
Connecting workpieces into a single whole
Working with patchwork technique is very painstaking
Advice! All seams of the finished product should be ironed in one direction, or rather down. Then, the curtain hanging on the eaves will have a neat appearance.
We decorate the curtain from leftover fabric. Buff on curtain tape
To avoid disappointment after washing a finished product, it is advisable to pre-wash the fabric in a washing machine. All this applies only to natural fabrics; synthetic fabrics do not need to be pre-washed.
In this master class we will sew a cosmetic bag . In principle, this is a small thing, and we can get by with a minimal set of tools. But still, I would like to say a few words about the devices that you will need if you are going to continue working in the patchwork technique. Patchwork uses special cutting tools: a backing mat (sometimes also called a mat), a special cutting ruler and a roller knife with a replaceable round blade. All this makes the work much easier. However, if you don’t have the listed materials yet, don’t despair! You can sew a small handbag with simple scissors and a regular cutter's ruler.
So, let's start sewing. To sew a cosmetic bag, we need cotton fabric in two colors.
From fabric we cut out 10 squares with a side of 10 cm: 5 squares from one fabric, 5 from another.
Now let's start creating the block from which the pattern for the cosmetic bag will be made.
Place one square of brown fabric on top of a square of fabric with red branches, right sides facing each other. We sew the parts along two diagonals.
Cut the stitched squares vertically in the center.
Now cut the square along the horizontal center line. After this, cut the triangle diagonally across the square. We will need the resulting small two-color squares.
In this way we prepare all the squares, after which we iron their seams. Seams in patchwork are most often pressed to the dark side.
The finished block will consist of four squares, which are arranged as shown in the photo:
We sew the squares into a single fabric. The canvas consists of 20 squares. How to assemble a product from squares is described in detail in our master class:
- Warmer for a teapot using the Patchwork technique.
A quilt involves having a patchwork front (the one we just assembled from the squares), a solid fabric back, and interfacing in between. To sew a cosmetic bag, thin padding polyester was used as a cushioning material.
We fold all three layers: first the whole fabric with the wrong side facing you, then the padding polyester and, finally, the patchwork front part with the right side facing you.
We pin it with pins.
We perform the stitch. It can be done by hand or on a sewing machine. Machine stitching is done with a straight stitch along parallel lines. When stitching, be careful not to create wrinkles on the back.
It's time to move on to cutting out the cosmetic bag itself. For this we need cardboard and a compass. With a radius equal to approximately one block (consists of 4 small squares), draw two circles. The distance from the center of the upper circle to the center of the lower circle is equal to the radius.
We cut out the part from cardboard and transfer it to fabric.
Let's start processing the edges. To do this, we cut out a strip 4-5 cm wide. For quilts with rounded corners (that is, as in our case), the edging strips are cut out on the bias. We sew it to the quilted fabric using a machine as shown in the photo.
Next, we manually sew the edging strip on the other side of the part using a hidden seam.
Now the resulting part needs to be shaped into a cosmetic bag (handbag). To do this, divide the part in half and retreat 4 cm to the right and 4 cm to the left from the middle line. We pin these points with pins.
Bend along the center line, turning the sides towards you. We work from the wrong side. We retreat about 2 cm from the edge of the corner and sew with a straight stitch.
Cut off a corner.
The raw edge can be hidden by sewing a strip of fabric to it.
Turn the cosmetic bag inside out and sew the sides together with a hidden seam to the points marked with pins.
We sew the zipper in by hand. The patchwork cosmetic bag is ready! We admire the result!
This master class was written specifically for the website world-hmade.ru, so please do not copy the entire material. And in case of partial copying, be sure to post a link to the source.
Features of care
Like any textile, patchwork curtains require proper care. In order for the product to serve for a long time and at the same time maintain an attractive appearance, it is important to take into account the characteristics of the fabric from which it is made.
Complex fabrics such as silk or wool require special care.
If washed or ironed incorrectly, the product may become deformed and completely lose its aesthetic appearance. Cotton is the most versatile in this matter. Thin and light material retains its shape well and pleases its owners for a long time.
Shred curtains will help diversify the interior of your home. This is an original option for window decoration and a great way to use leftover fabric that every housewife probably has.
The technique of sewing from such scraps is called patchwork. In this way, interior items are created in various styles. There is, for example, English patchwork - when scraps of fabric are selected in the same color scheme and form a certain pattern.
In contrast, there is a chaotic patchwork that combines patches of different colors. Things in this style turn out bright and unusual due to the absence of a specific pattern. For an oriental-style interior, Japanese patchwork is suitable, which combines smooth patterns and ornaments with harmonious and non-contrasting color transitions.
Curtains made from patches are an original way to decorate a home in country style.
Decide in advance what style you will use to make your own curtains.
Focus on the style of the room. They will fit perfectly into a country-themed kitchen, especially those made in chaotic or English patchwork. Japanese patchwork is suitable for rooms decorated with an oriental touch.
Sometimes you can sew such curtains with your own hands to dilute a strict interior - they will act as a “highlight” and add the missing brightness.
What is patchwork textiles?
The patchwork technique (patchwork or textile mosaic) involves sewing exclusive home textiles from a variety of scraps. They may differ in color, texture, type of fabric. This determines the design effect that can be achieved by decorating the interior with these magnificent handmade products. They will bring incomparable notes of frivolity and childish mischief to the design of the room.
Patchwork is especially good for the kitchen and nursery. But, in principle, it is also suitable for a living room if its interior is decorated in any national rustic style: Russian hut, American country, English shabby chic, French Provence.
Some sewing tips
To make ready-made patchwork curtains look more impressive, you can use a lining. It is made from lining fabric, padding polyester, and batting. It will hide all the seams from the inside out. To create original and stylish curtains, you can sew them from pieces of fabric of similar colors but different textures.
Products made from the same material, but in different colors, look very good. Thanks to the homogeneous material, the seams will be stronger and will last for many years. To decorate curtains, you need to use ribbons, ribbons, bows and other decorative elements.
How to sew patchwork curtains with your own hands?
Mastering the patchwork technique on your own is not difficult. The main thing is desire and at least minimal sewing skills.
In order for patchwork curtains to fit beautifully, originally and harmoniously into the existing environment, you need to know a few simple secrets:
The same type of fabric of different colors always looks harmonious in one product.
You can choose both contrasting colors and those with a slight difference in shades. The same texture of the material allows you to sew the flaps more tightly, and the product will be more durable. Different textures of the fabric and the same color or pattern always look original and stylish. The same motifs can be repeated on pillows, a bedspread or tablecloth. Use a lining where the flaps join.
This rule is especially important for thin and “slippery” materials. You can use batting or padding polyester as a lining. Small pieces with a large pattern look ridiculous in one composition. Pieces with a bright print or pattern go well with a plain fabric. Always a win-win classic - small stripes, polka dots or herringbone. Don’t forget about finishing the edges. A special finishing braid or tape is suitable for this.
The finishing material can be of a contrasting color or to match the product. Additional decor on the curtain will be superfluous, of course, if it is appropriate in the given interior. Wooden or glass beads, beads, bugles and fringe - it all depends on ingenuity and imagination. But do not forget about balance and harmony so that the product does not look too colorful and overloaded with decor.
What we sew from: choice of fabric
To work with scraps, you will first need some leftover fabric. Moreover, it is desirable that they have the same texture.
Although there are options where fabrics of different textures are used. If the material is new, it is better to wash and iron it immediately - this will avoid shrinkage during further use. Old shreds are starched and ironed.
To make patchwork curtains you will need scraps of fabric, scissors and a sewing machine.
What type of fabric to use for sewing in patchwork style?
Cotton ones are the easiest to work with. Palettes are characterized by softness and plasticity. Silk is also a suitable material, but curtains made from it will not last long, since the material may split after starching.
To sew curtains, prepare:
- pre-processed scraps; sewing machine; threads in the color of the fabric; scissors; sheets of cardboard, pencil, ruler for marking.
Before you start sewing, determine the size of the future curtains - the amount of fabric and the number of pieces will depend on this.
Cutting and sewing process
In order for the curtains to look impressive, you should select the flaps according to color and texture.
The important part of the work is to think over the pattern for the curtains with your own hands; it can be varied, to suit every taste. A simple pattern of identical sized shapes will look great.
The figure template is drawn on cardboard, cut out and transferred to fabric. 5-7 mm is added to it along the contour - these are seam allowances. The parts are cut out from the fabric.
Then the finished shreds are sewn together. If you want to make a more complex drawing, then draw a template divided into pieces on a large sheet of thick paper or cardboard. The pieces can be of different shapes.
Each element of the design is numbered and cut out. Next, the elements are copied onto the fabric. They are cut out with seam allowances, not forgetting the numbers, and sewn together.
When sewing patches into one curtain, make double seams so that they cannot come apart later. If you want to do without seam allowances, then connect the parts end to end and sew with two straight lines and a zigzag, which will catch both edges at the same time.
Decorate the seams and edges of the curtains with finishing tape in the color of the fabric or contrasting one.
Secure the curtains with elastic. Drive nails into the window and hang the curtains. Also, the curtain is optionally decorated with beads made of wood or other material, and ribbons of suitable colors.
Caring for patchwork style curtains is very easy. They are washed and ironed as needed. Such curtains will make you feel more comfortable and warm: they are bright and original, they improve your mood and are pleasing to the eye.
- Date: 04/27/2015 Comments: Rating: 38
Curtains made from well-chosen patches help diversify and complement the interior. In addition, sewing curtains from scraps with your own hands is a good way for self-expression and the use of leftover fabric available in every home. The technique of beautifully arranging and stitching such flaps is called patchwork, or patchwork sewing.
Patchwork curtains can be sewn from scraps and scraps of fabric.
Patchwork has several styles.
In English, fabric is selected by color, and for chaotic patchwork, scraps of different colors are used. Japanese patchwork is distinguished by smooth color transitions, soft patterns, and low-contrast patterns. The style in which the curtains will be sewn is chosen based on the existing interior.
For sewing you will need:
- scraps; threads; sewing machine; scissors; pencil or marker; square; measuring tape; iron; ironing board; curtain tape; cardboard.
Lambrequin curtains made of patches
All women know that curtains always create coziness in the house. The interior of an apartment often depends on how the curtains are lined up. Because curtains can create comfort, warmth, increase or decrease the space and height of a room. You can paste faceless wallpaper, but by hanging the right curtains and lambrequin, the room will look fashionable and rich. Every housewife has old curtains that are a pity to throw away and lie unclaimed for years. I suggest using old curtains to make a lambrequin out of them. Let's take two types of curtains of different colors, preferably a single color. I took two types, blue and coffee. We will also need threads of the same two colors and a lining for the main material. My curtains are made of thin silk and if they were sewn without a lining, then when hanging them on the window they would curl and lose their shape. You can use an old sheet for the lining; I happened to have a new white sheet, unused from the old days. We cut out three types of squares from paper, say 20x20, 16x16, 12x12. Well, that's up to you. We lay out old curtains and cut out an equal number of all types of squares from two colors.
We also make it from lining material.
The number of squares depends on the length of your window; you can roughly immediately draw a lambrequin on paper and calculate the amount you will need. I personally trimmed myself some more if I didn’t have enough of them when sewing. After cutting, you need to put the base on the squares.
Skolov sits down at the sewing machine with safety pins. I sewed using the largest zigzag function, overstitching buttonholes, 0.5 mm.
Each square was sewn along the contour of the opposite color with threads, creating contrast.
Coffee squares with blue threads, blue squares with coffee threads.
Then I carefully trimmed off the excess along the contour. After processing and cutting the squares, I made chains of them on the floor, making them as I liked. I tried to just put it in a square, it turned out simple and not very original, then I put it with an angle up, and it looked much more interesting. I sewed it on a machine using the same functions, first the chains in length.
Only then did I connect the chains together.
The lambrequin is ready!
I hung it up and my husband and I really liked it. The advantage of such a lambrequin is great! Look at Otto's catalogs. In the West, they really love things and decorations for home and apartment in this style. The advantage of such a lambrequin is obvious! Firstly, everyone has old curtains, old sheets too. This means you don't have to spend money to buy all this. Secondly, every housewife always has threads, especially since they do not need to be selected by color. The more contrast the threads are, the more beautiful they will look on the squares. This means you won’t have to spend money on buying thread either. A self-made lambrequin is unique, which means you won’t find one like this in any of your friends. The big plus is that when the lambrequin hangs on the window and the sun comes through the holes between the squares, this creates a very beautiful darkened sunny effect in the room. Sew and enjoy your crafts!
Types of patterns
Patchwork mosaic is very diverse. Each craftswoman comes up with her own unique patterns, but there are also common ones among them.
Patchwork pattern square within a square
This is one of the simplest patterns to make in terms of complexity. It is made from isosceles triangles. They are sewn together to form a square. Then additional triangular sections are sewn on all sides, which are again completed to form squares.
An interesting effect is obtained when each triangle consists of two equal elements. The sequence of light and dark elements will also look original. The main thing for this patchwork pattern is to achieve overall symmetry of the finished work.
American square patchwork pattern
The pattern is also quite simple in execution. Each element is a strip of fabric of the same width. You can make templates for cutting, or you can do without them and use a regular ruler.
When sewing curtains using this technique, a square piece is taken as the central element. Then, stripes are sewn to each of its sides. To these, in turn, the following are added. This continues until the required dimensions of the panel are reached. Try to boldly alternate the texture and color of the stripes, while maintaining the symmetry of each layer.
Decorating windows with patchwork blinders is a great way to show off your design abilities and create an original, very individual and most comfortable interior. Their manufacturing technique is relatively simple, but they give an expressive decorative effect. Show your imagination and feel free to experiment with the size, color and texture of the constituent elements and you will succeed.
Patchwork technique “Stained glass” (or “Windows of the Dome Cathedral”, “Church windows”)
Working with this technique requires both great skill and great patience. But she's worth it.
Products made using the stained glass technique resemble a flower bed of voluminous, convex flowers planted in a checkerboard pattern. The composition uses plain fabrics and fabrics with a pattern. If your flowers are made of plain fabric, then the background for them must be variegated (and vice versa).
I like this technique almost more than anyone else, I haven’t tried sewing with it yet, I’m looking closely, studying it, getting ready to. To begin with, at least something very small, literally from a few square flowers, to practice. It turns out simply amazing!
We will consider the manufacturing technique on a product measuring 40 by 40 cm.
Let's assume that you have red flowers against a green speckled background. For each flower you will need a square piece of fabric, the size of which should be twice the size of the flower itself. Therefore, for a flower measuring 9 x 9 cm, a piece of fabric measuring 20 x 20 cm is required, taking into account 1 cm on each side for seam allowances. Cut out 16 red squares of this size.
From the fabric for the background, cut out 32 squares measuring 5 x 5 cm; Fold 8 squares in half and cut diagonally
so that you get 16 triangles, you will use them to cover the background along the edges of the product.
You also need to cut out the base for the bottom side of the product measuring 41 x 41 cm, taking into account the seam allowance, select the fabric for the border, 25 buttons for the center of the flowers (to match the color of the flowers - red or yellow).
First we make flowers.
1. Place the square cut out for the flower (20 x 20 cm) face down on the table and turn it inside out 1 cm from each edge. Iron the edges, and if the fabric is elastic, then baste. Then align the corners of the square in the center and pin them.
The pins should be placed strictly in the middle of the resulting triangle, with the point towards the center.
2. Fold the corners of the resulting square towards the center in the same way as the first time, trying to carefully align the vertices of the corners in the center, and again secure them with pins.
3. Then, using small stitches, fasten the corners of the triangles together in the center of the square, piercing the needle through all layers of fabric.
Sew the remaining 15 flower squares in the same way.
4. Fold the squares in pairs (front to front), connect them with a seam “over the edge” (stitches should be small and frequent). Sew four strips from the pairs, and then, also by hand, connect them into a square cloth.
5. Pin the background squares into the center of the squares. Attach the background triangles to the edges with pins.
6. Now, alternately folding the edges of the envelopes onto the background squares, sew them carefully with a hidden seam so that you get oval petals.
7. Make the entire center in this way (don’t touch the edges with the triangles yet) and sew on the border (frame).
Material selection
To sew patchwork style curtains with your own hands, you can use any fabric:
However, it should be borne in mind that some delicate materials do not hold their shape well, fade in the sun, and therefore a product made from them will not last long. It is worth giving preference to durable ones that hold their shape well. Thick materials are used to create curtains for the bedroom or living room, and thin ones are suitable for light curtains for the kitchen.
Natural fabrics – linen and cotton – have good performance properties. They are easy to use (do not slip when cutting and sewing), durable, and do not deform.
Curtains are made from scraps, scraps left over from sewing other products, and ripped up old things. You can save a lot by purchasing pieces of fabric from a sewing studio or factory. Handicraft stores sell special sets of cuts for creating products using the patchwork technique - they are quite expensive, but the fabrics included in the set are of high quality and are carefully matched to each other in color and structure.
What fabrics are suitable for patchwork
Almost any type of fabric is suitable for sewing curtains in patchwork style. These can be used flaps or new cuts. The popularity of patchwork technology has even led to the emergence of specialized stores that sell exclusively patchwork fabrics, so craftswomen have no problems with the material.
It is also necessary to take into account the characteristic features that each textile has:
- Cotton is the most comfortable, unpretentious and easy-to-work material for textile mosaic. Patchwork curtains made of cotton, linen, and satin serve for decades and do not lose their consumer properties over time.
- Coat fabrics are relatively soft and stretchy. This nuance must be taken into account when cutting and sewing. Otherwise, “bubbles” may form on the finished curtain.
- Silk after starching is very similar to cotton, but over time it begins to fray. Silk patchwork curtains, although they look very interesting, do not have a long service life.
Patchwork curtains made from different textured fabrics look very impressive. The combination of smooth and fleecy fabrics will not leave anyone indifferent.
If you already have experience with patchwork mosaics, try experimenting with expensive fabrics such as cambric or satin. They are not only visually expressive, but also pleasant to the touch. But if you plan to decorate your kitchen with handmade textiles, it is better to choose simple cotton or mixed (cotton and polyester) fabrics, and in addition to the curtains, sew cute patchwork accessories: potholders, napkins, a doll with a fluffy patchwork skirt for a teapot.
Assembly
When all the elements are ready, they begin to connect them together. In order for the finished curtain using the patchwork technique to look neat, you should think about the layout of the patches in it. To make work easier, the parts are sorted into separate piles by color or a diagram is drawn up on paper and the workpieces are numbered.
- With the front side inward, 2 elements are placed next to each other.
- Sew with a straight stitch along one side. Seam allowances are processed using a zigzag or overlock stitch.
- Straighten the workpiece, apply a new one to the opposite side of one part, and connect it in the same way. Continue until you get a strip of fabric of the desired width.
- Again, take 2 parts, connect them together, make another tape. All pieces are sewn together in this way.
- Afterwards, iron the seams of the ribbons in one direction and sew them together. The seams are pressed again.
- Fold the fabric from the shreds and the lining with the right sides inward, and sew along three sides.
- Turn it right side out and place a secret stitch along the fourth side.
- A curtain tape is sewn to the top of the fabric.
- Iron the finished fabric.
- If desired, decorate the product with braid, beads or other decor.
The curtains are ready - all you have to do is hang them.
With the help of detailed instructions, making curtains that match the style and color of the interior of the room will not be difficult.
