As a rule, the installation of any floor covering should be completed by installing skirting boards, which not only beautifully decorate the floor, hiding the gaps between the wall and the flooring, but also often serve as a fixation for it.
Another function of such a product is the ability to hide communications that are brought into the room without damaging them. Floor skirting boards can be made from almost any material, most often polyurethane and wood play this role. However, not so long ago, plastic skirting boards began to gain popularity, which, when tested, turn out to be much more elastic, easy to install, and also inexpensive. These characteristics are not a complete list of the positive qualities of this material.
Of course, a completely logical question would be: how to attach a plastic skirting board to the floor? It is not possible to answer this question unequivocally, since much depends not only on the characteristics of the floor plinth itself, but also on what flooring it is attached to. If we talk directly about the technical characteristics of the product itself, then two parameters are important here - its type and material of manufacture. More details can be found in the video material prepared below.
Advantages of plastic skirting boards
Speaking about floor cornices made of plastic, it is difficult to ignore their positive qualities. They are the main reasons why most owners of houses and apartments choose this particular material. First of all, it is worth noting the flexibility and plasticity of the plinth, since it is really easy to install, is perfectly cut to the desired size and does not require any additional processing.
You can install skirting boards to the floor in a variety of rooms, from simple rooms to bathrooms and kitchens. Thanks to the rich palette of colors, you can choose absolutely any look and design, depending on the design of the room. The width of the floor plinth also varies, which is also important for some installation locations.
The warranty period for using such material is significantly longer than that of others. Plastic can last longer than wood, without losing any of its original properties and capabilities. This plinth does not fade in the sun and, accordingly, does not change its color. It is quite resistant to temperature changes, and is also non-flammable and does not support combustion.
You will not have to spend additional money on installing this material, since it is really easy to attach it, and you will not need additional tools to adjust the baseboard to the required dimensions. It should be noted that this floor product is moisture resistant, which allows it to be washed as often as desired, even with the use of special products.
Pay attention to the cost too. Despite all the positive qualities of the plastic version, its cost remains minimal. A wooden plinth will cost several times more, but will require more attention during installation, as well as professional skills during its processing.
Installation of planks
Before attaching plastic skirting boards to a concrete wall, please note that they are equipped with end caps, external and internal corners and special fasteners. All these elements make it easier to install the planks.
Based on this, the main advantage of plastic products over their wooden counterparts is the absence of the need to precisely trim joints, including corner ones, and also to strictly adjust the elements to each other.
Installation of plastic products
Plastic products are attached to plastic dowels with self-tapping screws.
Recommendations on how to secure a plastic plinth to a concrete wall look like this:
- Lay the planks, starting from one of the corners of the room and extending them to the opposite end of the wall. If necessary, cut the end sections of the baseboard.
Markings for installation.
- Mark points on the slats for future fastenings. The instructions note that the marking step depends on the unevenness of the walls and floor, as well as the thickness (thickness and width) of the planks. It is usually about one meter.
- In the marked places, drill holes in the wall directly through the planks. The diameter of the drill should be slightly smaller than the cross-section of the screw heads.
- Remove the baseboards and hammer plastic dowels into the holes.
The photo shows screwing in a screw.
- Place the slats back and screw the self-tapping screws into the dowels through the holes in them.
- Cover the ends of the planks and screw heads with plugs.
- Before attaching the plastic plinth to the concrete wall, so that the holes for the fasteners are the same depth, it is advisable to make a mark on the drill.
Note! At the initial stage of installation, you should not tighten the screws completely, you just need to “bait” them. The fasteners are finally screwed in after the skirting boards are installed around the entire perimeter of the room. At the same time, you should not tighten the screws too much, as this may cause the plastic to deform or crack.
Fastening wooden planks
Now let's talk about how to nail a plinth to a concrete wall if it is made of wood.
First of all, take accurate measurements of the perimeter of the walls and, using a tape measure, mark the distances on the baseboards for cutting them. To create corner joints of the planks, it is advisable to cut their ends on a miter box at a strict angle of 45º:
- Drive nails into the plank prepared for installation so that their points protrude slightly from the back side.
- Next, install the slats in place and, using driven nails, mark the locations of the wood plugs. To do this, lightly hit each fastener head with a hammer.
- Remove the wooden floor plinth and drill holes at the marked points using a powerful drill or hammer drill with a drilling function.
Plugs are inserted into the prepared holes.
- Then drive plugs cut from wood into these holes.
- After this, put the slats in place and drive the nails in completely.
At the final stage, the wooden slats are nailed down.
The cost of such installation will be low. If you want to use plastic dowels instead of plugs, then the procedure for attaching the slats will be similar to installing plastic analogues.
Now you know how to screw baseboards to a concrete wall. This work is not very difficult, but it should be approached responsibly.
The final appearance of the interior of the room depends on its results. The video in this article will illustrate the information. If you still have questions, you can ask them in the comments.
Components
When planning to install a plastic plinth, whether it is installed independently or with the participation of specialists, you should remember that it is necessary to calculate not only the plinth itself, but also the components with which it is attached to the floor and walls.
The main components include a certain set of additional parts, such as plugs, connections, as well as internal and external corners. Each of these parts has a specific function; therefore, without the use of component parts, you will not get a truly complete look of the installed floor plinth. In addition, depending on the type of material and floor, the components have different shapes, sizes and colors.
Corners are used as additional materials to connect skirting boards in the corners of the room. This allows you to get the most aesthetically pleasing appearance of corner joints. Moreover, depending on the nature of the joint, the corners can be internal or external. Accordingly, if the walls are connected inwards, then an internal angle will be required. Exactly the opposite is the case with the external angle.
Special caps are used to decorate the edges. It is very important to secure them at the end of the baseboard when it adjoins the doorway. Accordingly, depending on the side from which the plinth goes, the plugs can be either right or left. They are usually sold separately; therefore, preliminary adjustment of their color is necessary.
How to fix a plastic skirting board video
If you need to lengthen the planks by joining them together, you must use special connections. Outwardly, it looks like a piece of plastic equipped with grooves, which will hide behind itself the junction of two parts of the plinth. In addition to the component materials listed above, these also include special fasteners used to fix the planks on the wall.
Installation methods
So, you have chosen the main material, now you can tell us how to attach the plinth to a concrete wall. There are several ways - let's talk about each one in order.
Installation of plastic skirting boards with cable duct
The good thing about these products is that they are easy to join along the length and at the corners. For this, there are additional elements that are selected by color and profile. The plinth is cut at a right angle before joining.
To install products with a cable channel, you will need self-tapping screws and plastic dowels.
How to attach a plastic skirting board to a concrete wall is shown below.
| Image | Description |
| Place the baseboards around the perimeter of the room. Cut them to length at corners and where there is not enough length for whole products and they need to be extended. | |
| Remove the inserts covering the cable channel cavity. | |
| Place the plinth in the desired position and drill a hole directly through the back wall of the cable channel with a hammer drill to a depth equal to the length of the dowel. | |
| Insert plastic dowels into the holes and screw the screws into them. Don't overtighten them, especially if the walls are uneven - the plastic may bend or even crack. | |
| Lay wires in the channels and install decorative elements at corners and joints. | |
| Replace the cable channel covers. They should snap easily into the grooves. |
Clip mounting
This installation method can be used for both plastic and wooden planks.
Each manufacturer has its own form of clips, but they all have the same fastening principle:
- Places for installing clips on the walls are marked. The distance between them is usually about half a meter. But there may be other requirements, which the instructions will tell you about.
- Next, as in the previous case, holes are drilled at the marking points, dowels are inserted into them and the clips are secured with self-tapping screws.
- After laying the cable, the plinth snaps onto the clips. If necessary, it can be easily removed.
Installation of wooden skirting boards
Products made of wood and MDF often have to be fastened in an open way, by drilling or punching through them. In addition to dowels, in this case, finishing nails with a small, almost invisible head are sometimes used.
Required Tools
In addition to the actual skirting boards and components, you will also need special tools, without which installing the floor skirting board to the floor will not be simple and easy. Before you begin installing the plastic skirting board, you need to prepare the following tools.
Drill or hammer drill. They require drills of the required diameters. This tool will be needed to fix the baseboard to the wall. In addition, installation requires a screwdriver or a simple screwdriver, which automates the process of screwing in fasteners.
An important point is the accuracy of measurements. For this you need not only a tape measure, but also a protractor and a construction triangle is desirable. To record the accuracy of measurements, you will need a pencil or marker.
To obtain the required pieces of material, you should stock up on a hacksaw for metal, as well as a professional hand miter box. In addition, a grinding machine, chisel and sandpaper will not hurt.
Nails and a hammer are used as fastening materials. You can't do without a simple knife. During the work, you also need a vacuum cleaner, which will remove dust and dirt not only while drilling the wall, but also while cutting the baseboard into the required measured parts.
How to fix a wooden plinth with your own hands
Skirting
is not only a structural element that effectively masks the transition between the floor and the wall, but also a full-fledged interior detail. The baseboard panel can have different shades, heights and textures, so you can easily choose the most suitable option for finishing your room.
Fastening a wooden plinth: installation methods
First stage of installation
— preliminary preparation of the material. It is necessary for any type of wood, regardless of the type of wood and method of fastening.
How to prepare the baseboard:
- the profile needs to be well dried, because wood with high humidity is prone to deformation after drying;
- The baseboard is sanded using a soft abrasive stone;
- It is best to mount the baseboard already painted; for this, varnishes, oils or azures are used, matching the color of the walls or painted in a different shade.
Photo 1. Larch plinth
The installation of floor plinths should begin with a visual assessment. To do this, you need to lay out the existing panels along the walls so that they fully match the pattern and shade. Planks that have a lot of knots or other defects on their surface should be placed where the furniture will be in the room. It is always worth starting installation from a corner.
Attaching the plinth to the floor in the corner:
- To trim planks, you should use a miter box - a special tool designed for precise cutting of wood.
- To create clear and precise connections, you need to ensure that the plinth fits snugly against the upper and lower clamps in the miter box.
- The cut is always made at a 45 degree angle.
- Attaching a wooden plinth to the wall in the area of internal and external corners is done differently. This feature must be taken into account when cutting.
Before you begin installation, you need to drill a hole for the self-tapping screw (unless, of course, you use special screws with a drill at the end, for which you do not need to drill). Attaching a wooden baseboard to a wall also requires holes to be made in the wall.
Photo 2. Self-tapping screws for baseboards and trim
How to prepare wood for installation with self-tapping screws:
- At equal intervals, the plinth panels are marked with chalk or pencil.
- The panel is drilled in places marked.
- To completely mask the screw head, you can widen the upper part of the hole using a cone cutter.
How to nail a wooden baseboard using plastic dowels? To do this, you need to accurately calculate the location of the panel near the wall. Preliminary marks need to be made not only on the wood, but also on the wall, in the places where the dowels are installed.
Photo 3. Plastic dowel
Veneered plinth
- a more economical type of building material. It is made from different types of wood; thin strips of expensive varieties are glued only to the top part.
Installing veneered plinth using clips:
- Markings are made for installing fasteners with a step width of 50 cm.
- Holes are drilled using a hammer drill.
- Plastic dowels are installed.
- The anchor plates are attached to the wall with self-tapping screws. The orientation of the teeth is strictly 90 degrees.
- The profile is attached to the teeth.
In the LesoBirzha online store you can order all the necessary building materials for the final stage of repair - installation of the plinth panel.
Calculation of the required amount of material
In principle, the installation of skirting boards itself is not a complicated process. However, the main point is to accurately calculate the quantity of the product in meters before purchasing the material.
In addition to calculating the material, it is also important to consider the number of additional components, such as corners and connecting parts. Do not forget that they should also allocate a small amount of the perimeter of the room, especially for plugs, for the use of which it is always necessary to leave space.
To calculate the required number of plastic skirting boards, you will need a tape measure, which you need to measure the room around the perimeter. From the resulting amount, you should then subtract the size of the doorway. As a result, you will get a number that you then need to divide by the length of the selected baseboard. As a result, you will receive the number of required profiles, which should be rounded up to obtain the material supply.
When rounding by excess, you should stick to increments. This is necessary in order to purchase the number of skirting board profiles with a reserve. Let's say if, based on the results of calculations, you received the number of profiles 9.3, this means that you need to purchase 10 profiles.
Don't rush into your calculations. Repeat the measurements as many times as you see fit to finally get the required figure. If you have doubts while calculating the number of required profiles, it is better to seek advice from salespeople at a building materials store.
A little about the material
The first step is to choose the material. Plastic skirting boards today come in different varieties. If just recently the choice was not great, today this choice is quite wide, which allows you to choose a plinth to suit your room’s characteristics. Plastic skirting boards come in different heights and shapes. There are simple plastic plinths and plinths with a cable channel, which also serves as a place for attaching the plinth to the concrete wall. If you have no need for a cable channel and all your wires are laid in the walls, then the baseboard will be fastened in a special plastic box, onto which the baseboard itself is then snapped. Everything is done in such a way that in the end the fastening points are not visually visible.
Plastic skirting boards have a number of big advantages compared to their wooden counterpart.
- Firstly , such a plinth better presses laminate or parquet, so if your flooring sticks out slightly at the edges of the room, then you can lightly press this covering to the floor with a plastic plinth.
- Secondly , plastic plinth can be installed in rooms with high humidity, because if it comes into contact with water, such a plinth will not deteriorate in any way, but in the case of a wooden plinth, the material would be susceptible to rotting.
- Thirdly, it is more convenient to work with a plastic skirting board, since it is easier to cut corners and so on than with a wooden counterpart. This allows you to install the plinth much faster than with wooden plinths.
Technology for fixing a plastic skirting board to the floor
Installation of the product can be carried out in various ways, depending on the type of material to which it is attached. For the same reasons, you should choose the type of fastening element for installation, as well as the type of fastening:
Installing corners on plastic plinth video
- to the concrete wall.
- to drywall
- to the floor.
Towards a concrete wall
. The floor plinth must be secured to the concrete surface using self-tapping screws, which should be screwed directly into the wall surface. In this case, first make pockets in the form of dowels into which the screw will be screwed. Here you cannot do without using a hammer drill.
To drywall
. It is believed that attaching plastic skirting boards to drywall is not a very good option. However, if this is the only way out, then you need to purchase in advance special screws designed to work with just such a coating. Finishing nails coated with zinc are also similar. An important point is the placement of attachment points on the metal parts of the frame, which are often used when constructing a plasterboard wall. If the project plans to install the baseboard permanently, then instead of self-tapping screws, you can use liquid nails.
In order to secure the skirting boards to the floor, you should opt for specially shaped self-tapping screws. Their design includes the ability to recess the screw heads completely so that they will not be visible. The resulting depression can be filled with a special putty, which takes on the color shade of the wood.
Choosing a skirting board
The fastening method depends not only on the material of the walls or floor, but also on what the baseboard itself is made of. Therefore, first we choose it, then we think about how to attach it.
Material
These functional and decorative elements vary and are matched mainly to the flooring material.
- If the floors are wooden - made of solid boards or parquet, a wooden baseboard will best harmonize with them. Also made of solid wood, veneered wood or MDF for painting.
- Plastic products are usually selected for laminate, linoleum, ceramic tiles, self-leveling flooring and other modern coatings.
- It is practically not used, but sometimes a concrete plinth is still found. It can only be combined with concrete or tiles.
Advice. If you are going to paint the baseboard, and its original texture and color are not important to you, opt for products made from polyurethane foam. They are durable, lightweight, flexible and easy to paint.
Profile
Depending on the material of manufacture, the plinth may have a different profile.
- The cross-section of solid wood products is often a right triangle with a “hypotenuse” in the form of a straight or curly line. Depending on the size of the “legs,” they can be attached either to the floor or to the wall. Their main disadvantage is the impossibility of concealed cable laying behind the baseboard.
- A cut right angle or a special recess in the back of a wood or MDF plinth leaves free space at the junction of the wall and floor for laying wires.
- Plastic products have a special built-in cable channel, which, after installing the baseboard and laying the cable, is covered with a decorative insert. It creates the impression of integrity of the entire structure.
For reference. There are similar products with one or more channels, and without a cable channel, and with large channels for laying water pipes. Decide in advance which option you need.
In addition, there may be special slots on the back of the products. They are designed for hidden fastening with clips. Don't forget that they are purchased separately and you will have to determine how many you need.
Popular types of skirting boards
The installation of a floor plinth largely depends on the material from which it was made. Currently, there is sufficient variety on the construction market that allows you to choose the type that will be most appropriate in the interior. But in any case, it is customary to distinguish two main groups.
Wooden products: MDF and veneered options
The most elegant planks are those made of natural wood - cherry or oak; they give the room a special chic. But the most affordable are pine parts, which require a lot of attention due to the defects that occur. Often these types of species are covered with more valuable veneer. The question of how to attach skirting boards made of this material must be approached with all responsibility. The fact is that there are many factors that can lead to damage to parts.
The use of wooden skirting boards dates back hundreds of years and is considered a classic.
Things are much simpler with varieties made from MDF. They have a more durable structure, which allows for easy installation. But both options are installed exclusively on a flat base; any surface deformation will lead to the formation of cracks. Trying to cover them up with wax crayons or sealant will not correct the situation, because it is quite difficult to choose an identical color.
PVC varieties
A plastic floor plinth is a real discovery for those who decide to carry out repairs on their own, but do not have much experience. Its popularity is due to numerous parameters, among which the most notable are the price and the ability to install it on uneven surfaces. There are options on sale that can take on the desired shape, but you need to work with them according to the scheme provided by each manufacturer.
In general, the installation of PVC skirting boards depends on the specific model; this aspect should be taken into account at the purchasing stage.
Plastic skirting boards are distinguished by the presence of convenient cable channels and reasonable prices
Baseboard corners
It is necessary to cut corners at 45° only for the connelure profile. Other plastic systems use template corners; flexible (rolled) plinth does not require additional fittings at all.
Lack of experience in laying laminate flooring sometimes leads to an increase in the required technological gap between the panels and the wall. An error is discovered already during the installation of the plinth, and if the resulting gap attracts the eye, very often the home-grown master makes a mistake - he lays the molding in such a way as to cover the visible defect. As a result, tension arises in the structure of the plastic skirting board. The greater the bend, the higher the tension and, accordingly, the greater the likelihood of damage to small fastening elements. First of all, the fasteners of the decorative strip (plinth with cable duct) are damaged. The next step will be the destruction of the fittings for the corner joints.
Video - techniques for attaching plastic floor plinths at corners and joints:
A certain margin of safety (for the same baseboard system) is ensured by using corner brackets (outer corner crab), which are fastened with hardware under the decorative corner. But in most cases, the available list of fittings is limited to angles, straight connectors and end caps.
Using elements from other systems will not bring any effect, because... skirting board profiles from different manufacturers will differ.
How to attach a skirting board to a concrete wall
» Articles » How to attach a plinth to a concrete wall
All photos from the article
Skirting boards are elements of a room that mask the seams between its walls and floor covering. They also play a decorative role, being the finishing touch of the interior. Modern varieties of planks have technological recesses for laying wires and cables, so they can also mask utility lines.
Our article is devoted to how to attach a plinth to a concrete wall.
These decorative strips can be installed yourself.
How to attach a plastic skirting board to the floor: concrete wall and floor glue, glue the floor dowel-nail
Plastic skirting boards are inexpensive and easy to install. Skirting boards are used in every home. This is a beautiful decorative element that complements the interior and hides surface imperfections. Plastic floor skirting boards have many advantages and installation features.
Skirting material for fastening to the floor
First, it is important to decide what surface it will be attached to. There are two options: to the floor or to the walls. The choice depends on the characteristics of the walls and the selected material for the floor plinth.
Material for making plinths:
Plastic skirting boards are not as demanding on the flatness of surfaces as wooden or MDF
Wooden floor plinth is a traditional option, but expensive. It is used for rooms with parquet. Some skirting boards are the usual version of a triangular shape. Others may have a special recess for the cable.
A corner cutter is used to cut the material. The corner is cut out at a special angle and connected with special parts. If necessary, a plane can be used for sanding.
A prerequisite for installing wooden slats is the evenness of the floor covering. Also, the wood must be treated with a special impregnation and varnish. This will prevent the baseboards from cracking or being damaged by harmful insects.
MDF slats are products made from wood fibers covered with veneer and laminated. The appearance is not inferior to natural solid baseboards, but the price is much more affordable. Among the disadvantages of the material, it is worth noting their fragility. If you work carefully, you can easily damage the MDF.
Such slats are fastened using special brackets. The product kit should include plugs and corners. They will be needed for trouble-free removal of old material and reinstallation.
The most popular material for making skirting boards is plastic. PVC coatings can imitate any material, so they can be harmoniously combined with any floor covering. Also, plastic slats are resistant to moisture, sun, and temperature.
Polymer skirting boards have special grooves for fixing the edges. The corner element is attached much easier than in other types, since special components are provided for this. You can purchase a plastic post for the corner projection.
The length of plastic skirting boards is 2.5 m. This is practical when decorating a room. This size is convenient for installing and transporting products.
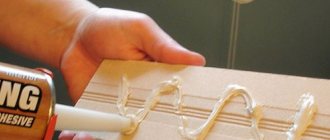
It would be correct to attach such slats to liquid nails. This ensures reliable fixation, but it can be difficult to disassemble such a structure if necessary, so other fastening methods are used.
Also, plastic skirting boards have space for cables. The kit also includes plugs, connectors, and a socket box. Moreover, such slats can also be fixed on uneven surfaces, which is very convenient.
Methods: how to attach a plinth to the floor
The material used to make the baseboards and the features of the walls of the house help you choose the method of attaching the slats. Installation of products can be on a plasterboard or concrete wall. The brick surface often becomes the place where battens are attached. The plinth can also be mounted on the floor. It is important to familiarize yourself with all the methods used when attaching skirting boards to different surfaces.
Source: https://betfundament.com/kak-prikrepit-plintus-k-betonnoy-stene/
