In order to create beauty and comfort in your apartment, there is no need to spend a lot of money on purchasing expensive furniture and household appliances. As a rule, in order to radically change and refresh the interior of a living room or bedroom, the simplest and most affordable materials available in any hardware store are sufficient. Such a material is drywall. It can be used to make arches, columns, suspended ceilings, walls, partitions and all kinds of shelves. The combination of various unique properties has made it an indispensable material for DIY repairs and construction.
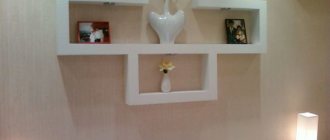
Shelves made of plasterboard will give an individual design to the room, and will also help you get rid of furniture that takes up significant space.
Properties of plasterboard sheet
A plasterboard sheet is a product consisting of two strips of thick mounting paper and a solid gypsum-based plasticizer between them. GCR has many unique features.
So, it has the following advantages:
- environmental Safety;
- flexibility allowing the creation of curved structures;
- affordable price;
- ease of processing and installation;
- no thermal expansion;
- water resistance after appropriate treatment;
- non-flammability;
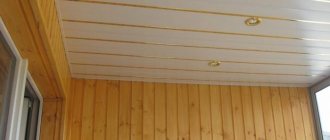
- possibility of equipping with lamps of various types;
- strength to withstand significant loads.
By installing plasterboard shelves in the hall, you can not only decorate it, but also hide some defects and unevenness on the wall.
Place of plasterboard shelves in the interior
Scheme of a plasterboard niche with lighting.
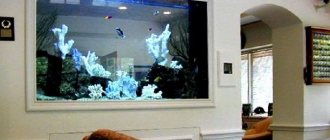
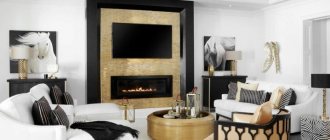
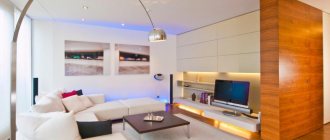
With the help of gypsum plasterboard products, you can not only get rid of furniture that takes up significant space in the room, but also create an individual design of both color and shape. Shelves on the wall can be used to display photographs, souvenirs, vases and flowers. Larger wall shelves can be used to display books and magazines, or as a stand for an aquarium or household appliances.
Related article: Do-it-yourself gutter installation: installation of roof sills, how to do it yourself, video
Shelves can be made from plasterboard in a wide variety of shapes. The most common options are:
- niches in the wall for a TV or related equipment;
- protruding volumetric frames;
- corner straight and curved structures;
- arches;
- vertical and horizontal bends.
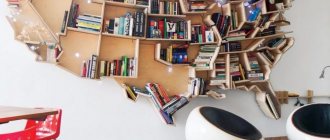
Shelves made of plasterboard, located on the wall, can perform both practical tasks, serving as a basis for placing various objects, and purely aesthetic ones, being a decoration and an integral element of design. So, in the hall, semicircular shelves located below similar suspended ceiling structures will look very good.
In order to install plasterboard shelves on a wall or partition in the hall, basic construction skills and tools that are found in every apartment are sufficient.
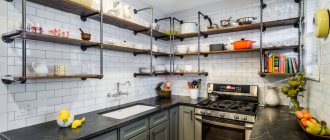
Straight and corner shelves made of plasterboard - functional and spacious
As an option, you can adapt shelves to cover the corner, especially if there is a corner sofa with a table in the corner. In this case, it would be reasonable and correct from a design point of view to hang them above the sofa. Corner shelves are preferable to straight ones in that the corner configuration gives the shelves additional rigidity; plasterboard sheets will sag less. In this case, a stylish lamp is placed on the top shelf.
Tools and materials
Before starting work, a drawing of the shelf is drawn up. The drawing can be executed on a sheet or used for this on a personal computer.
The project determines the location of the plasterboard shelf on the wall so that it looks harmonious against the background of the interior of the room.
When the project is completed, materials are calculated and tools are prepared.
To make a shelf for wall or floor mounting, you will need the following tools:
Tools for making plasterboard shelves.
- perforator;
- screwdriver;
- Bulgarian;
- hammer;
- belt grinder;
- building level:
- knife;
- metal scissors;
- roulette;
- pencil;
- spatulas 8 cm and 20 cm;
- sandpaper;
- paint brush.
The instrument must be checked and completed.
The list of materials required for the work is relatively small.
It includes:
- galvanized steel CD and UD profiles;
- arched profile;
- GKL thickness from 8 mm to 12 mm;
- reinforcing mesh;
- metal screws;
- dowels or anchor bolts;
- aluminum or plastic corners;
- starting and finishing putty;
- liquid primer;
- finishing material.
If the shelf is backlit, then the calculation and purchase of electrical wiring, lamps and switches is carried out.
Related article: How to fix a shower faucet without calling a plumber?
Making shelves from plasterboard
In the process of creating shelves you will need the following materials:
In addition, we will need the following tools:
If you have all the tools, you can get the job done faster
Prices for popular hammer drill models
It is worth noting that not all devices and materials may be useful, because if we plan to make a structure for heavy objects, then we will need a metal profile to create the frame. For decorative shelves, a simple rack profile with guides will be sufficient.
Important! In order to make the final finish, you will need putty, paint, a set of brushes, and rollers.
Create a project
First we need to develop a design for the finished shelf. It is recommended to do this in the following ways:
Approximate design diagram showing all shelf sizes
Important point! It is advisable to design a universal design that will be not only decoration, but also a functional element of the interior. That is why it is recommended to strengthen it.
Typically the following parameters are displayed on the drawing:
Important point! When drawing up a drawing, it is necessary to take into account the thickness of the materials used (gypsum board sheets and metal frame).
Sheets can be of different thicknesses
Regardless of the choice of one option or another, creating a diagram is an important step, thanks to which it will be possible to make a structure of an ideal shape. This way you get the opportunity to evaluate the correct placement of the shelves and avoid various problems during the installation process.
Surface preparation
Before starting installation work on the manufacture of plasterboard shelves, you will need to prepare the walls. Here, any irregularities can become an obstacle to the normal fastening of the frame, causing the structure to turn out crooked.
It is necessary to assess the condition of the surfaces. If there are all kinds of cracks, sagging, and depressions, they should be eliminated. In addition, it is better to treat the walls with several layers of primer so that they do not crumble in the future.
It is necessary to plaster the uneven areas
Important point! In some cases, preliminary floor preparation is required.
Step-by-step instruction
Frame installation
Step 1. Mark the wall. In order for the base for our shelves to be reliable, it is necessary to take the markings with special responsibility. At this stage we will use a building level, mark the location of all heights, and fasten the dowels. To mark the surface, you must use a marker or a simple pencil.
Leaving marks on the wall
Step 2. Calculate the load. Calculating the load on the shelves is not difficult - it is important to know what these shelves are supposed to be used for. For example, if a TV is installed in a niche, it is important to make it durable. For such purposes, it is better to strengthen the frame with metal jumpers.
If you plan to make a small shelf for shoes or other not very heavy objects, then a standard sheathing for drywall will be sufficient. The shelf for various postcards and souvenirs does not have to be strengthened at all.
Calculating the load is of great importance, because the durability of the plasterboard structure will depend on it
Step 3. Assembling the frame. The basis of the frame is made up of metal profiles that serve as guides. Thanks to the use of such beams, you can make a structure of any shape - for this you will need to make notches on the metal. It turns out that the more different bends there are, the more such notches will need to be left. It is recommended to use metal scissors when working. All parts of the frame are secured to each other with self-tapping screws. It is necessary to carefully tighten the fasteners to ensure a strong base.
You should check the correct location of all parts using a building level
Prices for building levels
Step 4. Attach the profiles to the wall. It’s not difficult to fix the shelf on the wall, because it already has markings that we set in advance. In any case, even at this stage you can still slightly change the location of the structure.
The frame of the shelves is fixed to vertical posts, which are first fixed to the wall
In the case of assembling built-in structures, it is necessary to secure the racks along the facade. To do this, lay a jumper according to the markings and then attach a jumper. Supports are fixed at its ends:
It is worth noting that the more you plan to load the shelf, the more dowels and screws you will need to use to secure the frame. Typically the pitch between fasteners is about 200-250 millimeters.
Installing drywall sheets
Step 1. Mark the gypsum plaster boards. Some craftsmen prefer to calculate the required amount of material at the stage of creating the project. The standard length of sheets ranges from 200 to 450 centimeters, and the width is 120-130 centimeters. Since additional changes are often made during the frame assembly process in order to mark the sheets, it is necessary to measure the frame. In this case, you will need to leave a few centimeters for gaps, because the entire base must be covered with plasterboard panels.
In order to avoid inaccuracies, it is recommended to use a cardboard template for this purpose (boxes from large household appliances will do). These parts can then be attached to the frame and some changes can be made if desired.
These patterns should be transferred to gypsum board sheets - for this we need a marker or a simple pencil
Step 3. Installation of lighting. It is at the stage of creating the frame that it is necessary to carry out wiring for the lamps. Of course, this step is not mandatory; it is only necessary if lamps are included in the project.
Holes of the appropriate diameter should be made in the plasterboard panels for spot light devices
Important point! There is an easier way to install lighting - using LED strip.
Step 4. Install the parts on the frame. It is important to be especially careful at this stage. The sheets are used either immediately after cutting, or they are additionally given different shapes. If you choose the second option, it will be necessary to carefully process the sheet with a wet roller on all sides, as a result of which it will become very plastic.
This is an example of installing gypsum board panels on a frame
After preparing all materials, it is necessary to begin installation:
We fix the sides of the structure
Shelves inside the frame
Prices for the range of drills
Here, too, it is necessary to calculate the optimal distance between the screws depending on the purpose of the shelves - it is important to remember that they should be no further than 100 millimeters from each other. However, it is recommended to take a minimal step between them.
Finishing
Prices for popular types of putty
When the entire structure is securely fastened, you can begin the finishing stage.
Step 1. Prime the surface. In order for the putty to adhere reliably to the plasterboard sheets, they should be pre-treated with a primer (a total of 2 layers will be required). It is better to apply the primer using a roller, this way you can quickly distribute it even over a large structure.
Choose a universal primer
Step 2. Apply putty. Now we have to apply the first layer of putty to the structure. It should be quite thick to hide all fasteners, joints, and irregularities. It is better to use a spatula to apply putty. The result should be a smooth surface.
It is better to take a medium-sized spatula
Step 3. Sand the surface with sandpaper. When the first layer of putty has dried thoroughly, it will need to be sanded using sandpaper - this will allow you to achieve an ideal surface.
For this work, it is recommended to purchase a special sandpaper holder
Next, you will need to putty this structure again. If desired, you can apply decorative plaster because the next step will be painting. The design of the shelves can be different, here everyone can show their imagination.
Video - Making shelves for a children's room
Installation of a steel profile frame
The frame must withstand not only the weight of the finishing material, but also the weight of the objects that will stand on it. This must be taken into account when mounting it on the wall.
The frame for the shelf in the hall is installed in the following order:
Scheme of assembling the frame by installing a galvanized profile under plasterboard.
- Lines for placing load-bearing profiles are drawn on the wall (floor, ceiling).
- Load-bearing elements of the required length are measured and sawed off. Holes for fastening are drilled in them every 25-35 cm.
- The load-bearing profile is applied to the load-bearing and supporting surfaces, and places for dowels are marked.
- Holes are drilled into which dowels are inserted.
- The supporting profile is attached to the wall (floor, ceiling).
- The frame structure is assembled from the CD profile, side and T-shaped connectors. The parts are fastened to each other using special metal screws.
Upon completion of installation, the strength of the frame is checked by pressing on it from different sides. If the structure meets the strength requirements, then electrical wiring is installed inside it in a special protective box.
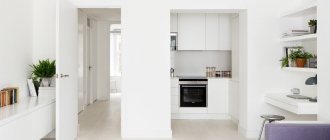
Free-standing and built-in plasterboard shelves: which do we prefer?
Shelves can be made either as a separate piece of furniture or as a structure built into the wall, something like a niche. When making a choice in one direction or another, you need to be guided by your artistic taste, considering and taking into account the size and configuration of the room and its filling with furniture.
Freestanding shelves are great because they can be moved anywhere in the room, but they take up specific space.
In contrast, built-in shelves seem to free up some area of the room, but due to the design features they cannot be large and deep. Additionally, once placed in one place, they cannot be moved. Of course, built-in furniture is generally preferable for small, cramped spaces.
Frame covering
Diagram of the correct joining of drywall sheets.
In order not to make mistakes when preparing blanks from gypsum plasterboard, it is recommended to make a pattern for each of them. Newspapers, sheets of Whatman paper or wallpaper are suitable for this. Only after careful fitting can you apply the pattern to a sheet of finishing material and cut out the part.
You can do this using:
- sharp knife;
- hacksaws for wood or metal;
- jigsaw.
The finished fragment is placed on the frame and screwed to it with metal screws. Their caps need to be recessed into the surface by 1-2 mm. Curvilinear gypsum plasterboard fragments are wetted and, after achieving the required flexibility, attached to the profile. After drying, they can be processed.
Excess material protruding beyond the edges of the frame can be sanded off using a belt grinder. Finer sanding of the edges is done by hand with sandpaper.
Related article: What is the shelf life of wallpaper glue?
Surface finishing
To ensure that the surface of the shelf is smooth and durable, it is finished.
It consists of the following:
Scheme for filling drywall joints.
- The entire surface is treated with a liquid primer.
- Holes from screw heads and joints between individual parts are sealed with starting putty.
- The edges and corners are covered with plastic or aluminum corners. A reinforcing mesh is glued over the joints between individual gypsum plasterboard fragments.
- Finishing putty is applied to the entire surface. Allow at least a day for it to dry completely.
- Grinding and polishing are carried out using fine-grained sandpaper.
- A liquid primer is applied to the treated surface.
The finishing touches are complete, you can move on to decoration.