Types of materials
Types of materials used to create shelves:
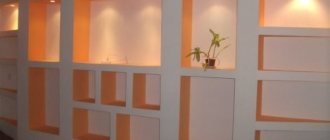
Decorative plasterboard shelves in the bedroom
Kitchen wooden spice rack
Chipboard bookshelves
Beautiful glass shelves for decorative items
Plastic shelves for bathroom
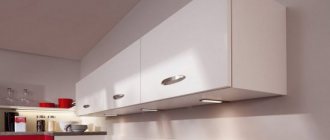
Wall-mounted metal box shelf for the kitchen
Shelves on the wall in different types of interiors
Shelves are an element that has a place in any design project. Such products can be hung in a variety of places. For example, in the bedroom near the bed or in the living room above the sofa.
Over-bed shelves are an excellent alternative to furniture such as bedside tables. In addition, they can be hung above the desk in the student’s room. They can replace a lot of furniture, even wardrobes.
It is very important that the appearance of the shelves matches the style of the interior. The manufacture of such products must be carried out in accordance with the design project. Otherwise they will look out of place.
Shelves in every interior style:
- Scandinavian style is the predominance of simplicity and natural materials. Solid wood models will look good here. They can be light or dark. Both angular and straight options are welcome.
- In the loft style, metal products, as well as wood, will look good. Perforated shelves assembled into a rack look great. They may even have holes for bottles.
- Small narrow hanging options, decorated using the decoupage technique, will look great in romantic and rustic interiors. The image for registration can be absolutely anything.
- Classic design loves white tones and simple shapes. However, ornate golden jewelry would be appropriate here. A white console will look good.
- It is impossible not to mention the interiors in high-tech style. Glossy furniture looks great in them. Therefore, here you can use voluminous square shelves made of chipboard, covered with PVC film.
Hanging shelves are a world-famous interior element. Almost all furniture collections include such elements.
Required Tools
Tools for attaching shelves to the wall
To securely hang a shelf on the wall, you should use the following tools:
- drill or hammer drill;
- drill of the required diameter;
- screwdriver;
- level;
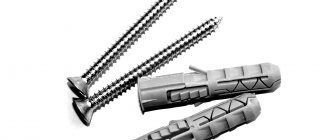
- dowels;
- self-tapping screws;
- pen or pencil.
Mounting methods for wall shelves
When planning wall shelves, the type of fixation is decisive. Once you familiarize yourself with the mounting method, you can easily choose the option that suits you.
Using invisible fastening . By choosing this look, you will hide the fasteners, and the wall structure will look light and elegant, no matter what room it is hung in. It is desirable that the wall be concrete or brick. Wall partitions made of plasterboard less than 10 cm are not recommended.
How to properly fix a shelf on the wall so that it fits perfectly into the interior?
You can use a variety of materials for wall shelves.
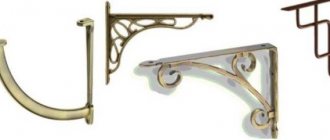
Using brackets . In this case, you cannot hide all the elements; they will always be visible. You can save money by purchasing metal or plastic corners. If you want to add beauty and originality to a piece of furniture, buy decorative fasteners, but always in pairs. It is necessary to take into account an important point - the brackets are not suitable for every interior.
They are attached to absolutely any room.
Working with it is not difficult, and its mass is small.
On holders for glass shelves . In such fasteners, rubber or silicone gaskets are used to protect the plane at the fastening site. Shelf holders can be of different sizes and shapes; there are options with suction cups. They are attached from below, and the upper surface remains open.
Anyone can do this work if they want to.
How to attach a shelf to a wall?
Using loops and corners . This is the most common method - easy, efficient, does not take much time, and will fit into any environment. The format of loops or corners allows for a decrease or increase in the load on the shelf. Attachment to guides or metal posts. Not all types can be put into practice on your own. In some cases, it is worth contacting specialists.
When planning wall shelves, the type of fixation is decisive.
To hang a shelf on a brick or concrete wall, you need to make markings using a level.
Installation of a light shelf
A shelf with hidden fasteners looks neater.
If the shelf was purchased in a store, then fastenings may be included. It is better to use them after reading the instructions before doing so. The need for preliminary study comes from the fact that some shelves are attached to the wall in a special way. Ignoring the necessary conditions may cause an undesirable result.
Depending on the shape, they can be very diverse: a straight shelf, a multi-tier shelf, a corner shelf, a closed and open shelf, a round and square shelf, and so on.
Various shapes of open shelves
Before you immediately nail the shelf to the wall, you should prepare. To do this, you need to decide on a place for it on the wall. First, the shelf is adjusted to the wall and marked in the center of the holes with a pencil.
Take a level and mark with a pencil the exact locations for the holes for the dowels
To ensure that the shelf is level, the distance between the fastenings is measured and compared with those marked on the wall. Then everything is checked by level, only after that the preparatory stage is completed.
Choosing a place to install the shelf
Then, using the tool, holes are made in the wall. It is important to use a drill bit that is the same size as the fastener. Once the mounting points are ready, you can hang the shelf.
We make 2 holes in the places of our marks
Where and how to hang bookshelves
The main problem of a real book lover is the eternal lack of space to store his favorite books. Our small apartments will never fit the magnificent library from Disney's Beauty and the Beast, not to mention the wonderful library staircase. Most often we have to share the place where books live with cats, children, husbands and parents.
Still from the cartoon “Beauty and the Beast” (1991)
However, there are several design ideas that will help you save space. We have collected 9 of the best for you.
1. Give books the most uncomfortable part of the room.
In older apartments, you can almost always find nooks and crannies that are completely non-functional. Place bookshelves there and create a mini-branch of your home library. You can, for example, hang them in a corner between two doors or behind a door.
2. Design a closet for this purpose.
Few people are ready to part with the pantry as a place to store all sorts of junk, if they already have one in the apartment. But if you suddenly decide to make such changes, keep in mind that then you can remove the door, hang shelves inside and turn a dark nook into a cozy place for reading.
3. Rise Higher
The space under the ceiling is usually unoccupied. To save space, you can place shelves exactly there, without being limited by the standard height of a bookcase.
4. Go lower
If you have low ceilings in your home, shelves at the top can make the space appear even smaller. In this case, it is better to use the space below - under the window or at the foot of the bed.
5. Hang a shelf above the door
The distance from the door frame to the ceiling is completely non-functional. In addition, the shelves hanging in this place are not visible from the entrance and do not narrow the room.
6. Try not to use cabinets
Many people choose them, thinking that this will keep the books cleaner. In fact, the differences are not that significant. In any case, it is recommended to wipe the home library from dust from time to time. And cabinets only take up extra space.
7. Integrate books into furniture
Any chair can be lined with bookshelves around the perimeter. This is now very fashionable abroad.
8. Use drawers and boxes to store small amounts of books
When there is little space in the apartment, every twenty centimeters will come in handy. It’s better to stick a mini-shelf in the corner than not use it at all. Methods for storing books can be very different - from boxes to shelves on wheels.
9. Turn shelves into decorative elements
If your family has “crazy hands,” the shape of the shelves depends only on your imagination.
Until new books!
Your Book24
Attaching a Heavy Shelf
If you need to attach a shelf, you should think through some details in advance. You should decide on the choice of material from which it will be made, as well as its functional purpose. If the answers to these questions led to an understanding of the need for a reliable shelf, then it is worth knowing its features.
To attach a heavy shelf you should use: a drill or hammer drill, dowels and screws, drills of the required diameter.
So, we start by adjusting the shelf to the wall and marking the holes. In order to correct the evenness, we check with a level. After this, you can begin the drilling procedure. Using a drill, make holes in the marked places. Insert dowels into the resulting holes. Afterwards, the shelf is tried on the wall a second time and attached with self-tapping screws.
To determine the exact place where to screw a screw in a brick wall, you can use electrical tape
Correct execution of all steps guarantees safe operation of the suspended surface.
These spikes will serve as a mount for an invisible shelf.
Shelves from IKEA
IKEA LACK.
A universal solution is the IKEA LACK shelves. Why and how they were not used. They are sold in several versions: 110, 190, 30 cm, in white, black, red, wood. There is also a 30 cm vertical shelf module. With a base thickness of 5 cm, classic colors and no visible fasteners, they have a modern look that matches and complements IKEA cabinets.
LACK can be mounted evenly in a row, offset, in corners, at an angle; narrow shelves can be mounted vertically and used as limiters.
Corner shelves for small items.
Mounting to adjacent walls.
Shelf module in the bathroom.
Shoe storage.
Storage in the toilet.
Mounting above the desktop with offset.
A hidden metal bracket is attached to the wall, a shelf is placed on it and secured with two small screws from below. Maximum load 7-15 kg, depending on length and base.
Hanging a shelf on a tile
To attach the shelf to the tile, it is better to use a drill or hammer drill, dowels and self-tapping screws. The reason for choosing this type of tool is the fragility of the tiles.
A good guide to horizontality will be the seams between the tiles
The first stage - selecting a surface, marking holes and checking with a level - is the same for all types of surfaces. The second stage is the actual moment of drilling. But it is he who conceals his own nuances. For the effectiveness of this process, it is worth drilling the tile itself at low power, and then changing the drill to a smaller one and working fully.
You should not forget about the fastidiousness of tiles. Any wrong action can result in a crack in it. You should be very careful and follow the recommendations.
If you still need to drill the tile, mark the location of the hole on the masking tape
Varieties
Before you start making a shelf, you should consider its main varieties. So, according to their shape and location of installation, shelves are divided into the following types:
The classic bookshelf has a simple shape, so making it with your own hands is not at all difficult. The main requirement for such a shelf is strength, since it must withstand quite a lot of weight.
This design has a straight shape, is made of durable materials (wood, fiberboard) and has a reliable fastening. If you show some imagination, even such a simple shelf can be turned into a very interesting decorative element.
The corner shelf has the shape of a triangle and is attached to the corner of the room. Often such shelves are hung in small spaces. They can be attached to the inner and outer corners of the room.
Very often, a floor shelf is used for interior decoration. If such a structure has a height of more than one meter, then it is usually called a rack. It is placed on legs and sometimes attached additionally to the wall for greater stability.
The hanging shelf is very functional. It is usually suspended from heating pipes located under the ceiling. It can also be hung on special brackets. This shelf would look most appropriate in the kitchen or bathroom.
Before you start making your own, it is important to understand what you can make a shelf out of and what material to use for it. Shelves are made from a variety of materials.
The most common are various types of wood, chipboard and plywood. However, rooms are often decorated with shelves made of glass, plastic and metal. It all depends on the preferences of the owner and the style of the interior.
