Why does laminate flooring squeak when you walk?
Laminate is a beautiful and high-quality coating, but even these factors cannot guarantee its trouble-free use. It is characterized by some unpredictability and even full compliance with the installation technology will not give any guarantee. Why there is a creaking and the floor begins to crack - there are several reasons for this. In some cases, the “bad behavior” of the floor covering is influenced by one thing, and in some cases, the cause of the squeaking is a whole complex of unsuccessfully performed actions. Let's analyze the reasons. Sometimes you want to walk barefoot on a beautiful floor without it causing discomfort.
Uneven base under the coating
The technology of laying laminate flooring requires careful preparation of the base for laying the covering. The floors must be leveled to perfect condition, otherwise the problem of squeaking cannot be avoided. If the base is poorly prepared, the laminate does not creak over the entire surface, but only in certain places. Precisely in those where there are base defects, small holes or irregularities. Even the smallest and most inconspicuous ones, over time they will lead to the strip of laminate sagging and the laminate, experiencing the heaviness of the weight, will bend when walking. This will lead to the squeaking sound.
Substrate thickness
The correct technology for laying laminate flooring involves the use of a special fabric - a backing. It is used to level out small defects in the base. Its thickness varies and, as a rule, in such cases a thick substrate is used. And this is completely wrong, since the squeaking problem will not be solved, but will only get worse. The thicker the substrate, the more the laminate will sag and the stronger the squeak will be.
The normal thickness of the substrate for proper installation of laminate should not exceed 3 mm. This is the most optimal number.
The gap between the laminate and the wall is too small
When laying laminate flooring, it is necessary to leave a gap between it and the wall. Its minimum size is at least 7 mm. The choice of size will depend on the total area of the room where the covering is laid: the larger it is, the larger the gap should be. It could be three centimeters, or even four. The main thing is that it is then covered with a plinth; accordingly, the width of the plinth will need to be taken into account.
The gap is necessary so that the laid laminate can diverge and, thus, take the position that will be optimal for it. The voltage on butt locks is reduced and creaking does not occur. With a very small gap left, there is not enough space for the “expansion” of the laminate, it begins to press into the walls and baseboards, which leads to the appearance of loud, unpleasant sounds. The same thing will happen if you put the covering close to the wall, without the necessary free space.
Inconsistent room humidity
Laminate flooring is extremely sensitive to changes in humidity in the room. As the humidity level increases, the material will squeak or crunch a little when walking. And what is especially unpleasant is that this will happen not only in some specific places, but over the entire surface of the floor. Such sounds are not at all pleasing, but cause irritation and nervousness. As soon as the humidity begins to drop, the sounds produced by the laminate will begin to decrease in level and become quieter. With normal humidity, the squeak will disappear completely.
Sand and dust particles
One of the reasons why laminate flooring makes strange sounds is the presence of sand and dust particles under the coating. During installation, it is necessary not only to follow the technology, but also to carefully monitor the cleanliness of the material used. The boards themselves, the substrate and the base must be perfectly clean, so a vacuum cleaner is required when working. With its help, dust, sawdust, and sand are collected.
All work on preparing laminate boards, trimming and filing, is best done in another room. Then there will be significantly less waste, which is what needs to be achieved for the job to be done correctly.
Any debris, dirt or dust, even the smallest particles, getting on the connecting lock of the material, can not only lead to a nervous state with its crunching, but will also do its dirty work in damaging the original material.
If the base of the floor was leveled using a screed, over time, under the weight of objects, it may begin to crumble. The laminate, resting against its base, grinds the crumbled particles, thus creating the “favorite” creaking and crunching underfoot by everyone.
Buying low-quality laminate
Like any other building material, laminate is produced both expensive, but of high quality, and cheap, but far from high quality. Buying cheap cover is sure to lead to some surprises. And even if all the rules were followed during the work and all technologies were observed, there is no guarantee that the laminate will not creak after a few days.
Tension in locking elements
The most common reason for all-round squeaking of laminate flooring in the first six months after installation is the tension that high-quality laminate flooring retains in the locks. Its well-known feature is the independent search for the optimal position. The laminate, after installation, remains in a floating state for some time. He knows how to adapt both to the base and shape of the room, and to the characteristics of its running parameters.
If there are gaps between the laminate and the walls, the coating will safely find its position, occupy it completely in 2-3 months, and the tension in the lock elements will drop to a minimum.
The natural expansion of the laminate can be hampered by furniture that is bulky and heavy. Its weight will definitely cause the laminate to creak. It is better to buy and place in the room some light furniture.
What to do if the laminate creaks immediately after installation
Initially, there are two options - either the installation was high-quality, or low-quality. In the second case, all of the above problems are possible:
- divergence of locks,
- lack of expansion seam,
- uneven base,
- incorrectly selected substrate.
If the installation was carried out according to all the rules, then it is better not to take any action for some time and wait up to 2-3 months.
The fact is that laminate flooring requires a certain period of time to adapt to new conditions. In this case, a certain voltage is possible in the locking connections. It is caused by the fact that the lamellas move, “searching” for their place, until they lie stably.
How to fix it so it stops cracking and creaking
The first part of the article discussed the main reasons why laminate flooring creaks and crunches when you walk. And now we will talk about how to remove the squeak and fix the floor covering.
Trimming laminate
In a situation where, during installation, no gap was left between the wall and the covering, or it was made too small, the laminate will have to be trimmed. To do this, you need to remove the baseboards and trim the boards that are outermost to the wall either in length or in width (will depend on the installation method). Since the laminate is assembled using the puzzle method, the boards can be easily pulled out, cut and laid in place, thus ensuring the required gap size. In conclusion, return the baseboards to their place and rejoice at the problem being resolved.
Remove debris under the laminate (needs to be disassembled)
Having determined that the laminate is creaking due to the presence of debris, you will need to clean the base and the strips of material themselves. Solving the problem will be very difficult, since you will have to dismantle the entire floor, clean it and lay it in a new way. If the cause of the squeak is in the screed, the coating will again have to be dismantled. After removing the laminate, the surface of the screed should be thoroughly dust-free, apply a new layer of primer and lay down a substrate, preferably also a new one. In some of these situations, a plastic film is laid over the screed, which will prevent debris from directly touching the laminate.
When disassembling the laminate, be sure to number the boards. This will help with subsequent installation.
Leveling the floor: dismantling and laying again
When the cause of the squeak is an uneven base surface, it needs to be leveled. With local creaking, everything is not so bad. It will be enough to disassemble the coating in the problem area, find the unevenness and eliminate it. A solution that hardens very quickly will help level the floor. Apply it using a spatula. When the surface is completely dry, it will need to be sanded, then line the area with sheets of cardboard, return the backing and put the laminated boards in place.
Drastic measures will be required if there are numerous creaks and crunches. The covering will have to be completely dismantled and the base leveled. This can be done with a regular primer or “self-leveling floors”. If the substrate is very thick, it should be replaced with a thinner one, no more than 3 mm. After complete leveling, the laminate is laid in a new way and, if everything is done correctly, the creaking is eliminated.
It will be more difficult to get rid of the problem in a situation where a regular wooden floor was used as a base. You will have to remove the entire covering, along with the baseboards and thresholds. After cleaning the floor, you need to find problem areas, paying close attention to old, rotten boards that have been attacked by mold or mildew. If necessary, the boards are replaced with new ones. The boards that have come loose from the joists are fixed, and the entire floor is checked for defects. Then the boards need to be scraped, which will make the surface perfectly flat.
If scraping is not possible, the floor can be easily leveled using sheets of plywood. Its thickness should not be less than 10 mm. It is installed using glue and secured with self-tapping screws.
Other ways to fix the problem
When purchasing laminate flooring, it is better to purchase quality products from a well-established manufacturer. It will cost more, but the risk of squeaks and crunches will be minimized. To a greater extent, they are typical for poorly made laminate.
If the cause of unpleasant sounds when walking depends on changes in humidity, there is no need to worry. After some time, when the humidity returns to normal, the sounds will disappear on their own. the same will happen if the required gap is left. After 2-3 weeks, the laminate will find its optimal position and everything will work out.
If the technology is fully followed, a slight creaking in certain places should not be alarming, since after the required time it will stop on its own.
The glue used in the manufacture of the laminate protects the lock elements from the penetration of debris and dust. From this point of view, it will be better to use types of adhesive laminate, since they creak the least.
It is not entirely correct to use laminate immediately after purchase. It will be better if he lies in the room where he will be laid for several days. This way the material quickly adapts to the desired temperature. This is especially true in winter. The laminated coating sold is unlikely to be stored in warm rooms. The usual place is cold storage. Low temperatures make it impossible for the material to maintain the correct shape and it will be very good if the laminate lies in a horizontal position at room temperature for several days. Only after this can you start working with it.
Good quality of the coating will be indicated by the presence of recommendations for use when purchasing. A manufacturer who cares about the quality of his product and the reputation of the company necessarily gives advice on the use of the products he sells. The recommendations should be carefully followed and then many problems can be avoided.
Living room tables made of natural wood.
How to properly apply Venetian plaster video, see this article.
Wallpaper for a small bedroom: https://trendsdesign.ru/home/bedroom/sovremennye-idei-dizajna-dlya-nebolshoj-spalni.html
How to fix creaking laminate flooring without disassembling it
It happens that even after all preventive measures have been taken, including filing down the expansion joint, leveling the size of the gaps at the joint, especially at the ends of the lamellas, and eliminating places with hanging edges does not give the required result. This happens with laminate flooring that has lasted at least 3-5 years. This is a problem not only with laminate; strong squeaking can be produced by wooden block parquet and mosaic sets of sections. The reason for this phenomenon remains the drying out and deformation of the locks; in other words, the joints wear out and play appears. The protective coating gradually wears off, moisture absorption increases, and, as a result, the lock begins to squeak.
If the laminate has an insert (blue), then you can’t do without lubricant
There are three ways to eliminate creaking sounds:
- Use silicone oil to treat rubber seals on car windows and metal-plastic windows;
- Using defrosting mixture VD-40. It is not intended for use on wood, but can be used as a temporary measure to eliminate squeaking;
- Use homemade powder lubricant for wooden products.
It is clear that each of the above materials has a certain degree of effectiveness. If you need to remove the squeak immediately, then perhaps silicone in an aerosol will be the best solution. In other cases, it is advisable to experiment with materials.
WD-40 aerosol is a mixture of alcohol and camphor oil, so you need to be extremely careful when applying the material to the joint. It will be incredibly difficult to wash off drops and marks after treatment, so you can first stick some tape on. The technology for combating laminate squeaking is shown in the video:
Treatment with silicone anti-squeak grease for laminate looks much more interesting. This is a fairly viscous material, so it is better to apply it in small portions using a knife blade or spatula. There is no point in spraying with an aerosol, as this can ruin the laminate flooring.
The candle must be wax
You can also get rid of squeaking using the smallest powder, rubbed from a frozen wax candle; you can buy them in a church shop or in a store, the main thing is that the material is soft and plastic at room temperature. The rubbed dust is carefully poured into the seams, the surface is wiped with a brush to remove residues, and heated with an industrial hair dryer at a temperature of no more than 80°C.
The powder melts and spreads inside the lock, as a result of which the creaking disappears for a long time. A kind of solid lubricating film is formed inside the joint, which does not dry out or be absorbed by the lamella material.
Conclusion
Like any other problem, it is better to prevent the appearance of squeaking laminate flooring than to deal with it in the future in every possible way. But if, nevertheless, a creaking, crunching or other unpleasant sound when walking begins to gradually appear and become larger, it is necessary to immediately begin to eliminate them. Lost time will make the problem more serious, and the costs of solving it will be greater.
What is better, laminate or parquet board, read in this material. Find out which laminate is best for your apartment here.
The best ways to eliminate squeaking
If the root of the evil lies in poor quality materials or poor installation technology, most likely the floor will have to be dismantled and reinstalled. But don't rush into this decision!
Dismantling is not the only way to eliminate creaking laminate flooring. Understanding the cause of unpleasant sounds will further help determine the simplest, inexpensive option for getting rid of it.
Getting rid of squeaks due to uneven floors
Poor preparation of the base will lead to one result: the laminate creaks. Any pits or bulges appear when walking and spoil the geometry of the laminate floor.
Unfortunately, to correct an uneven base, you will have to disassemble the floor. How much depends on the scale of the problem.
If the laminate creaks in one place, take it apart, cement the depression or grind off the bump, let it dry, and put the boards in place.
If the sound is throughout the entire floor, it is necessary to dismantle the floor covering, level it - it is best to use the self-leveling method, lay the underlay, and lay the planks again.
Important: Crooked lamellas cannot be returned to their place; they require replacement with new ones.
Watch the video to find out why you can’t lay laminate flooring on an uneven base.
What to do if the laminate creaks due to a temperature gap?
When the laminate creaks not constantly, but with changes in the temperature or humidity of the room, remove the baseboards and check the condition of the technical gaps.
Laminate boards tend to expand/contract with climate fluctuations. If, when laying the laminate, you do not leave enough space between the covering and the wall, or leave it insufficient, the planks will quickly hit the wall when they expand. The surface begins to creak and bulge in some places.
The photo shows one of the ways to leave gaps when laying laminate boards
When wondering why laminate flooring creaks, first of all check the climatic gap near the walls and pipes for compliance with the standards:
- the correct gap for most rooms is 1 cm;
- distance from the board to the pipe - 1.5 cm;
- the gap between the floor and walls in damp and large rooms is 1.5 cm.
If this is the cause of the laminate squeaking, the solution will not require dismantling. Craftsmen advise eliminating this problem by cutting the boards to the required width around the perimeter of the room. At long distances, a grinder or jigsaw will help - cut off carefully so as not to damage the wall and floor. And around the pipes, cut off the laminate with a sharp knife.
Removing the creaking of laminate locks
Tension in the locks is another cause of squeaking. If this is the problem, then an unpleasant sound will appear almost immediately after installation. This is due to the fact that the floor covering adapts to the surface of the base, traffic, and room climate.
The photo shows an example of a laminate floor. After installation, 2-3 months must pass for the slats to take their final shape and stop creaking.
When the floor settles down and takes its final shape, the creaking will stop on its own. As a rule, this takes up to 3 months. If this does not happen, first of all check the presence and size of climatic gaps, following the instructions from the previous paragraph.
How to remove laminate flooring from squeaking due to remaining debris?
If laminate flooring squeaks when you walk, sand and other small debris may be the cause. Dust does not arise on its own, but remains after hasty installation - without thorough cleaning before, during, or after installation.
A loud crunch will indicate that sand has gotten into the locks of the laminate floor. Do not delay repairing the coating: small debris can lead not only to extraneous sounds, but also to damage to the locking connections.
As a rule, it is not possible to remove the squeaking of laminate flooring without disassembling it - you will have to remove the lamellas, remove the backing, clean the base of debris, and put on new lamellas. To avoid confusion when reinstalling, number each part before disassembling.
The photo shows a construction vacuum cleaner that will make it easier to clean the screed from debris and dust
A crumbling screed can also lead to dirt accumulation and squeaking in the laminate flooring. To correct the mistake, the coating is dismantled to the place where it creaks, filled with cement, leveled, dried well, and primed. If you are not sure that you can handle it, call a specialist for a beacon screed.
Proceed with installation after complete drying. Thoroughly clean the base before you begin, and go over each strip with a vacuum cleaner during the process.
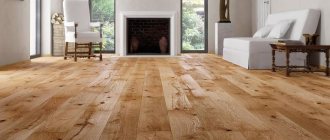
How to fix squeaky laminate if the backing is too soft?
The underlay is the most important layer of the finished floor. It smooths out small unevenness, protects the laminate floor from water and moisture, dampens noise, and insulates sound and heat. But bigger doesn't mean better. You should not try to solve the shortcomings of the screed by making a flat floor with a thicker gasket. A substrate that is too thick will settle, the laminate on it will begin to sag, its locks will fail, and it will certainly begin to creak.
The photo shows a thin cork backing for laminated panels
The optimal thickness depends on many factors. Including the type of laminate, operating conditions and substrate material. Most often, the manufacturer indicates the most suitable option on the packaging with panels.
Dependence of thickness on material:
- cork - 2-4 mm;
- coniferous - 4 mm;
- foamed - 2-3 mm.
Dependence of thickness on laminate:
- standard 8 mm panels - 2-3 mm;
- thin 6-7 mm - 2 mm;
- thick 9-11 mm - 3-5 mm.
How to eliminate laminate flooring squeaking due to the underlay? Change! It will be necessary to completely dismantle the covering, replace the old gasket with a new one and re-install the lamellas.
Why did the laminate begin to creak - reasons and solutions
If creaks are detected, there is no desire to disassemble the floor. After all, when you step on the slats and they crackle, the thought of dismantling immediately appears. This means we’ll immediately look at cases where you can eliminate squeaks on laminate flooring without removing it.
There is no or minimal compensation gap (indentation) from the wall.
Laminate changes size (shrinks and expands) when temperature and humidity conditions change. This is why a gap of 8-12 mm is left near the walls. If it is not there, the boards will eventually hit the wall. And then, if further expansion is impossible, they will bump into each other at the joints.
A characteristic feature is that the lamellas have risen at the junction.
When you walk, a cracking sound will appear in these places. Since the planks will rub against each other from tension. How to remove laminate squeaking in this case?
Solution: The situation can be corrected without disassembly. It is enough to remove the baseboard and check the gap. If its size is insufficient, simply file the edge of the laid laminate. This can be done with a grinder or jigsaw, but it is most convenient to cut the laminate with a renovator.
The laminate is pressed against heavy furniture, which prevents it from moving.
Example: The humidity changes, and the board begins to increase in size, pushing the next one. But the next lamella is pressed against the sofa and its movement is limited. As a result, the dies will rest against their ends and will crack if stepped on. This, as in the previous case, occurs due to friction of the narrow parts of the slats.
The sign is a slight swelling at the junction. How to eliminate squeaking laminate flooring without removing it?
Solution: You need to move back a little the board that rested on the adjacent one. This will remove friction between them and get rid of the crunching.
For this:
- We take a small wooden plank and glue 2-sided tape on it;
- Then you need to press this board tightly to the desired lamella. The side on which the tape is;
- Now, pressing the plank to the floor with your hand, tap it with a hammer until the pieces of laminate come apart.
There are differences on the floor of more than 5 mm.
Perhaps there are holes, bumps or significant differences left on the base of the floor. This is either a low-quality screed or an old wooden flooring. This is why laminate flooring creaks most often. Indeed, with high traffic, the planks will begin to sag in these places. The load on the locks will increase, and constant friction will cause them to creak.
The main symptom is sagging slats.
Solution:
- The best way to get rid of the cracking is to disassemble the floor to this point and remove the hole. It can be filled with self-leveling mixture. Then lay the boards again;
- But, there is another option. In order not to remove the slats, you can drill a small hole in this place. Next, pour in the same mixture with a syringe and wait for it to harden. Then we cover the hole with wood plaster to match the color of the floor and paint over it with a furniture marker;
- Regular application of silicone to noisy areas (every week).
Very thick and soft backing.
As a rule, the thickness of the substrate should not exceed 2-3 mm. However, some take a lining thicker than 5-7 mm. Someone wants to make the floor warmer on the 1st floor. Others try to smooth out the unevenness of the base with a thick substrate.
But over the years, the lining material wrinkles under the laminate. And as you walk, the boards begin to sag more and more. This usually happens in the hallway and near doorways. Locks begin to creak due to constant friction and stress.
Solution:
- Remove the laminate planks to the problem area and replace the backing;
- Another option is to coat the crunchy joints with silicone. However, you will have to constantly lubricate squeaky places.
Debris and sawdust under the laminate or in the joints.
This happens if, during laying, you cut new boards next to the laid rows. You need to cut in another room. After all, the scraps fly into the locks and onto the substrate. They definitely need to be removed. Otherwise, the laminate floor will begin to creak in the first days. This occurs due to the rubbing of debris in the joints or under the coating.
Features – the new laminate crackled after a couple of days.
Solution:
- Wait until the sawdust grinds and the cracking disappears. This is not the best solution, as debris can damage the integrity of the locks;
- Until they brought in the furniture to dismantle the floor and get rid of the garbage.
If a laminate floor creaks, what should you do, how can you eliminate the extraneous sound without dismantling the flooring?
Sometimes it happens that when you walk on a laminated floor, the laminate creaks. Often this is not even related to the age of the flooring or the intensity of movement on the laminate.
Laminate floors in the bedroom
Most often, if the laminate creaks, then the installation technology is broken. But what to do if the floor is already laid? How to eliminate squeaking laminate flooring without dismantling the coating?
Before moving on to recommendations for correcting the situation, let's look at the sequence of laying the coating and what violations in the work technology lead to the fact that the laminate flooring creaks when walking.
Ways to solve the problem depending on the cause
If the methods listed above did not help, and the laminate still creaks, what can be done without dismantling the entire structure? Options for solving problems depending on the reason that caused the creaking.
Uneven base
If you lay laminate flooring on an unprepared (carefully leveled) base, the installed coating will creak.
In this case, you will need to fill the depressions in the base with foam. This is done in a similar way to the method using glue: problem areas are identified, holes are drilled, filled with foam, masked and varnished.
However, if there are a lot of unevenness or there are places where the base protrudes above the general plane of the floor, then you won’t be able to get rid of the squeak in this way; you will have to dismantle the structure and prepare the base according to all the rules.
No technical space between the wall and the covering
How to remove the squeaking sound of laminate flooring from the wall of a room? The grinding noise caused by the board touching the wall is quite easy to eliminate.
- Remove the baseboards that hide the junction of the laminate with the wall.
- Using a circular saw, carefully cut off the edges of the boards, leaving at least 10 mm between the wall and the covering.
- After vacuuming the perimeter of the room, carefully removing shavings and dust formed as a result of the work, install the baseboard in place.
Creating a technical space between the wall and the covering - eliminating the creaking of the laminate
It is quite possible that the baseboard also provokes creaking - it is advisable to immediately check how tightly it adheres to the covering. If the gap between it is too small, it is recommended to fix the baseboard a little higher so that it does not put pressure on the covering.
Grinding noise from panel joints
How to get rid of squeaking if the laminate was laid according to all the rules, but an annoying sound appeared immediately? Most likely, in this case, the cause is a grinding noise made by the locking joints or joints of the laminate panels. It usually goes away within 2–3 months after installation of the coating.
If even after this period the creaking does not go away, a special sealant is poured into the locks or panel joints. Before starting work, it is important to inspect their condition. There should be no dust, sand or other debris between the boards.
High indoor humidity
Increased humidity in the room affects the size of the panels, they swell, increase in volume, the load increases at the joints, friction is created when the load is placed on the floor, and an unpleasant sound is heard.
Laminate swollen from moisture
How to get rid of the squeak in this case? Reduce humidity levels. To do this, turn on the heating devices and warm up the room. Operating radiators will remove excess moisture from the air in the room, and after some time the panels will return to their normal shape, after which the creaking will stop.
Preventing laminate flooring from squeaking
By following these simple recommendations, you can further prevent the appearance of extraneous sounds:
- It only costs to buy flooring from trusted manufacturers.
- The substrate must have a rigid structure and a thickness of 3 mm.
- Preparatory measures should not be ignored; the base must be thoroughly cleaned of particles of dust, dirt and other debris.
- Before installation, the laminate should lie in the room where the floor renovation is planned for several days.
- It is imperative to leave enough free space between the panels and the wall.
- Control the humidity level and temperature in the room.