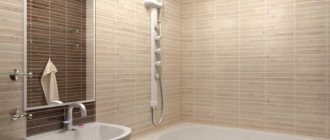
A bathroom is a room where a person cleanses his body, putting it in order. Therefore, it makes sense to ensure that it maintains a comfortable environment for complete relaxation. Mosaic tiles are an attractive-looking covering of walls and other surfaces with decorative elements made of a certain material (glass and ceramics are most often used in practice), which will decorate the space, allow you to highlight certain areas and decorate those surfaces that a person comes into contact with more often than others. . As a result, you can significantly improve the interior of this important room.
Features of the material
A photo of mosaic tiles in the interior always looks advantageous. This is due to the fact that with the help of such finishing material you can create a unique and inimitable interior. This type of tile has the following advantages:
- Easy to install, since you no longer need to glue each mosaic element separately - they are assembled into small sections on a mesh or paper base.
- Easy to care for. Mosaics are chosen for finishing rooms with high humidity, which means that the tiles are not afraid of water and are easy to clean.
- The finishing material is not afraid of sudden changes in temperature and is not prone to cracking.
- Sections can be cut using an ordinary mounting knife. This is much easier than cutting ordinary tiles.
- The materials from which the tiles are made are completely environmentally friendly, and therefore safe for humans.
Just like other types of ceramic tiles, mosaic has a long service life.
Where is mosaic on a grid used?
The scope of mosaic is wide. If ceramic mosaics are suitable only for interior decoration, then porcelain stoneware, glass and stone can be used literally everywhere. It is only important to follow the recommendations for glue and grout for a specific room - the wrong choice can ruin all your efforts. This material is not afraid of moisture and, thanks to the seams between the chips, is not very slippery. Therefore, mosaics are often used in bathrooms, swimming pools, saunas and hammams. However, mosaic tiles also go well with kitchens, living rooms, and public areas. Fragments of this finishing material feel great when placed on the most complexly shaped surfaces. It would be an incredible stylish solution to decorate the entire interior of the room with mosaics, leaving only the doors!
Kinds
Today there are a large number of finishing materials that can satisfy every taste and budget. Among the mosaics, the following varieties are distinguished:
- Ceramic tiles are the most affordable and also come in many shade variations.
- Stone tiles, which are made from materials such as granite, marble. The sizes of mosaic tiles made of natural stone can be very diverse.
- Glass finishing materials are made from heat-resistant glass, which has characteristics similar to ceramic tiles. In addition, glass mosaic has an unusual appearance.
- Metal mosaic is made of stainless steel. May also have a bronze or gold color.
The choice of material depends on the features of the future interior of the room, as well as on financial capabilities, since prices have a fairly wide range.
Types of materials
There are several types of mosaics:
- Ceramic - fire-resistant and easy to maintain. Ceramic surfaces can be glossy or matte. This cladding goes well with regular tiles and is often used to create accents in a specific area of the room.
- Glass - made by melting and stamping glass. To ensure the resistance of the material to mechanical stress and shock, the resulting elements are fired. This type of tile has a presentable appearance and can be laid on both walls and floors. In the latter case, it should be taken into account that the surface must have anti-slip properties.
- Stone - granite or marble is used for its production. During the production process, the stone is polished, ground and subjected to additional technological processing. If necessary, the material can be aged artificially.
Size chart
For ease of installation, the mosaic is assembled into sections similar to the size of ordinary ceramic tiles. The size of one square of mosaic tiles can vary from 10 to 50 mm. The most popular tiles are those measuring 20x20 mm. It is easy to assemble and has a universal appearance. There are also mosaic tiles with a chip size of 15 mm. Ceramics most often have a classic rectangular shape, and its small size allows you to lay out interesting panels or decorate curved surfaces.
In some variations of designer mosaics, different dimensions of mosaic elements can be successfully arranged on one wall. This technique can achieve the effect of depth. The size of the tiles and the width of the mosaic in the composition may also vary. Thus, from small tiles assembled in sections measuring 30x30 centimeters, it is easy to assemble a beautiful composition.
Recommendation on how to cut glass mosaic on mesh
Mosaic on a grid is quite popular, because unlike ordinary ceramic and other types of tiles, mosaics can cover any shape and area. And the impression will not be spoiled by seams, because in the case of mosaics, they are an integral part of the composition! However, mosaic meshes often have to be trimmed. If the cut needs to be made along the gap between the chips, then the mesh can be cut with ordinary scissors. If you need to cut the mosaic directly, use a glass cutter. Try to place the cut tiles on the edges so that they do not catch the eye.
Where is mosaic appropriate?
Many people, seeing beautiful mosaic panels in building materials stores, admire the beauty of the elements. This involuntarily prompts them to think: where could such decoration be carried out in their own home? Most often, mosaic tiles are chosen for finishing rooms that have high humidity and are characterized by serious temperature changes, such as the kitchen or bathroom.
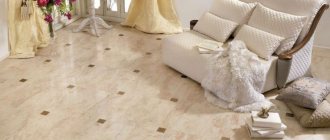
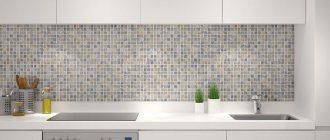
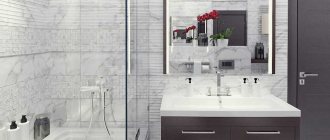
In this case, an unusual finishing element can be used as a floor covering to highlight individual zones. In the bathroom, tiles can be used to highlight an area with a washbasin and mirror; in the kitchen, a mosaic is often used to lay out the apron behind the work area or the wall near the dining table.
Types of mosaic coverings
Depending on the material of manufacture, mosaic coverings are divided into several categories:
– universal material. It can be used to decorate a swimming pool, balcony, veranda, because it can withstand high humidity and sudden temperature changes. Also, tile mosaics are strong and durable; they can withstand various types of loads well. It can be cleaned using any detergent, since floor ceramics are practically immune to the action of active chemicals;
ceramic tile
glass mosaic on a grid is a masterful imitation of ceramic mosaic, however, it can also be installed in the kitchen and is even suitable for a swimming pool. Glass mosaic is distinguished by the fact that it refracts light rays in an unusual way and creates unexpected effects in the interior. For example, under the influence of light, a mirror surface may appear on the floor and walls. The material is unpretentious to operating conditions, cleans itself; in extreme cases, a soap solution is used to clean it;
concrete mosaic floor tiles – made of concrete with coloring additives. It differs from ceramics in that it is more stable and durable. This mosaic tile is rough, it is rarely used for finishing a swimming pool or bathroom, but it is excellent for arranging verandas, borders, and paths;- metal mosaic is the latest material on the domestic market, which consists of thin steel plates attached to the base. It looks great in the interior; it can be used to create a mirror surface. Metal floor tiles are suitable for finishing walls and floors; they are unpretentious and durable;
broken ceramics - opens up wide possibilities for creativity. It has the same performance qualities as factory-produced ceramics, but consists of many pebbles with unequal edges that can be combined in different ways to create unique patterns. The sizes and colors of each element vary. With its help, a mirror surface can be prepared when the pattern is reflected along an invisible axis. Broken ceramics are suitable for a swimming pool, shower, bath, and will look great in the kitchen and dining room.
Glue selection
In order for mosaic tiles to last a long time, you need to pay some attention to the materials that are used to adhere them to the wall or floor. Most often, special adhesive mixtures are used for laying tiles. They may differ and depend on the type of tile and the room for which it is intended:
- The most common ceramic mosaic tiles use white or gray adhesive based on cement. These types of building mixtures can be elastic or stable.
- Reactive adhesive should be used to install natural stone mosaics. In addition, marble is susceptible to high humidity, so it is recommended to carefully seal the joints between the tiles.
- For the glass version, exclusively white polyurethane-based glue is used.
You should also remember that if you plan to lay mosaic tiles in a room with high humidity, then you should give preference to moisture-resistant adhesives.
Types of mosaic tiles
What types of mosaic tiles are there?
Manufacturers produce elements with different types of surfaces:
- structural or relief,
- smooth or spongy
- glossy-shiny, matte.
This characteristic depends on the raw materials used to produce the coating.
The most common mosaic tiles are made of glass, ceramics, and smalt.
Glass tiles are durable, inexpensive, resistant to changes in room temperature, high humidity levels, and chemicals. The material is used for cladding bathrooms, saunas, showers, swimming pools, and kitchens; for decorating tables, cabinets, as well as bar counters, stoves, fireplaces.
Ceramic mosaics are made with a glazed surface for rooms with high humidity and for rooms with a dry microclimate with an unglazed surface.
Smalt tiles are opaque, their texture changes shade when the light or temperature conditions in the room change. This is a wear-resistant and durable material.
Mosaic tiles are also made from porcelain stoneware, metal, and concrete. Expensive types of tiles are made from natural stone (granite, onyx, tuff, jasper), with the addition of gold foil or components that create an imitation of semi-precious stones.
Preparatory work
After the final determination of the dimensions of the mosaic tiles and the selection of an adhesive that corresponds to the parameters of the finishing material, preparatory work should begin. They consist of the following manipulations:
- When laying mosaics, it is recommended to check the evenness of the surface, since any differences can negatively affect the appearance of the final finishing result. To do this you need to use a building level. If the differences are insignificant, then leveling can be done with tile adhesive; otherwise, it is recommended to use plaster to pre-level the walls or sheets of drywall.
- The surface must be thoroughly cleaned of debris, dust, previous finishing material and other contaminants. Oil stains, if there are any on the surface, require special cleaning. It is also important to eliminate raised bulges.
- The final stage of preparation is the application of primers. They are necessary for strong adhesion of the glue and the surface of the wall or floor. Using a roller or wide brush, apply two coats of primer and allow each coat to dry completely before applying subsequent coats.
It is important that the walls are smooth and even, otherwise the mosaic canvas will follow all the curves and irregularities.
Laying technology
How to properly lay mosaic tiles on a grid? Installation can be done with your own hands. First you need to select tools and finishing materials. Calculate the required amount of glue and grout. Prepare the base to which you will glue the mosaic on the grid. Laying mosaic tiles with your own hands requires meticulous preparation! You will need the following tools:
- Glue mixing container and construction mixer
- Building level
- Regular rubber spatula (rubber)
- Notched trowel
- Roller
- Deep penetration primer for base
- Glue suitable for the type of room
- Grout with similar properties
- Sponge
Preparing the base
The walls or floors that will be covered with mosaics must be perfectly smooth. Large depressions will need to be filled with drywall or plaster. Otherwise, the mesh will lie crookedly and the drawing will be distorted. The integrity of the mosaic canvas will be compromised. In case of a large number of irregularities in the original base, it is necessary to use an elastic composition of mosaic adhesive. Surfaces exposed to dampness must be covered with antifungal materials.
Surface cleaning
If the repair is not carried out from scratch, but in an area that was once lined with other materials, the following steps must be taken. It is imperative to clean the surface from dirt and old coatings. The plaster can be left if it does not crumble. If it crumbles, then remove it too. If the base is completely crooked, then it is better to create a new base from plasterboard.
Wall marking
Marking the walls is carried out after leveling and applying a layer of primer (and its drying). To begin with, it is worth making a “dry layout” without using glue. Thanks to this measure, it will be possible to avoid unpleasant surprises during finishing installation. We choose where to start laying. The best option would be to do it from top to bottom. After dry laying out, the mosaic elements are signed or secured with tape. Next comes the actual styling. It is better to lay each individual mesh by checking the building level to avoid mistakes.
Performing markup
This stage marks the beginning of the installation of mosaic tiles. It is very important, since the evenness of the subsequent coating depends on it. Mosaic tiles with cage dimensions of 30 by 30 mm are the most common among this type of finishing materials. Using an ordinary stationery pencil, you need to mark the outline of the tile on the walls or floor according to its size. To do this, it is also recommended to use a ruler, tape measure, or attach the mosaic section to the wall.
If there is a pattern on the tile, then it is important to draw up a drawing on paper marking the main elements on the wall. This way you will be able to create a perfectly even and correct pattern. You should also remember that if the room has corners that will be finished with mosaic tiles, then work should begin with them.
Materials for creating a decorative surface
Today, for ease of installation, the mosaic is attached to a special flexible mesh measuring approximately 30 by 30 centimeters. The mesh for mosaic tiles can be metal or plastic. In some cases, paper is used instead of a grid. In this case, the mosaic is laid with the paper facing out, after which, once wet, it is easily separated from the front surface of the material.
Preparing tools and glue
Regardless of the size of the mosaic tiles for the bathroom or kitchen, it is important to have the following construction tools before starting installation:
- notched spatula for applying glue;
- rubber spatula for grouting joints;
- roller for applying the primer mixture;
- mixer for preparing glue;
- construction knife;
- hard sponge;
- bucket for stirring.
You also need to purchase special mosaic glue, primer and grout mixture of the appropriate color.
Most often, adhesive mixtures are sold in dry form. Before starting work, you need to prepare the mixture that will be used for laying the tiles. To do this, you need to follow the following rules:
- First, you need to pour the required amount of water into the container and only then, stirring constantly, gradually add the dry mixture. Violation of this order can lead to the formation of lumps and uneven mixing, which will significantly affect the durability of the mosaic masonry.
- The amount of glue should correspond to the size of the mosaic tile on the grid, as well as its quantity. Otherwise, there may not be enough material to complete the work.
- According to the rules, the glue must be mixed twice. After the first stirring with a mixer, you need to let the mixture rest for 10 minutes, then stir again.
- The mixer speed should be medium, since the main goal is to stir and not beat the adhesive composition.
The rules for preparing tile adhesive should be indicated on the packaging. Depending on the manufacturer, they may differ slightly.
Bathroom tiling with mosaics
Before you begin cladding, you need to carefully think through and plan everything.
Before you begin tiling your bathroom with mosaics, it is important to plan carefully. Based on how the design of a particular zone is planned, a mosaic is selected and its laying is carried out. For example, a plain floor covering can be done with a background mosaic. These are the so-called mosaic tiles for the bathroom, which are traditional ceramic tiles. Its only difference is the cuts on the surface, thanks to which the finished cladding resembles a mosaic in appearance.
Cladding with conventional mosaics can be carried out in accordance with a direct or reverse set pattern.
- Direct installation is laying the mosaic directly on the wall, onto which the adhesive has previously been applied. This type of masonry requires a high level of professional training from the performer.
- Reverse set is widely used when creating artistic panels. In this case, the mosaic is first glued with its front surface to the previously marked paper. After applying the adhesive composition to a flat surface, mosaic paper is placed on it. After the glue “sets,” the paper is moistened with warm water and removed.
- mosaic,
- primer,
- tile adhesive,
- grout,
- a spatula for applying glue with teeth,
- rubber spatula for applying grout,
- trowel and rubber hammer,
- sponge,
- soft dry rags.
So, how does the mosaic tiling process work? First you need to stock up on the necessary tools and consumables. Let's consider the process of laying mosaics using reverse set, since it is most convenient for those who do not have sufficient experience.
You will need
Before starting work, it is necessary to prepare the walls. First, level the surface, because otherwise the mosaic, due to its small size, will clearly emphasize all the unevenness. The flat surface must be carefully primed before laying.
ADVICE TO THE OWNER:
Experts recommend marking the wall before applying the adhesive to avoid mistakes.
- Apply the adhesive solution to a small area of the surface (comparable in area to the size of ordinary ceramic tiles) with a notched trowel, and then begin laying the mosaic. It is very important to lay out the first rows evenly, since laying over the entire surface depends on this. After the sheet is completely attached to the surface, using a trowel and a hammer, you must carefully hammer the mosaic into the solution and level it.
- After finishing laying the mosaic, you should wait for 20-30 minutes, after which the surface of the paper is moistened with warm water. When the paper is saturated with moisture, it must be carefully removed, and then the excess glue protruding from the seams must be removed.
- 48 hours after installation (when the glue has completely set), you can start grouting. Use a rubber spatula to apply grout to the surface of the tile. After about an hour, remove excess mortar with diagonal movements of a rubber spatula, then wipe the masonry with a dry cloth, and then with a damp sponge. Finally, the masonry should be sanded with a dry soft cloth.
ADVICE TO THE OWNER:
If you want to create an artistic panel, this can be done using modern computer programs and the reverse typing method. To do this, the drawing you like must be digitized, after which the paper to create the sketch is drawn and the mosaic is glued according to the color scheme.
We wish you a successful renovation and you can also read our tips on choosing a sink with a cabinet for your bathroom and on how to independently repair and decorate the ceiling in your bathroom.
Laying tiles
For ease of installation, the dimensions of the mosaic tiles on the grid correspond to the size of the standard ceramic finishing material, therefore the installation process is quite similar:
- Apply glue to the pre-primed surface using a notched trowel. It leaves grooves on the mixture, which contribute to good adhesion of the tiles to the adhesive composition. It is important that at one time you need to apply the mixture only to that part of the surface that will be covered in 30 minutes, otherwise the glue may lose its properties.
After this, you can begin laying the mosaic. It should be remembered that the distances between sections must be the same, otherwise the end result may be unsuccessful. You also need to make sure that the glue does not get on the mosaic, since after drying it is quite problematic to remove it.
Once installation is complete, allow the tiles to dry for two days.
If it is necessary to cut mosaics, it is recommended to use a construction knife.
What glue to use
Glue is one of the main items in a set of tools for laying mosaics. The grids should not move away from the wall, this is a fatal flaw! The basic composition of the glue depends on the material of the mosaic being laid, on the base and type of room. Particular care should be taken when selecting adhesives for surfaces exposed to contact with water. Let's look at the adhesive for each material:
- Ceramics and porcelain tiles - cement adhesive is suitable. If the mosaic is glued to an insufficiently level base, then you need to use an elastic compound.
- Natural stone is a delicate material that can be damaged by too long installation. Such mosaic tiles must be laid on quick-setting or reactive adhesive.
- Glass mosaic on mesh is a special light-colored adhesive solution. It can be polyurethane or cement. When laying in a pool or shower cabin, it is necessary to add a plasticizer to the glue to achieve the desired consistency. This component plays the role of waterproofing. For reliability, further grouting can be done with epoxy materials.
Laying mosaics on a grid
Laying mosaic tiles on a mesh is a painstaking and responsible task! You can start with it after preparing the tools, base and mixing the solution. The solution mixture should be stirred twice. The mosaic installation technology is as follows:
- The adhesive solution is applied to the surface using a notched trowel. There should be grooves on the surface. In one go, cover the area with the solution that you can cover in thirty minutes. This will make it easier to lay the mosaic without allowing the solution to dry out.
- We apply the mosaic slab to the base with the mesh down and press lightly. To ensure that the glue is distributed evenly over the surface, roll the surface with a roller. Make sure that the distance between the chips remains the same and that the glue does not flow onto the front side of the mosaic. To avoid confusion when laying multiple mosaic grids, use special plastic crosses.
- Remove the film and remove excess adhesive mixture as quickly as possible. If you don’t do this within half an hour, it will harden and it will be much more difficult to do. Leave the glue to dry for a couple of days.
Grouting joints
The last stage is grouting the joints. There are many types of grout on the market today. Lots of colors and even glitter grouts that are great for glass mosaics. But first of all you need to pay attention to the composition. There are several types of grout:
- Cement grout. Suitable for dry areas, but there are also options with hydrophobic and antifungal properties. The most budget option.
- Latex grout. The addition of latex greatly improves the properties of the mixture, making it more reliable and resistant to the external environment.
- Epoxy grout. The best option for swimming pools and showers. Does not change color when exposed to humidity. The downside is the high price.
- Liquid glass. Transparent grout with excellent properties.
Choose grout according to the location of the material. Having decided on it, we get to work. Prepare the mixture according to its instructions. To make it easier to get rid of traces of grout on the material later, you can pre-treat the mosaic with a protective spray. Approximately 30 minutes after treatment, we begin grouting. We put a layer of the mixture on a spatula and rub it over the joints of the material, lightly pressing on the tool. After 20 minutes, the solution will begin to harden little by little. At this point we need to get rid of the excess mixture on the mosaic surface. We do this with a damp sponge. If after treatment there is still a residue of cement dust left, remove it with a five percent sulfuric acid solution. Finally, rinse the mosaic with water.
Grouting joints
Mosaic tiles laid in a bathtub can significantly transform the interior. However, in order for its appearance to be complete, the seams need to be sanded. This is done as follows:
- The grout mixture must be diluted with water in the proportions specified in the instructions.
- Experienced professionals use a protective spray to make it easier to remove excess mixture from the tiles.
- Grouting is done using a rubber spatula. A grout mixture is applied to it, which is evenly distributed over the entire surface of the mosaic, filling all the seams.
- After application, the mixture should be slightly moistened with a spray bottle.
After 20 minutes, the seams will begin to dry. At this time, use a hard sponge to remove any excess mixture that has fallen on the tiles. The seams will finally harden only after two days.
Mosaic care
Regardless of the type of tile, care is carried out according to the same principles:
- Periodically it is necessary to treat the seams with antifungal drugs to prevent the formation of mold. This is especially true in the bathroom, as it is in a state of high humidity.
- It is strictly forbidden to use abrasive products for cleaning, as they can remove the beautiful gloss from the mosaic. It is necessary to use substances exclusively with a gel texture.
- Dirt must be removed with a soft sponge.
- It is not recommended to rub the tiles with products that contain wax, oils, or phosphoric acid.
It is also recommended to wipe the tiles with a dry sponge after each wash to remove excess moisture.
Types and characteristics of mosaics
The variety of mosaics on the modern market of finishing materials confronts consumers with a difficult choice: “What is better to choose?” Below you can find out about the different types of mosaics for the bathroom and their characteristics.
Glass mosaic. As a rule, Venetian glass is used for its manufacture, due to which the finishing material acquires the following performance characteristics:
- impact resistance,
- moisture resistance,
- heat resistance,
- frost resistance,
- durability.
The continuous structure of the chip (a separate set element) makes it impossible for microorganisms to penetrate into it, and, therefore, such a mosaic can be used for finishing structures with increased hygienic requirements, for example, a swimming pool.
It is impossible not to note the aesthetic properties of glass mosaic. It offers the consumer a wide range of colors, a huge selection of textures and different sizes of square chips or tessores:
- 10 x 10 mm,
- 15 x 15 mm,
- 20 x 20 mm.
There are tesserae of other shapes, for example, rectangular, round, oval, etc.
Glass mosaic with various inclusions looks luxurious: mother-of-pearl, semi-precious aventurine, iridium. Thanks to this, the surface finished with it can acquire an unusual texture, for example, a mother-of-pearl sheen, a noble shine of gold leaf, a metallic sheen, etc.
Smalt mosaic. Smalt is a type of opaque and translucent glass, which, unlike ordinary glass, contains potassium salts, not sodium. And various additives give the product a rich, saturated color and the necessary texture.
A type of mosaic that is a mixture of opaque and translucent glass
Smalt glass is made by pressing small glass particles with the addition of metal oxides and subsequent sintering at a temperature of 700-800°C for 24 hours. This production technology makes it possible to obtain a material of the desired shape and size with excellent physical and mechanical properties:
- impact resistance,
- durability,
- moisture resistance,
- frost resistance,
- resistance to various chemically aggressive substances and abrasive wear, which is a significant advantage over analogues made from ordinary glass.
Today, there are several technologies for the production of smalt mosaics, resulting in materials with different textures. For example:
- transparent smalt mosaic is produced using fire-resistant dyes,
- opal - using antimony oxide or tin dioxide;
- spotted or veiny, combining several colors or shades - using substances of different shades and subsequent heat treatment;
- gold or silver mosaic (used in St. Mark's Basilica in Venice) - by sealing foil between two layers of glass.
The main feature of smalt mosaic is that it seems to glow from within, and also that chips of the same color can differ in shades from each other. Thanks to this, the surface lined with smalt mosaic literally attracts the eye.
Ceramic mosaic . Her chips are nothing more than reduced-size ceramic tiles. The range of ceramic mosaics on the modern market of finishing materials offers the consumer a huge variety of colors, shades and textures.
This type is nothing more than a reduced version of ceramic tiles
There is a regular glazed mosaic of various colors, there is a mosaic with “special effects”, for example, craquelures - small cracks that give the surface of the chip the effect of antiquity, there is a mosaic with a heterogeneous texture and texture - stains, inclusions or an uneven front surface.
Glazed ceramic mosaic has the same physical and mechanical properties as smalt, and therefore it is excellent for wall cladding in the bathroom.
Unglazed mosaic tiles have a porous structure, which in conditions of high humidity promotes the formation of mold. Therefore, it is better not to use it for bathroom walls.
Stone mosaic . When making mosaics from natural stone, a wide variety of rocks are used - from marble to jasper. It, of course, has a unique appearance, and each created stone mosaic panel is unique.
It is not recommended to use this type of material for the bathroom, as the stone very quickly loses its appearance in conditions of high humidity.
True, natural stone mosaics, as a rule, are not used in the bathroom, since most rocks lose their appearance when exposed to chemically aggressive and abrasive substances. Moreover, some rocks have a porous structure, which in high humidity conditions promotes the development of fungi and mold.
IMPORTANT!
If your choice, however, falls on a mosaic made of natural stone, then to preserve the appearance of the masonry, you must regularly rub the surface with protective mastics.
A worthy alternative to mosaics made from natural stone is mosaics made from porcelain stoneware – an artificial stone whose strength characteristics are many times higher than those of ceramics. And this is not the only advantage. Porcelain stoneware mosaics are different:
- low price,
- a huge variety of colors, shades and textures,
- high impact resistance,
- moisture resistance,
- resistance to temperature changes.
The only thing that should be taken into account when choosing porcelain stoneware mosaics is the reputation of the manufacturer. The fact is that, if made without strict adherence to technology, ceramic tile mosaics will discolor and delaminate over time, and well-known manufacturers guarantee the quality of their products.
Metal mosaic . The “youngest” type of mosaic, since it appeared on the market only a few years ago. Metal mosaic chips are 4mm high caps made of 0.5mm thick stainless steel sheet.
This species is the youngest, as it appeared on the market only a few years ago.
These caps are attached in a special way to a special patented elastic band, which will give the chips the required rigidity. Metal mosaic is a practical and extraordinary solution in the interior. Indeed, in addition to aesthetic appeal and enormous opportunities for implementing bold design ideas due to the huge variety of shapes and sizes of chips, it is different:
- impact resistance,
- moisture resistance,
- durability,
- resistance to chemically aggressive substances and temperature changes.
But the resistance to abrasive wear of metal mosaic is very low, so only liquid detergents and soft cloth should be used to care for it.
