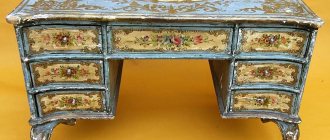
With the help of decoupage you can transform absolutely everything - we have already told you how to update an old bedside table or table lamp. The main thing is that this is a fairly simple and inexpensive way to make something unique with your own hands for your home. I want to show you a step-by-step master class on decorating a decorative plate using the reverse decoupage
. The name “reverse” means that we will decorate the plate from the reverse side. In addition, if in usually decoupage we first prepare the surface and paint it, and only then glue the decoupage napkins, then in the opposite case we will do everything completely the opposite. So let's begin!
Reverse decoupage of plates: master class
To work you will need:
- glass plate;
- decoupage paper (or napkins);
- varnish;
- acrylic paints (white and gold);
- gold outline;
- craquelure varnish;
- acrylic gold outline;
- brushes (or sponge);
- sandpaper.
How to make reverse decoupage on glass
In this master class I will show you what reverse decoupage on glass is, how to make an inscription on the back of a plate and how to get a very interesting background using a bag.
For this lesson we will need: white, purple and gold acrylic paints, a gold and glitter glass outline, a regular cellophane bag, diluted PVA glue, a napkin (or any cutout) with a floral motif, a pen and a piece of paper.
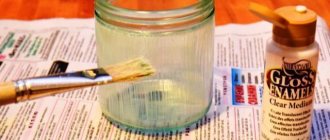
Take a glass plate and glass cleaning liquid.
And degrease the plate from the outside.
All! We don’t touch it with our hands on this side, but if you get tired, grab it, wipe it right away, otherwise your imprint will remain on this plate forever :)
On this plate I decided to make a wide purple border with a very beautiful background. In order to draw an even circle, I placed a smaller plate on top of our plate
I found the middle approximately by eye so that it would not be displaced and secured it in some places with masking tape. For anyone who doesn’t have a good eye, I advise you to use measuring instruments :)
And she outlined a small plate with dots on the glass with a golden outline.
Let's wait 5 minutes for the outline to dry, and carefully remove the small plate from the large one.
This is what happened.
Now we glue fumlent along these points, it’s something like electrical tape, only it has a less sticky second side, ideal for glass and varnished surfaces. The convenience is that it stretches and bends as you need. That is, where the tape needs to be pinched or folded, the tape will stretch and lie flat.
That's how it happened.
We need to make an inscription in a circle “Happy Easter.”
To do this, we take paper, preferably thinner, but in general this does not play a special role, and a pen or pencil. We apply paper to the plate, outline the arc along which we need to write, and write along the drawn line, the intended phrase and cut out the paper.
This is how it worked out for me.
Now we turn the pieces of paper over and circle the inscription on the back side. If your paper is thick, it will be more convenient to do this on illuminated glass (or just on a window during the day).
This is our ready-made copybook. Place it under the plate.
And we begin to circle. Since our decoupage is reverse, we do everything in reverse order.
First we will apply the outline with glitter.
And after it dries, apply the main gold outline on top.
And along the edge of the plate, I also made a simple pattern with just a gold outline; it could be dots, squiggles, anything. But with a defined edge, the plate always looks better, neater, more complete.
Well, we have finished the preparatory work. Now let's get to the very interesting part, the border background! We take purple paint and apply it by padding to the border limited by the fulenta.
While the paint is not dry, crumple the bag and hold it in your hand, like this.
And we begin to apply the bag to the plate, quickly but carefully, without moving or smearing the paint, but simply tearing it out along the folds of the bag. It should look something like this.
You will be able to regulate the degree of paint residue yourself, leave it denser or make it even more flexible :) Don’t forget to either wipe the bag, or rumple it, or simply replace it with a new one. After all, at some point the package takes on paint and ceases to perform its functions.
We make a second layer, contrasting with the first, but in the same tone. We take white paint and add a little of the same purple paint to it, we get a light purple. And also apply it with a swab on top of the first layer.
In general, we can stop here, but I decided to cover this layer with a bag.
And make the third gold 
That's how it happened.
And closer so that everything is clear :)
Of course, there can be a myriad of these layers, experiment! An indescribably interesting result can result.
Add a couple more layers of gold for opacity. Waiting for it to dry. And we remove the fumlenta. Since enough paint got on it so that when removing this paint would not be pulled behind it, I recommend trimming the paint with a stationery knife.
Now you can remove it.
And we go through the edge of the border with dots with a golden outline.
Next, take a napkin, I took my favorite one, with snowdrops. the last one (oh, I won’t be going to Voronezh any time soon, where they are given as gifts, wonderful Voronezh decoupage girls:)
We cut out the motif very carefully along the contour and separate the very top layer.
We find a place for her. Attached.
And glue it using diluted PVA glue and your fingers.
We try not to spill too much glue on the plate; we glue it carefully. We blot the excess with a damp cloth, and at the same time smooth out any wrinkles if there are any.
Don’t be alarmed by traces of glue on clean glass, there will still be traces of glue next to the motif, we’re not magicians :) Then we’ll calmly wash them off. Let's wait until it dries. To speed it up, you can dry it with a hairdryer.
This is what we got. As you can see, traces of glue are very obvious :)
We did not cut out the light yellow background between the greenery of the flowers. I didn't do this on purpose. I’m lazy by nature, and I’ll fix this mistake faster than I would have to worry about cutting it out :)
Apply green paint and try to guess the color from the color that is close to the color of the greenery itself. And carefully, without stepping anywhere, we paint over this unnecessary yellow background.
This is what I got, and yet I stepped in, you can see it, and the color should have been made lighter, but it seems to me that I didn’t really disfigure it. In general, be careful :)
After the paint has dried, coat the napkin with varnish. I coated it with regular acrylic water-based varnish. It is odorless. brushes are washed with water. And most importantly, it dries very quickly!
We also cover it carefully, without interfering with the edges of the motif. Let me explain why this step is needed. Many napkins have a loose structure and when gluing, very, very small holes are formed, and if you immediately cover the napkin with white paint, the paint will pour into these small holes, and the whole motif will be a tiny white dot. To prevent this from happening, we will fill these holes with varnish, and nothing will flow in there.
After the varnish has dried, we make the motif opaque and rich in color. We cover it on the reverse side with white paint. For these purposes I use white acrylic primer. But for me it is very opaque.
Naturally, under no circumstances should we step over the edge; if we do, immediately remove it with a damp cloth and wipe clean.
Now, after drying, our picture is reliably protected from being washed off, and we can wash the plate from all unwanted stains. I wash with a sponge with “Fairy” around the motif. I try not to touch the napkin itself too much.
Here's a clean plate.
Wipe it off carefully.
And lastly, draw a cross and write “Christ is Risen.” Since I have a personalized plate, I will also add a name on top. I drew a cross on a checkered piece of paper, cut it out, and put it on a plate in the place where it will be drawn.
We trace the cross along the contour, with dots (it’s smoother this way). We wait for it to dry and remove it.
We make a piece of paper with an inscription using the same technology. We write:
We turn the sheet over and circle the inscription on the reverse side.
We place this side under the plate and outline it, first with an outline with glitter.
And immediately fill in the cross with the glitter outline.
We wait until it dries and outline it with a gold outline on top.
And we cover the cross with gold paint.
We clean all the mistakes from the transparent glass, carefully degrease it again and varnish it. So our wonderful plate is ready. And for those who love purple, like me, it's simply gorgeous
Since all the paint is on the back side and is well covered with varnish, this plate can and should even be used as a plate for Easter cakes. My sister will definitely go to church with this Easter cake.
Tips for working with decoupage technique
Having mastered the first steps in the art of decoupage, you can apply additional techniques for decorating objects.
The use of craquelure varnish allows you to create an aging effect. To do this, it is necessary to apply a layer of the product to the surface on which a primer or a layer of paint has previously been applied. After 20-30 minutes, apply a layer of contrasting paint and set aside until completely dry. After some time, cracks will begin to form on the surface, which must be varnished.
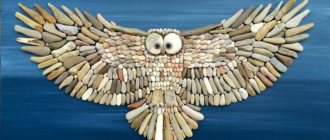
A mosaic made from eggshells, which must first be dried and crushed into small pieces, looks no less original. It is necessary to apply it on a thick layer of PVA glue, then dry thoroughly. If desired, the design can be applied to the mosaic itself, or you can apply pastel colors of acrylic paint and varnish.
The design of the plate can be supplemented with pieces of textured fabrics, beads, shells and other unusual items, which will give the product a special sophistication. The main thing is to observe moderation in everything and not to overdo it with decorative elements. After all, if a handmade item is made with taste and soul, it will delight not only you, but also your loved ones, who will certainly enjoy an unusual gift given for a family holiday.
Stylish decoupage plates
The trends in modern interior fashion are to bring something unusual, new, and distinctive from the apartments of girlfriends and friends into the design of premises. This is a new side of sensations and perceptions, a new look at your own interior.
Things made with your own hands perfectly express the self of a person with skillful hands. An interesting modern option for homemade room decoration is plates processed using the decoupage technique. A new word in modern applied art came into the Russian language from French, and its literal translation means “to cut out.”
Even the cheapest plate is suitable for using the decoupage technique.
What is decoupage:
- Cutting out;
- Bonding;
- Drawing missing details or patterns;
- Design of the edge, edging of the plate;
- Processing the back side with gluing a secure loop;
- Varnish coating in several layers.
It is these processes that make up the decoupage technique. Its basis is gluing fragments of a picture, creating a single composition by drawing, followed by a final coating with varnish so that the surface layer of the work is as durable as possible.
Different decoupage techniques allow you to use plates of various qualities, and the resulting products are akin to works of art. And if you take a set of transparent plates and use the reverse technique, then you can also eat from such dishes, on holidays, of course.
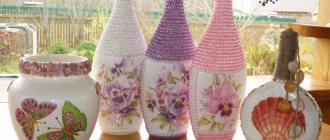
Do-it-yourself decoupage of vases - technology, features, photos
A vase is one of the most beautiful decorative elements in any interior.
You can give it a beautiful, stylish look using decoupage - a type of creativity that involves using ordinary scrap materials.
The main material for decoupage is paper or napkins with a pattern. The images from them are transferred to the surface and fixed with glue.
The following devices will be needed:
- brushes of various sizes;
- container with water;
- paper glue;
- acrylic or polyurethane clear varnish;
- multi-colored acrylic paints;
- additional decorative elements - beads, beads, shells, lace, etc.
Everything you need can be found at home or purchased at affordable prices at the nearest store or craft supply store.
Technique for applying a pattern to the surface of a vase
The decoupage process includes the following steps:
- Prepare materials and equipment for work.
- Trim the edges of the selected picture and attach it to the surface of the vase. It is better to immediately mark the contours with a pencil - they will serve as a guide when gluing the picture.
- Apply a small layer of glue to the marked area.
- Gently press the image, straightening all edges and bubbles. To secure, apply another layer of glue on top.
- Paint the background with multi-colored paints and add bright touches to the details of the picture if necessary.
- After drying, coat the surface with clear varnish in one or more layers.
You can decorate not only a vase, but also other containers - jars, mugs, jugs, decorative vessels.
Features of decoupage vases from various materials
When starting to decoupage a vase, you should take into account the characteristics of the material from which this product is made.
The simplest and most popular options are vases made of ceramics and glass, transparent, plain or already having some pattern that needs updating and additional decoration.
Ceramic vase
On an unpainted ceramic surface, it is best to use images without a background, carefully cutting off unnecessary edges of the parts. This will give the product maximum naturalness and accuracy. If the vase has a white background, then you can use ordinary paper napkins with a pattern as a material for decoupage.
The finished ceramic vase can be coated with acrylic paint and kept in the oven at temperatures up to 150 degrees - the painted surface will become smooth and shiny.
Glass vase
To work, you will need a standard set of decoupage tools. Before decorating, the glass surface must be wiped with a piece of cotton wool soaked in an alcohol solution.
To get a smoother surface, after gluing the picture and applying clear varnish, you should smooth out any unevenness using a piece of sandpaper and apply another layer of varnish on top.
Care should be taken to ensure that no particles of dust or dirt remain on the surface of the vase before varnishing. When decorating transparent glass vases, you can translate not only the picture, but also all the images along with the background.
Ideas for decorating vases
- Currently, there are many popular styles and options for decoupage that can be used to decorate any vase.
- With their help, you can give a new look to any product, harmoniously combining the design with the overall style of the interior, or prepare a vase as a gift souvenir for every taste - from classic to sophisticated and fashionable style.
Romantic vintage
- This style is not only one of the classics, but it is also luxurious and never goes out of style.
- Decorations in this style feature antique effects, beautiful floral arrangements, and dark backgrounds.
- To decorate a vase in a vintage style, you must follow these steps:
- Apply a layer of light paint (white, brown, yellow) to the cleaned surface;
- after drying, add another layer of darker paint on top to contrast with the previous one;
- You can transfer the prepared picture onto the resulting background and then cover the vase with a layer of transparent varnish.
Decoupage plates are divided into types:
With napkins. If special napkins are used, intended specifically for decoupage, then they are layered, separating the upper part; if ordinary analogues are used, they are not separated into layers, but glued as is. The execution technique can be found in Fokhtina’s photo and video lessons at the end of the article. With craquelure. The plate is painted with a paint of a special composition, which cracks textured when dry. Eggshell. Pieces of eggshell are glued onto the drawing, photograph or the area around them as a frame. Photo design. The style and technique is the same as when using napkins, just using a printed photograph as the image.
By combining different techniques, you can create something original.
Decoupage and golden acrylic paint
For decoration, you can also use printed photos or simply portrait images.
Owls cut from decoupage sheets
In addition to this method, decoupage plates are divided into:
- direct - an image or photo is superimposed on the front of the dish;
- reverse decoupage of a plate - the design is applied to the reverse side. Typically used on transparent saucers.
One of the most popular motifs is romantic, most often combined with aging
There is nothing complicated in the decoupage technique, you need to do everything carefully and follow the correct sequence
Popular articles Use of aluminum foil, or food foil for all occasions
Decoupage of plastic plates: 9 necessary tools
It requires special skill and knowledge of a special technique to apply decoupage to plastic plates. Disposable plates are usually used in teaching decoupage techniques to children aged 3 and older; the main thing is to arouse children’s interest in this work. To do this, a master class is held with a step-by-step demonstration of movements in the style of a magician - one or two, and you're done. Children are fascinated by the process, they become interested, and they get involved in the work with pleasure, begin to do the same as adults do, urging them on with questions: “What’s next, what’s next”….
Thanks to the decoupage technique, you can make an original gift from a simple plastic plate.
All you need:
- Disposable plates;
- There are two types of paper napkins - plain and matching with patterns;
- PVA glue;
- Brushes with different bristles quality;
- Simple pencil;
- Scissors;
- Scotch;
- Double-sided adhesive tape;
- Decorative elements as desired - sequins, foil, ribbons, beads, seed beads.
Popular articles Hot water bottle and teapot napkin
The goal of the children's master class is to teach step by step how to make direct decoupage using accessible means, to attract children to creativity, and to develop creative thinking. Parents can also work with their children, giving them the impetus to develop an excellent hobby for the whole family.
The edges and design can be decorated with sequins, beads, and snowflakes. Adults can decorate the edges by painting with acrylic paints on dried glue or paper. This will give the work prettiness and tenderness. On the back side, don’t forget to glue a narrow loop of ribbon onto double-sided tape so that the plate can be hung on the wall.
What is plate decoupage?
Decoupage is a technique for decorating dishes by gluing part of a picture to it with a final coating of varnish so that it is well fixed, and literally “decoupage” translated from French means the word “cut”. The founders of decoupage were German artisans of the late fifteenth century, who began decorating simple furniture with similar pictures.
In the seventeenth century, Europe was swept by a wave of hobbies with various motives, and therefore all countries became interested in homemade decoupage, so after some time, it became widespread; but this technique came to Russia only at the beginning of the 21st century, and has gained great popularity only in our time. Using this technique, you can decorate the surface of both disposable plates and plastic bottles and various ceramic dishes. An old wooden tabletop can also become beautiful and decorative if you apply decoupage to it. And decoupage plates can even look like works of art - I was convinced when I came across amazing works by Polish craftswomen on one of the sites, where everything from an Easter egg to a New Year's tree ball looked simply masterpiece!
The easiest thing for newbies will be decoupage of glass plates, then in the same style you can start decorating furniture, handbags and other things - the main thing is to find a good mk. The theme can be different: New Year's landscape, flowers, still lifes, even details of traditional paintings. Or, why not, old photos of your favorite uncle. The main thing is that you create this product with your own hands.
Popular articles Clawed monster
What we need for the master class:
- Dishes.
- Napkins - these can be high-quality napkins for decoupage or simple products with any pattern.
- Picture or any photo.
- Glue for acrylic.
- Sharp scissors.
- Alcohol.
- Craquelure.
- Eggshell.
- Nice brushes.
- Varnish.
- Primer.
- Acrylic paint of any color.
- Oil-based gold or other paint.
The entire list will not be needed for the master class. You need to take all the tools, but you can take just one thing from napkins, photos, craquelure or eggshells.
Decoupage plates are divided into the following types:
- With napkins. If special napkins are used, which are needed specifically for decoupage, then they need to be layered, removing the top part; if simple analogues are used, we do not separate them into layers, but glue them as they are.
- With craquelure. We paint the plate with paint of the desired composition, which will crack textured when dry.
- Eggshell. Glue fragments of eggshells onto the drawing, photo or the area around them as a frame.
- Photo design. The style and technique are the same as when using napkins, we just use printed photos as an image.
In addition, decoupage plates are divided into the following types:
- straight - we put a drawing or photograph on the front of our dishes.
- reverse decoupage - we apply the design to the reverse side. Most often, they are used on transparent saucers.
Decoupage of a vase - master class on decoration and options for creating a stylish vase with your own hands (85 photos)
Handmade products or, in the modern interpretation, hand-made products are extremely successful and popular among creative and creative people. One of the fashionable and popular trends in creativity is the decoupage technique, with which it is easy to turn old products into stylish and original decorative elements.
To perform decoupage you will need a little free time, a minimum of financial costs, your desire and a flight of imagination. But believe me, the result is worth it. The created works of art can be proudly shown to family and friends.
Try to start with the simplest product, for example, an old vase, and we will tell you a little how to decoupage a flower vase.
Transforming an old glass vase
Do-it-yourself vase decoupage is the simplest, so beginners are better off starting with this. Prepare the necessary materials in advance: a vase, rice paper, colored napkins, PVA or special glue, acrylic varnish and paint, a brush, cotton wool, a sponge and alcohol.
Operating procedure
- The order of decoupage with napkins is as follows:
- Determine a place for the creative process, clear it of unnecessary objects and prepare the materials necessary for decoupage.
- Take the prepared glass vase, clean its surface from dirt with a swab or cotton wool soaked in an alcohol solution.
- Tear the rice paper into small pieces and use PVA glue to cover the surface of the vase with them.
Pasting objects with rice paper is the most popular technique for decoupaging vases with napkins and other decorative elements. In this case, paper is the main background for decoration.
Let the paper dry, then give the surface the desired shade using a sponge dipped in paint. When transitioning from one color to another, you need to start from the bottom.
- While the vase is drying, you can pay attention to the stage of preparing the decor from napkins and cut out the necessary fragment with the image.
- Carefully glue the fragments from the cut out napkins onto the surface of the vase in the form of the intended composition.
- Cover the piece with a thin layer of acrylic varnish, let dry, then remove any unevenness using fine-grit sandpaper.
Coat the product with varnish again and install it in a visible place. Enjoy your health!
Decoupage vase with threads
In addition to napkins, threads are used in the decoupage technique, and the product looks unconventional and interesting in appearance. Even beginners can do this kind of vase decoupage.
- In the process of work, you cannot do without white spray paint, napkins with pictures, PVA glue, putty, syringe, scissors, white thread, varnish in an aerosol can, toothpicks, alcohol and cotton wool.
Step-by-step decoupage
- Before starting work, you need to familiarize yourself with the master class or step-by-step instructions for performing the vase decoupage technique in order to have a clear idea of the creative process as a whole, and then only occasionally peek at it so as not to make a mistake
- So, the operating procedure is as follows:
- clean the outer surface of the vase using cotton wool and an alcohol solution;
- cover the product on all sides with white spray paint;
- cut out the desired fragment with the image from the napkins;
- draw up a project for the arrangement of fragments with the image on the surface of the vase along the lower and upper edges;
- glue the prepared fragments according to the intended project, without touching the middle of the product;
- wet the threads first in water, then in glue, and glue them in the form of patterns on the vase. Using a toothpick and brush, remove excess glue and angularity;
- make volumetric dots using putty drawn into a syringe, or glue small beads (pearls);
- secure all elements with spray varnish. The process is completed, the decoration of the product is complete!