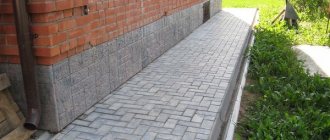
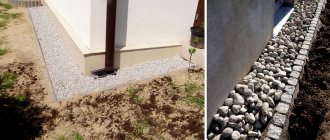
DIY crushed stone blind area: main stages of construction
Crushed stone is an irreplaceable material made from different rocks, and its quality often differs significantly.
For example, limestone and dolomite are considered the most environmentally friendly, granite is the most durable, so its use is logical for multi-story buildings, and gravel-based materials have high waterproof properties. This is what is most often used to make the blind area of a house from crushed stone. Having decided on the choice of type, you need to select the material of the required size, and in this case, the size of the fraction is considered a significant indicator. Most often there are two types of “crushed stone” - small and medium fractions. In the first case, the size of the “grain” does not exceed 20 millimeters, and the size of the large fraction reaches 40 millimeters or even more.
You may ask which is better for our purpose, but it is difficult to answer this question. The larger the fraction, the cheaper the material, and the finer fraction is easier to compact. If you want to get a good result, we recommend using different fractions at the same time. This design will cost less, but it will be durable and can provide high-quality drainage.
A blind area made of crushed stone around the house, in addition to its low cost, is a good opportunity to show what you are capable of, because you don’t have to hire specialists to make it, since you can do it yourself. A blind area made of crushed stone can be made quickly with your own hands, and you only need to arm yourself with an entrenching tool; the help of a neighbor will also come in handy, who can support the conversation and give valuable advice.
- Along the perimeter of the house, you need to dig a trench no more than half a meter deep, while its width can reach one meter.
- Next, we lay a kind of sandwich, where the first layer will be 10-15 centimeters of clay that can hold water without letting it through to the foundation structure.
- To improve the waterproofing properties of the structure, roofing felt or other insulator having water-repellent properties is laid on the clay. In this case, roofing material is the best solution to the problem, since it has a low cost.
Such a blind area has an advantage in price and ease of construction, but loses in performance characteristics and service life. This option is designed for an average of 7 years of operation. A blind area made of crushed stone is not capable of providing a sufficient level of foundation insulation and acceptable drainage. In addition, such a surface is inconvenient to move on. The only advantages of a blind area made of crushed stone are ease of installation and low cost.
Below is the procedure for constructing a gravel blind area:
- Dig a ditch to a depth of 20 cm, encircling the perimeter of the base.
- Pour oily clay onto the bottom and compact it. It is better to provide for the slope at this stage.
- Lay waterproofing material - PVC film, roofing felt, thick polyethylene. The edge of the waterproofing must be higher than the level of the future base strip. If there is not enough material, the material is increased: another strip can be overlapped with mounting tape, or an additional strip of roofing material can be glued to the film with bitumen mastic.
- It is advisable to dig another small ditch from the outer edge, cover it with the edge of the waterproofing and fill it with crushed stone. Water from the base will flow down the clay surface and go through the drainage layer of crushed stone. You can lead the outer ditch into the storm drain.
Another way to install drainage: instead of crushed stone, place plastic pipes cut lengthwise into a small ditch. It is advisable to heat these improvised gutters in winter with an electric cable, because... After heavy snowfalls during a thaw, flooding of the area is possible.
- Pour coarse sand onto the roofing felt/film, then crushed stone. Compact.
- You can leave the gravel area as is or decorate it with lawn grass.
Arrangement of the blind area is a mandatory final stage in the construction of each residential building. The blind area of a house made of crushed stone is the simplest, most economical and at the same time very reliable protective structure, the construction of which can be built by any person with minimal skills in performing construction and excavation work.
To create such a waterproofing system you will need the following consumables:
- fatty clay;
- waterproofing material - roofing felt, special PVC film or dense rolled polyethylene;
- coarse seeded river sand;
- geotextiles;
- gravel or granite crushed stone of the middle fraction.
The technology for arranging a blind area made of crushed stone includes the following operations:
- planning the blind area and marking its boundaries on the ground;
- excavation;
- arrangement of the blind area.
The angle of inclination is a parameter responsible for the rate of moisture drainage from the surface of the blind area. The minimum possible value is 1%, but if you decide to properly make a blind area around the house, then stick to 5-6%. According to building codes, the slope in any case should not be more than 10%.
Also at the stage of preparatory work, it is necessary to take care of the quality of the trench. Quality means treating the land with herbicides and manually removing large root systems. This is done in order to further avoid the growth of plants through the materials of the blind area and its destruction.
And the last point regarding the creation of a high-quality blind area is the continuity of the protective strip around the entire perimeter.
Having taken into account all these points and having decided on the type of blind area, you can proceed directly to the work.
Protective perimeters made of sand and concrete are the most popular, but other technological solutions are also common.
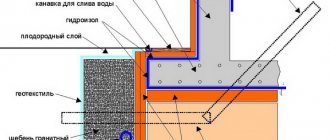
A blind area made of crushed stone is created from a sequence of layers:
- clay – 0.1-0.15 m;
- waterproofing material;
- coarse sand – 0.1-0.15 m;
- geotextiles;
- crushed stone
The sequence of layers is the same, but there is a peculiarity. To prevent the heavy stones of the paving slabs from sliding down the slope, the perimeter of the blind area will need to be lined with a curb stone or something similar.
The created border is mounted in a concrete lock to avoid deformation of the “fence” under the weight of the main finish.
You can experiment with “soft” solutions. The simplest blind area around a house of this type is done according to the following scheme:
- Rolled waterproofing material is placed in a trench dug at a slope.
- Some of the earth is poured back.
- The surface layer is made of pebbles or gravel.
Combinations of techniques are also possible to achieve an optimal aesthetic and functional effect.
The most important thing is that all the work is quite easy to do yourself. After all, it does not require special professionalism, special equipment or specific skills. All the craftsmen need is 2-4 days of free time and the desire to make a high-quality and inexpensive blind area around the house.[tab:Video]
How is a concrete blind area made?
There are several types of blind areas. Of course, they perform the same function, but their operating scheme is somewhat different. The most popular type of blind area is concrete. It is the most reliable, but also the most labor-intensive. Other types are simpler, but they are not as durable as a concrete blind area. Therefore, you should start with it.
Let us consider in more detail the stages of construction of such a blind area.
Digging a trench
Using a shovel, a trench about half a meter deep is dug around the entire house, close to the base. You can, of course, limit yourself to 30 centimeters, but you must understand that if you want to have a reliable structure, then it should be made solid.
The width of the trench can be different, but it must be taken into account that it should be about half a meter wider than the extension of the roof slopes, otherwise water will fall from them not onto the blind area, but onto the unprotected ground. In this case, the structure will not help in any way, since large quantities of water will go into the ground and penetrate under the blind area, thus reaching the foundation itself.
Covering with sand and gravel
After the trench has been dug, it should be filled with sand; the sand cushion should be approximately 10 cm thick. Crushed stone is poured on top in a layer of 10-15 cm. The resulting “pie” is well compacted, and a reinforcing mesh for concrete is fixed on top of it.
Pouring concrete
Now comes the concreting stage. The concrete is poured so that the blind area has a slight slope from the building, about 2-3 degrees, this is necessary so that water flows from its surface away from the house and does not accumulate on the surface.
However, we should not forget about expansion joints - longitudinal and transverse. The fact is that during seasonal freeze-thaw cycles, the soil tends to move (make shifts). Thus, the concrete blind area can also move, and cracks will certainly appear between it and the base into which moisture can penetrate.
Laying roofing felt
Therefore, before concreting, sheets of roofing material folded in half should be attached to the base along the entire perimeter of the trench. One edge of this gasket should be bent towards the blind area, the other should remain on the base. Thus, even if cracks appear, water will not flow into them - the roofing material will stop it. This will be a longitudinal (or horizontal) seam.
Transverse expansion joints are designed to prevent cracking of the concrete itself during the spring defrosting of the material. They consist of wooden slats that are installed perpendicular to the blind area before pouring the last layer of concrete so that after pouring they do not protrude above the surface, that is, they are either flush with it or recessed by a few millimeters (up to a centimeter).
These slats are placed approximately 1.5-2 m from each other. However, many builders prefer technological rubber to short-lived wood, which lasts much longer than wood and, moreover, can “breathe” along with the defrosting concrete, preventing the appearance of tears in the body of the blind area.
Drainage belt device
After the concrete has been poured around the entire perimeter of the house, it is necessary to ensure that water is drained from the blind area into the drainage system. To do this, a drainage belt is laid along the outer edge of the blind area.
Such a belt is made from water pipes cut along the length - ceramic, cast iron or plastic. It should be borne in mind that ceramics will be the most durable, while plastic will fail faster. Cast iron is also, in principle, a durable material; it does not corrode, but in severe frosts it can crack.
Water falling onto the blind area from the roof will flow into these gutters due to a slight slope and be diverted away from the house.
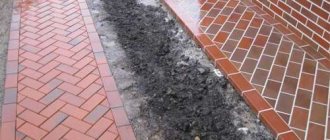
Laying tiles
The concrete surface of the blind area itself is technologically advanced, but to add aesthetics to it, you can cover it with ceramic tiles; the best option is paving. Some people prefer to lay large slabs on concrete, others prefer stone paving stones. But this is a matter of taste for every homeowner, the main thing is that the blind area fulfills its waterproofing function, and the aesthetic component is a secondary matter.
We make a blind area from crushed stone with our own hands
- A trench 0.25 meters deep and the required width is prepared.
- Treated with herbicide.
- It is filled with sand so that the first layer is at least 0.1 cm. At the same time, make sure that the required angle of inclination of the protective strip is maintained.
- The surface of the sand is compacted.
- Liquid glass or silicate is prepared for work according to the instructions attached to it.
- Liquid glass is applied to a layer of compacted sand. It is convenient to use a regular watering can here.
- A layer of hardener is applied on top.
- For the second layer of sand, a finer fraction of a homogeneous structure is used.
- Liquid glass and hardener are applied.
- Cover the blind area with film and leave for several days.
We invite you to familiarize yourself with: Rafter system of a pitched roof - All about building a house
The whole complexity of this technology is working with liquid glass, the preparation of which usually takes some time. Otherwise, difficulties do not arise even for inexperienced masters.
Now you know enough to decide what kind of blind area you need. Further material will help you understand the details, and in order to decide whether to take on the work yourself or order it from builders, we inform you: the price of just the work of constructing a blind area in Central Russia ranges from 2000-2500 rubles / sq. m.
This is due to the fact that a normal customer, a normal designer and normal builders make the blind area at the same time as the entire structure. A finished house without a blind area is unfinished, but how much do builders like to finish unfinished projects and whether such work is profitable for them, you can ask any of them. Perhaps expand your knowledge of Russian, in parts not reflected in general-purpose dictionaries.
What are the features of sandy blind area?
Scheme of the blind area with dimensions.
A decade ago, many preferred to make only a regular concrete blind area, but it was not so attractive in appearance. One option for creating an attractive and reliable blind area is to use sand. What is special about this design? A layer of compacted sand is laid around the perimeter, then it is moistened with a solution of warm liquid glass and a layer of a special hardener. The sand binds and then turns into sandstone. The result is a durable and exceptionally hard material that is not washed away by water and does not allow excess moisture to penetrate under the surface of the foundation.
Sodium silicate, that is, liquid glass, is a material with a density of 1.35 g/cc. When performing painting work, potassium glass is used, and for concrete work, sodium glass is used. Today you can find silicate blocks on sale, which are crushed and boiled with added water for 2-3 hours.
The construction of a sandy blind area begins with the turf being removed along the perimeter of the building, after which a trench 25 cm deep is dug.
Scheme of waterproofing pipes and foundation blind areas.
The bottom of the trench is spilled with herbicides, then covered with a 10 cm layer of sand mixture and compacted. Next, you need to cover the blind area with warm liquid glass. This can be easily done with a regular watering can. After glass processing, a layer of hardener must be applied. A solution of 5-10% calcium chloride or sodium silicofluoride (3-7%) is taken. The top layer of the blind area is made of sifted fine sand, all actions are performed in exactly the same way as in the previous case. The finished blind area is covered with a piece of roofing felt or ordinary film and left for 3-4 days.
To make a sand-glass blind area around the house, you need to prepare the following building material and tools:
- tape measure, wooden pegs and twine for marking;
- shovel;
- herbicides;
- sifted sand of fine and medium fractions;
- liquid glass solution;
- hardener;
- garden watering can;
- roofing felt or polyethylene film for covering.
Concrete blind area around the house: quality for many years
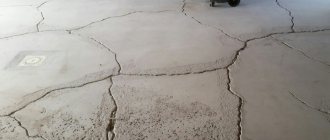
A concrete blind area is more complex than a gravel or crushed stone base, but it is the most durable and performs its functions better. The concrete base completely removes all water from the base part of the foundation, but the only drawback is that under strong mechanical stress, the concrete can crumble and wear out.
The procedure for pouring a concrete blind area is described below:
- Clear a 0.7-1 meter wide strip around the base. It is recommended to pre-mark with pegs and marking cord.
- Remove the sod and about 25 cm of soil. Compact the surface.
- Sometimes the ditch is filled with herbicides to prevent rising vegetation from destroying the concrete. In any case, the roots should be uprooted.
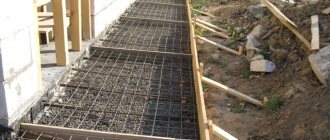
- Install board formwork along the outer edge of the ditch.
- In increments of about 3 meters, install slats coated with bitumen inside across the formwork. You will get expansion joints in the blind area, which will protect the concrete strip from cracking.
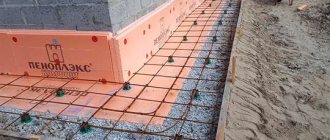
- Place extruded polystyrene foam on the bottom to insulate the blind area or pour a sand and gravel cushion 10 cm thick. The sand is spilled with water to compact it, and the cushion is compacted.
- Reinforce the blind area. To do this, you need to lay a reinforcing mesh with a cell size of at least 8 cm on the bottom. The thickness of the rods is 6-10 mm. If the base needs reinforcement, grooves are selected in its wall and rods are placed there so that the reinforcement connects the old structure with the new one.
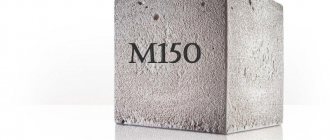
- Prepare a mixture of M200 cement (minimum, preferably M500), crushed stone and sand in a ratio of 1 (cement): 4: 4. Dilute with water to a thick consistency.
- Fill two-thirds of the formwork height, preferably in several layers. The previous layer is leveled with a rule or a lath, pierced with a reinforcing bar to expel the air. Let it set and pour in the next layer. The total thickness of concrete must be at least 8 cm to give the blind area sufficient strength.
- Before the solution has time to harden, dry cement is sprinkled on top of the tape to increase the wear resistance of the surface layer.
- Cover the surface of the concrete with polyethylene so that in bad weather the tape is not washed away by rain, and in hot weather dehydration does not occur instantly: when concrete sets quickly, it loses strength and subsequently cracks.
- Until it hardens completely, the tape should be regularly sprayed with water (in hot weather several times a day).
- After the blind area hardens (after about three days), the formwork is removed.
From the given instructions it is clear that a concrete blind area generally consists of a layer of sand cushion, a layer of insulation and a layer of reinforced concrete. The thickness of such a blind area is at least 25-30 centimeters. This is enough to prevent the foundation from freezing.
An area around the perimeter of the house, protected from the weather by a concrete layer, is the best solution for those who choose quality and durability. This blind area is suitable for any type of soil, including heaving soil. If performed correctly, it will not require restoration work or additional care measures.
How to make a blind area around a concrete house is not at all difficult, the main thing is to observe the order and density of the layers, and also use only the materials recommended for the work.
- Prepare a trench 0.2-.25 m deep, from the bottom of which plant roots are removed and additionally treated with herbicides.
- The first layer of the base is sand 0.1-0.15 m thick, which should be thoroughly compacted.
- The second layer is waterproofing, for example: Gidroizol.
- The third base layer is sand.
- The fourth layer is crushed stone. It is poured to ground level, that is, the hole is completely covered.
- Prepare formwork with a wall height of about 0.1 m.
- The formwork is poured to a height of about 7 cm with concrete. It is better to choose concrete between grades M200 or M300.
- Without allowing the concrete to set, reinforcement mesh is laid.
- Pour the top layer of concrete to the top edge of the formwork, while simultaneously creating the desired slope for the blind area.
- Concrete is reinforced to improve its waterproofing properties. To do this, the surface of the newly poured mortar is sprinkled with cement and leveled using a trowel.
A concrete blind area around a house requires the mandatory creation of temperature expansion joints that will prevent the concrete from collapsing under temperature fluctuations and humidity changes. One expansion joint must pass at the junction of the house wall and the blind area, and protective strips must be created at intervals of no more than 2.5 meters in length.
As a barrier, any of the following materials are laid between concrete sections:
- oiled wooden blocks;
- flexible vinyl tapes;
- roofing felt;
- damper tape or other analogue.
You can create expansion joints using liquid compounds. To do this, during the work process, gaps of about 20 mm thick are left, which are subsequently filled with liquid glass or concrete.
In addition, it is for this type of protective perimeter that professional builders recommend strengthening the adhesion of the foundation and blind area. To do this, use a hammer drill to make recesses in the wall so that when pouring concrete, about 0.3-0.35 m deep into the wall. More reliable adhesion is provided by pieces of reinforcement, which are driven into the groove made and concreted in the main layer of the blind area.
We suggest you read: How to decorate the inside of a bathhouse
How to make a blind area on heaving soil: instructions
Much attention needs to be paid to how to make a blind area on heaving soil, which is subject to seasonal changes. During installation, the following conditions must be observed:
- the depth of the blind area should be from 15 cm, but not more than 25 cm;
- the extension should be 30 cm greater than the distance from the eaves. This will ensure proper protection from water that flows from the roof surface to the ground. But we must remember that the width of the blind area cannot be more than 90 cm.
For heaving soils, monolithic concrete is best suited and meets all requirements. A concrete blind area, the construction of which is not difficult, is done in this way:
Insulation scheme for the blind area.
- along the perimeter of the house it is necessary to mark the blind area, then dig a trench of the required depth;
- a 15 cm layer of sand is poured onto the bottom and compacted thoroughly;
- formwork made of wooden boards is installed along the edges;
- the base is filled to a depth of 7 cm with concrete grade M200-300, after which, without waiting for the solution to dry, a reinforcement belt is laid and another pour is performed. This reinforcement allows the concrete not to crack during seasonal heaving. The top layer of concrete should be 3-5 cm with a slope of 10% from the house;
- The wet concrete surface is covered with dry cement, which is carefully leveled with a trowel. This allows for the so-called reinforcement of concrete, that is, high-quality waterproofing;
- When performing work, it is worth considering that pouring should be carried out in small sections of 1.5-2.5 m. This will ensure the creation of expansion joints 15 cm thick. After pouring, they will need to be filled with liquid glass or tar. For these purposes, you can also use special vinyl tapes, which have the ability to bend under the influence of various loads, preventing cracks from forming in the surface of monolithic concrete.
The final part of the work on constructing the blind area is that a trench deepened into the ground is installed along the outer perimeter for water drainage. This is required so that sedimentary moisture does not accumulate and penetrate under the blind area structure, but immediately flows down the gutter into the drainage system of the house. As a result, simple, but very reliable and effective protection of the base and foundation is provided from destruction due to the negative influence of moisture.
How can you save money?
But how to reduce the cost of a homemade blind area? To determine the scope of work, you need to know its width; the length will be given by the perimeter of the building, and the depth will be given by the selected scheme. According to SNiP, the blind area should extend at least 20 cm beyond the roof overhang, including gutters, but not narrower than 70 cm.
That is, we climb onto the roof with a plumb line and beat its outline along the ground. Then we measure along the entire length; if somewhere up to 0.7 m is missing, add as much as needed. Then we measure the resulting perimeter of the blind area; We now have a complete set of data to calculate the volume of materials and labor purchased.
What is it for?
Concrete blind area is a mandatory event. Its device performs a very important function - protecting the foundation. This element around the house removes rain and melt moisture from the perimeter of the basement walls, thereby reducing the load on the drainage system and vertical waterproofing.
Before making a blind area with your own hands, you should decide on its width. To perform the given function, the protrusion of the blind area around the house is taken equal to one meter. This value allows you to reliably protect the basement walls. In some cases, it is allowed to reduce the width, but only if absolutely necessary (for example, tight conditions on the site). The minimum value is 80 cm. It is important to take into account the protrusion of the roof eaves. Its projection onto the ground surface should be at least 20 cm less than the protrusion of the concrete protection.
The main role of the blind area is to protect the foundation from water
In addition to waterproofing, the blind area takes on several more functions:
- completion of the architectural appearance of the house;
- arrangement of a pedestrian zone around the building (the blind area plays the role of a pedestrian path).
The blind area can be used as a path only for low-rise individual buildings, subject to timely removal of ice from the eaves and snow from the roof. It is important to remember about safety precautions in winter, since when moving close to the eaves there is a danger of snow and ice falling on a person.
Slope of the structure according to SNiP
To perform the main function - water drainage, the blind area must be made with a slope. The height decreases away from the walls of the house.
The installation of a blind area around the building requires a slope of at least 0.015.
This value means that for every horizontal meter there is a vertical change of 1.5 cm. Before pouring the blind area, you should calculate its height near the walls of the house.
Insulation and drainage
The next circumstance that can significantly increase the cost and complicate the blind area and still turn to professionals is its insulation. However, it will only be of any use if the blind area is monolithic, expensive and complex. Taking into account the fact that insulation most often has to be combined with drainage, the cost of work here can be a small fraction of that of materials. But is insulation necessary at all? And when, if so? Insulation of the blind area is necessary in the following cases:
- The house has a heated basement or ground floor.
- The house was built on heaving soil: clay or loam with high moisture absorption.
- The winter is unstable, with prolonged thaws, and the house stands on dusty soil with high moisture permeability; these are sandy, loess and alluvial soils.
- The freezing depth can reach that calculated according to SNiP (see below) more often than once every 3 years or once for any period of time for more than 2 months.
Extruded polystyrene foam (EPS) and polyurethane foam are suitable for insulating blind areas. The latter, at first glance, is tempting with its cheapness, but it only seems so. Below we will deal with foam, but for now we will deal with EPS.
If the need for insulation is caused only by point 1, and the winter in a given area is consistently not very severe and the soil under the building is stable, the blind area should be insulated according to the diagram on the left in Fig. The principle is clear from there: the insulated blind area pushes the zero isotherm away from the house, which ensures its durability, as described above, but under difficult operating conditions.
Designations on the diagrams:
- reinforced concrete monolith;
- Eps boards;
- waterproofing;
- sand cushion;
- stone border;
- geotextile drainage pipe clip filled with crushed stone;
- drainage pipe.
The simplified (left) diagram differs from the traditional ones, which we will talk about in more detail. First, how much EPS should I put under the blind area? This material is not very cheap, and every extra centimeter of its thickness means in this case an overspending of about 10,000 rubles. and higher.
Here it is appropriate to use the experience of traveling construction teams, that is, coven workers. They, by the way, are not at all such grabbers and scammers as they signed with the Soviet “Crocodile”. If the wolf is fed by his legs, then the coven, like a banker, is his reputation. Which consists not only of the speed and quality of work, but also of the savings on materials that are visible to the owner, because coven workers do not carry them with them.
So, the shabashniks have long ago developed an empirical formula to calculate the minimum permissible thickness of EPS under a blind area, namely: take the estimated freezing depth under the house in centimeters, subtract from it the width of the blind area, also in centimeters, and multiply the resulting value by 0.75, this and there will be the minimum required thickness of EPS in millimeters. Let’s say freezing is 1.8 m or 180 cm; The width of the blind area is 1 m, then you need a layer of EPS from 60 mm. More won’t hurt, as long as the customer forks up.
Seasonal soil freezing in the Russian Federation
The freezing depth can be accurately calculated according to SNiP 2.02.01-83 “Foundations of buildings and structures”, with annexes and design manuals, and according to SNiP 23-01-99 “Building climatology”. In recent years, houses are often built on heaving soils, because... plots for development on them are cheap and there are a lot of them left from Soviet times, when they tried not to build “on the pukka”.
| City | M | vM | Soil freezing depth according to SNiP, m | ||
| loams and clays | fine sand, sandy loam | coarse sand, gravelly | |||
| Arkhangelsk | 46,1 | 6,79 | 1,56 | 1,90 | 2,04 |
| Vologda | 38,5 | 6,20 | 1,43 | 1,74 | 1,86 |
| Ekaterinburg | 46,3 | 6,80 | 1,57 | 1,91 | 2,04 |
| Kazan | 38,9 | 6,24 | 1,43 | 1,75 | 1,87 |
| Kursk | 21,3 | 4,62 | 1,06 | 1,29 | 1,38 |
| Moscow | 22,9 | 4,79 | 1,10 | 1,34 | 1,44 |
| Nizhny Novgorod | 39,6 | 6,29 | 1,45 | 1,76 | 1,89 |
| Novosibirsk | 63,3 | 7,96 | 1,83 | 2,23 | 2,39 |
| Eagle | 23,0 | 4,80 | 1,10 | 1,34 | 1,44 |
| Permian | 47,6 | 6,90 | 1,59 | 1,93 | 2,07 |
| Pskov | 17,9 | 4,23 | 0,97 | 1,18 | 1,27 |
| Rostov-on-Don | 8,2 | 2,86 | 0,66 | 0,80 | 0,86 |
| Ryazan | 34,9 | 5,91 | 1,36 | 1,65 | 1,77 |
| Samara | 44,9 | 6,70 | 1,54 | 1,88 | 2,01 |
| Saint Petersburg | 18,3 | 4,28 | 0,98 | 1,20 | 1,28 |
| Saratov | 26,6 | 5,16 | 1,19 | 1,44 | 1,55 |
| Surgut | 93,3 | 9,66 | 2,22 | 2,70 | 2,90 |
| Tyumen | 56,5 | 7,52 | 1,73 | 2,10 | 2,25 |
| Chelyabinsk | 56,6 | 7,52 | 1,73 | 2,11 | 2,26 |
| Yaroslavl | 38,5 | 6,20 | 1,43 | 1,74 | 1,86 |
On the left diagram of Fig. at the beginning of the section, another crazy trick is visible: the vertical EPPS base slab (its thickness is calculated in the usual way based on the heat loss of the building) is not brought down to the freezing depth, but breaks off at the lower edge of the insulation of the blind area. The fact is that an insulated blind area reduces heat loss through the bare root of the foundation, and you won’t have to groan over bills for fuel or electricity for heating.
The existing methods for calculating heat loss do not take this circumstance into account. But a weak additional heat flow from the side, combined with an upward geothermal flow (our planet has a positive heat balance, otherwise life on it would be impossible) pushes the zero isotherm even further.
When to finish the base?
Finishing the base above the blind area
Usually it is recommended to do the blind area as the very last thing, after finishing the base. But these tips go back to the times of Khrushchev-Brezhnev mass construction, when plinths were, at best, plastered. And now, for example, how to make a waterproof thermal joint between the blind area and the base, trimmed with relief stone or base siding?
We suggest you read: How to calculate the current load
Taking into account the use of modern finishing materials, the base of the building should be finished after installing the blind area. It won't get worse, it will only get better. Look at fig. In the place marked with a red dotted circle, above the thermal seam, the finishing of the base forms a small cornice - a teardrop. Now only a tropical hurricane can drive moisture into the seam.
Blind area around the house: general rules
For a rigid blind area, a sand and gravel cushion is made. It is needed in order to:
- level the base;
- replace subsidence, heaving soil with one more resistant to loads;
- break the capillarity of the soil;
- create a dense base for the blind area.
By the way, the construction of a cushion of sand and gravel is far from a prerequisite: the specific composition of the “pie” depends on the type of soil on the site. For example, if the soil on your site is sandy, you can refuse to fill it with sand. But the sand and gravel base is the most universal and is suitable in almost all cases.
Sand and gravel
If a pit is backfilled, then a layer of crushed stone is laid on the backfill sand compacted during the work of filling the foundation sinuses. In the case of constructing a blind area in a trench, a layer of sand is poured onto the leveled base.
Sand compacts well when spilled with water. You need to work until the so-called “solid body”, that is, until the imprints from the impacts of the rammer disappear and the movement of the compacted material stops (SNiP III-10-75, clause 3.26). The thickness of the compacted sand layer is 100-150 mm.
https://www.youtube.com/watch?v=
Installing a curb
The beginning of the installation of the cushion is the best time to install curb stones: ready-made concrete, natural stone or other materials, if you plan to use them. The installed border can serve as formwork. If there is no curb, then formwork is installed along the outer edge of the future blind area.
Crushed stone or gravel with a fraction of 5-50 mm is laid on the compacted sand and is also compacted in such a way that the stones are partially pressed into the sand layer. The thickness of the crushed stone (gravel) layer in finished (compacted) form is 60-90 mm.
A reinforcing mesh is laid on the prepared base, the beacons are placed taking into account the required slope, and a concrete solution is poured into the formwork, pulling it along the beacons.
Laying mortar into blind area formwork
After the surface of the concrete has dried a little, ironing is performed. This operation makes the surface denser, stronger and more water-repellent.
The underlying layer for a soft blind area is arranged in the same way as for a hard one. The fundamental difference between these types of blind areas is where the waterproof layer is located.
For hard, this is the outer surface of concrete or asphalt. In soft water, it calmly penetrates through the covering (turf, pebbles, paving slab seams) and is drained away from the structure along the waterproofing layer located under the top decorative layer.
Scheme of soft blind area
Previously, a clay castle was used as waterproofing. Nowadays, modern waterproofing films or membranes are most often used, which are laid on a base made of ASG (sand and gravel mixture) with a formed slope.
The design of the blind area - soft or hard - is ready and can perform its main function: reducing the load from atmospheric water on the foundation. All that remains is to complete the finishing work if the owner does not like the appearance of the result.
The familiar “paths” along the perimeter of apartment buildings and private buildings are nothing more than blind areas that prevent the destruction of the building’s foundation. The presence of a protective strip is a mandatory condition for the operation of any home. Even if the building is located in a dry climate, and the soil on the site is not considered difficult, the blind area should still be present.
It also happens: a house is purchased ready-made, but does not have a protective area around the perimeter. Then you will have to decide for yourself how to make a blind area around the house with your own hands, otherwise you will soon have to worry about repairing the foundation or basement.
- the base, which bears the main load in terms of strength and durability;
- coating responsible for stability and waterproofing.
Classification is usually carried out according to the second parameter, although the structure of the base is not a constant value.
- sandy;
- turf;
- crushed stone;
- asphalt concrete;
- from reinforced concrete slabs;
- with monolithic concrete covering;
- mixed options.
Mixed options are those that are made from improvised means in compliance with the technological features of creating a shoot.
Most often these are combinations of leftover floor tiles and concrete.
The width of the blind area varies from 60 cm to a meter or more. The determining factors are two points:
- roof overhang;
- additional purpose of the protective strip.
Add 30-40 cm to the overhang of the roof and obtain the optimal width of the blind area. If in the future it is planned to use this area as a path, path or for a flower bed/lawn, then the width is selected in accordance with these requirements. Also, strict requirements are imposed on blind areas on heaving soils - their width must be at least 0.9 m.
A sand-based protective strip is a simple and inexpensive way to create a blind area. To carry out the work you will need:
- sand;
- shovel;
- liquid glass – potassium (sodium) silicate;
- boiler;
- watering can;
- hardener – a solution of calcium chloride (5-10%) or sodium fluoride (3-7%);
- dense polyethylene film.
Concrete is a universal surface
Concrete is a building material that is almost always the basis of a structure that requires further finishing work.
Depending on what and where the concrete has to be used, it is covered with:
- Ceramic or porcelain tiles.
- Granite.
- Polymers.
- Panel finishing (plastic or wooden).
- Enamels and paints.
Interesting! Modern finishers often use toppings. This method of finishing concrete involves grinding concrete that has not yet completely hardened while simultaneously applying and rubbing in special additives. This technique is practiced when installing industrial floors.
But today we will talk about why and with what to paint concrete, so that repairs do not create a gap in the budget, and the work is done with high quality and for long-term use of the surface.
Often, “bare” concrete is painted in production and industrial premises
Why paint concrete
By painting concrete, we expect to perform several tasks that increase the comfort of a person’s stay in a room with painted walls:
- Dust the concrete surface.
- Protect from:
- Mechanical damage.
- Wear.
- Exposure to chemicals.
- Aggressive effects of precipitation and temperature changes in the case when concrete has to work in the open air.
- Maximize service life.
- Make the concrete surface more aesthetically pleasing.
- Improve its performance characteristics.
Important! Many of the above factors depend on the quality of the finishing material applied, so when buying cheap paint, rest assured that it will not last long.
How to paint concrete
When choosing paint for concrete, first of all you should consider:
- In what conditions will concrete have to work (street walls, residential premises, industrial surfaces).
- What do you expect from the appearance of a concrete product or structure.
- The price for the material that you are willing to pay to achieve the goal.
Let's look at a simple example of what is common in the questions of how to paint a concrete monument and how to paint a concrete blind area. Both surfaces will be exposed to the adverse effects of the atmosphere.
This means the paint should be:
- Frost-resistant and resistant to temperature changes.
- Water repellent.
- Contain antibacterial additives.
The only difference will be the requirements for the appearance of the object to be painted. It’s another matter if the concrete is painted from the inside of the premises.
For your information! In areas where “clean” concrete floors are practiced, such as retail floors, warehouses, industrial freezers, hangars, polymer coatings are used for finishing.
If you are going to apply paint to an old paintwork, be prepared for the fact that you will have to apply not two, but at least three or four layers
Types of blind areas and their features
They often talk about the numerous functional advantages of the blind area. However, many of them are far-fetched. The main function of the blind area around the house is protective.
How to make a blind area around the house with your own hands: a blind area made according to all the rules creates an excellent waterproof barrier. This means that no precipitation, melted water, or even partially groundwater will reach the foundation. Thus, at low cost, they increase the durability and preserve the integrity of the entire house.
We can, of course, also mention the aesthetic properties of the blind area around the house, when a beautifully designed protective strip emphasizes the external decoration of the walls of the building or fits organically into the local landscape design. But this parameter relates more to the individual wishes of the owners.
How is a blind area made from sand and liquid glass?
There are simpler options for constructing a blind area. One of them is using sand and liquid glass; concrete is not required, but you will still have to dig a trench around the house, although not so deep - 20 centimeters deep.
Sand is poured into the bottom of the trench in a layer of about 5 cm; as some kind of reinforcing agent, heavy cobblestones can be placed in the sand at some distance from each other.
Then the same layer of crushed stone is poured in, this entire cushion is well compacted. You need to lay roofing felt or geotextile on top. Pieces of waterproofing are laid overlapping with an allowance of 5-10 cm, the joints should be sealed with bitumen or epoxy resin, the edges are bent so that they reach the top of the finishing coating.
Sand is again poured on top and compacted well again. The surface of the sand is filled with liquid glass. After the glass has dried, the surface of the blind area will look like natural sandstone. True, such a blind area will not withstand too much traffic on it, but it will perform its main function - draining water from the foundation - for a very long time and with high quality.
About the curb
https://www.youtube.com/watch?v=5-pP-1rc-Vs
A proper blind area does not need a border. But it can be useful if there are cultivated plants near the house - root aggressors: raspberries, blackberries, poplars, plane trees, etc. of the same kind. Then the cushion under the lock of the curb stone is made approximately a spade bayonet deeper than the standard one and is made of sand mixed with broken glass.
Tags: around, gravel, blind area
« Previous entry
