Create!
Try making knitted beauty yourself. We will tell you how to crochet both regular and unique rugs with diagrams and descriptions. Before starting work, you need to decide on the color scheme and choose a model that is organically suitable for your home or country interior.
For inspiration, look through photos of similar items on the Internet. Many of them are simply amazingly beautiful. We will show you what knitted rugs can be like and teach you how to knit models that are popular today, simple and beautiful.
It is not always necessary to have extensive experience and craftsmanship to create a knitted masterpiece. There are patterns that even a beginner can do, but the grace and beauty of the knitted product will be undeniable.
Knitting techniques
Home carpets knitted from yarn can be in the form of a continuous fabric of any shape with different knitting algorithms. For example, rectangular ones are knitted in straight rows, like on knitting needles. And the round ones start from the central loop, then knit in the round.
Knitted rugs made using the fillet technique are based on a base mesh, to which a pile of yarn, such as grass, is added. And uniform in style, separately knitted fragments in the form of any shapes are combined into a magnificent canvas of “motifs”.
We will show beginners step by step how to create a rug of different shapes from yarn with your own hands.
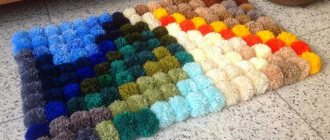
Fluffy pompom rug
If after knitting some things you have yarn left over, do not rush to throw it away. You can use it to create a wonderful fluffy rug with your own hands. The product can have a square round or any other shape.
To work you will need the following:
- Yarn (it is better if it is multi-colored).
- Sewing needles.
- Scissors.
- Thick cardboard.
- Mesh for the base.
The manufacturing sequence looks like this:
- In order to create fluffy pompoms that will later make up the rug, do the following: cut out a circle of suitable diameter from cardboard, in which mark a circle of smaller diameter in the middle. After that, cut it out by making a hole in a circle of cardboard. Make 2 of these parts.
- Take the yarn and wind it around the cardboard rings using a needle, folded together. In this case, the amount of yarn should be large enough - this will determine how fluffy the resulting ball will be.
- When the entire ring is wrapped with yarn, fasten the last thread and remove the needle.
- Take your scissors and use them to cut the yarn from the outside of the two wrap rings.
- Separate the two rings, tie the yarn in the middle with thread as tightly as possible, without cutting the thread for tying.
- Trim the pompom, removing excess with scissors.
- Make the required number of such pompoms.
- Take the base and start tying the fluffy balls to it as tightly as possible to each other so that there are no gaps and the mesh is not visible.
- Fill the entire base with fluffy pompoms.
The rug is ready!
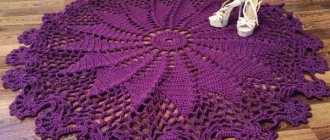
Round rug
Most versatile for home use. Looks great in any interior. Made from yarn of different textures and thicknesses. It can be elegant, openwork knitted or solid, tightly knitted. Openwork and “airy” - for covering the dressing table. Voluminous, with a continuous large knit and knitted “cones” - for a nursery or living room, it holds heat well.
To create a round fabric from yarn, you need to make the first three air loops, connect the first loop to the last. Then knit a row of six single crochets. In each next row, add new loops evenly, increasing the length of the circular row.
Note!
How to crochet a mouse and a rat: video master class on crocheting the 2020 symbol
How to knit a warm hat with ears for a newborn boy and girl - video tutorials with patterns, instructions for beginners
How to crochet a beautiful scarf: video master class on creating unusual, beautiful, simple scarves for boys, girls, men and women
Star with a simple knitting pattern and description
This pentagonal knitted accessory looks original and interesting in the interior of your home. Job description below.
You can knit such a star-shaped rug from any desired material: yarn, bags, scraps.
Knitting starts from the center. You need to dial 5 ch. and close them in a ring.
1 row. 3 v.p. lifting, 2 tbsp. s/n. above the 1st ch. previous row, 2 ch, * 3 tbsp. s/n., 2 v.p. Knit from * to * 5 times to form a pentagon.
2nd row. 3 v.p. lifting, 2 tbsp. s/n. above the 1st ch. previous row, 2 v.p., 3 treble s/n., 1 v.p. and then continue knitting according to the pattern shown in the photo below.
The pentagon is knitted in circular rows to the size you need, and then each “ray” is knitted separately.
Knitting pattern Stars:
If you knit this accessory from soft thick yarn, then it can be used as a bedspread or blanket.
Oval rug
Harmonious for geometrically elongated rooms. Before knitting it, divide the width of the future product in half and subtract it from the length, find the length of the initial chain. For example, if we plan to make a rug measuring 40 cm by 100 cm, then the desired length is 80 cm.
Remember that the cast-on chain will stretch by about 30-40% when knitting.
Next, knit in the round according to the pattern, with gradual addition of loops on the semicircular sides.
A beautiful oval rug can be made from store-bought knitted yarn or from yarn made from discarded knitted clothing.
The first and last loops must be discreetly secured with a thin thread, and to increase strength they must be glued or sewn to a dense base.
The popular model “Miracle of May” is an oval rug made on the basis of three magnificent Patricia Kristoffersen napkins. Stylish and elegant, it fascinates with its beauty and grandeur, good in any color and interior. A video master class on napkins from Patricia Kristoffersen is easy to find on the Internet.
Note!
How to knit a hat with a lapel using knitting needles or an elastic band: step-by-step instructions for beginners
How to crochet a winter hat: 95 photos of new models of warm, fashionable, original knitted hats with a lapel and a beautiful pattern
- How to knit a beanie hat correctly with knitting needles: video master classes, patterns, knitting patterns for fashionable models
Rug made from old knitted T-shirts
Surely, everyone has a large number of old knitted T-shirts in their closet. Some simply don’t like them, others have lost their appearance during wear. But you shouldn’t throw them away, because you can use them to make a mat on a mesh of threads with your own hands, which will become a useful thing for your home.
To work you will need the following:
- Old, unwanted knitted T-shirts.
- Yarn,
- Large crochet hook.
- The base is in the form of a grid.
The sequence of actions looks like this:
- First, prepare strips of T-shirts. It is advisable to cut them about 2 cm wide.
Important! Don't worry if the material on your T-shirts has faded, as it won't be noticeable on the mat.
- Roll the first strip into a ring and start from the center. Then tie the resulting ring with a post. Make about ten such columns, tying the ring you received at the beginning of the work.
- Next, continue crocheting in the round. Knitting loops is carried out without double crochet through each loop of the previous row. In this case, you need to make each increase in loops evenly, knitting two single crochets from each loop.
- After inserting the hook into the loop in the previous row, pull the thread through it.
Important! The knitting technique in the round involves inserting a hook into a loop in the previous round.
- After this, pull the thread through both halves of the loop at once so that they cannot stretch too much. So tie the whole circle.
- As you finish each knitted strip, take the next one and attach it to the tip of the previous one.
- Continue knitting until you run out of stripes. This way you will get a product of the desired diameter.
Making a fluffy rug with your own hands is not at all difficult, although this work will require some time and patience. It all depends on the size of the product. But the result is worth it, because such a thing will become a wonderful decoration in any room.
But we don’t say goodbye to you here, come back again!
Rectangular crochet rug
It is laconic, its placement at home or in the country will add uniqueness to the home. Convenient as a floor runner in a country-style room or in a nursery. It is extremely easy to knit; even a beginner in needlework can handle it. The basic model is done in single crochets.
We make a chain of air loops the length of the width of the future product. Then we knit a row. Turn it over. We knit the next row in the same way as the previous one. Turn it over again. Repeat until the desired length is achieved.
For decoration, after completing the main fabric, we make tassels from the same yarn. A rectangular carpet made from square motifs is also quite accessible for beginning craftswomen.
The best crochet rug for beginners
Even the most inexperienced knitters will be able to easily cope with making a rug thanks to a master class for beginners. It is recommended to start with a square rug on the floor. In the photo you see an example of such a product.
To knit this pattern you will need thick cotton yarn, which knitters call “spaghetti”.
Choose yarn colors to suit your taste. Step-by-step master class with description:
- Cast on a chain of v.p. the length you need.
- 1 row. Knit all stitches st. s/n. Turn the knitting to the wrong side.
- 2nd row. Knit all stitches st. b/n. under the front wall of the loop. Turn the knitting over to the right side.
- 3rd row. Knit st. b/n. under both walls of the loop.
- 4 row. Knit the same as 2nd.
- 5 row. Columns s/n. knit under the back wall of the loop.
- Row 6 and all subsequent rows are knitted in a pattern repeated from the 2nd to the 5th row.
See the video for an example of such work.
Square rug
So seemingly simple, but in the hands of a creative craftswoman it turns into a designer model. The square will fit harmoniously into a bathroom, glassed-in loggia or hallway. This is done in one of two ways:
- The first is similar to knitting a rectangular rug, but in compliance with the new proportions characteristic of a square: the length is equal to the width.
- The second method is using the granny square technique. We cast on eight chain stitches of the initial chain. We connect it with a half-column into a ring. We knit a row, knitting three double crochets in each corner loop. And so on in every row.
Flower
Attractive and airy, the knitted flower is quite complex to make. Only experienced needlewomen can cope with it, since each loop must be made strictly according to the pattern. Skipping at least one of them will ruin the entire drawing.
However, there is an option to make a “flower” in a simple way. We knit five identical circles with double crochets. Then we connect them as follows: we bend each circle on both sides so that a flower with five petals is formed. We sew the “petals” into a “flower”. We decorate the middle with a button or a knitted small circle.
An interesting technique for creating on a fillet mesh
If you are completely new to knitting, find out what fillet knitting is - this is one of the most famous techniques!
Knitting rugs on fillet mesh is another innovation invented by needlewomen. Such products look rich and lush. At first glance, it seems that tying anything using this technique is very difficult. In fact, the work is done easily and quite quickly. Even a novice craftswoman can cope with this task if she already knows how to knit chain stitches and double crochets.
You can use any yarn you want and the corresponding hook number. The knitting process begins by making a fillet mesh of the size you need. The photo below shows the knitting pattern.
When the mesh is knitted, start knitting the outer part of the product. It is recommended to start knitting from the middle of the fabric, then the pattern will be even and the “waves” will go in one direction. Each side of the cage should be tied with a st. s/n. There can be from 1 to 3 on each side. The thinner your thread, the more stitches you need to knit.
Thus, focusing on the drawing diagram, you tie all the “cells” of the fillet mesh.
This is what the back of the work should look like.
Scheme for tying the base with ruffles:
Knitting pattern:
Such products have an attractive appearance, and thanks to their structure they look very elegant and rich.
Knitted rug in the interior
Will add comfort and grace. For the bedroom - soft, calm colors. In the living room - bright, catchy. Pleasant to the touch textured carpets will find their application in the hallway. Rectangular ones will decorate the interior in an industrial style.
In light colors and round shape - for a room in the Provence style. Soft, colorful, with a fairytale motif, but at the same time environmentally friendly, safe and easy to clean - a rug for the nursery. It can be in the shape of a pencil, an animal, a favorite character, or your child's hobby item, such as a guitar or palette.
It is very easy to create a knitted rug in the shape of an animal: just knit simple figures in the form of elementary geometric shapes and assemble everything into a single composition.
For example, a “bear” rug looks like this: the muzzle is a simple gray circle, the ears are two white-gray semicircles, the nose is a white circle and a black triangle, the cheeks are two pink circles.
How to choose a hook
Each craftswoman has her own priority type of hook; she chooses it at her own discretion: aluminum, plastic, steel (metal), wood, bone or a combination.
However, the thickness of this tool is selected in accordance with the thickness of the yarn used for knitting and the desired knitting density. When choosing, pay attention to how the hook feels in your hand, whether it will create tension in your fingers during prolonged use. Aluminum ones are most in demand by knitters because of their lightness, strength and availability.
Mat material
Classic material - thick yarn from camel, sheep, any other wool, ribbon yarn. In accordance with its thickness, hooks are selected to work with numbers from five to eight. For durability and preservation of appearance, the best material is synthetic yarn, acrylic. Lovers of eco-friendly materials will prefer yarn made from natural cotton. It is pleasant to the touch, but does not hold heat well.
Knitting carpets from cord
Cord carpets are very textured. They add charm to the interior. Two types of cord are used in this work: cotton and polyester. Carpets made from all-natural cotton cord are more environmentally friendly. They turn out to be heavy, due to this they lie stably on the floor.
Rugs made of polyester cord are popular due to the practicality of their material and its hypoallergenicity. They are easy to clean and do not lose their shape and color even with prolonged use. It is better to choose a simpler scheme for them.
Fabric rugs without weaving
There is another original way of making fabric rugs with your own hands, as a result of which you can get a bright and lush accessory, for example, for a child’s room. To work, you will need a lot of old things, a rubber mat or dense mesh, and sharp scissors.
Instructions on how to make a rug from old things with your own hands:
- Shirts, T-shirts, dresses (and any other items of clothing) are cut into pieces of the same size. To decorate a child's bedroom, it is better to use multi-colored textile blanks, which will contribute to the development of the baby's visual perception.
- Using a hook or tweezers, the flaps are threaded through the pores of the prepared mesh.
To attach parts to the mesh, one simple knot is enough.
Carpets made from knitted yarn
With a skillful approach, they turn out to be original, with their own individuality. You can buy knitting yarn at the store or make it yourself. To do this, you need to cut old knitted items into strips and knit them into a single thread. Knit according to any pattern you like, suitable for thick yarn.
Multicolored grandma's heritage in round shape
As a child, most of you probably had so-called “grandmother’s rugs” in your room. These are multi-colored round floor mats crocheted from strips of fabric.
In order to knit a “grandmother’s” rug from scraps, you will need a No. 10 hook and scraps of fabric. The flaps need to be cut into strips and sewn (or tied) together, rolled into a ball.
We knit in a circle with single crochets. To do this, you need to know the “rule of the circle” developed by knitters: cast on 3 ch. and connect them into a ring. Next, into a ring of 3 vp. knit 6 tbsp. b/n. Now divide the circle into 6 wedges and evenly add 6 tbsp in each row. b/n. on a circular row. In other words, it should look like this: 1 row – 6 tbsp. b/n., 2nd row – 12 tbsp. b/n., 3rd row – 24 tbsp. b/n. etc.
The crochet pattern for a round rug looks like this:
If you knit the product according to this pattern, but only knit single crochets behind the back wall of the loop, then the rug will turn out to be more embossed. The photo below shows how to knit st. b/n. behind the back wall of the loop.
This accessory can be laid on the floor and covered with it on a chair or armchair.
For more details on the work process, watch the video tutorial.
Carpet made from old things
The material can be leftover homemade yarn, synthetic tights, old bed linen, rope, strips of polyethylene from garbage bags. When crocheting circles on the floor from rags, you often get quite interesting and original products. They serve perfectly in the country or in a summer house. When knitting, try not to be too colorful to make the rug look stylish.
Rules for making rugs
All rugs made from old things with your own hands must be safe for humans. The surface should not contain sharp protrusions or cutting edges that could injure the foot. For the bathroom, all mats are equipped with a non-slip base (for example, a silicone plate that provides strong adhesion to the floor).
This approach reduces the risk of injury from a fall. The best option is a mat that can be washed and periodically treated with an antiseptic solution.
Exotic crochet Japanese rugs
Although Japanese rugs with their unique pattern look complex, the technique for making them is simple: hollow rings are knitted, which are then connected to each other. The lightest model consists of four rings filled with a fabric of double crochets. Another version of the Japanese rug: we make a knitted ring, a chain of hollow rings connected by a standard weave is sewn to it. A Japanese rug will add ethnic motifs to the interior. The carpet configuration can be changed.
It is difficult to imagine all the variety of knitted rugs. Give free rein to your creative imagination - crochet a rug yourself exactly the way you want it, best suited to the design of your home. An exclusive decorative interior element will bring comfort, coziness and warmth to your home. Don't be afraid that what you knit will look old-fashioned.
We recommend choosing the exact color of the yarn, this will add modernity to knitted interior items. The color of the materials used, in contrast with the interior color scheme, will enliven the room and add a bright personality to it.
However, try to avoid excessive variegation and the melange effect, and maintain clear boundaries between the colors of the yarn used. Apply a smooth transition from one color to another. This will give a good effect. Get inspired and start implementing your “knitted masterpiece”.
LiveInternetLiveInternet
Japanese rugs only look complex in appearance, but upon careful analysis of the crochet technique, it turns out that this is the usual knitting of hollow circles that are connected in a certain sequence. For a simpler option, it is enough to use a model of 4 circles, which were later “filled” with a canvas of double crochets.
Here is a detailed master class “ HOW TO KNIT A JAPANESE SQUARE RUG ”
For experienced craftswomen
Experienced craftswomen can choose to crochet more complex patterns and variations, where most techniques use stitches that are difficult to knit. It is also worth noting the compatibility of complex patterns - pineapples are combined with cones, and cones with floral motifs, and so on. But you should still present several models for crocheting rugs yourself.
Rug based on the "Grand" napkin
You can easily make carpets from crocheted napkin patterns, and here, if necessary, you can increase the size of the future canvas by combining or “wedging” several rows with certain patterns. So the “Pineapple Song” napkin prompted experienced craftswomen to knit based on the existing pattern of the rug, called “Grand”. The new model fits perfectly into the interior design of Provence, Rococo, Baroque, Classicism, the more luxurious Gothic or Empire style. There is nothing complicated in knitting it - the main thing is to use the given patterns with descriptions:
Cast on 8 chain stitches and close the chain into a ring. Next, continue knitting according to pattern 1. If necessary, you can increase the diameter by repeating the last few rows. Photo pattern for crocheting a rug grand
Next, move on to knitting pattern 2 - here you can also increase the size of the rug by adding a third row of petals above the pineapples. Photo pattern for crocheting a rug grand
At the end of the work, go to pattern 3 - this will allow you to finish the rug smoothly and textured. Photo pattern for crocheting a rug grand
For edging, pattern 4 is used, consisting of air loops and picot.
The presented model is recommended for independent execution in white, but if necessary, more attractive shades of thread that suit the color scheme of the room are also taken into account. The finished rug is simply soaked in cool water and laid out on a cloth, or directly on the floor until completely dry.
Simple but attractive blue lace
An openwork rug can be knitted using a simpler pattern - here it is only important to correctly arrange the petals from ordinary double crochets. So, it is proposed to use the following diagram, which will help to create a very attractive and versatile crochet rug model - change the shade, and you will get a completely different version of the fabric.
Rugs from bags
Rugs from bags are knitted using the same technique as from T-shirts and knitted fabrics. Here you will also need to cut long strips from the bags; see the detailed master class on .
It is not recommended to use an openwork pattern, because the joints of packet threads may become accessible to the public.
Children's variations
Children prefer their own rooms with appropriate furnishings - everything should be bright and fabulous. Therefore, the task of parents is to take into account every little detail. If you previously did not take care of purchasing furniture or textiles for the children's room with appropriate prints, then today you can easily correct the situation:
First, buy curtains with a child's pattern for your child's room.
Secondly, replace the existing dark blanket on the bed with a bright children's option.
Third, tie the rug! But not a simple one, but a special one - in the form of an animal.
Do you think knitting rugs in the shape of animals is a difficult task? Not at all - here only circles, ovals, squares, hexagons, rectangles and other individually connected figures are correctly assembled into a single composition
For example, you can see how to knit a simple rug in the shape of a bear:
tie the bear's face - a simple circle of a suitable size in a gray shade;
bear ears - 2 semicircles of white and gray;
the bear's nose is a white circle, and the triangle is cut out of black suede (later it will be sewn on);
bear cheeks – 2 circles of pink shade;
eyelashes - 2 suede parts, which are also later sewn on in the designated places.
The rest of the children's rugs are knitted using the same principle - use your imagination and don't look for complications in the patterns! Everything ingenious is simple!
Bathroom rugs
A crocheted bath rug can be the key point of the entire design. Thus, a set of a rug in the toilet, in the bathroom, a “seat” for the toilet and an “organizer” for toilet paper can outshine expensive tiles or a super-functional bathroom. Moreover, similar knitted bath and toilet mats make an excellent housewarming gift. Below we offer the most interesting crocheted rugs for the bathroom and toilet.
.
. .
.
.
.
.
.
.
.
Whale
A knitted bathroom rug can be made in the shape of a whale, which is knitted quite simply:
Knitting begins in the round - this is the body of a whale.
Having tied it to a suitable size, they begin to knit the tail, where the fins are simple and standard pineapple tying patterns.
Next, you can begin tying the harness from half rows of fan-shaped repeats. It is better to do this even before knitting the tail - this will eliminate the need to constantly turn over the already bulky fabric.
Finally, a fin is knitted - this is the same standard pineapple pattern.
Finish knitting the whale by knitting and attaching the eye, as well as the line of the waterfowl's mouth. You can separately give the whale a bow and splashes - let it be soft and cute.
Photo examples of crocheting rugs
Please repost
0
