How to decorate the headboard of a bed with your own hands?
The most affordable option is to attach pillows.
You can make and sew them yourself. How to decorate a headboard with your own hands:
- Be sure to provide ties and fasteners with which they will be attached to the wall next to the bed. To tie pillows, you can use metal fasteners, which are sold in curtain fittings stores.
- Nowadays there is a very large selection of rings and decorative fasteners created for such purposes. After all, during use, almost all the fabric becomes greasy and dirty, so from time to time it will have to be cleaned and washed.
- The best option is upholstery made of leatherette and eco-leather. It can be washed using mild detergents. In addition, it lasts quite a long time. If the air in the room is not very dry, the decor will last about 10 years.
- If this is not possible, you can use the simplest options. Usually the headboard area is somehow highlighted, or decorated with wallpaper of a different color, frames, and ordinary foam baguettes. They are attached to liquid nails and thus decorate the back of the bed.
Option
DIY bed headboard decor
You can also come up with something similar to a screen.
DIY bed headboard decor:
- For these purposes, several sheets of plywood are fastened together; it is best to attach them to hinges so that the screen can be folded like an accordion. Next, each sheet is covered with wallpaper, which contrasts with the main color scheme of the room, or with ordinary silk fabric.
- Try to ensure that the width of the screen exceeds the width of the back of the bed. It needs to go beyond its limits. In height, it may be slightly larger than human height, or slightly smaller.
- It all depends on whether you are going to use the screen for its intended purpose or whether it will serve as a headboard and room decor.
From the blanket
How to make a headboard with your own hands?
A full bed is not cheap. Even if you choose from mass market models or the popular IKEA, it’s difficult to find a suitable model along with a mattress for less than 20 thousand rubles. Save money - for example, make some of the furniture yourself, and buy the frame and mattress in the store. We tell you how to create a soft headboard for a bed with your own hands, as well as what you will need to implement it. And we’ll give you some cool ideas on how to decorate some of the furniture yourself on a budget.
The article will appeal to those who furnish an apartment on their own or live in rented housing - when you want to add comfort, but there is no opportunity or desire to invest money. Let's begin!
DIY headboard: ideas, options
If you don't have a huge amount of money to decorate your bed, you can make something similar to curtains, only in the wall area.
DIY bed headboard, ideas, options:
- To do this, select a fabric that is thick enough, attach a cornice to the wall, and hang the fabric on it. It is best if it is folded several times, imitating folds.
- If desired, you can make lambrequins, or original knots, fasteners, beautiful ribbons, with which you can decorate the headboard.
- This is a kind of imitation of a canopy that covers the part of the wall located at the back of the bed. At the same time, this design is very practical, since it can be removed and washed in a machine.
Cheerful decor
Board headboard
If you have several boards, no matter new or old, you can make such a simple headboard for your bed with your own hands in just a couple of hours. It’s just that if you use second-hand boards, it will take quite a lot of time to sand. The headboard is a simple design, essentially just a knocked down wooden board, but the main task is to make it beautiful.
The configuration can be any, imagination is not limited here, you don’t need to worry about strength either, just cut it out, sand it and varnish or paint it. Here, all the stages of work are shown in this small collage, four photographs were enough.
If you need instructions, you can visit the website of the author of the project, link under the gallery. Since headboards today play more of an aesthetic role, your style choices are limitless. This example is very simple, if you like curly backs, you can cut out any configuration and even write something, fix a lamp, hang decorations. Well, besides beauty, a durable headboard when you sleep at night allows you to feel more comfortable and safe in your bedroom.
Photo source: www.addicted2decorating.com/cheap-easy-diy-wood-headboard-from-cedar-fence-pickets.html
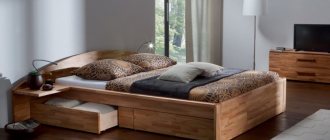
DIY soft headboard for a bed
An upholstered headboard is an affordable option that can be used for decoration. It is very easy to make it with your own hands, without specific skills and materials.
DIY soft headboard for a bed:
- To do this, you will need a sheet of plywood measuring 120 by 240 cm. Or any other size that matches the parameters of your bed. Next, you need to deal with the upholstery and filling. It is best if the fabric matches the color or contrasts with the wallpaper in the room.
- As a filler, you can use regular padding polyester, foam rubber, or, in extreme cases, an old duvet. Experience shows that this is an excellent alternative if there is no money for some more expensive option. In this case, a cover made of fabric is sewn onto the duvet, which best matches the repair.
- Next, the duvet is secured to the plywood using a stapler or staples. In turn, the plywood is attached to the wall. There are now many fasteners that you can use to secure your headboard to the wall.
- If desired, you can use buttons so that the filling does not move out or clump together. This is true if a duvet is used. If it is padding polyester or foam rubber, then even with long-term use it does not break into pieces and lasts quite a long time.
Pillows
What will it take to create a colorful headboard for your bed with your own hands?
The head of the bed plays an important role - it holds the entire structure of the bed. Without a monolithic, large headboard, the bed would be too fragile and would constantly break. Therefore, you will have to make a strong, reliable headboard first of all, and then think about its decorative appeal.
You can make a monolithic headboard from plywood sheets. It is enough to glue them together and you will get a fairly strong composite headboard that will last a long time and which can be processed simply enough to give it decorative value.
Using a lagund, you can cut the required amount of material from each sheet of plywood at the desired angle to give the headboard the desired curves and give it a classic decorative appeal.
To create a headboard you will need:
- Several sheets of plywood.
- Special glue for wood.
- Grinder with cutting wheel.
- Primer.
- White paint with brush.
- Special decorative stickers.
You will need to spend more effort than money, since plywood costs mere pennies, and everything else you need is probably already in the apartment.
DIY laminate bed headboard
It is very easy to decorate the headboard using laminate. This method is ideal if there is material left after repair.
DIY laminate bed headboard:
- This way the headboard will contrast with the floor and generally fit into the interior of the room. For these purposes, it is necessary to provide beams that will act as sheathing. They must be installed around the perimeter, at a distance of approximately 30-50 cm from each other.
- In the lower part, using small shoe nails, the first sheet of laminate is attached to the sheathing. Next, you can lay it using a locking connection. For reliability, you can glue it, or use shoe nails.
- However, a headboard made using a locking connection will look more interesting and neat. After this, you need to hide the side parts. They can be decorated with laminate, or use baguettes made of polystyrene foam or polyurethane foam. Nowadays there are a lot of products that can be used to decorate a bed and its headboard.
Laminate
DIY headboard cover
The simplest option is to make a cover for the headboard. For these purposes, use a fabric that is easy to wash in the washing machine so that it can be easily cleaned from stains and dirt.
DIY headboard cover:
- If the headboard is made of soft upholstery, you can use fabric and padding polyester inside. The result will be something similar to baby crib protectors.
- These are ordinary sheets of fabric that can be attached to the headboard using Velcro, buttons or regular ties. The dimensions of the cover should be slightly larger than the head of the bed.
- Additional fabric is left to secure the cover using ties or Velcro. Below we present a diagram for making a cover for the head of a bed.
Case
The nuances of making a headboard, how you can do it yourself
The bed is the main piece of the bedroom set. Today there are many different models of beds, one of the first places is occupied by options with soft headboards. The cost of such products is quite high, but making a headboard with your own hands is not difficult. This will not only save on work, but will also give you the opportunity to experiment with finishing.
DIY carriage headboard
A very popular headboard is the carriage headboard style. It looks like something similar to diamonds. For these purposes, you will have to make a new headboard, which is cut from plywood.
DIY carriage headboard:
- Cut a piece of plywood to a size equal to the width of the headboard. The height can be whatever you like. After this, a padding polyester or foam rubber is taken, and holes are drilled in the plywood in the places where the buttons will be located.
- The most labor-intensive process is gluing or covering the buttons with fabric from which the main part of the headboard is made. Can be made using foam rubber and furniture glue. It is better to take foam rubber approximately 5 cm thick. Initially, you need to make markings using a ruler to determine the size of the diamonds. At the points where the lines intersect, it is necessary to make a hole in the plywood and foam rubber.
- This is best done using a special drill attachment called a tsifenbor. If you don't have one, a regular cookie cutter will do and will be roughly the same size as the holes you need.
- It is necessary to take 20 cm more fabric on each side, since the folds also require a small amount of fabric. There is no need to secure the fabric around the perimeter. It is best to do this starting from the left side, moving towards the center, forming folds.
- They must be fastened with thread and a needle. You can fasten it on the reverse side with simple buttons or a stapler so that the threads do not slip off and the carriage tie does not deteriorate. For decoration, you can use buttons on the outside. Below you can see how the fold is formed and the carriage tie looks like.
Carriage tie
DIY soft headboard “Carriage screed”
Carriage binding is a decorating technique that was widely used in the 18th century to decorate carriages (hence the name). Today this method is used for upholstery of upholstered furniture and interior items. The modern name for the carriage screed is capitonne. In order for the result to look truly impressive, it is recommended to use expensive, rich material that looks good with numerous folds, for example, leather, velvet, velor, faux suede. Light cotton with small flowers is a completely unsuitable fabric.
The screed pattern itself can be made in the form of squares or diamonds; buttons covered with the same fabric, beads, and crystals in color or contrast are used as rivets.
Materials and tools:
- plywood for the base (furniture board);
- foam rubber about 5 cm thick (the size of a plywood sheet);
- padding polyester;
- covered eyelet buttons;
- drill for drilling plywood;
- sharp knife;
- Crochet hook;
- universal glue;
- strong lace (rope, twine to fit the buttons through the eyelet);
- furniture stapler with thickened staples;
- scissors;
- wall fastenings and screws.
high-quality fabric (with a margin of 25-30 cm more than the length and width of the plywood base);
Progress
Take a sheet of plywood, you can use a rectangular one or cut it into an interesting shape. In this example, two boards are used with dimensions: 200 cm by 60 cm and 140 cm by 60 cm. Cut the foam rubber to the size of the plywood base. Mark the places where the buttons are attached on the foam rubber, for example, in three rows in a checkerboard pattern.
Next, use a sharp knife to cut holes in the foam for the buttons.
A fun way to make holes is to use a heated metal tube. Heat the tube on the stove for 3-4 minutes, then make holes with quick movements. You can make 2-3 holes at a time, then heat the tube again for 15-20 seconds. Before doing this, be sure to place a board under the foam rubber so as not to spoil the floor.
Place the foam rubber on the plywood and use a pencil to mark the locations for the holes. Drill the holes with an 8mm wood drill bit.
Glue the foam to the plywood. Make sure that the holes in the foam and the plywood match.
Place a layer of padding polyester on top with a margin of 3-5 cm on each side. Lay the fabric on the padding polyester with a margin of at least 10 cm on each side. Turn the plywood over and secure the fabric with a furniture stapler on the reverse side.
Prepare your buttons. You can cover them with fabric yourself or take them to a workshop. Thread a cord at least 15 cm long into each button and tie a knot. This project required 62 buttons. Take a crochet hook and insert it into the hole from the plywood side.
From the front, on the fabric side, feel for the hook. Check the distance from the adjacent button with a ruler and make a small hole with nail scissors. Hook the lace with the button and thread it through the hole.
Pull the cord well and staple it securely to the back.
Attach the fasteners with self-tapping screws and hang them on the wall. Ready!
How to upholster the headboard of a bed with fabric with your own hands?
To make a soft headboard, you can use ordinary pillows. That is, it is not necessary to use plywood and carry out woodwork. It is enough to purchase a metal cornice in the form of a pipe and fasteners. It is necessary to sew pillowcases for pillows.
How to upholster the headboard of a bed with fabric with your own hands:
- For these purposes, you can use old unnecessary pillows, into which you can breathe new life. It is best if they are filled with padding polyester or some kind of light filler. Next, you need to sew loops to the pillowcases.
- Using the same method as curtains are attached to similar curtain rods, you need to attach the loops to the tube. The cornice is attached using dowels to the wall, directly next to the bed, so that the pillows are slightly higher than the most protruding part of the bed.
- This is one of the most affordable methods to decorate a headboard while spending a minimum of money. An ordinary housewife can handle this. The man will only have to secure the cornice.
Upholstery
DIY eco-leather bed headboard
A very simple option is also to use eco-leather. You will need a sheet of plywood to use as the base.
DIY eco-leather bed headboard:
- You can use a regular sheet of plastic, or plywood, with a laminated surface. Next, you need to purchase adhesive tape from the hardware store, which is attached with tape; these are standard Velcro.
- The first part must be attached to the surface of the plywood using Velcro, and the second part must be sewn to the pillows. Oddly enough, you can vary the position of eco-leather pillows, arrange them in a checkerboard pattern, or use a variety of patterns.
- It is best if the pillowcases are removable so that you can wash them. By changing pillowcases you can significantly change the interior of your room. Of course, there are now many stores that sell headboards and install them.
- However, with even a little knowledge of construction and sewing, you can make a fairly decent product that looks good.
Unusual decor
DIY wooden headboard
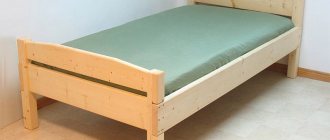
Another unusual option is a wooden headboard. It is best to use timber or boards for these purposes.
DIY wooden headboard:
- Please note that it is best to pre-paint them or cover them with stain. Unfortunately, such a headboard will not fit into any interior, but only in grunge or country style.
- However, if you are planning to make a renovation in this style, then you can try to do it using acrylic paints and wood that is available. Wooden beams are fixed to the sheathing, covered with a layer of paint, and decorated with stickers or stencils.
- Acrylic or water-based paints can be used. Below we present an option for decorating a bed headboard with wood.
Tree
How to choose the right option?
Now that we have talked in detail about how to make structures with your own hands, we will explain how to choose the right model. The options from our list can be divided into 3 types: soft, hard and unusual shapes.
Soft
Suitable for those who spend a long time in the bedroom in the evenings or in the morning, who like to lean on the back to read a book, work or watch a movie without getting up. For such cases, our selection contains several ideas.
It is important to choose the right upholstery material. It is better if the fabric is wear-resistant and easy to clean. Beware of natural wool in the composition - the surface will be prickly. Modern upholsteries such as velor, flock, jacquard are suitable.
Hard
This is the choice of those who primarily care about design rather than comfort. Choose wood, plastic or metal. Sometimes a rigid back is used as a shelf - such options are also presented in the article.
Unusual options
Ideas that are not attached to furniture, but act as wall decor, are considered unusual. And here the scope for imagination is enormous: from ordinary paint to wicker panels. Depends on what suits the style of the bedroom and will be more attractive to the owners.
In this article, we gave step-by-step instructions on how to make a headboard with your own hands - now it’s easy to repeat this idea. And to have plenty to choose from, there are 12 more options worthy of being inspired.
Write in the comments which style you like best: classic soft options or exotic ones?
1,912 views
DIY headboard drawings
First of all, you should focus on the design of the room and the overall style. The dimensions of the bed are also taken into account. Below we present do-it-yourself drawings of the headboard of the bed.
Blueprints
Back
Drawing
Substrate treatment
To make a bed headboard with your own hands, you need to process the base. If the base is an old bed, first of all you need to rid the frame of the previous covering. Then, on the inside, along the length, boards or plywood cut along the contour are bolted. If desired, you can increase the length of the headboard using special bars, placing them on brackets for soft covering. Don't add a lot of details. If you need to make a wooden headboard of the bed with your own hands, then wooden boards are used as the material for the backrest, which can be arranged in any order.
The best do-it-yourself headboards: ideas, photos
Of course, the most beautiful option is a carriage tie, but its implementation requires a lot of time and certain skills.
In addition, you will have to purchase plywood, a stapler, some accessories, and tools from a hardware store. Before you start making a headboard with your own hands, photos of which are below, you can choose an acceptable option in magazines or a store. Tree
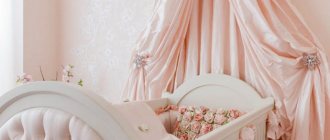
Photo of a children's bed with a soft headboard
We have finished making a soft headboard for the bed. We place the bed in its place against the headboard to feel the full shine of our product. Children especially like these headboards: you will see how your child will want to immediately go to bed to try it out. Perhaps children like the fact that leaning their heads against them as a second pillow allows them to have sweet dreams, or they like to lean on them while playing.
Good luck in your endeavors! And don't be afraid to start something new that you've never done before. You can actually make your own upholstered headboard. You just need to take your time and carefully measure everything so that you can then enjoy the finished product of your own hands.