To lay walls made of aerated concrete blocks, a special device is required. It's called a planer for aerated concrete. The tool is a simple design and can easily be made by hand.
This device is used when laying walls made of aerated concrete blocks.
The geometric accuracy of aerated concrete blocks, achieved through the use of a plane, is considered one of its advantages. However, as with any other technique, there are some small errors, even with the addition of tolerances: positive and negative. Externally, all the blocks look exactly the same, and measuring them will probably show complete identity.
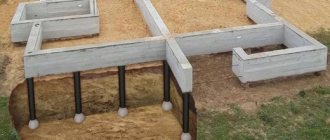
The laying of aerated concrete blocks has its own specifics: special adhesives are used for their installation, which make it possible to make a very thin seam at the joining site, thereby eliminating the possibility of the formation of “cold bridges”.
Despite all these advantages, there is still a “minus” - this is the distortion of the entire masonry due to the accumulation of those very “tolerances” (deviations from the nominal value), which gradually, row after row, become distorted. It will not be possible to correct it using an adhesive composition due to the small thickness of the layer, unlike the case with foam blocks - where the distortion can be corrected using the solution with which they are laid.
To correct these “tolerances” a plane for aerated concrete is used. Without processing the blocks, it will be impossible to bring the walls into proper construction form. You can buy a plane for aerated concrete, or you can make it yourself.
Required Tools
To create a plane for aerated concrete, you must have all the tools.
To create a plane for aerated concrete with your own hands, you will need the following tools:
- Bulgarian;
- electric jigsaw;
- hammer;
- hacksaw;
- plane;
- file;
- sanding paper;
- chisel;
- brush;
- calipers;
- ruler.
After acquiring the above tools, you can begin creating the device.
How to make your own plane for processing aerated concrete blocks
To work you will need the following tools and devices:
- angle grinder;
- jigsaw;
- hacksaw;
- hammer;
- sandpaper;
- file;
- ruler, chisel;
- brush;
- marker or carpenter's pencil;
- calipers.
The easiest way is to make a plane for aerated concrete with your own hands from self-tapping screws. The sequence of actions is as follows.
- Using a jigsaw and a hacksaw, we cut out a wooden blank measuring 110x400 mm from the board. The thickness of the workpiece is 25 mm.
- Using a file and sandpaper, we process the chamfers and corners, and grind the surface.
- Using a ruler and caliper, we make marks on one side of the workpiece at an equal distance from each other and draw six parallel longitudinal lines.
- We place marks along each line in 5 mm increments.
- Using a screwdriver, screw in screws at each mark at an angle of approximately 30°. In this case, the slope of each row should be opposite to the directional slope of the screws of the adjacent row. The length of the screws is chosen so that on the side opposite to screwing they protrude no more than 2 mm.
- We cut out an arched handle 350 mm long from the board and fasten it to the workpiece with self-tapping screws.
Important: the aerated concrete float (plane) can be painted with colorless varnish or white paint. Otherwise, marks will remain on the surface of the blocks.
Another method involves using metal files to make plane blades. The sequence of actions is for your attention.
- The board blank is marked with transverse parallel lines every 6-7 mm.
- Cuts are made along the lines with a depth equal to half the width of the files. In this case, half of the cuts are made at an angle in one direction (angle - about 30°), and the other half - at an angle in the opposite direction.
- Two-component epoxy glue is poured into the cuts and the files are inserted.
- The handle is screwed on.
After the glue has hardened, the plane can be used for its intended purpose.
Planer design
Planer design for aerated concrete blocks.
Externally, a plane for aerated concrete blocks looks like a construction trowel. It is a wooden body with a handle, into the base of which several pieces of a fine-toothed saw made of durable alloys are vertically embedded. These segments are placed in two opposite directions at an angle to each other, each segment consists of 5-6 toothed segments.
This design makes it possible to eliminate unevenness of the block by scraping and grinding its surface. The body of the plane can be made of plastic or wood - any sufficiently durable material, and the handle of the structure should be simply easy to grip. Sharpening of sharp parts is carried out using a triangular file.
The processing of an aerated concrete block with a plane is carried out parallel to the masonry level in one direction, away from you, with slight pressure. It is not recommended to do this work with other tools (jointers, semi-jointers and carpentry tools), as you can damage both the gas block and the tool itself.
How to make a plane for aerated concrete?
Installation of gas silicate blocks, like other building materials, includes a certain amount of tools. The construction of buildings is a labor-intensive and complex process that requires considerable effort and money.
Experienced builders have a full arsenal of tools, but as for novice workers or summer residents who want to equip a house with their own hands, it is more difficult for them in this regard.
Construction work involves the use of many different tools, which not everyone can afford to purchase. There is a way out - you can make the instrument yourself.
What is a plane needed for?
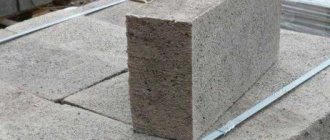
An aerated concrete planer (also called a grater) performs the function of leveling the protruding parts of aerated concrete blocks. The advantage of a planer is its ability to give the material a flat surface, which is especially important for subsequent stages of installation.
When in contact with wood, the plane performs the function of planing, cutting off the top layer, which is not suitable for aerated concrete. If gas silicate (aerated concrete) is used in the work, the plow must have a different design so that it can be used for grinding and scraping.
You cannot remove a large layer from the surface: such material is considered defective and it is prohibited to work with it.
In professional planers for aerated concrete, the design resembles a kitchen shredder with a construction grater, which allows you to scrape and sand the material at the same time.
Sometimes correction of the gas block is necessary.
Graters have different areas of application. The planer is used for planing surfaces; it is also used for chamfering and cutting grooves. In general, there are different types of graters:
- sherhebel;
- zenzubel and folded gobel;
- double plane with a false blade;
- semi-jointer;
- double jointer;
- small plane;
- bear
How to make it yourself?
To mount a plane on aerated concrete with your own hands, wooden and plastic materials are used. To make a tool from wood, take a block 0.5 cm thick and 11 cm wide.
The handle is also made of wood, and it is sanded well until it is smooth, so that later the remaining chips do not get into the leather when working. The blade is a file with a density of 500 kg/cub.m.
Next, the aerated concrete planer is glued together with a reliable adhesive.
DIY making
Creating a plane with your own hands requires a certain set of materials:
- regular board about 5 cm thick;
- elements of a carbide saw or wood saw (note that with this option you will need to constantly sharpen them);
- glue “Moment”.
http:
When creating a plane for planing aerated concrete, the following procedure should be followed. An ordinary board 300-400 mm long is taken, processed with a wood planer, and all edges and corners are rounded or cut off. Next, the cutting elements are marked. On one side of the board, notches are made in 5 parallel lines at the same distance from each other, using 40% of the board area. These lines should be positioned at an angle of 70º to the longitudinal axis of the board (slope to the right from the cross section). Markings are made in a similar way on the other side of the board (the other 40% of the area). So, the markings in the opposite halves of the board will face each other.
The final stage of creating a plane for aerated concrete will be screwing an easy-to-use handle onto the back of the board.
Using a jigsaw, you need to make slits along the marked lines. Their width should correspond to the saw blades. The cuts are made at a distance of 2-3 cm from the edge of the board on both sides. Next, the board is sanded with sandpaper, and the files are broken off into pieces of the same length that were made on the board and vertically inserted into the slots. The slots are pre-lubricated with glue, and excess glue is cleaned off. If necessary, the slots can be glued again if the first time was not good enough. The teeth of the saw should protrude approximately 5 mm above the surface of the board. They can be sharpened using a grinder or, conversely, their size can be increased. In any case, it is worth consulting with an expert.
Self-made device
Industrially produced aerated concrete planes are not always on sale. Yes, I also don’t want to spend a considerable amount of money, especially if this tool may no longer be needed. But such a device is available for self-production at home.
To do this you need:
- select or cut a board of the required size (30-40 cm) for the base;
- process the base with a plane, sharpen all sharp corners and edges;
- make markings for the cutting elements, which should be located at the same distance;
- make cuts using a jigsaw and coat them with adhesive solution;
- cutting strips are inserted into the slots.
After the glue has dried, you should check the reliability of the fastening of the cutting elements and remove any remaining glue.
It is worth understanding that the plane leaves behind a rough surface, and in most cases this is enough. But to give the blocks an ideal surface, treat them with a special sanding board.
Additional accessory
For those who do not yet have experience working with aerated concrete planes, you should make a simple additional device. It is designed to limit the penetration of cutting saws into the gas block material.
The essence of the work of the additional device is that wooden slats form guides along which the plane moves. Accordingly, the height of the slats creates a limitation on the deepening of the saw blades of the planer for the gas block.
http:
You can make this device like this: take two boards 2-3 cm thick, and their upper ends should be exemplary straight and, of course, perfectly polished. Next, the edges of the boards are overlapped with wooden blocks. Taking into account the additional length of the fastening, the length of the bar must exactly match the width of the gas block. The device is attached to the surface of the masonry wall so that the surface of the block coincides with the horizontal level of the block in the row.
Features of using planes for aerated concrete
An important advantage of laying aerated concrete with your own hands is the use of adhesive compositions that ensure a small thickness of the seam. If with large layers of mortar it is possible to level the plane of the row due to different indentations of individual masonry elements, then when using adhesive compositions this is not possible and all errors in the block dimensions accumulate when laying the row. This property of aerated concrete masonry necessitates leveling the blocks themselves.
In general, a plane is a tool for leveling a surface using the planing method. When processing wood, planing is carried out by cutting off a thin surface layer of the material. This method does not work for aerated concrete. It has a porous, inhomogeneous structure, so cutting off a thin layer will lead to tearing out inhomogeneities and significant surface unevenness. Sometimes it is possible to use a regular plane to level aerated concrete with minimal overhang of the cutting edge, but it quickly wears out and becomes unusable.
For high-quality surface treatment of aerated concrete blocks, it is necessary to combine the functions of scraper and grinding. This principle should be incorporated into a self-made aerated concrete plane.
Homemade design
To make a plane, it is necessary to incorporate the maximum available materials into the design. The easiest way is to make the body wooden. For these purposes, a board 40-50 mm thick and 10-12 cm wide is suitable. You can attach any handle that is available. If it has to be made, it is better to make it from a wooden board or block.
As the cutting elements of a plane for aerated concrete, you should use saws made of hard alloys. Wood saws can be used if foam concrete or aerated concrete with a density of no more than 500 kg/cubic meter will be processed.
To make a plane for gas blocks, you need to glue wood and metal together, as well as wood to wood (if necessary). Typically, Moment glue is recommended for such a connection. At the same time, any adhesive composition that can reliably glue metal will do.