April 23, 2019
2955
1 comment
Reading time: 4 min
The appearance of mold and mildew on the wooden parts of the structure is observed due to the proliferation of pathological microflora. A wooden house most often rots, starting from the corners, the space under the floor, and cracks in the walls. This is where the fungi and bacteria that cause mold are concentrated.
However, when a wooden house rots, it is necessary to first establish the cause of this manifestation. And only after its elimination can you be sure that the process will not repeat or worsen.
Wooden beam in concrete
Good afternoon, forum members. I am faced with the task of making a pine railing (100x100 pine beams) like a fence-type fence on the veranda, which is an integral part of the house.
But given that in several places it was not planned to erect brick columns, I will have to embed the support columns directly into the reinforced concrete slab, having previously hollowed out the corresponding holes for them. But I am tormented by vague doubts about the durability of wood, immersed in concrete and exposed to direct atmospheric influences, such as rain, sun, snow and wind (in general, everything that is possible in our southern latitudes). As for the external treatment, I have already decided it will be one layer of soil and two or three layers of Belinka. But the actual question is how to treat the lower part of the pillars, which will be walled up in concrete, in order to prolong their long-lasting life. 2MankoPavel We boil drying oil in a barrel, immerse the beam and soak it. All. Now you can put it in damp soil.
Mikhalych wrote: We boil drying oil in a barrel, immerse the beam and soak it. All. Now you can put it in damp soil.
One of the options. Transformer oil can also be used in a similar way. But in our area they are reinforced concrete. Power line poles are replaced with wooden ones. The latter are simply dug into the ground (and not attached to reinforced concrete stepsons). The pillars are treated with XM-11. In special conditions, of course, and not by simple spraying. But nonetheless.
Mikhalych wrote: We boil drying oil in a barrel, immerse the beam and soak it. All. Now you can put it in damp soil.
Can you give me some technological details?
e-babay wrote: Transformer oil can also be used in a similar way.
The mining will go to the pillars; wrap the end in roofing felt when pouring.
MankoPavel wrote: I will have to embed the support columns directly into the reinforced concrete slab
Why is it so difficult? It is enough to embed mortgages. type of rod, pipe, etc. Nothing is eternal. If you are going to hammer concrete, then this is stupidity; any treatment with drying oil, etc. will come out of the concrete and collect dirt, and the wood will dry out and dangle. But what if you want to beautifully, neatly lay tiles on concrete? Will you be cutting tiles to look like wood? You need to drill under the stud, “plant a post” and isolate the wood from the concrete with a gasket, for example a sheet of metal, or make a support from professional. pipes 100*100 with a height of 100-150mm. Although if you carefully drill a hole with a diamond drill. D80-100, then theoretically, why not?
In principle, I also had the same thoughts, embed an ordinary round pipe D 50 into concrete, and drill a hole of the same diameter with a depth of 150 mm in a wooden post with a feather, screw it all together with a couple of bolts and I’ll probably be happy, but I’m still confused by the reliability of such constructions with the possible support of an adult weighing 80 kg or more (we do not take into account the wife whose weight ranges up to 47
) As for cutting out ceramic tiles around the pillars, this is not a problem because the pillars are supposed to be placed only at the outer corners of the veranda, and for this you will only need to cut out a square corner from the tile.
MankoPavel wrote: but it still confuses the reliability of such a structure when it is possible to support an adult weighing 80 kg or more
A single post will certainly look unreliable, but it will also be connected by railings. The problem of rigidity is solved constructively. It is necessary that the railing does not end obliquely with the post. It is advisable to install the pillar in a corner. Or make a support scarf. The simplest option is an M12 rod pin at least through the post with a tightening from above.
To simplify the discussion of the issue, I am posting a fencing project
You need to fasten not the outer posts, but the entire lower beam. In this case, it would be nice to provide spacers that would raise it above the floor by at least a couple of cm. This will keep the timber dry.
Of course, the lower beam will be raised a few centimes from the floor to drain rainwater
So fasten it to the concrete with anchors and you don’t need to hammer anything.
Or maybe the embedded parts can be made from 4 corners protruding above the concrete? Or plates? At least it will be possible to rise from the concrete and moisture and anchor securely. But if the goal is to hide the metal completely, then a pipe is preferable.
mmda, I wouldn’t really like protruding metal
As for tying the mortgage, that’s correct. In addition to impregnation with xm-11 (as far as I understand, this is waste from the electrolytic sludge of galvanizing sites) can be impregnated with copper sulfate. After impregnation, be sure to dry or oil it so that the impregnation does not wash out. Another reliable way is to immerse the entire area of the log in a “cushion” of a mixture of freshly slaked lime and sand, this is exactly what was done at my dacha.
So, punch the beam through with a 300-gauge nail, and drill a hole in the concrete under the nail end. And install it, either on epoxy or on cement with liquid glass.
Then it’s better to attach the entire lower beam to regular anchors or to these as a last resort:
DSP007 wrote: In addition to impregnation with xm-11 (as far as I understand, this is waste from the electrolytic sludge of galvanizing sites) you can impregnate it with copper sulfate.
For reference: XM-11 is copper sulfate + sodium (or potassium) dichromate in a 1:1 ratio. Non-washable antiseptic.
serezhiki wrote: Or maybe the embedded parts can be made from 4 corners protruding above the concrete? Or plates? At least it will be possible to rise from the concrete and moisture and anchor securely. But if the goal is to hide the metal completely, then a pipe is preferable
No need to wall up the corner. You need to fill one (.) plate along the width of the column. The plane of the plate is perpendicular to the wall. Only needed for the rightmost column. Saw the post from below to the height of the plate, put it on the plate and tighten it to it with screws, self-tapping screws, etc.
The meaning of the idea: it won’t swing left and right (along the wall). But in the “to the wall-from the wall” plane, a steel plate will not work. At the same time, unlike the corner, it is easy to hide inside the post, but unlike the pins, it works better for bending in this plane.
The remaining elements do not bend in relation to concrete; it is enough to simply pull them to the concrete with anchors or anything else, without using walled up wood. The problem is only with the far right column and only with rigidity in one plane
see also
Comments 49
Larch as pillars - and for centuries
Larch is good, but we have 15/15 timber only fir and then to order. There isn't even a pine tree.
I can say it's awesome. I think you have plenty of metal. So I'd be out of it. It will be cheaper and most importantly stronger. Next, cover the racks with board 20 and that’s it
Be sure to soak the timber in Senezh, a hard-to-wash antiseptic (green) and can even be buried in the ground. Or creasote!
Fill type piles with reinforcement. Place a gazebo on it through roofing felt.
Weld a plate from the end to a square pipe. Pour the resulting glass into the concrete with the hole facing up, and insert a beam into it.
I did this: I drilled the soil to the required depth with a drill, and made a formwork 15 cm high above the surface of the earth, slightly larger than the size of the timber. I poured the concrete, and then laid metal plates in the concrete to attach the timber to them. It's been standing for three years now.
At my dacha, the outer support of the stairs stands on an asbestos pipe and is concreted in it, the support is treated with bitumen varnish. It’s already been 10 years and no matter what, there’s still no hint of rot.
How does wood behave in concrete?
The design of the floor is as follows: Wooden beams (100x100) were attached to the load-bearing walls (width between walls 4000) in increments of 600 on studs. The bottom of the beams was sheathed with a ceiling profile and GB slabs. Next, reinforcement D12 (at the bottom) and D10 (at the top of the beams in the cut grooves) was laid below and above the beams. After installing the supports, the whole thing was filled with a 15-centimeter layer of concrete, so that the wooden beams were completely “recessed” in the concrete.
This is what the ceiling looks like before pouring concrete (with installed water and sewerage pipes and corrugation for electricity): 2806280728082809
And like this after pouring the concrete: 2810
Two questions: why? Why?
“Why?”: It would be possible to use a channel, but I didn’t want to come up with a way to attach GB plates to the iron. “Why?”: Well, since I chose arbolite slabs (a mixture of wood and cement) in the “permanent formwork” technology, why not use this “mixture” in floors as well - it turns out much cheaper than with iron channels. and easier to manufacture.
Wood in concrete behaves poorly for two reasons:
1. wood becomes moist and rots in the absence of ventilation. 2. the wood becomes moisturized and increases in volume, tearing the concrete (the wood swells and can tear the rock).
Theoretically, it would be possible to take heat-treated wood and tightly roll it in varnish. But this is a perversion: technology for technology's sake.
geronimio, thanks for the constructive comments, but.
1. There are certain conditions for wood to rot: – humidity is more than 20% and higher, – the presence of oxygen is mandatory (wood does not rot in water), – positive temperature from 5 to 45°. If the temperature always satisfies the conditions of rotting, then it will be difficult to gain 20% from the air, being “recessed” in concrete (I’m not going to build a pool on such floors). and air access through the concrete will be difficult. 2. I agree. “The pieces of wood swell and are capable of tearing the rock,” but to do this, this piece of wood needs to be “watered” every two hours. And who will “water” the beams filled with concrete?
Self-production
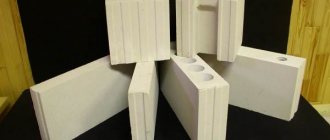
There are more and more enterprises producing wood concrete in the country, and it is not difficult to buy these products. However, there will always be craftsmen who prefer to do everything with their own hands. If you have all the necessary materials available, why not give it a try? There are several manufacturing technologies that differ in structural composition and molding technology. Description of one of them:
- The wood chips must be thoroughly cleaned of dust and dirt, dried or treated with silicate glue. The drying method is usually applied to softwood, which then becomes plastic. Treatment with liquid glass (silicate glue) can significantly reduce drying time and is applied to many types of wood, but the material becomes more fragile.
- Additionally, it is recommended to use fine sand, since it is quite difficult to maintain the correct size of sawdust at home. If wood-concrete blocks will be used as load-bearing blocks, fine crushed stone up to 10 mm can be used instead of sand.
- Mixing all the components will have to be done manually, because concrete mixers do not cope well with such work. Initially, it is recommended to treat the sawdust with lime mortar, then mix it with Portland cement until completely enveloped and gradually add sand and water. Water should not ooze out of the resulting mixture, and the lump should not crumble.
- In order for the mass to acquire a certain shape, formworks of the desired shape must be made, which must first be treated with machine oil.
- The parts should be removed from the formwork at least after 24 hours (at normal air temperatures). After removal, they harden for a few more days, and then are sent to dry under cover for two weeks.
And yet a tree
Over time, the wooden structures surrounding a person become so familiar that they begin to be taken for granted. But when creaks begin to be heard or stability is disrupted, the object becomes the center of attention and the search begins for a means that stops the wood from rotting and destroys the bugs.
An example of not the best wood care
The question quite logically arises: how advisable is it to use a material that is susceptible to the destructive effects of rot? Perhaps synthetics and alloys are more stable, but wooden benches, elegant pergolas, cozy gazebos and various kinds of fences look so nice and natural in the garden.
Fans of “natural products” should know which wood does not rot in water and can be successfully used in open spaces:
larch, especially its mature wood, which, for example, has successfully supported Venice for many years;
Larch resists rotting very well
- oak, which, thanks to till - substances in the core of the trunk, miraculously resists rot;
- aspen - in addition to being resistant to moisture, it is light and durable;
- sequoia, which successfully resists not only rot, but also fire.
It is no secret that, due to lack of funds, it is often not varietal material that is used, but what is at hand, and not everyone can afford to install, for example, a larch fence. That is why it is important to find what to impregnate wood from rotting, so that forced savings do not lead to a thoughtless collapse of your expectations.
The photo shows a real arsenal for protecting wood
In Russia, it seems, log houses, houses made of beams or rounded logs will never lose their relevance as environmentally friendly and relatively inexpensive homes. Alas, incompetence or simple greed forces manufacturers to violate wood processing technology, putting the future structure in danger.
In hot countries, the main enemy of wooden buildings is termites, which can instantly turn a house into a pile of memories. In our climate with hot summers and damp autumns, spring and often winter, this danger is posed by moisture, which contributes to the slow “decomposition” of the material. Accordingly, protecting wooden structures from rotting and fire becomes a priority.
Methods of protection
It is much easier to prevent the appearance of rot than to deal with its manifestations later.
In order to ensure that there are no rotting processes during operation, a few simple rules are followed:
- choose the optimal time for procurement of raw materials;
- Only healthy trees are used;
Note! In addition to its appearance, tree disease also affects the concentration of various substances in the wood. So it is better to use it only for firewood.
- natural drying in ventilated stacks in a warehouse takes a long time and largely depends on environmental conditions. Then you still have to think about how to protect the wood from rotting, but the drying conditions are very important;
Tree trunks are dried before further processing.
- Chamber drying or gas-steam drying is carried out in special rooms and allows you to set the necessary humidity parameters.
How to impregnate wood
The design of the finished building must provide for ventilation of all wooden elements and eliminate the possibility of condensation. It is these areas that will subsequently become the starting points for the spread of infection. Compliance with the mentioned conditions does not cancel the mandatory disinfection of finished wooden elements.
In such conditions, no wood will last long
Note! If the finished and treated part has undergone additional drilling/sawing, the protective substance should be reapplied to this area.
The range of industrial preparations always allows you to choose what to impregnate wood against rotting and include the following substances:
- oil based;
- water soluble.
Note! Some antiseptics from the group of water-repellent varnishes have a strong odor and are toxic, so they are used only for external elements. Impregnating wood from rotting with such substances inside the house is strictly prohibited.
As for specific products, we can mention, for example, Pinotex Impra; this liquid guarantees reliable protection against the appearance of mold and mildew on the surface of the wood. By itself, it does not stain the wood, but only reveals the texture of the wood, so if staining is not planned, then this is a good choice.
Professional in wood protection
If the surface will be painted, but have not yet decided what to impregnate the wood with to prevent it from rotting, then you can turn your attention to antiseptics, which can also act as a primer for paint. An example is Senezh Ecobio. When processing wood in 2-3 layers, protection against rotting will be provided for 20 years.
Note! When processing wood with your own hands, it is not soaked through, but 5-6 mm is enough for the antiseptic to penetrate. The ends should be treated especially carefully; these are the places that are most vulnerable to wood-loving insects.
The ends are the most vulnerable place; when processing, they need to be given special attention
There are also solutions that perform two functions at once - in addition to protection from insects and moisture, they also provide protection from fire, that is, they are antipyretics. In addition to solutions, antipyretics can also be produced in the form of special coatings and plaster solutions (they can be used in cases where it is not necessary to preserve the appearance of the wood).
Folk remedies for protecting wood
Sometimes situations arise when it is not possible to use purchased wood protection products. For example, the work is carried out in the country and there is simply no antiseptic on hand, and the trip to the store is too long.
In such situations, several ways to protect a tree using improvised means will come to the rescue, however, not all of them are equally useful:
- Sometimes you can come across advice to concrete wooden pillars; many people don’t even have doubts about whether the wood in the concrete is rotting or not. In fact, this option is even worse than just a pole dug into the ground, the fact is that the ground can dry out relatively quickly, but the concrete in the ground will always be damp, so in this way the life of the wooden pole will only be shortened;
- To protect the underground part of the pillar, you can use homemade built-up waterproofing. The instruction in this case is that the lower part of the beam is wrapped in a sheet of roofing material and then heated with a construction hairdryer until a specific smell appears;
- builders still use homemade solutions based on flour, iron sulfate, slaked lime, table salt (mass proportions 0.8: 1.5: 1.6: 0.4) this whole mixture must be dissolved in 10 liters of water to the consistency of a paste . Protection for 10-15 years is guaranteed;
- underground parts can be protected using waste transformer (or automobile) oil. The price of such oil will be a pittance, and you can negotiate the purchase at any service station;
Waterproofness and frost resistance of concrete
Waterproof
. Depending on the ability to pass liquid (under the influence of hydrostatic pressure or capillary forces), concrete can be of four grades: W2, W4, W6, W8. The higher the brand, the lower this ability. That is, W8 practically does not allow water to pass through. It is rational to use such concrete if the foundation is placed on soil with a high groundwater level or high humidity.
The level of water resistance can be changed by varying the ratio of components in the solution, as well as by choosing a specific brand of cement. For example, using hydrophobic or pozzolanic Portland cement, you can increase this indicator. There is a special brand of cement (“NC”), which is used to create concrete that weakly absorbs moisture, which simplifies the subsequent waterproofing of the foundation and protects it from the effects of groundwater.
Frost resistance
— the ability of hardened concrete to withstand multiple stages of freezing/thawing in a saturated state. This indicator is especially important when constructing a building in cold climatic conditions (severe or long winters). According to this indicator, concrete can be of the following grades: F35, F50, F75, F100, F150, F200. The higher the number, the more defrosting/thawing cycles the solution can withstand.
In this case, higher grades are used in more “extreme” conditions of foundation construction (the higher the protection from groundwater and precipitation, the lower the grade you can choose). To create frost-resistant concrete, a special grade of cement “PL” is used.
It is also worth mentioning the two most common brands of cement, which make it possible to obtain concrete with certain properties:
- "B"
- fast-hardening. Used to reduce construction time: it allows you to reduce the hardening time of the solution at individual stages. - "SS"
- sulfate-resistant. It is used if there are aggressive chemicals in the soil.
How to eliminate the effects of wood rotting
Despite all the advice and recommendations, people often think about protecting wood only after part of the wooden structure has already rotted. In some cases, the situation can still be corrected:
- There are often situations when the corner of a log house is rotten; the problem of what to do if the corner of a wooden house is rotten can be perplexing. In this case, most likely, a piece of the foundation has been damaged, it will have to be replaced, and the main difficulty is that the house will have to be raised, this is a rather labor-intensive task;
Note! When lifting the house, it warps a little, this will have a detrimental effect on the stove (if there is one, of course). Therefore, before lifting, you will have to dismantle the floor and ceiling of the stove and pipe, respectively.
- If you had to check from your own experience whether wood rots in concrete, then you cannot do without replacing the concrete and wooden parts. In general, it is not the best idea to combine such different materials. It is recommended to make the entire underground part from concrete, and the above-ground part from wood, this will be the best option;
- As for rotten boards on the walls of the house, it all depends on the degree of damage. If the process is localized at an early stage, then you can simply dry the problem area and then thoroughly saturate it with a solution that restores the wood texture;
- if the structure is load-bearing (for example, the rafter system is rotten), then part of it may need to be replaced. Still, the rotten area becomes much less durable.
An example of rotten rafters
In general, a rotten section of wood is a source of constant headache. Despite all the measures taken to restore and protect it, it will still remain “at risk.” Therefore, it is better not to skimp on protection, especially since the question of how to paint wood so as not to rot is not so complicated; a combination of a primer (antiseptic) + several layers of paint will do.
How to avoid destruction of concrete from sulfuric acid?
Atmospheric and chemical exposure to concrete pavement has a detrimental effect on its condition. Damage to concrete from sulfuric acid can be avoided by finding ways to prevent its precursor gas from adsorption into the concrete. Through his research, Matthew Lasich discovered that protecting concrete infrastructure from corrosive effects would require pre-treatment to target adsorption sites in the cement hydrate where most hydrogen sulfide molecules attach. However, this approach may be difficult due to their widespread distribution.
The porous structure makes concrete vulnerable to natural gas adsorption. In their study, the authors perform nanoscale analysis based on Monte Carlo simulations to simulate the migration of gas molecules into the cement hydrate structure. Their modeling suggests that good cement hydrate uptake requires a certain combination of molecular size and surface area.
Concrete screed on a wooden floor: if it’s not possible, but it’s really necessary
Making a screed using concrete is the most common type of base for any finishing coating. The material is cheap and durable and easy to work with. Concrete screed on a wooden floor is a special case. Experts do not recommend leveling wooden flooring with mortar.
Wood is a living and moving material, which concrete does not like at all. Accepting the situation that it is necessary to fill a wooden floor with concrete, let’s consider how to “reconcile” these building materials, what mistakes should be avoided, and how to make a screed so that it lasts as long as possible.
Specifics of the wooden base
The above materials behave completely differently. The situation when a wooden floor is installed on top of a concrete screed is quite practical. Concrete, after gaining maximum strength, becomes a static base, and wood is a living and breathing material throughout its entire period of operation.
Attention! Wooden flooring is especially active in the first 4 years. During this period, you should not even think about filling the boards with concrete.
Additional factors affecting wood are fluctuations in temperature and humidity indoors. Boards can shrink or increase in volume, fluctuate in height and even change linearity.
The topic of a separate article could be the case when wood is poured to create warm floors. In such a situation, the number of variables increases significantly. Based on the properties of wood, the first important conclusion can be drawn:
The screed, which is installed on a wooden base, must be autonomous. It is not recommended that the materials come into contact during operation, otherwise the properties of each layer may harm each other.
Preparation for pouring
The structure of a wooden floor can be different. If the boards are stuffed onto logs fixed to a concrete base, then don’t be lazy: remove the wood and fill it with a rough screed. And you will get a more durable floor, and there will be no problems in the future.
If you have boards as a base, then it is also better to exclude the logs and finishing layer from the floor pie structure - this will reduce the mobility of the base. Before preparation, baseboards and other decorative elements are removed.
For further work, the plank base should be prepared:
- Secure all playing elements; the flooring should become as rigid as possible.
- In case of deflection of the flooring, it should be strengthened with transverse guides.
- The floor should not have differences in height.
- Before pouring, all damaged elements should be replaced.
Concrete is characterized by increased weight, so you should gain sufficient load-bearing capacity of the joists, increasing their number, if necessary. Ideally, the step between the beams should be 35 cm + - 5 cm.
Repaired, replaced, secured, and the next stage will be processing. Choose primers with antibacterial and waterproofing properties, this way you will prevent the process of destruction of structural elements.
Waterproofing
It is this event that will allow us to isolate materials from each other. Therefore, durable polyethylene film of maximum width is selected. It is better to avoid gluing the seams on the poured surface.
Important! When laying the film, be careful: breaks and punctures are unacceptable.
The film is covered with an overlap on the wall, the entire perimeter is taped with damper tape. As a result, when pouring, you will get a floating concrete slab that does not come into contact with the material of the base and walls. In such a situation, the tree can continue to live actively, and the concrete will be at rest - which means it will not crack and will maintain its linearity.
Why film?
This question seems very important, because the tree under the film will begin to rot and rot. When working with such structures, other waterproofing materials are usually used, for example, glassine, roofing felt or something impregnated with bitumen.
The film is chosen not for wood, but for concrete. The solution does not adhere to polyethylene at all.
By laying polyethylene between wood and concrete, we get a triple floor pie in which each layer is absolutely autonomous:
- Both the wood base and the rough screed can move along the insulation;
- concrete will not pull the film along with it and will not tear it;
- Integral polyethylene will prevent the wood from drawing moisture from the concrete.
Important! To minimize the damage caused by polyethylene to the boards, treat them with a waterproofing primer.
Laying on joists
This is the most popular technology for arranging a wooden floor, the advantage of which is the camouflage of communications under the floor. Their disadvantage: since the thickness of the base is 10 cm, it is not recommended to lay such a floor in rooms with low ceilings.
The boards are attached to wooden joists, which are beams, beams or thick boards standing on an edge.
Installation of a wooden floor on logs is applicable if the thickness of the boards is at least 20 mm.
The logs are placed on the base perpendicular to the rays of light penetrating from the window, following the step:
- Board thickness less than 35 mm – 0.6 m;
- 35-40 mm – 0.8 m;
- More than 40 mm – 1 m.
The sequence of actions when arranging a wooden floor on joists is as follows:
- Use screws and dowels to secure the joists to the concrete base. Recess their caps by a few millimeters;
- Level the joists. The deviation should not exceed 2 mm for every two meters;
- lay wood-fiber material along the walls for sound insulation;
- fill the niches between the joists with materials for sound and heat insulation (expanded clay, mineral wool, polystyrene foam, etc.);
- secure the floorboards with self-tapping screws.
Laying is done in the direction of the light rays, starting from the wall. In this case, it is necessary to leave a seam 0.7-1 cm wide in case of expansion as the temperature rises.
Technology for attaching floorboards to joists
The joints of the boards should be located in the middle of the joists.
A tongue-and-groove board has a groove on one edge, and a tongue and groove on the other side, this promotes rigid fastening of adjacent boards. It is advisable to drill holes for self-tapping screws in advance and obliquely, which will prevent cracking of the boards. When all the boards are laid, it’s time for the baseboards.
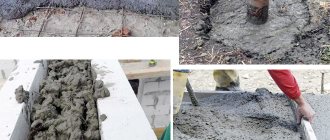
Pouring technology
After we have figured out the basic principle of how a concrete screed should be installed on a wooden floor, we can begin pouring. Apply an arbitrary zero level to the walls around the perimeter.
This is easy to do using any building level. It will be more convenient if the zero level is marked within 0.4 - 0.7 m from the floor. From the line we put the same distance down along the entire perimeter and make marks. This will be the height of the screed.
When choosing the height of the concrete screed, consider the following parameters:
Material advantages
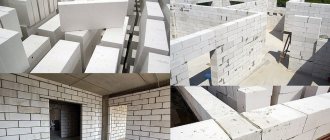
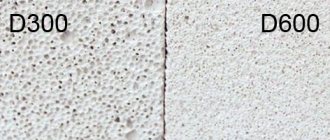
Containing wood chips and Portland cement, wood concrete has some advantages over competitive building materials .
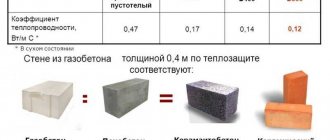
- Low thermal conductivity properties lead to a significant reduction in construction material costs. According to manufacturers, houses made of wood concrete 30 cm thick are in no way inferior to two-meter brickwork.
- Excellent sound insulation, superior to reinforced concrete and brick walls.
- The material does not contain harmful substances and does not rot or decompose. In addition, wood concrete is vapor permeable, which does not lead to the formation of condensation on its surface.
- Wood concrete can withstand high temperatures and hardly burns, unlike expanded polystyrene.
- The light weight of the material is convenient for transportation and construction.
- Wood concrete perfectly combines strength and ductility. It does not collapse or crack under mechanical stress, and perfectly restores its shape after removing the load.
Another important quality of building materials is the availability of processing. Parts of the material can be easily cut and adjusted to the desired area, and the walls can be plastered without reinforced mesh. In addition, the walls are easy to drill, you can screw screws into them and hammer nails.