What is stamped concrete
Printed (decorative) concrete is painted concrete onto which, even before the solution hardens, a relief imprint is applied that imitates the texture of natural wood, stone, brick, tile, etc.
Stamped concrete is quite common because it is beautiful to look at and practical.
Due to its availability, durability and attractive appearance, pressed concrete has a wide range of applications. Today, concrete decorative surfaces are used for finishing floors and walls of both residential premises and adjacent areas (decoration of areas near swimming pools, garden paths, finishing of gazebos), as well as industrial facilities, shopping, entertainment and exhibition complexes, internal and external areas of gas stations, airports, train stations, etc.
Decorative concrete is also indispensable for restoration work on ancient surfaces, when it is impossible to find an identical material: with the help of special forms and colors, you can easily and quickly obtain a product that imitates ancient masonry.
Stamped concrete: advantages
In addition to wide application possibilities and beautiful appearance, decorative concrete coating has many other advantages related to its performance characteristics.
The advantage of stamped concrete is that it can easily withstand heavy loads
So, the main advantages of stamped concrete include:
- The ability of the material to withstand high loads. Printed concrete for domestic use can withstand a load of 400-500 kg per cubic meter.
- Resistance of the coating to moisture (corrosion), exposure to UV radiation.
- Concrete resistance to sudden changes in temperature (up to -40 to +40 degrees Celsius).
- Frost resistance. The coating can easily withstand more than 300 seasons.
- The ability of the coating to withstand the effects of acid-base and oil industry products, fats without changing the appearance.
- Durability. The service life of the concrete base is at least 25 years.
At the same time, decorative concrete has a rich color palette and a wide selection of textures (if necessary, a textured print in the form of plants, graphic images, or complex designs can be applied to the coating).
What types of stamps are there for concrete?
The relief pattern is applied to concrete using special stamps. It is thanks to them that you can get a surface that imitates wood, masonry, or paving stones. At the same time, the drawing can be anything.
You can get acquainted with various options for stamps for concrete in specialized stores
Today, to obtain high-quality impressions on concrete, the following types of stamps are used:
- Silicone (polyurethane) are flexible stamps with which you can create a texture of any complexity. Their advantages include long service life. In addition, silicone stamps do not need to be lubricated with oil: the formliner is easily removed without any lubricant.
- Plastic are rigid stamps that are distinguished by their ability to clearly and accurately convey a geometric shape. Most often, they are used to imitate paving stones and brickwork. You can work with rigid stamps both on the floor and on a vertical surface.
Separately, there is a concrete stencil - a form that represents a contour for pouring concrete. Working with such a stencil is very simple: lay it on the ground, then fill it with a solution, wait for it to harden and remove it, rearranging it further. Thus, you can make a garden path, decorate a porch, the floor of a gazebo or terrace.
You can purchase ready-made molds in many construction stores and on the Internet (for example, in the Damascus online store). In addition, products can be made independently from available materials.
Buy polyurethane stamps for concrete and plaster
Polyurethane stamps for concrete and plasters Read how to use them on the pages:
Do-it-yourself decorative concrete Do-it-yourself top concrete Painting decorative concrete Printing on gypsum plaster Finishing stoves and fireplaces using the “Decorative concrete” technology
Polyurethane stamps
for concrete
and plasters are used in the technological process of manufacturing decorative concrete on both vertical and horizontal surfaces, top concrete, when applying gypsum and cement plasters and putties to the surfaces.
Buy a stamp for concrete and plaster
You can see all the stamps for concrete and plasters, new items and much more in our online store Cheap and cheerful. To go to the store, click on the image below.
Sh stamps for concrete
and plasters, which you can buy in the “Cheap and Cheap” store, are of excellent quality, as they are made of high-strength two-component polyurethane Duramould ET 45A made in England and its analogue Eracast ER45A and are designed for stamping on both concrete and cement and gypsum plasters. Service life is 2-3 years with daily use.
Technical characteristics of Duramould ET45A: it is a polyurethane elastomer with a high degree of elasticity:
- 1000% — (not less) elongation at break;
- 45 - Shore hardness
It is highly resistant to moisture and is designed for the production of any shape, including shapes with negative angles. Molds made from Duramould ET45A polyurethane are superior to many similar products in the number of concrete products cast into them.
Manufacturer: Dow Corning. Country of origin: Great Britain.
It is used for the manufacture of molds for the production of paving slabs, and artificial stone, facade tiles, bricks, enclosing structures, staircases, monuments, window sills, building blocks, small architectural forms.
Stamps for concrete
and plasters manufacturer Kamform will provide consumers with high quality pressing, embossing, stamping on concrete, cement and gypsum plasters, putties and adhesives produced on both horizontal and vertical surfaces.
Stamps for concrete and plasters meet all the necessary requirements: High resistance to abrasive wear. High resistance to alkaline solutions. High tear resistance. Elasticity. High number of work cycles.
Stamps for concrete and plasters are made in Ukraine, but are sent all over the world, the price for delivery of one stamp, for example, to Russia will cost the buyer approximately $12-15 per piece, this is several times cheaper compared to the prices for the product and delivery of stamps and skins from American producers. Air delivery time is up to two weeks. It takes 1-2 days to produce one unit of goods, but on a first-come, first-served basis. Therefore, citizens of Russia and neighboring countries, when ordering goods (usually via e-mail or by phone specified in Contacts), need to take into account the production and delivery time (2-3 weeks) before starting work on stamping concrete or gypsum surfaces. More details on how to buy our stamps for concrete, as well as delivery information, can be found on the Payment and Delivery page
DIY decorative concrete
Stamped, decorative concrete, due to its high performance indicators and attractive appearance, is an ideal solution for decorating the backyard of a private house or cottage. You can order the laying of paths using decorative concrete from specialized companies, or you can save money and make artistic concrete without professional help, with your own hands. To complete the work, you will need a solution, a stamp or stencil, and a tool (building level, fasteners for the stencil, trowels for decorative concrete).
It is quite possible to make decorative concrete yourself, the main thing is to prepare all the necessary materials and tools for the work
The technology for creating relief prints includes the following steps:
- Preparing the base. In order to obtain a high-quality concrete coating, a layer of soil 100 mm high is removed from the area to be poured. After that, the formwork of the desired shape is installed and the ground is covered with crushed stone.
- Pouring the mixture. Depending on the type of stamps, concrete is poured into a stencil or laid out on crushed stone. To ensure that the surface is level, use a building level.
- Decoration. To obtain an attractive wood or stone surface, concrete is coated with bulk dyes. To consolidate the result, use a colored hardener (to give the surface a rich color, a plaster or “wet stone” effect, use a special varnish for stone and concrete, which can be ordered on the Damascus website).
- Seal. If a stencil was not used to create the relief, then the design is applied to a flat concrete surface using stamps.
- Cleaning the coating. The relief surface is washed after 2-3 days with a solution of hydrochloric acid.
- Applying a protective UV and moisture-resistant layer (most often an acrylic fixer is used for this).
This way you can create high-quality, attractive stamped concrete that will last for decades. The covering design option depends on the landscape design of the site, the decoration of the house, and the personal tastes of the apartment owner.
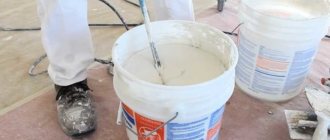
Dry mix for preparing pressed concrete can be purchased at any building materials store (from budget options, you can choose Flex Concrete brand material), or you can prepare it yourself.
How to make a stamp with your own hands
You need to take the cheapest linoleum, smooth, without texture (or with minimal texture) and preferably dense. You can buy a piece of special artistic linoleum for linocuts at an art store. I like this one the most for its structure, but when I need to cut something in large quantities, I use the most ordinary one.
You need to apply a pattern to the linoleum. The easiest way is to redraw with a pencil or pen directly on the linoleum, in a mirror image. But, when it comes to accurately transferring the design, it is better to print the layout in the required size on a laser printer (an inkjet will not work) and transfer the image to the linoleum using an iron.
Attention! When you apply a drawing this way, you don’t need to mirror it!
We ironed it and see what happened.
Now let's cut it. Let's go along the contour of the ampersand with a stationery knife, and along large areas with pencil erasers, which you can do without if the work is small.
Tip : If the linoleum is too soft to cut, you can put it in the freezer for a while. Conversely, if the material is difficult to cut, it is better to heat it on a radiator or in warm water.
We cut out the letter and remove the excess material around the edges. We try to level the surface in large areas.
Next, glue the linoleum to the wooden base (children's wooden cube) using good glue.
Now you need to make a test print and trim off any flaws, if any. I also lightly go over the fine-grained sandpaper to even out the surface of the stamp.
Can be printed with regular water-based ink or acrylic. The main thing is that immediately after printing, clean the stamp from any remaining paint in warm water (if oil, then with solvent or turpentine) and leave it to dry naturally (not on a battery!).
With this simple method you can create a completely unique design.
But it’s worth remembering: the larger the board, the harder you need to press so that the material absorbs the paint. Sometimes this can no longer be done by hand. For example, the A3 size print on a T-shirt shown in the photo was already printed using an etching press. Small stamps can be tapped with a wooden hammer to obtain a perfect impression.
How to make printed concrete: technology and recipe
The mixture for the production of decorative concrete includes sand and crushed stone, Portland cement, and a plasticizer. An important ingredient is polypropylene fiber, which increases the service life of the relief coating and prevents it from cracking and chipping. The ingredient is taken in an amount of 600 grams per cubic meter of solution.
When producing decorative concrete, special attention should be paid to the choice of plasticizer
For the production of decorative printed concrete, it is better to choose Portland cement grades M400 and M500/D20, which are moisture and frost resistant and can withstand loads of 400 and 500 kg per cubic meter.
What is stamped concrete? How to make it yourself
Modern technology of stamped decorative concrete makes it possible to obtain a unique durable coating on surfaces such as gypsum, plaster, OSB, brick, cement screed. This method consists of applying a special solution to the building structure, leveling it and applying a special shape that gives the desired texture. In order to obtain a high-quality and clear imprint, a plasticizer and other components are added to the concrete, after which the surface is treated with hydrophobic or silicate impregnations. Without exception, the entire stamping process is easy to carry out yourself, it is only important to comply with the requirements of the technology: prepare the base, evenly apply the hardener and separator, firmly attach the forms, wash the concrete and coat it with a protective varnish. The matrices are used repeatedly; to speed up work, they are sold as a set.
Features and advantages of the technology
Creating stamped or printed concrete requires a more flexible solution than normal. For this purpose, a colored hardener and separating components are distributed over the most leveled surface, most often in the form of powders. After a certain period of time, the consistency begins to resemble plasticine and does not stick to hands and forms. To create the required relief, ready-made stamps are used, the inner side of which imitates brickwork, natural stone, wood, plant patterns or aged surfaces. Many forms are made by pouring onto natural materials, which allows you to obtain spectacular and most natural textures.
Stamped concrete technology is simple, but at some stages you must act very quickly. The process also requires accuracy and certain skills in working with building mixtures; errors are difficult to eliminate; at the time of embossing, great attention is paid to the boundaries between the stamps being laid. It is important to choose the right interval for applying and removing the mold, it takes effort to get a clear print. It is advisable to use compaction tools and more expensive, but convenient stamps with grooves and handles (costing from 3,500 rubles per piece, a set - from 7,000). The finished surface completely hardens only after a day, but it is better to eliminate embossing defects immediately after removing adjacent forms.
Benefits include:
- Durability and strength of the coating.
- Resistance to ultraviolet radiation, pressure and temperature changes, and external aggressive influences.
- Unique texture, wide range of stamps and colors.
- Affordable cost of the material, concrete is several times cheaper than tiles or decorative stone.
- Environmentally friendly and easy to use.
- Anti-slip properties.
- Easy to install, you can do all the work yourself.
Roll stencil
It is a canvas with a pattern cut into it. The thickness depends on the relief of the applied ornament: from a millimeter and thicker. The manufacturing material must be strong and dense to avoid tearing during dismantling.
Purpose : used for decorative finishing of walls, floor cement screed and concrete paths. The basement and ebb of the cottage decorated in this way looks very good.
Preparation . It’s quite simple to do, but it will require some time and diligence:
- The canvas can be: cardboard, plastic, linoleum without insulation or any other material that does not stretch much. You need to put an image on it that will be reproduced on a wall or sidewalk.
- Imitation brick is a frequently used option. The contours of the side end of the brick are sequentially drawn one after another, as in masonry, leaving a distance of approximately 1 centimeter between them. To achieve greater realism, rectangles are depicted in an inaccurate geometric shape.
- Then the stencils are cut out. A stationery knife with replaceable blades will do this well.
You can also make any images: stars, flowers, animal silhouettes, letters, plant leaves. The main thing is that the elements do not fit closely.
Application work is carried out in several ways.
First way:
- A stencil is attached to the prepared wall or path, which is plastered flush with the canvas.
- After drying, the stencil is removed, leaving a convex ornament.
- Then painting is carried out: you can initially apply colored, decorative plaster or a small “fur coat”. For paths, it is better to use a mixture of tile adhesive and hard stone chips (marble or granite).
Second way:
- The concrete screed is poured.
- A stencil is placed on top and pressed in with a roller.
- It is removed, as in the first case, after drying: there is no need to wait 3 days until the concrete fully hardens.
- The surface is then brushed to remove nicks and washed. The surface is ready for treatment with hardener and varnish.
Range
Two types of stamps are used for decorative concrete and plaster:
- Flexible polyurethane (silicone), allowing you to create a texture of any complexity (down to the smallest detail) and can be easily removed.
- Plastic, with high rigidity, for sidewalks or paving stones, strictly conveying the geometric shape.
All stamps have different degrees of hardness and are not afraid of alkaline influences. The first variety has more advantages; with proper care, they last a long time and do not lose their original shape, and do not require pre-treatment or lubrication with oils. But the denser the stamp, the clearer the relief pattern is obtained; it is more difficult to work with too soft ones. Polyurethane matrices with a hardness of at least 80 units have good reviews. according to Shore.
The process of creating stamped concrete with your own hands occurs in the following sequence:
- Preparation of the base, reinforcement and pouring of the site.
- Uniform distribution of color hardener.
- Application of release agent.
- Stamping concrete.
- Elimination of defects, cutting of shrinkage seams.
- Flushing.
- Application of a fixing composition.
Preparing the concrete base
The area is marked using pegs and a cord; it is advisable to provide boundaries, taking into account the placement of stamps, including corner elements. Next, the process occurs in the usual sequence: selecting the soil, filling and compacting crushed stone, laying the formwork, reinforcement (the mesh is raised 2-3 cm above the ground level), mixing and pouring the solution. This type of construction work requires concrete with a strength of at least M350. The horizontal level must be checked, the maximum possible evenness and uniformity of the surface is achieved, the top layer is smoothed with a trowel.
1. Use of powder formulations.
The colored hardener is applied to fresh concrete in two layers, with an interval of 5–10 minutes. This is a powder mixture of tinting pigments, astringent modifier, ground particles of quartz, granite and pure river sand. This additive gives the concrete color, strength and density; it is distributed as uniformly as possible, in small portions, from a height of 1–1.2 m. The second layer is needed to achieve uniform coloring; after spreading the powder, the entire surface is leveled with a steel trowel.
The next step is to apply a release agent to prevent the stamps from sticking to the concrete. This substance (powder or special liquid compositions) also serves as an additional dye, significantly increasing the decorative effect of the coating. It is recommended not to scatter it with your hands, but to apply it using a wide brush with a long handle (shake at the same level). At the end of this stage, the corners of the site are lightly sanded.
The process begins after the concrete has acquired the required plasticity; it should bend under your fingers by 5–6 cm, but not stick to your hands. When the correct consistency is achieved, the stamp will fully support the weight of one person, but will not sink into the solution. The forms are stacked one by one; for ease of use of the sets, they are often numbered. To work with vertical surfaces, the easiest way is to order and buy a polyurethane stamp with medium hardness; to prevent concrete from flowing down, shallow horizontal marks are made on the wall with a spatula. Unlike hard plastic stamps, silicone stamps are not lubricated with any oils. For better compaction, a vibrating screed is applied or passed over them from above. After stamping, the surface is left alone for a day until completely hardened.
3. Final processing.
First of all, the quality of the joints is checked; in case of displacement, the defects are smoothed out with a roller or, conversely, eliminated with a spatula. To prevent the formation of cracks, shrinkage seams are provided (a cutter or grinder is used). Next, the hardened surface is washed: first with clean water, then with a solution of hydrochloric acid (to create stains). At this stage, the pores of the stamped concrete are opened and prepared for sealant treatment. Every other day, a varnish or silicate impregnation with hydrophobic properties is applied to the surface; it enhances the saturation and shine, simplifies the care of concrete and additionally protects it from aggressive influences and cracks. For high-quality protection, at least 2 layers of sealant are required; you can start using it only after it has completely dried.
Matrices for printed concrete
In order to prepare stamped concrete with your own hands, you need to stock up on convenient and durable stamps (matrices). Matrices are the main equipment used to create artistic design for a printed surface (see photo).
Stamps for concrete
Therefore, in order to obtain a high-quality coating, a number of necessary requirements are imposed on the material from which the stamps are made:
- resistance to mechanical shock;
- tensile-compressive strength;
- wear resistance.
Polyurethane stamps for concrete
The most common materials for the manufacture of matrices are aluminum alloys and polyurethane, which have all of the above properties. Most often, polyurethane stamps for concrete are used for the manufacture of printed coatings, which allow the relief structure to be most accurately transferred to the surface of the coating.
In some cases, you can make stamps for concrete with your own hands, but for this you need to have professional skills - the ability to use a welding machine and cutting power tools.
DIY stamp
The price of such equipment will be significantly lower, since such matrices can be made from auxiliary materials.
Analysis of the technology for creating printed (stamped) concrete
Increasingly, technologies are appearing in construction that can create works of art from familiar coatings and materials. Such a transformation is possible even with such an ordinary material as concrete. By using polyurethane or metal stamps, dull concrete surfaces can be made to look like stone pavers, wood decking or slate slabs. This type of concrete is called stamped, printed or pressed concrete. We’ll talk about it now, as well as the possibility of creating a printed surface yourself.
The essence and possibilities of using this technology
Stamped concrete is ordinary concrete, onto the surface of which decorative embossing is applied using special stamps. The relief pattern can imitate any material: brick, paving stones, boards, animal skins, weathered stone, cracked earth. You can choose stamps with leaf patterns, dinosaur footprints, and animal figures.
Stamped concrete is especially popular when decorating terraces, patios, areas near swimming pools, garden paths, sidewalks, gazebos, floors in restaurants and exhibition halls. This technology becomes indispensable for complex restoration work. For example, when it is necessary to recreate a destroyed part of an ancient pavement. It is often not possible to find exactly the same materials that have aged naturally. And with the help of stamped concrete technology, exact copies of existing old brick or half-erased stone can be easily created.
Variety of stamps for printed concrete
The first stamps for stamped concrete were made of cast aluminum and were massive molds equipped with handles. Such matrices are well suited for simulating ordinary brick or stone patterns. But they are unable to copy complex textures. Modern polyurethane stamps are a completely different matter. They are cast on real materials, the texture of which must be copied. As a result, incredibly authentic textural effects can be achieved using polyurethane molds.
Ready-made stamps can be purchased at many construction stores or centers. When choosing, you should pay attention to the degree of rigidity of the shape. The denser the stamp, the easier it is to create a clearly visible design. Forms that are too soft and pliable are more difficult to work with and require more effort during the printing process.
LiveInternetLiveInternet
Friday, August 05, 2011 14:27 + for the quotation book, just make it from a strip of foam rubber
And the simplest drawing is not easy to draw on the wall. However, many would like to decorate the walls of their home with their own motifs. One solution is a foam rubber stamp, which is easy to make yourself. These stamps from the German company EFCO have appeared on sale. However, the company does not sell a stamp; it sells a set of materials for its manufacture. You will make the stamp yourself from a strip of foam rubber with double-sided adhesive tape glued to one side. The kit also includes a clear plastic plate that overlays the design of your choice. And foam tape is glued to the contours of the pattern on the front side of the plate. That's it - the stamp is ready!
Then apply acrylic paint of one or several colors to the strip design with a sponge or brush and press the stamp against the wall. The original EFCO plate has curved edges that make it easy to hold onto when pressing the stamp against the wall. Let's see how to make such a stamp. Making a stamp.
1. To make a stamp, we will need a round foam strip, double-sided adhesive tape, a plastic or glass plate and a design drawn on a sheet of paper. 2. Place a sheet of paper with a pattern under the plastic or glass plate.
3. Glue a foam strip onto the contours of the drawing. Then use a foam sponge to apply paint of one or more colors to the strip. 4. Gently press the plate with the painted strip against the wall. The paint is easily washed off from the foam strip, so you can make a design in several colors with one stamp. Are you convinced that the stamp making process is simple? So you don’t have to buy a ready-made stamp; you can make it yourself. The foam strip is similar to window insulation strip. The only thing you need to do is glue the handles to the plastic plate. Happy wall decorating! Source Read also: Original wall decoration with your own hands? There are many options. We choose paints, stencils and stamps and begin to decorate the walls and furniture. Refresh the look of an old interior with expressive wallpaper and stickers. Blog about interior design of a small apartment Author: Svetlana
We choose paints, stencils and stamps and begin to decorate the walls and furniture.
Anyone can become an artist - just choose from a wide range of paints and other materials intended for decorating residential premises. Emphasis on style and color.
As you know, colors affect your mood, so when choosing paints to decorate your home, you should pay attention to the system in which they are presented at the point of sale. As a rule, colors are divided into groups so that they are in harmony with each other and, as a whole composition, evoke certain moods.
Each group of paints intended for decorating walls and furniture always includes matte acrylic paints for painting smooth walls, plaster and concrete, a series of transparent glazes for coating wooden surfaces, MDF boards, linen and paper, as well as paints for decorating textiles.
Acrylic paints do not contain thinners, cover the surface well and dry quickly. The highlight is the various pastes, gels and powders for plastic decoration, often with a metal or gilding effect.
The metallic effect paint looks luxurious.
How to use stencils.
For decoration, there are two types of stencils made of durable but flexible plastic - 0.1mm and 0.5mm thick with a variety of laser-cut ornaments.
Thin stencils with a thickness of 0.1 mm are designed for flat decoration. Secure the stencil along the edges with adhesive tape (for construction work) and apply paint evenly through it with a sponge or brush. The paint is always applied in a vertical direction, i.e. up and down so that the paint does not bleed under the edges of the stencil.
A thin stencil can also be used to apply a special gel emulsion containing transparent plastic beads. Apply with a spatula in a thin layer containing only one layer of beads.
Stencils with a thickness of 0.5 mm allow you to create three-dimensional, so to speak 3D, images and are designed for working with acrylic cements and powders.
It is necessary to work with these materials quickly so that the drying paste does not stick to the stencil and, when removed, the edge of the motif does not come off along with it.
Gold-plated particles are added to acrylic powders to create a diamond shine.
How to work with stamps
The next interesting decoration option is stamps. For each ornament there are always two stamps - a large stamp with a diameter of 16 cm and a small one with an additional element of the motif.
They are made of soft sponge material to absorb paint well.
Stencils can be combined, turned over, and different paints, pastes and gels can be used in one motif.
Tips for working with stencils and stamps: -
Use stamps and stencils to dissect a large surface. The use of paints and gels with a metallic effect gives the interior a spectacular look. — Motifs from stencils can be turned over, combined and applied in layers. — Endless possibilities when choosing paints and materials (gels, powders and cements) that create different effects. — After finishing work, do not forget to wash the stencils and stamps in warm water. Dried paint ruins stencils.
Decorating a wooden staircase.
Decorating the walls in the bathroom.
Decorating a children's room. Source Read also: Original wall decoration with your own hands? There are many options. Let's draw funny fish on the wall in the children's room. A simple way to decorate the walls with a stamp: just make it from a strip of foam rubber.
| Categories: | HANDCRAFTS/PAINTING |
Tags:
painting
Cited 15 times Liked by: 4 users
Like share
0
Like
- 4
I liked the post - Quoted
- 0
Saved
- Add to quote book
- 0
Save to links
Liked4
0
Self-production technology
The technology of stamped concrete is quite simple, but you should only take it on if you already have some skills in working with concrete. Otherwise, the result may not be what you expected. Problems may arise for the following reasons:
- concrete hardens quickly, after which the use of stamps does not produce clear embossing on the surface;
- To perform embossing using stamps, you need to apply physical force;
- errors in embossing a concrete surface are difficult to correct;
- stamped concrete technology requires the worker to be able to use special tools to form and smooth the surface.
Once you are confident that you can handle the potential problems, you can begin creating the concrete pad and performing the stamping work.
Step 1. Preparing the concrete site
The basis for stamping is a regular concrete platform with reinforcement, made of concrete grade M350 and higher.
Technology for creating such a platform:
- using pegs and a cord, mark the boundaries of the area where stamping will be carried out;
- remove the top layer of soil (depth 15-20 cm), compact the soil bottom;
- pour a crushed stone cushion (10-15 cm thick) onto the bottom of the excavation and tamp it down;
- formwork made of boards is installed along the border of the site;
- lay a reinforcing mesh in the formwork, raising it above the ground level by at least 3-5 cm (by placing stones and bricks under the mesh);
- concrete is mixed manually, using a concrete mixer, or ordered ready-made;
- concrete is poured into the formwork, a metal rule is used to obtain the required level of the site;
- compact the concrete with a vibrating screed;
- The top layer of concrete is smoothed with a trowel, achieving a smooth and uniform surface.
Step #2. Application of color hardener
A colored hardener is applied to still fresh concrete, which simultaneously colors the surface and increases its strength. A colored hardener is a powder that contains coloring pigments, a binder filler and ground particles of granite and quartz sand. Due to the dispersion of the mixture, its particles penetrate into the pores of concrete and fill them. The concrete surface becomes more dense and durable. At the same time, the particles give the concrete a lasting color (about 30 tones to choose from).
Work on applying a colored hardener begins after the initial setting of the concrete surface. You can focus on the moment when all the water that appears from the surface has evaporated.
Colored hardener powder is scattered over the concrete surface manually, from the center of the site to the edges. At the same time, they perform movements similar to throwing a bowling ball. Scoop up a portion of the powder, move your hand back and with a sharp movement throw the mixture forward from waist level. This principle of applying powder minimizes the number of particles flying through the air.
The first layer of hardener should be absorbed into the concrete, which takes 5-10 minutes. During this time, the surface of the concrete is smoothed by rubbing the dye into it using a magnesium smoother. Corners are also processed using corner smoothers to make them curved and neat.
Then a second layer of colored hardener is applied. It is necessary to paint the surface more evenly and compact it. The powder is applied in exactly the same way as in the first case. After application, the surface is leveled with a steel trowel.
Step #3. Application of the release agent
The release ink prevents the concrete from sticking to the dies during the printing process. In addition, it additionally colors the surface of the concrete, giving it subtle shades of color. The release agent is available in the form of a dry powder or liquid. Most often, powder is used, applying it to the surface of the concrete with a wide brush (brush).
The brush is immersed in a bucket with a separating component so that the bristles are evenly covered with powder. Then, holding the brush at waist level, throw your hand forward and “spray” the powder over the surface of the concrete.
After painting, the corners of the area are treated with textured sandpaper.
Step #4. Surface stamping
Before you start stamping, you need to make sure that the concrete has acquired the required degree of plasticity and has become similar in consistency to plasticine. If you start stamping too early, the concrete surface will not be able to support the weight of the workers and maintain the print lines. If you are late, you will have to put more effort into the stamps to print clearly. In addition, the texture of the stamps may not be imprinted at all on concrete that is too dense, especially at the end of the job.
To determine the degree of density, just press your finger on the concrete surface at several points on the site. If there are prints left with a depth of 4-6 mm, then stamping can begin. You can also check it another way: place a stamp on a concrete surface (at the edge of the site) and step on it. The stamp must support the weight of the worker, not sink into the concrete, and not slide across the surface.
If all tests pass successfully, you can begin stamping. The stamps are laid out on the concrete surface, one after another. Manufacturers often number the stamps (1, 2, 3... or A, B, C...) to indicate the desired sequence of their placement in the printed design.
How to create interesting patterns on walls using a stamp
Having decided to decorate the walls with paints, you may sigh heavily: “it will be boring without patterns.” Don't be sad in vain. Firstly, patterned walls are not appropriate in every room. Secondly, patterns are not only on wallpaper. Interesting patterns may also appear on a painted wall : classic or unique. It all depends only on your desire and availability of free time and imagination.
There are several ways to apply a drawing to a wall. In one of the articles, I talked about how to use slow-drying paints for this. Here I’ll tell you about another option - applying a pattern using a figured roller, a stamp and other, somewhat unusual, tools.
The stamp is serious
Rollers and stamps for decorating walls are usually made of molded plastic or rubber; they can also be covered with soft leather. You can purchase ready-made rollers and stamps, but if there is nowhere to buy them or you want to create your own unique pattern, you can make a stamp yourself: cut out a mold for the stamp from thin rubber. The prepared pattern must be glued onto a rubber strip and secured to a board. In principle, an ordinary plaster grater will also be suitable as the “backbone” for the stamp. The only thing that must be taken into account is that the surface of the trowel must be free of unevenness, otherwise the pattern on the wall will be poorly drawn, because the stamp does not fit tightly to the wall. The finished stamp is dipped in paint and pressed against the wall painted with background paint. The result should be a clear drawing. Just in case, it’s better to practice at least a little on horizontal and vertical drafts to find out how much paint you need to use for the desired design.
Using stamps, you can decorate a wall in such a way that it will look approximately the same as covered with wallpaper. Or you can arrange the prints in a chaotic or pseudo-chaotic order - then you will get very interesting patterns or even whole paintings from them. You can combine multiple stamps to create a unique design.
You can use not only a rubber mold, but also fabric as a stamp. True, the technology is slightly different. Using a piece of knitwear or matting, impressions are left on the wall, similar to the texture of the “stamp” used. To do this, a piece of fabric is moistened with paint, wrung out well and, holding it with both hands, “hit” on the wall. The blows should be light, butting. If you hold the material in one position, the pattern will be almost identical over the entire surface. If you change the position and shape of the “stamp”, the pattern will constantly change, which will allow you to create a rather interesting pattern on the wall.
Approximately the same results are obtained when using rollers, but the technology is completely different.
Author: Nadezhda Fedorova
A few tips for quality stamping
I would like to note a few points:
- If you are using a stamp for the first time and have no idea what the stamp will look like on concrete, do a test stamp on compacted sand.
- Avoid repeating the printed pattern on the surface, especially if the stamps imitate natural materials (stone, wood, etc.). Random compositions will look more realistic.
- To achieve an antique effect on the surface, apply a small amount of dry release agent (in powder form) to the still liquid concrete. Spray a liquid release agent over it. The liquid will dissolve a light layer of powder, after which color accents will remain on the surface, similar to scuff marks.
- Make sure that the release agent particles are well pressed into the concrete when printing. Otherwise, it will simply be washed away with water when washing the surface.
- Make sure that the person walking on the dies while compacting wears clean shoes free of traces of construction debris and dust. Inevitably, these contaminants will transfer to the fresh concrete and disrupt the desired texture of the stamped surface.
That's all the secrets of stamped concrete technology! But, before you start stamping yourself, we suggest you watch a short educational video. It demonstrated the main stages of the technology: painting concrete, applying a release agent and creating a surface texture using stamps.