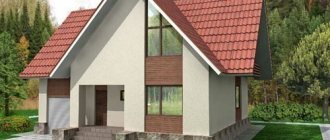
Advantages of aerated concrete houses with an attic
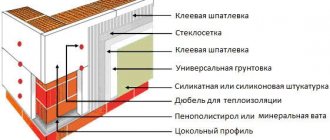
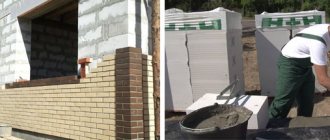
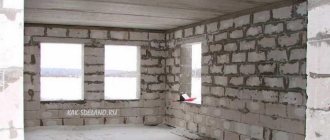
House designs made from aerated concrete blocks are becoming increasingly popular, as this material has many advantages. The material is made from quartz sand, cement, aluminum powder and lime, so the material has a number of advantages:
- light weight;
- high rates of sound and heat insulation;
- resistance to temperature changes;
- ease of processing;
- rot resistance;
- fire safety.
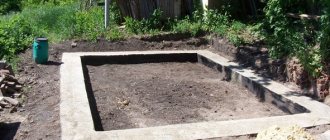
Thanks to these characteristics, aerated concrete is widely used in construction, and construction takes a minimum of time. For aerated concrete houses with an attic, there is no need to build a solid foundation, since the light weight of the material means the loads are minimal. It is worth saying that an inexpensive foundation significantly reduces overall costs.
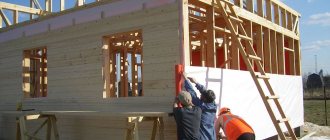
Mansard roof. Breaking according to the rules
A mansard roof is a common option for country houses in the mid-price category. Most often, “attic” refers to a sloping roof (with a variable angle of slope), although this break is not at all necessary. An attic is appropriate for both a gable roof and a hip roof - it all depends on the architectural solution (however, the fancier it is, the higher the estimate).
The main advantage of the simplest (“broken”) attic roof is obvious: this solution allows you to increase the usable area of the second floor. But constructive solutions in this case will be more complex - and there are many nuances that you need to know.
The fundamental difference between a “broken” roof and those built according to the scheme of layered and hanging rafters (which we wrote about earlier) is that they use two types of rafters: as a rule, layered on all slopes - or only on the lower ones (and on the upper ones are hanging).
Thus, the roof is “divided” into simple geometric shapes - two right-angled triangles formed by the lower slopes, and a triangle crowning them (from the upper slopes). As we have already said, the lower triangles are always formed by layered rafters.
It is interesting that the upper “triangle” may well have the same angle of inclination of the slopes as the angle of the lower ones - then the roof ceases to look “broken” (but simply “broken” due to the intermediate attic wall), which looks, perhaps, even more aesthetically pleasing.
Option 1. Mansard roof with layered and hanging rafters
In this case, “right triangles” made of timber connected by contractions are placed along the walls. They form the frame of the attic walls.
These triangles are made according to the scheme of layered rafters. From above they are crowned with a triangle of hanging rafters, in which the tie is also a beam of the attic ceiling. It is obvious that the tightening in such a scheme works mainly in tension, although it does not withstand too much deflection from the weight of the attic ceiling. To prevent this deflection from being excessive, the tie is often suspended from the headstock or struts are arranged.
However, the rafters can be of large sections in the case when they cover the entire span and form a full-fledged roof.
In turn, the lower rectangular triangles are made according to the scheme of layered rafters, with or without struts. The racks of the lower “triangles” rest on the mauerlat - or the bottom of the rafters is moved beyond the wall (to increase the overhang of the cornice). In the latter case, the rafter leg is supported not in the Mauerlat, but in the beam. In this case, it is necessary to install a strut under the rafter. Mauerlat is not needed at all with this scheme. Note that it is permissible to cut the racks into the floor beam no more than one third of its height (for obvious reasons).
When constructing such roofs, one should not forget about anti-wind measures: even if the wind does not break the rafters (which are at a fairly sharp angle), it may well demolish the roof. The installation of wire twists is useful here, as well as fastening the roof to a monolithic wall belt (the same Mauerlat) with threaded anchors with the possibility of tightening.
Option 2. Attic with plank rafters on a timber frame (or without it)
Here the lower “right triangles” are assembled according to the schemes described above, but the upper one is made according to the scheme of layered rafters. In this case, the scrum that connects the lower triangles automatically serves as a support beam under the post of the upper triangle. This beam needs to be made especially powerful (but the rafters, on the contrary, can be made from boards laid at the end).
Thus, we get a frame covered with rafters. This method is especially suitable for the construction of complex spatial forms: first, in fact, you need to design and assemble the frame of the future rooms, and then lay the rafters on them.
The top of such rafters can rest directly on the posts. The layered rafters of the lower slopes must be supported by transverse beams. If you plan to place rafters more often, then an auxiliary beam is installed between the transverse load-bearing beams - although this is usually useless: snow does not linger on such a roof, and additional rigidity of the slope itself is provided with the help of sheathing.
In light country houses, the attic can be made without a frame, but directly from board frames assembled “on a nail.” A layered rafter system is usually used here. It is necessary to take into account the danger of “cutting” nails: in some cases it is advisable to replace nails with bolts. However, we must remember that the use of bolts or “wood caps” somewhat reduces the calculated load-bearing capacity of the wood (due to drilling holes in this wood) - this capacity is usually calculated based on a coefficient of 0.8.
The geometric rigidity of plank frames is ensured in the same way as in traditional rafter systems - by installing paired screeds and lathing.
For reference:
Layered rafters are called so from the word “layer” - that is, to lay. Obviously, their ends are laid “overlapping” on opposite walls of different heights (in a pitched roof) - this is the simplest system, or (in gable roofs) one end of the rafters is laid on the outer wall, and the other on the inner wall. The rafters can also be laid on a special sub-rafter structure located on the internal wall.
Hanging rafters , in contrast to layered ones, rest their upper ends against each other, and they do not provide support under the junction.
The lower ends of the rafter legs “rest” against the wall (the so-called Mauerlat), and the upper ends rest against each other. At the same time, they largely transfer the horizontal load to the walls.
What are we ready to offer?
is ready to offer a full range of construction services, starting from the development of an individual project or adaptation of a standard one, ending with finishing works. Each project of a cottage made of aerated concrete with an attic, which is presented in our catalog, is perfect for construction in any cottage or dacha village in the Moscow region. When designing, our specialists take into account the specifics of working with aerated concrete blocks, as well as the arrangement of attics. If you have any questions regarding cooperation, then you just need to contact us, and our employees will help resolve them.
Roof elements
To make a roof, you need to create a standard rafter system. It should be remembered that for rafters you need to use timber with a cross-section of at least 10x10 cm. A gable roof consists of the following elements:
- Mauerlat. This roof element is installed along the entire perimeter of the building and secured to the load-bearing walls. It is necessary to distribute the load from the roof onto the walls. Most often, this roofing element is created from softwood; its cross-section is usually 12x12 or 15x15 cm.
- Rafter legs. They are the main elements that form the roof. They determine the width and height of the roof. When choosing these elements before creating a roof, it is worth remembering that they must be reliable enough to withstand the roofing and wind loads. The rafters are fixed to the mauerlat at a distance of 70 to 110 cm. If the roof is large, additional elements are placed between the rafters to increase the rigidity of the structure.
- Horse. This element forms the joint of the gable roof, connecting the upper ends of the rafters.
- Filly. This additional element is installed when the length of the rafter leg is not enough. It is fixed outside the junction with the load-bearing wall. The filly is created from timber of a smaller cross-section, which allows you to save on expensive materials.
- The roof overhang is a part of the roof that is located outside the walls and is necessary to remove precipitation from their surface. The length of the overhang is about 40 cm.
- Crossbars. These elements are horizontally located between the rafters and are designed to strengthen the entire structure. They are installed if the roof is more than 5 meters wide.
- The beam is a horizontal beam that is located between the vertical posts of the rafters. It is usually made from timber with a section of 10x10 or 15x15 cm.
- The racks are positioned vertically and are installed under the ridge or rafter leg. For them, a beam with a cross section of 10-15 cm is selected.
- Struts are additional structural elements. They serve to connect the rafters with the supporting beams.
- The sheathing consists of boards that are fixed on top of the rafter legs.
During installation of all the described roof elements, it is necessary to check the reliability of the connection so that the structure is stable and can withstand wind and snow loads.
Roof sheathing
After installing the insulation, a sheathing is created, which is necessary to secure the roofing material. To create it, boards or steel profiles can be used.
Laying the material depends on the type of coating. If roofing felt, bitumen shingles and other similar materials are laid, a continuous sheathing is created. The intervals between its elements should be no more than one and a half centimeters.
If slate or metal profiles are used, a lathing is created, the distance between the elements of which should be about one and a half meters. About 30-40 cm is left between the sheathing elements.
How to choose a material for roof insulation
There are a number of requirements for insulation that is mounted on the roof:
- Waterproof. If the material is hygroscopic, a large amount of moisture will accumulate in it, which will lead to an increase in thermal conductivity and a change in other important characteristics.
- Ability to maintain shape. If the material does not meet this requirement, over time it will begin to peel off the roof, which will lead to the appearance of areas of the roof that are open to cold penetration.
- Long service life.
- Environmental friendliness and safety of the material. Products for creating both residential and industrial buildings must have this characteristic. To insulate the roof, it is unacceptable to use insulation materials that can release toxic compounds during operation.
- Resistant to temperature changes. It is especially important to pay attention to this parameter when creating a roof in cold regions.
- Fire safety.
Methods for insulating a gable roof
Before insulating a gable roof, you should choose one of the insulation methods used:
- laying thermal insulation material between the rafters;
- room on the rafters;
- installation under the rafters.
The first method is most often used. During the installation of thermal insulation material, it is necessary to follow all the rules for carrying out work, since the effectiveness of insulation depends on this. Violation of construction technology can lead to the material absorbing moisture and losing its properties.