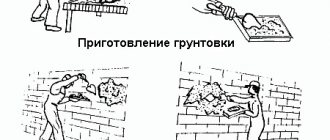
Preparing for work and setting up
The laser level is used in the type of work where you need to obtain markings on the surface. It is much more accurate than the traditional, but outdated water one. Some people are put off by the cost of purchasing a laser level, but the costs will be recouped by quick repairs and accurate calculations of the material.
Laser levels come in rotary and prism types, the latter are cheaper and have a shorter range. In both cases, before starting work, you need to install the level on a tripod in a vertical position. The height is changed using sliding sliders on each of the legs - even a beginner in working with a level can handle this.
Rotary levels are more high-tech; they are able to adjust themselves due to the built-in gyroscope. When the device is tilted five degrees to the side, it automatically returns to its original position.
To set the laser level correctly, you need to check it with a water flask (similar to water levels). In this case, the adjustment is carried out manually (screws) until the air bubble is located in the middle. To align levels with automatic adjustment, you can follow the following algorithm:
- Place the device on a tripod and level the height.
- Turn on the device, automatic adjustment of readings will begin.
- During the process, the device emits sound signals; when they are completed, the device will be ready for operation.
- In case of problems with self-adjustment (the level does not emit signals), you need to check the position of the tripod. The angle of deviation from the equilibrium position must be less than 5 degrees.
It is important that the tripod legs are well secured and on a solid surface. If you have to work with a level on the ground, you need to dig their protrusions into the soil.
How to use the level: setting up a tripod
The operation of such devices is determined by design features. The operating principle of such measuring devices is quite simple. Studying it will help you understand how to use an optical level. The optical axis of the device is located in a strictly horizontal plane.
The level can be used both on a tripod and without it
This line is static, so its deviation is impossible even when the device is in motion. This quality significantly increases the efficiency of the device. Let us dwell in more detail on the question of where the work begins in the case of using such a device.
So, let's look at how to use a level during construction. The first step is to install the device. To do this, you need to unfold the tripod and place it on a flat surface. The ends of the legs that the stand is equipped with have sharp tips. If the soil at the installation site is soft, they need to be pressed into the soil.
Then you should adjust the length of the legs. This will allow the device to be placed at a convenient height for the operator. The platform located at the top of the tripod is needed to install the working part of the device. It must be positioned strictly horizontally.
Note! The tripod has a vertical level, which reduces the error in the final measurement result. Thus, the position of the holder affects the horizontal level, which is displayed in the working part of the level.
The accuracy of measurements depends on the correct installation of the device
The accuracy of the measurements, of course, depends on the correct work with the geodetic ruler, but the initial stage, which involves installation, is also extremely important. Telescopic supports and special locking elements (clamps) make it possible to increase the efficiency of installing the device on the ground.
Checking for correct installation
The check is carried out as follows:
- The device is placed between parallel walls, closer to one of the walls (up to 1 meter). The distance to the second one should be more than 2 meters.
- Turn on the level and place two points on both surfaces.
- Move the level directly to the far wall. Align the beam with the point marked on it.
- Project the beam onto the second wall - it should hit the mark.
If the marks match, the device is configured correctly and you can operate. Otherwise, you will need to adjust the tripod and reinstall it.
The greater the distance between the walls during testing, the higher the accuracy of the laser level.
How to use it correctly
Once the laser level settings have been completed and checked, you can proceed directly to working with it. Its operation is not difficult; there are 3 main modes for constructing lines - horizontal, vertical and plumb. The more expensive the model, the greater its functionality - the choice of a specific mode depends on the type of construction work being carried out.
Alignment of walls
The curvature of the walls will not allow you to create a beautiful coating, be it wallpaper or decorative plaster. If its depth is less than 7-10 cm, use lighthouse plaster. To determine the degree of curvature, you can use a laser level:
- Set the level, select the vertical plane mode.
- Move the device as close to the wall as possible; the projection should not touch the wall itself.
- Use a ruler to measure the distance from the virtual plane to the physical surface.
- Take measurements every 50 cm, marking the wall with squares.
It is convenient to enter the measurement data into a table: this will clearly show the deepest depression and the curvature gradient itself.
After this, you can begin leveling the wall:
- Clean the surface from the previous coating and prime it. Step back 10 cm from the corners and mark vertical lines for installing beacons. The gap between adjacent ones should not exceed 20 cm.
- Enable laser level and vertical construction mode. Mark 5 cm indentations from the corner on adjacent walls. The plane projected by the level should be aligned according to the marks.
- Mark marks on the rule at a distance of 4 cm and align it vertically along the marks. There will be a gap of about 1 cm between it and the wall.
- Beacons must be installed in this gap. They must always pass into it, otherwise you need to slightly shift the virtual plane.
- After the beacons are installed in the wall and aligned, you can apply the mixed plaster solution every 0.5 cm.
- Coat the lighthouse with plaster and press it with the rule - tamp it down so that it aligns with the beam. Remove excess solution, move to the next beacon.
- After the wall has dried, apply plaster between the 2 beacons. The rule is to press the beacons again and smooth the surface. Remove excess from the rule, fill the gaps. Move to the next pair of beacons and walk the entire wall.
If you do the work carefully, you will get a smooth wall. After drying, you can begin finishing.
Leveling the floor
To eliminate floor curvature, a rotary level is best suited. To properly use a laser level to level the floor, the device must be mounted on a tripod in the middle of the room and leveled. Once turned on, it will give a horizontal plane throughout the room. If the laser level is an old device, it can only produce a line. In this case, it will have to be turned to go around the entire perimeter. Next, it is marked with an upholstery cord and the laser is turned off - the landmark is ready. You can leave it turned on so that the projection is always visible. It is important to remember that the beam hitting the retina of the eye is dangerous - you need to wear glasses.
Leveling the foundation
It is best to start building the foundation right away with the laser level - the frame is built using it. Those. a virtual vertical is installed along which the container for the base is erected. In this case, the filling will be smooth after hardening; no additional actions will be required.
General provisions
How to make an even fence from corrugated board? To do this, fence boundaries are drawn on the ground. The extreme points of each side are secured with a column of any material. A thread is pulled over the posts. This will be the starting point for installing fence posts. A standard corrugated sheet has a width of 1.2 m. However, its working width is somewhat smaller.
Existing sizes of corrugated sheets
In order for the fence to be continuous, it is necessary to lay the outer ridges of the sheet one on top of the other. The length of the sheet can be any, up to 6 m. For fencing with horizontal sheets, this length is optimal. Pillars are selected depending on its purpose.
Wooden poles can be used for a temporary structure. For permanent fencing, it is preferable to use a metal square of 100x100 mm.
The pillars are buried at least 1.5 m into the ground. Those already installed are checked with a cord. The cord should be in light contact with the surface of each post. Next, the sheathing is attached. It is mounted using a level or under a level. The correct installation of the sheets and the overall beauty of the entire resulting structure depend on the horizontality of the sheathing. If the profiled sheet is mounted vertically, then it is enough to install 2 horizontal sheathing lines at the bottom and top of the fence.
Diagram with the dimensions of a fence made of corrugated sheets
If the location of the corrugated sheet is horizontal, then the lathing is made to the width at the junction of two sheets overlapping each other.
In this case, the distance between the supports should allow the horizontal sheets to be connected exactly at the location where the pillar is installed. At this point, an additional vertical sheathing is placed on the post. The sheets at the junction must fit tightly to it and overlap by a length of at least 5 cm. In any case, the pillars must be placed vertically. The height of the fence should not exceed 2 m. If a higher height is required, this is agreed with the supervisory organizations and architecture.
Drawing with the dimensions of a fence made of corrugated sheets
In the case of fencing a construction site, an additional reinforced canopy is provided for the fence with a width of at least 1.5 m. It is necessary to maintain the position of the fence at a certain distance from existing or under construction buildings and structures.
This distance is provided for by fire safety regulations. It is permissible to attach the fence to the front wall of a garage or to the wall of an existing house. In this case, for the beauty of the entire structure, the alignments of the fence and existing buildings and structures must match.
Return to contents
The essence of the device
A tool for marking and monitoring the horizon in its modern form is a laser level. Its working mechanism consists of a complex optical system, which includes:
- Focus system;
- Balance controller;
- Light emitters (lasers);
- Power and control units.
In other words, a laser level is a descendant of the usual construction level, which is used to check the evenness of lines and angles. It is installed strictly vertically at one point, from which markings and measurement (reconciliation) of heights are carried out. The device is equipped with a laser catcher, which helps you find the signal in sunny weather, and glasses with red lenses will help you see the beam with your own eyes.
Varieties
Choosing a laser level for a non-professional is not an easy task. There are many types of devices with different sets of functions, which is the determining factor in choice.
| Rangefinders | These devices are also called construction laser tape measures. In fact, they are not levels, but they are still used to level heights. Rangefinders emit a light beam over significant distances, which are difficult to measure with a tape measure, and determine the values of the measured sides with high accuracy. This device is useful in the construction of foundations. |
| Line Builders | These are devices that emit laser beams, which, when refracted, create perfectly even angles with the required parameters. For devices, the magnitude of the angle sweep can be different - from none to 1600, and sometimes more. The devices project from 1 to 8 lines simultaneously, so they have a wide range of action. They are used both for marking the foundation and for repairs, interior decoration, and facade decoration. |
| Axis builders | These are simple devices that do not emit radiation; they only project points on vertical and horizontal surfaces. Using such levels, you can determine the evenness of the foundation walls and mark the foundation pit, but only with the use of an auxiliary strip. The use of the device is limited to obtaining only control points (axes). |
| Rotational builders | This type of laser levels is universal and has a wide range of applications, but due to the wide range of functions in everyday life, it remains unclaimed - these are professional devices. The emitted laser beam creates a wide marking in the vertical and horizontal planes. Using a rotational laser level, they mark the foundation and control the vertical and horizontal of the structures being built. |
How to use a level correctly: setting up the device
Measuring devices of this type may differ from each other from a design point of view. However, they all require certain conditions to be met. The accuracy of the devices depends on their correct location in space. Before starting measurements, it is necessary to properly configure the device.
To regulate the level, there are special mechanisms that allow you to determine the optimal location on the ground. For construction purposes, as a rule, devices equipped with levels are used. These devices are classified as bubble devices, and it is with their help that the correct calibration of the measuring instrument is carried out. The best laser levels include additional adjustment tools.
How to choose a self-leveling laser level
Construction laser level: types and design features. General characteristics of the equipment.
The efficiency of the device can be increased by screws that can change the location of the device along three axes (X, Y and Z). In order to adjust the tool, you need to tighten each screw one by one. If the alignment of the level position was successful, then the bubbles in the levels will be clearly between the limiting marks.
Screws that can change the location of the device along three axes significantly increase the efficiency of the device
At the top of the device there is another level - circular. On the bulb of this element there is a marking in the form of two circles (large and small). At the end of the adjustment work, the bubble should be placed strictly at the central point of the smaller circle.
Selection Guide
When searching for a model suitable for construction work, you should consider not only the set of functions and the type of device. There are a few more criteria to consider:
- Accuracy. For professional devices it is 0.5...1.0 mm per 10 meters, for household devices it is optimal 1.0...3.0 mm per 10 meters.
- Line range. When constructing sports or industrial-scale facilities, powerful devices are required that can produce a beam over a distance of more than a hundred meters. To build a private house, it is enough to use the simplest 20-30 meter ones.
- Line color. There are levels with a red and green emitter. The first ones are the most common - to make them easier to find on the street, glasses with red filters are used. However, the green line is more pleasing to the eye. Otherwise there is no difference between them.
- Power class. 1 are household appliances with a short beam, class 2 are more powerful, 3 are professional rangefinder devices.
- Adjustment method. The most affordable ones are manual ones, the vertical and horizon adjustments of which are made by a person. An easier-to-use laser level that is self-leveling. It is enough to install it on the control point, press the button and the device itself will take the working position, which will be signaled by an audible signal. This will cost much more than a manual one.
- The battery capacity determines the operating time of the level.
- IP protection level. Levels are used outdoors. Rain, dust, heating and cooling - the device must be protected from all these influences. IP54 is the optimal solution for construction conditions; for the street and field, you should not skimp on IP65 or IP67.
- Equipment. Filter glasses, a signal interceptor and other auxiliary items are designed to make working with the level easier, but you will have to pay extra for them.
Operating rules
A new level must be tested for accuracy - all working mechanisms and optics must function in the device. To ensure that the accuracy of measurements and angles is not distorted over time, the device must be handled carefully:
- do not drop, hit, or subject to mechanical impact;
- use only in accordance with the attached instructions and manufacturer's recommendations;
- store equipment in a protective case.
After a certain period, the optics must be sent for verification and calibration to specialized centers. The frequency of maintenance is specified in the level's passport.
Working with a laser level
Before starting work on marking or measuring objects, you need to prepare your workplace:
- Check the battery charge or insert batteries (depending on the type of level).
- There should be no obstacles in the path of the beam - refraction from any objects will give a significant measurement error.
- To operate, the level is installed on a tripod, placed on a flat surface and carefully centered. To use self-leveling devices, this is not necessary; in general, you can use a felt or any portable stand.
When the preparatory work has been completed, you can proceed directly to marking.
Next, if necessary, you should prepare additional devices:
- a strip with markings; a long wooden board will do;
- the laser beam receiver greatly facilitates working with the device on a sunny day;
- glasses (not mandatory, but a very convenient attribute for a surveyor).
How to use a level when marking a foundation
We proceed directly to marking work on the land plot.
- First of all, we set an approximate line, the location of which is easy to determine: usually it lies parallel to the road or fence of the site at the distance specified in the project. Let us denote the line AB, where the letters are pegs with string stretched between them.
- Next, the level is required to have a beam direction function. We install and center the device above peg A, set the angle to 90° and set off with the staff and signal catcher towards the end of the line perpendicular to AB, which abuts point A. At a given distance along the staff, we catch the perpendicular point and place the peg.
- In the same way we set the fourth point.
- We stretch the twine between the installed pegs. The contour perimeter is ready.
- Internal walls are marked in the same way.
Pegs can be placed as guides for installing cast-offs - wooden fences and beacons, the support posts of which are located on the design line of the foundation or wall (outside the perimeter at the offset). In this case, the horizon of the cast-off control posts is checked with a level, and the perimeter of the building is transferred to the area using a tape measure and twine.
Inspection of existing structures
Pegs can be installed manually by measuring the sides geometrically without instruments. In this case, you should check their orientation and evenness of the corners, again with a level. In this case, you will need a rotary device.
- We install the tripod at a distance from all control points (in our case, corners). It should be remembered that the distance should not exceed that allowed in the technical documentation for the device.
- We turn on the signal laser and go with the signal catcher and the staff to the control points.
- We install the staff in a vertical position at any point and catch the beam, making a mark on the staff.
- We repeat the same action at each point.
- We check the distances between the notches. For large construction, a small range of height differences is applicable; for private construction, a difference of no more than 1 cm per 10 meters of wall or foundation is allowed.
The visual process is presented in the video:
Working with a level: types and use, operating rules
A level is a special geodetic instrument that allows you to determine both the height of the terrain and the location of objects on a flat surface. Using a level, you can establish the horizontality of a surface, which is why such a tool is used today not only in geodesy, but also in construction. We will tell you in more detail how to use the level and staff and obtain the most accurate data.
- Types of levels
- Using the device
- Operating rules
Currently, you can find various types of levels on sale, which differ in their characteristics. Depending on the accuracy of such devices, they are usually divided into three categories:
- Technical, the error of which can reach 10 millimeters.
- Accurate - with an error of no more than 2 millimeters.
- Highly accurate - with a permissible error of 0.5 millimeters.
Until the recent past, optical levels were in demand, but today the most popular are measuring instruments that are built on electronic and laser technology.
Laser levels are compact in size, and using such a device does not require any professional skills. Today, such devices are most popular in construction, where they can be used to calculate the horizontality of even small-sized surfaces. Laser models are capable of drawing a luminous, clear line, the presence of which makes it possible to visually establish existing deviations from the horizontal, which greatly simplifies the necessary calculations.
Optical instruments use a special design of numerous lenses, which allows you to build the most accurate image, obtaining data on the horizontal surface. This measuring device is simple in design and easy to use. It consists of the following elements:
- Telescope.
- Stands.
- Round level.
- Tripod or tripod.
Using the device
Initially, these measuring instruments were used in geodesy, where topographic surveys were carried out using such instruments, as well as numerous land management works. Today, these measuring instruments are used in the construction of various buildings and structures, landscaping, construction of gazebos, playgrounds, construction fences, and so on.
Working with the level is not particularly difficult. We offer you the simplest algorithm for using these measuring instruments, which will allow you, even without any special experience, to obtain the most accurate data and determine even the slightest deviations from the horizontal.
- It is necessary to correctly install the tripod, for which you loosen the fastening screws located on the legs, install the level horizontally on a stationary plane, and the measuring device should be located at chest level. Fasten the screws and fix the legs.
- A telescope is installed on a tripod and secured with a mounting screw.
- The level is brought to a horizontal position, for which three adjustment screws are rotated and the air bubble is placed in the central position on the round screen in the viewfinder.
- The optics are being focused and adjusted. The eyepiece should be adjusted to the operator's vision. To do this, the device is pointed at a large illuminated object, after which, by rotating the ring on the eyepiece, a clear image is achieved.
- To work, you will need two geodetic slats, which can be 3 or 5 meters long. The slats are marked in millimeters on one side and in centimeters on the other. They can be made telescopic from plastic or aluminum and folding from wood.
- Height alignment. The surveying rod is installed as close as possible to the point that needs to be measured and leveled. In the eyepiece it will be possible to observe the center line of the reticle, the data from which is recorded on paper or electronic media. Next, similar measurements are taken with other points, the area along which the alignment will be determined is determined, and based on the calculations obtained, it will be possible to ensure the most accurate and perfectly straight line.
- Centerline alignment will give you the most accurate data possible. It is necessary to choose a place where all the points are visible, through which you need to build a perfectly straight horizontal line. The level is installed in such a way that the nearest point is at least 5 meters away. The measuring rod is placed at the front of the device, and the second measuring rod is installed at the rear. The rear staff will be needed for marking, and the main staff at the front will allow you to calculate the height. The instrument is initially aimed at the rear staff, the values are recorded along the lines, after which the main staff is focused and data is recorded on the red side.
Modern laser and electronic devices can significantly simplify calculations. All information and all data are calculated automatically and then provided to the user in a readable form. Each of us can handle the use of such electronic and laser devices, even if he does not have the relevant work experience.
Levels are fairly easy-to-use devices that allow you to obtain geodetic data and determine the ideal geometry and horizontal plane. The use of such devices is not difficult, especially when used for measuring laser and electronic levels.
tokar.guru
Where else will you need a level?
What else is a laser level needed for:
- Wallpapering walls. To do this, set the level under the ceiling at the required distance and focus on the line. In this case, there is no need to do so-called chops.
- Installation of the tiles will be helped by a device that can cut the beam into 2 or 4 perpendicular beams. On the wall from this you can see a projection of intersecting lines, the thickness of which is the seam between the tiles, and the edges coincide with the edges of the fastening elements.
- Painting and finishing of staircases and other inclined structures. In this case, the horizon is leveled at the desired angle (the apparatus itself is tilted and fixed on a tripod).
- Installation of household appliances, especially those requiring suspension and leveling.
- Assembly and installation of furniture.
Buy or rent?
As you can see, a laser level or level is a universal tool that can be used not only for construction, but also for numerous repairs, installation of furniture and equipment. Let us note that non-professional devices are quite inexpensive - you can buy a laser level at an affordable price - from 3 thousand rubles. A professional level will cost a hefty sum, but its functionality is not intended for household use.
It is advisable to rent only professional levels, but only accompanied by a qualified surveyor - it is quite difficult to understand how to work with such a complex device without special knowledge.
The construction of any structure is preceded by the development of a project. As soon as the necessary calculations and drawings are completed, it is allowed to begin practical activities - marking the foundation. This work stage is considered important, because the evenness of the corner sections and the geometry of the load-bearing walls will depend on the correctness of its implementation. To accurately draw the outline, the foundation is marked using a laser level.
Laying out the foundation with a level
In construction, marking the foundation for a house is the transfer of the dimensions and axes of the designed structure from the drawing to the construction site.
If the foundation is incorrectly marked, its walls will not form a rectangle, but a rhombus or trapezoid. This may not be visible to the eye, but when laying the slabs of the first floor above the basement, they may fail or hang in one of the corners. This situation will be noticeable.
It will turn out much worse if there is not enough support area for the slab, and instead of 150 - 200 mm there will be only 50 or 30 mm left.
The slab will fall into place, and then, after loading with screed, flooring, heat and sound insulation and their structural elements, furniture and residents, it can break off part of the wall and...
Building a roof without right angles is also problematic. It will be very difficult or impossible to install rafters and install the roof correctly, for example, laying tiles or slate.
Site requirements. Linking to terrain taking into account geodesy data (soil types, groundwater)
The construction site should, if possible, be level and clear of trees and bushes. It will be nice if it has a slight slope.
The contours of the site must be clear, i.e., points that do not move during the entire construction period and are marked on the plan. If one of the edges of the site faces the “red line”, then it must be marked on the ground. You can drive several stakes on this line.
If possible, you need to drill several wells to determine the characteristics of the soil at the site, the level of groundwater and its chemical composition.
If the groundwater on the site is close to the surface and is located near the design level of the foundation, then it is necessary to arrange drainage, i.e. drainage. In this case, the water must be diverted 0.7 - 1 m from the bottom of the foundation.
Tools and materials for marking
Marking tools include:
- Roulette. Preferably metal, at least 10 m long, preferably 20 m. Fabric is lighter and a little more comfortable, but it sags and accuracy decreases.
- Laser level for marking the foundation, its height, horizontality, etc.
- A water level, also known as a flexible level or hydraulic level, is a long flexible tube with transparent glass or plastic sighting tubes at both ends, on which divisions are applied exactly every 1 mm and each of them is closed with a stopper. This device operates according to Pascal's law for communicating vessels. The length of the flexible tube is 12 meters or more. The tube is filled with water so that it is located approximately in the middle of the sighting tubes.
- Thin strong rope (twine), cord. You can use thin wire, but it is not very convenient to work with.
- Markers, pencil, paper, multiplication table, formulas.
- Hammer, nails.
- Material for making cast-offs – wooden stakes – at least 16 pcs. and bars - 8 pcs. Sometimes 8 pcs are used. U-shaped pieces of steel reinforcement that are driven into the ground.
Brief description of the laser level
A laser level is one of the devices that belongs to a large group of measuring instruments.
The main purpose of the level is to determine the difference in heights of one place on the surface relative to another place and to construct planes: vertical, horizontal and any intermediate ones in the form of a line - a trace of a laser beam. In addition, such a device can construct point projections - give a point on the surface.
Most often, self-leveling cross levels are used, which build two perpendicular planes - horizontal and vertical. They can be rotated and installed in any direction. The horizontal plane is constantly adjusted by auto-leveling elements.
The main characteristics of laser leveling are:
- measurement accuracy, professional devices give an error of up to 3 mm at 10 m, and household devices up to 0.5 mm at a distance of 1 meter;
- measurement range: for households up to 10 m, professional – 30 m or more;
- number of projected planes - usually two or more, etc.
But a level is, first of all, a measuring instrument.
It will only help you well if you know how to use it correctly.
If you take it for temporary use, i.e., rent, do not expect it to work on its own.
If you do not know what adjustment is, do not rent the device.
When starting to work with it, check the accuracy of the measurements and whether the settings are messed up, i.e. check all the characteristics described in its passport. All verification operations are in the description of the device.
There is no work on laying out the foundation that cannot be carried out without a level. Therefore, an ordinary water level, used correctly, can easily replace it. Although a laser level speeds up and simplifies work on a construction site.
How a strip foundation works and its advantages
It is called strip because it looks like reinforced concrete strips laid in a trench dug along the contour of the building. If the soil is crumbling, the depth is large, and there are many intermediate walls inside the perimeter of the building, for which it is also necessary to build a foundation, then a foundation pit is torn off, in which all foundation work is carried out.
Structurally, a strip foundation can be monolithic or prefabricated monolithic. In the latter case, its upper part will have the form of a monolithic reinforced concrete belt located along all the walls of the foundation, assembled from individual blocks.
When carrying out private construction, trenches for a strip foundation, in order to save money, can be dug manually. In this case, the soil is either removed or scattered across the site, raising its level.
The depth of the strip foundation is usually determined by the level of soil freezing. For the southern regions of Russia it is a little more than a meter, in the northern regions and Siberia - 1.5 - 2 or even more.
Advantages of strip foundations:
- simple construction technology;
- it is possible to lay a ground or basement floor;
- built on strong soils - stone-sand and clay;
- they are quite economical;
- parameters - width, depth, amount of reinforcement, etc. indicators that affect strength are easily adjusted.
You can build such a foundation for a house with your own hands.
Marking axes and angles - placing benchmarks outside the perimeter of the foundation
The starting point of all markings should be a point on the ground that is precisely “tied” to the site plan.
Most often, this is a corner point, usually associated with the so-called “red line” - the border of your site and public territory, on which neither you nor anyone else is allowed to build.
The intersection of the border of your and the neighboring plot with the “red line” will give such a point. Your property's fence should be located inward from the red line.
Preparatory work
Before marking the foundation with a laser level, preparations should be made so that the construction site is a flat area. For this:
- all vegetation is removed;
- the top layer of soil is removed;
- The mounds are cut off and the holes are filled.
It is best to level the area using a level. Some craftsmen use a square and a three-meter-long rod, with the help of which they check the quality of the work performed.
Preparing the device for work
In order to correctly mark using an optical level, you should check the readiness of the device for operation. For this:
- make sure that the battery is charged or insert batteries;
- along the beam line, obstacles are excluded, since the slightest refractions create errors;
- For accurate work, the level should be installed on a special tripod, placed level and centered. This does not apply to self-leveling devices.
Marking using the device
Most often, marking the foundation is done using a laser level. The algorithm of actions is simple:
- beat the peg;
- We fix the device on its upper part;
- Using a laser level, the required distance is measured and the second peg is hammered in;
- a ninety-degree angle is drawn with a laser to mark the transverse axes, and now a couple more pegs can be installed;
- we pull the rope along four landmarks to mark the perimeter;
- Interior partitions are marked similarly.
The pegs can be used as guides for installing cast-offs. In this case, the level will help to verify the horizontal position of the posts, and the perimeter of the object is transferred into place using a tape measure and ropes.
How else can you mark the foundation with a laser level? We set the pegs manually, measuring the sides geometrically. We check their orientation and evenness of the corner sections using a rotary device.
The tripod is set at the distance allowed by the instructions from all control points, the laser signal is turned on, and you are sent with a staff and a beam catcher to one of the points. Having aligned the staff vertically, make a mark, repeating similar steps at the remaining points. All that remains is to check the markup data.
Many people do not know how to use a laser level when marking a foundation. It's simple - an inexpensive device has manual adjustment, and modern models are equipped with automatic self-leveling.
Marking the foundation with a level requires some skills, but anyone can master this tool on their own by studying the manual for its operation.
Please note that for the next ten meters the laser produces a three-millimeter error. If you compare it with a tape measure, then at a similar distance it deceives by two to three centimeters.
How to use a level and staff: measuring and recording values
The calculation of data through the use of a measuring instrument of this type is performed using a special algorithm. It is very important to determine the reference point to which orientation will be made during measurement. Correction of the location of other objects is performed based on data about the original position.
The rod should be installed at the highest point corresponding to the plane being measured. After this, you should point the instrument at its scale, which will allow you to calculate the required values.
The rod should be installed at the highest point that corresponds to the plane being measured
Correction of the position of the geodetic rod is also included in the complex of manipulations necessary during the work process. To do this, this element must be moved up or down. This is done until the integer on the staff converges with the point in the lens corresponding to the intersection of the lines. The value that was obtained should be recorded in the log.
Now you need to move the staff to another measuring point. The new position allows the next value on the scale to be calculated. It must also necessarily coincide with the intersection of lines in the instrument lens. Then the two values determined from the cross points must be combined, after which the lower edge of the staff will correspond to the position to which the orientation is made.
It is important to know that the mark is most often placed on a special structure called a benchmark. Construction cords are pulled between these components, which allows you to get a clear picture of the future construction event. Benchmarks are actively used when pouring the foundations of buildings or when erecting walls.
The clearest data can be obtained using laser levels. Levels of this type also contain slats, which facilitate the conduct of appropriate measurement surveys.
The staff must be moved up or down until the integer number on the staff aligns with the point in the lens
Thanks to the level, it becomes possible to determine and set the necessary points over huge areas. The range of other measuring instruments is much greater.
Choosing a level
When purchasing a device, study its type and functions. The final choice is made according to the following criteria:
- accuracy indicator. For domestic use, a value of 1.0 – 3.0 per ten meters of length is sufficient;
- lline length. For the construction of large objects, the beam must “shoot” a hundred meters or more; for private construction, its length of two to three dozen meters is sufficient;
- color shade of the beam signal. There are devices with red and green beams. The first option is more common, but for ease of operation it is recommended to use special glasses to distinguish the direction of the laser;
- power level;
- adjustment option. Manual adjustment devices are available, but it is better to purchase a device that can align lines automatically. It must be set at the control point, turned on, and the level itself will set up for work, giving an audible signal that it is ready. True, the cost of such a device differs significantly from the manual version;
- The battery capacity determines the operating capabilities of the device over time;
- IP protection. The level is used outdoors, so it is important that the device is protected from weather conditions;
- completeness. The kit must include special glasses, a signal catcher and other auxiliary elements that make working with the device easier. True, you will have to pay extra for their availability.
Requirements for operation
It’s not enough to know how to mark a foundation with a laser level. You must be able to keep the device in working condition.
A new device must be checked for accuracy and proper operation of all mechanisms and optics.
To prevent the device from starting to produce distortions when marking after a certain time, it must be handled with care:
- shocks and mechanical impacts are excluded, the device is protected from accidental falls;
- the device must be used in accordance with the rules specified by the manufacturer in the instruction manual;
- A protective case is used to store the level.
After a certain time, the instrument optics are sent to a special center for verification and calibration; the frequency of such maintenance is indicated in the passport.
How to work as a level
In addition to the passport, the level kit includes a key for maintenance and a soft flannel for wiping the lenses and, of course, a protective case where it is stored. Models with a horizontal dial - protractor - are equipped with a plumb line for installation exactly at the desired point.
Protect the level from shocks and shocks, even when it is in its case. Modern devices are equipped with a special device that performs precise horizontal adjustment; a strong push, which does not leave the slightest trace outwardly, can damage its delicate mechanism.
Installation of the device The operating principle of the level is extremely simple: the optical axis of the device is located strictly horizontally and does not deviate when the device is rotated, being constantly in the same horizontal plane.
We begin work by installing the device. We extend it and install the tripod.
Application of laser device
We already know how to mark the foundation with an optical level. What other jobs can such a device be used for? Believe it or not, you can do the following using a laser beam:
- wallpaper the walls. The level is set to the required distance under the ceiling, and a reference line is taken. You don't have to do beats;
- a device that cuts the beam into two or four beams located perpendicularly will help you work with facing tiles. On the walls there is a projection of intersecting rays, their thickness indicates the seam areas, and the edges indicate the contours of the fastening material;
- In addition, the level is capable of assisting in painting and finishing stairs and other structures located at an angle. The horizon is set to the required angle, for which the device will have to be tilted and the tripod fixed in this position;
- household appliances will be placed accurately if you mark with a level;
- Some craftsmen use such a device to assemble cabinet furniture.
Correct focusing of the measuring device
The next step in setting up a device used in construction is adjusting the optical lens. To carry out this operation, devices are equipped with special elements that allow precise adjustment of the working part. These include:
- eyepiece rings;
- adjusting screw;
- guide screw.
The first element is the most important in the design of the level. What is the eyepiece ring for? It is designed to focus the eye on the lines that form the grid. This marking consists primarily of horizontal contours, but it also includes one vertical. Measurements are taken exclusively along the longest line located in the horizontal plane.
The screw that is used for focusing allows you to get a clear image of the object being measured. Let's take a closer look at how the setup should be done. A grid of lines should appear in the eyepiece. After a clear image appears, you need to turn the screw that is responsible for focusing. The manipulation is performed until the picture on which the threads are superimposed becomes clear. This kind of correction is made before each measurement data is taken.
Image clarity can be obtained by rotating the screw responsible for focusing.
Helpful information! When focusing, the vertical line should be strictly in the center of the geodetic ruler. By following the instructions, you can accurately adjust the device and get an answer to the question of how to use the level and staff. Video tutorials that contain a detailed description of setting up and taking data are recommended for viewing.
In order for the calculation accuracy to be maximum, it is also worth knowing how the data is corrected after it has been taken. Proper use of such a device allows you to plan a construction event.