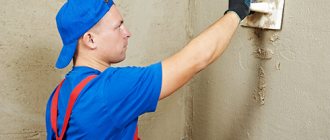
Gypsum plaster is an excellent material for finishing rooms, kitchens and other residential premises. This type of plaster is made from environmentally friendly raw materials, has excellent heat-insulating and noise-reducing properties, is vapor-permeable, practically non-shrinking, dries quickly and is easy to use. If cement plaster needs to be applied in three stages, then for gypsum plaster in most cases only one is enough.
Finishing walls and ceilings with gypsum plaster is an excellent way to prepare surfaces for further work with wallpaper, paint, etc.
Despite all its undeniable advantages, it is not recommended to use gypsum plaster to cover the walls of a bathroom, laundry room or other rooms with high humidity, since gypsum does not tolerate moisture well and will begin to spread. For these purposes, you should find a special moisture-resistant dry plaster gypsum mixture. It is also not recommended to use gypsum plaster in unheated rooms (for example, garages) and on open street surfaces.
The optimal areas for using gypsum plaster are kitchens and living rooms.
Preparatory work for plastering
Before you start applying plaster, you need to thoroughly clean the walls.
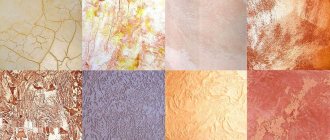
The advantages of plastering are difficult to overestimate. Plaster not only protects against moisture, allows air to pass through and has the ability to breathe, but also gives the treated surface excellent heat and sound insulation characteristics. Using different types of plaster, you can achieve a variety of surface textures.
When starting work on applying plaster to concrete, it is necessary to take into account the importance of this work: a smooth and durable surface is the key to the quality of the coating for the entire period of its operation. If the work is carried out correctly, the layer of plaster will last a long time without cracking or crumbling.
Before plastering concrete walls, the following conditions must be met:
- the surface of the walls must be thoroughly cleaned of dirt and dust;
- the concrete must be rough.
In order to process the walls with your own hands, you need to prepare the following materials and tools:
Tools for plastering walls.
- scrapers and brushes;
- putty knife;
- chisel or jackhammer;
- hammer;
- plaster;
- fiberglass mesh;
- level and plumb;
- rule;
- slats that will be used as beacons;
- primer.
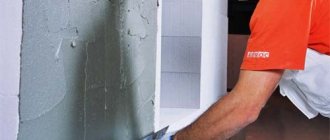
The technology for preparing walls involves starting work by removing the old decorative coating (paint or wallpaper). This is usually done using a spatula. Then the entire surface is carefully tapped with a hammer to identify loose plaster or putty. In those places where the coating needs to be replaced, the blows will be loud. The loose putty is removed from the concrete walls with a spatula.
This process will create a new base that guarantees strong adhesion of the plaster layer to the concrete. If work is carried out in new buildings where plastering has not yet been carried out, care must be taken to clean the walls of formwork compound. This can be done using brushes and scrapers or regular water supplied under high pressure.
When the surface is cleaned, notches should be made on it, which will allow the concrete to adhere more firmly to the plaster layer. Typically, the notches are applied with a jackhammer, but if one is not available, a chisel or scarpel can be used.
How to plaster bathroom walls
Plastering the walls in the bathroom should be done exclusively with cement mortar; no need to bother with lime, etc. “Can gypsum plaster be used in a bathroom?” – Gypsum cannot be used in rooms with high humidity. Therefore, we take any cement plaster and perform all the same operations that were described in the chapter on “how to plaster walls using beacons?” There are certain nuances in the bathroom if you plaster under good tiles and make good repairs.
Firstly, with high-quality repairs under the tiles, it is necessary to plaster and do this in a beacon manner. It is necessary to respect the geometry of the room, especially where the bathtub or shower will be located. To do this, you will need a large square (corner) and the beacons need to be set so that each corner is 90 degrees. There are often a lot of disputes and questions about this, because it is when the angles are set at 90 degrees that large layers appear. There is only one way out - plaster!
Don’t skimp on the geometry of the room, the tiles are square, they will show all the errors in the bathroom. It is unlikely that you will want to spend a lot of money on tiles and a bathtub, but by saving on plaster, you will end up with unsightly wedge-shaped tile cuts and huge gaps between the wall and the bathtub. I hope I answered the question of how to plaster a bathroom wall under tiles, etc.
Carrying out priming work
Plastering concrete walls cannot be carried out without first priming the surface. It is the primer composition that makes it possible to increase the reliability of the structure and extend the service life of the finish.
The primer significantly improves the adhesion of the plaster layer to concrete, the putty layer to plaster, and the paint layer to putty.
Priming the walls is necessary to improve the adhesion of the plaster to the concrete.
In addition, applying a primer can improve surface properties. Concrete becomes more moisture resistant, less susceptible to fungus and mold, rotting and other negative factors. It dries faster after applying the finishing coat.
For monolithic concrete walls with a dense structure, a mineral-based primer is usually used, in which cement is the binder. Experts recommend using a primer called concrete contact. This material is capable of stabilizing concrete walls for the application of gypsum and other plasters.
Features of applying gypsum plaster.
Gypsum coatings must be applied to a concrete surface prepared with a deep penetration primer. This will increase the adhesion of dissimilar layers.
Gypsum plasters are not made independently, but are purchased ready-made, since the plaster mixture is not gypsum mixed with water.
It is applied in the same way as cement-sand plaster.
Using mesh for plastering work
Plaster mesh is used when the plaster layer exceeds 2 cm.
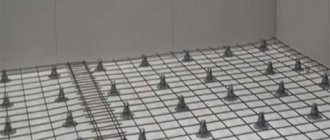
If the thickness of the layer of plaster composition exceeds 2 cm or there is no confidence in its strong adhesion to the base, it is recommended to use a special plaster mesh. Such a fiberglass mesh can have a different cross-section, but it is desirable that the cell size does not exceed 5x5 mm.
By applying a mesh, an internal frame is formed that holds the layer of plaster on the concrete. It is necessary when finishing concrete walls with your own hands in rooms where there is a high difference in temperature and humidity levels and the risk of mechanical stress.
The mesh laid on the layer of primer must be stretched as tightly as possible, otherwise the mesh will begin to vibrate and the plaster will soon crack and fall off. To protect the mesh from corrosion, it is recommended to paint it with oil paint or cement laitance before use.
How to apply decorative plaster-concrete
To perform the work, a traditional set of tools is used, which is used when applying standard plaster.
Finishing bedroom walls with concrete
Tools will be required to prepare the surface and apply the mixture.:
- chisel;
- hammer;
- rule;
- spatulas;
- paint roller;
- container for primer;
- plaster float;
- roller with a shaped nozzle.
Using relief stamps, you can imitate brickwork or a stone surface. Before performing finishing operations, it is advisable to experimentally evaluate the quality of the surface obtained when applying a relief using a roller or stamp.
Concrete plaster - DIY composition
To perform finishing work, it is better to buy a ready-made composition, but you can prepare it yourself from the following materials:
- cement or gypsum plaster;
- putty mixture;
- pigment dyes.
The ratio of ingredients is selected experimentally.
Concrete plaster photo bath
Another option is possible using the following components :
- polyvinyl acetate glue – 200 ml;
- gypsum mixture – 5 kg;
- water – 2.5–3 l.
By mixing the components to a homogeneous consistency, we obtain a ready-made plaster composition.
Material classification
Currently, there are many different mixtures for wall decoration on sale. Separate views are assigned for each surface.
Common types of plaster:
- Gypsum (ordinary) or a mixture of sand and cement. This plaster is designed to level the walls, as well as to protect the surface from moisture and dampness, as well as temperature influences.
- Special. A mixture that has a narrow focus. Its main task is to protect the room from radiation, retain heat and suppress noise.
- Decorative. The name itself says that this mixture is used for the final stage of repair work, when it is necessary to give the surface a beautiful appearance.
Examples of manufacturers
The quality of gypsum grinding and the purity of the components determine the operational reliability of the coatings. Manufacturers of dry mixtures are constantly improving technologies for the production and use of their mixtures.
Master Isopro
Gypsum plaster mixture (starter) with a maximum depth of a single layer of up to 5 cm. Retains abrasion resistance, shrinkage resistant, environmentally friendly. Increases heat and sound insulation of rooms, has a high degree of vapor permeability.
It is used for preliminary leveling for painting and wallpapering on brick, concrete, plaster and sand-cement surfaces. It is laid on a cleaned base primed with “Master Universal” and “Master Inner” compounds; the concrete is primed with “Master Hydrostop” emulsion. The optimal temperature for use is 20 degrees, the mixture should be prepared within 90 minutes. For 1 mm of thickness you need 1.4 kg per 1 m2.
Alignment of walls
You can make walls smooth in different ways. The result is better when plastering the walls along the beacons is used. This topic will be discussed in our article.
The plaster composition can be applied mechanically or manually. From an economic point of view, machine plastering of walls is justified for large volumes.
Modest scales can be leveled in the old “old-fashioned” way, that is, by hand.
All that remains is to decide: do the work yourself or entrust it to a specialist. At first glance, plastering walls using beacons with your own hands seems complicated and time-consuming. However, practice shows that, in general, there are no difficulties - the same plaster, you just need to figure out the installation of beacons.
