Advantages of handwritten design
Like any other craft, decorating flower pots will help you decorate the entire room according to the hostess’ wishes, give it a unique look and comfort, and fill it with homely warmth.
This is a great opportunity to break away from social networks and the latest horror stories on TV, as well as to tear your household away from them and have a great time with them.
This is a wonderful opportunity to give unnecessary things a second life and get rid of some of the accumulated trash that you feel sorry for throwing away, because it will certainly come in handy someday.
Preparatory work
The decor of plastic pots does not require additional preparation, but it is better to treat clay products with several layers of acrylic paint so that water does not leak through the pores and spoil the creation of its owner.
The second option would be to periodically change the decor, which will help quickly transform the location of the plants.
Marine motif
Everyone in their home who has ever been to the sea has a collection of seashells, pebbles, and colorful pieces of glass. These are the souvenirs that can be used to decorate flower containers. Sea pebbles and glass can be found in any store, now this is not a problem. It is quite beautiful to combine sea souvenirs with various small objects (coins, buttons, fragments of broken dishes, tiles).
It is very important that before gluing the shells to the flowerpot, be sure to wash and degrease them. It is best to glue parts to the surface of the container with construction adhesive, which has a high viscosity and dries fairly quickly. In order to better strengthen shells, stones, glue must be applied to objects and to the pot. After applying the glue, the decorative elements must be pressed onto the surface of the container and held for a couple of seconds.
After all the pebbles and pieces of glass are glued, you can paint over individual empty spaces (at your discretion). Filling voids can be done using paints, or a mixture of cement and PVA. This mixture should have the consistency of thick sour cream (dilute with water). It is necessary to add tone with acrylic paints, for example, the color of turquoise. The resulting mixture must be applied with a brush. After the voids have been filled and the mixture has dried a little, the excess mass should be removed from the decorative elements.
Decorating a flower pot by cutting birch branches
Another option that will help fill the voids and emphasize the marine style is sand decoration. Sea or river sand is suitable for this. Decoration occurs as follows: glue is applied to the voids, after which the flowerpot (at an angle) is sprinkled with sand. The decoration of the flower pots is completed by applying regular varnish. This will add shine to your product and make it stronger.
Popsicle sticks
The simplest sticks will help you beautifully decorate a round or square pot.
The main thing is that the size of the wooden utensils matches the size of the pot. If the container for decoration significantly exceeds the length of the sticks, the part that is not covered in beauty can be decorated with another material.
You can do the same with pencils or small tree branches.
Note!
- Master class on decoupage: step-by-step do-it-yourself decoupage schemes. Master classes on creating products for beginners (130 photos)
- Bouquet of candies: TOP-170 instructions for creating a bouquet of candies + DIY design ideas
- Bouquet of Raffaello: the best instructions for creating a bouquet of Raffaello with your own hands + simple diagrams with photo reviews
And finally, decorate your own creation with an elegant bow or a strict elastic band.
Paper
Decorating a pot with paper is a short-lived option. Although it will do to start the design process. Any material will be useful: for non-standard design, old newspapers, pieces of wallpaper, packaging or craft paper, sheets of music are used.
Even corrugated cardboard is suitable, which can be beautifully painted with paints, and then folded like an accordion and unfolded into a voluminous fence.
To create a custom pot, paper is glued to the walls of the pot, and then additionally tied with colored ribbon or regular twine. You can glue beads or artificial flowers onto the newly created surface.
Cereals as a way of decoration - master class
Decorating with grains is also a pretty good idea for decorating pots. As they say, cheap and cheerful!
Necessary:
- pot;
- glue;
- millet cereal;
- acrylic paint (we took gold and silver colors);
- brush;
- wooden stick;
- napkins;
- sponge;
- varnish
Let's get started: In order to give the surface an extraordinary relief, we decorate it with paper and glue. We dilute the glue with water (about half the glue, 1:1). We tear the napkin into small pieces. Using a brush, apply glue to a napkin and glue it to the surface of the dishes. Use a stick to make small raised folds. In this way we glue all the free space and leave it for a while.
After the glue has dried, we proceed to the millet. To begin, apply undiluted glue to the folds, then sprinkle cereal on top. We blot with a sponge and leave to dry. Next we start painting. Using a brush, completely paint the pots silver and dry. After the paint has dried, decorate the flowerpot with golden paint, painting only the part where the millet is poured. Cover the top with varnish.
Paints
If the hostess has the ability to draw, you can decorate the flower house with painting. And what it will be: elegant Japanese drawings, strict geometric shapes, non-standard torn lines, funny polka dots or pictures from cartoons, it’s up to her to decide for herself.
If you don’t have any special drawing talent, you can buy ready-made stencils or cut them out of durable cardboard. It will not be possible to depict a complex design, but even a novice artist can easily create an unusual ornament.
Instead of paints, you can use colored nail polishes or permanent markers.
Mosaic
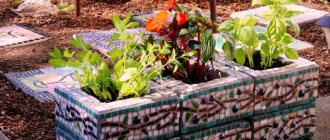
Any small fragments will be suitable as a mosaic. They can be small pieces of ceramic tiles, multi-colored pieces of glass, plastic Lego parts, pebbles, buttons, shells, coins.
Note!
Drawing master class: step-by-step do-it-yourself drawing schemes. Master classes on creating drawings using different techniques (120 photos)Master class on sculpting - TOP 150 photos with step-by-step instructions on sculpting products with your own hands. Master classes for beginners
Sewing master class - TOP 150 photos with detailed DIY sewing master classes. The basics of sewing from experienced craftsmen
For this type of decoration, the pot is first covered with soil and then with glue. And before it has time to dry, he lays down the selected decor. Usually you start decorating from the bottom, but some ideas will require you to change direction and start from the top.
This way you can decorate the entire pot, make unusual stripes or interesting inserts.
Decorating flower pots | Good idea
Tired of boring, dull pots bought for the occasion and completely not fitting into your wonderful interior?
Don't rush to part with them! Decorating flower pots with fabric is a great option for those who like to do their own home improvement. A selection of master classes from craftswomen from different countries will help you create original interior objects without extra money.
| More interesting master classes on decorating pots. |
Decorating flower pots
The first master class from craftswoman Shannon, she claims that decorating pots with fabric is one of the easiest ways to turn ordinary underground containers into works of art. If you exclude the drying time of the final layer of varnish or glue, the whole process takes no more than half an hour.
Shannon
Shannon
To decorate a flower pot you will need:
- flower pot,
- beautiful fabric,
- scissors,
- MOD PODGE glue (PVA can be used),
- hard flat brush,
- tailor's centimeter.
Popular articles Octopus artist
Step 1. Measure your pot and cut the required amount of fabric, adding ten centimeters to the measurement for the hem of the fabric at the top and bottom of the pot.
Step 2: Apply a thick layer of glue to the surface of the pot as shown in the photo.
Step 3. Cover the entire container, carefully smoothing out wrinkles.
Step 4. At the bottom of the pot, fold the fabric by making cuts in it, as shown in the photo.
Step 5. Do the same with the excess fabric at the top, make cuts in the fabric and cut off the excess.
Step 6. Fold the fabric inside the pot, lay it so that there are no folds and coat everything with glue.
Step 7. Cover the entire surface of the pot with a layer of glue or acrylic varnish and let it dry.
Translation by Oksana Korshunova especially for the site: Good IDEA https://masterklass-krasivo.ru
Decorating flower pots with your own hands
How do you like this beauty? I really like it, of course it’s not the easiest option to care for, but in my opinion it’s very suitable as a flowerpot or stand for topiary (tree of happiness).
To work you will need:
- a pot or any suitable container,
- PVA glue),
- glue gun,
- fabric for gluing,
- flat brush,
- felt and buttons for decoration.
Step 1. Measure the bottom of the pot, cut the required piece of fabric.
Step 2. Spread the pot with a thick layer of glue and glue the fabric to the surface, smoothing out wrinkles that formed as you worked.
Step 3: Remove excess fabric and let the pot dry.
Step 4. Make decorative elements from a strip of felt and buttons as shown in the photo. You can see more interesting felt flowers in this publication.
Step 5. Attach the flowers using a glue gun to the top of the container.
Translation by Oksana Korshunova especially for the site: Good IDEA https://masterklass-krasivo.ru
Decorating flower pots with your own hands
In this project they will show how to decorate ordinary flower pots with lace.
For work you will need the following materials and tools:
- terracotta colored pots,
- PVA glue or similar,
- glue brush,
- scissors,
- cotton lace.
Step 1. Apply a thick layer of glue to the surface of the pot in the place where you plan to decorate it with lace.
Step 2. Place the lace on the pot and hold it until it sticks.
Step 3. Decorate all your containers for flowers. If you want, you can create additional protection for the lace by treating them on top with another layer of PVA glue or acrylic varnish.
This is what happened to the girls. I think it's very cute.
Translation by Oksana Korshunova especially for the site: Good IDEA https://masterklass-krasivo.ru
Decorating flower pots with fabric
master class from designer Marina Berdinskikh. She is creating topiaries and this video lesson is dedicated to decorating a plastic container for the base of a tree. It seemed to me that the decorating technique shown in this video lesson is quite suitable for decorating anything, including a flower pot.
Step
Decorate your home with inspiration and live in it with pleasure!
Decorating flower pots - a selection of interesting master classes! Original stylish pots with your own hands!
Leg-split
Decorating a pot with twine is also not particularly difficult. It is necessary to apply glue and wrap the pot tightly with twine. The initial and final pieces of this rope are secured with an additional layer of glue.
The direction of winding is usually chosen horizontally, but no one forbids winding the pot diagonally or in any order. The main thing is that the twine fits tightly to the adjacent turn.
A lovely “country” pot can be decorated with artificial flowers or an elegant bow with a bead inside.
Instead of twine, you can use yarn, braid, or lace.
Eggshells as a decoration
Eggshells are a fairly popular and, most importantly, affordable means of decoration. The shell can be used in its natural color or given the desired tone.
It is very important, before you start decorating the pots, to remove the film from the shell, degrease it, rinse it, and dry it well. Decorating a pot with eggshells is quite simple in its technique. First, you need to prepare the foundation. The first step is to cover with glue the area of the flowerpot on which the material will be attached.
Afterwards, with the convex side outward, a fragment of the shell is attached. It must be attached tightly to the surface, but very carefully so as not to break. You can correct the position of the parts using a needle or toothpick. After all the work done, the decorated surface is covered with PVA glue.
The next step is painting. If the shell is already painted, then you can only add brightness to it. Another option: completely paint the surface, which can be either the main background or the basis for further decoration. At the end of the process, to secure the product, it is coated with varnish.
Cereals
The decor of clay pots for the kitchen will help you create ordinary cereals. You can use them to make different color stripes or paint entire pictures.
A similar master class on decorating pots can be found on the Internet, but in itself it does not present any tricks. A small area of the flower house is carefully greased with glue and the selected type of cereal is poured. After this, they move to the neighboring area. For ease of work, it is better to immediately draw a sketch on the surface of the pot.
For work, any cereals, seeds and even eggshells are used. Only the last material must first be thoroughly degreased and washed. Otherwise, the stench of rotten eggs will force you to throw the entire pot in the trash.
Decorating flower pots with your own hands photo and video instructions
It would seem how simple it all is - I bought a ready-made flower pot and the whole task was completed. But that was not the case, we all know that small details create comfort and beauty in the house. Create your own individual pot
The same can be said about flower pots. You can simply purchase a regular container for flowers in the store and not waste your time, or you can make a decorated flower pot yourself in accordance with the design of your home or apartment and surprise your guests and family.
How to choose a flower pot?
Flower pots are mainly made of clay and plastic. The soil in clay pots dries out faster, and with abundant watering it does not rot.
The tray of the pot must accommodate all the water that enters through the holes in the pot, and such holes must be sufficient to create a good drainage system, which contributes to the normal development of the plant. When choosing the color of a pot, you need to remember that dark pots heat up faster than light pots.
In addition to the materials and colors of the flower pot, you need to consider what plant you are choosing the container for
Particular attention should be paid to the root system of the plant.Pay attention to the root system of the plant
Some more tips for choosing flower pots:
- When choosing an outdoor pot, it is better to take a clay one, as it is more resistant to temperature changes and your plants will not be damaged.
- Consider the place where the flowerpot will be placed. If in an open area, it is better to choose a pot with plenty of drainage holes.
- Wide slides are chosen for plants with large foliage.
- Instead of a regular slide, you can create a hinged one.
Be sure to plant flowers in pots with bottom holes
Decoration materials
If you prefer everything bright and unusual, then make your own flower pots. To do this, just show a little creativity and recreate your plans. Knitted flower wrappers
Take a careful look around you and you will find a lot of ideas and materials for decorating. Necessary tools
But there are things that you simply cannot do without when creating a new creation:
- First of all, this is the flower pot that you will decorate.
- Glue for gluing decorative elements.
- Glue brush.
- A cloth for hands and for wiping off glue.
- An apron to keep your clothes clean.
- Pencil for drawing the necessary drawings and borders.
- Scissors, they always come in handy.
Decorating ideas and the process itself
There are a large number of ideas for decorating flower pots. Now let's look at the most interesting of them.
Decorating with fabric. Initially, we need to make a pattern; to do this, we place the pot on the surface of the paper and roll it over the drawing, taking 2 cm more at the top and bottom to apply the fabric. Making the pattern
Next, using the finished pattern, cut out the desired piece of fabric and place it in a container with glue. Now you can wrap the pot, just distribute the fabric evenly around the circle. Step-by-step instructions
On top of the fabric you can glue various decorations, rhinestones, bows, and so on at your discretion.
To decorate outdoor pots, you can use a regular old barrel.
We treat it with an antiseptic and putty all the irregularities and holes, paint it white to make the background even. After drying, apply the desired design or you can use a ready-made stencil and a can of paint. Barrel decor
Another interesting option for decoration are the soles of old high-heeled shoes.
Such decor will definitely arouse the attention and interest of others.
We take the sole of the old shoes, take out the inside of the “nose”, make drainage holes and the new flower pot is ready. Pot made from shoes
For such flower pots you can use not only old shoes, but also shoes and boots. Flower pot from an old shoe
Here is another simple idea for decorating flower pots. We take two iron cans from canned food and other things, one higher and the other lower, attach clothespins in a circle on them, put one in the other and the flower pot is ready. A simple version of a pot made from tin cans
You already understand that decorating flower pots is not difficult. The main thing is to show your imagination and combine colors and details correctly. Egg decor
Popular articles The second life of a stool
Put in a little effort and desire, and the original, interesting decor you create for your garden or windowsill will surprise you and your loved ones.
Knitted pot
A charming flowerpot can be easily made using yarn, knitting needles or a crochet hook. Large, dense knitting will help hide all the scuffs of the old pot, and using a crochet hook will create incredibly light and elegant designs.
This decor option can be removed and washed at any time, giving the item a pristine, clean look.
If the housewife is not particularly good at knitting, a piece of sleeve from a knitted sweater the size of the pot will do. All that remains is to cut off the excess part and decorate it with additional elements: buttons, flowers, appliqué, bouquets of dried flowers or dried berries.
An excellent solution for decorating a small pot would be ordinary or terry socks.
Stitched covers
Pieces of fabric are also suitable for decorating flower pots. To do this, you simply need to wrap the selected scraps around the pot and secure them with a ribbon or a lush bow.
Such sewn covers look great from leftover curtains, beautifully completing the decoration of windows.
Decorating with fabric - master class
Decorating flower pots with your own hands with fabric is an easy way to update and decorate your flower pots. You can choose one fabric for decoration for several pots, making a certain ensemble, or different ones, at your discretion. The finished product can be decorated with lace, beads, etc. Necessary:
- flowerpot;
- textile;
- glue;
- brush;
- scissors.
We start by cutting off the required piece of fabric. In width, it should completely cover the flowerpot, in length it should be a little larger to envelop the bottom and top of the inside of the container.
After you have prepared the fabric, you need to grease the pot with glue using a brush. The fabric is also lightly coated with glue; there should not be too much of it. After this, glue the fabric and level it. The next step is to cut the bottom and top allowance. It is necessary to cut the fabric into small wrinkles, then grease it with glue and glue it to the bottom of the flowerpot. From above we put the fabric inside the plastic container and secure it. If desired, the pot can be decorated and that’s it – the product is ready.
Custom pots
Very often for large plants you have to use a regular bucket. You can decorate it using any of the above methods.
Do the same with mayonnaise buckets.
Magically attractive flower pots will decorate any room; you just need to come up with a non-standard use for the most standard things. And for those who don’t want to strain their imagination, they will help you choose the design of the photo “pot decor”.
