Country toilet made of wood - drawings with dimensions
Of course, most often, when deciding to build an outdoor toilet with your own hands, wood is used as the main building material. It is cheap, accessible, easy to process and gives considerable scope for creativity. Moreover, there are many construction options here. Let's study the most interesting of them, and at the same time highlight the dimensions of the country toilet.
Teremok
This garden toilet is also known as a hut. It is considered the most complex architectural form, but at the same time one of the most beautiful. You will have to spend a lot of materials for construction - you have to cut a lot.
But the excess consumption of wood is compensated not only by its external beauty, but also by the fact that a “teremok” type toilet retains heat well even in winter, and rain and snow cause less trouble than in other buildings of this type.
House
Another good solution if you want to build a comfortable toilet in your summer cottage with your own hands. It takes up no more space than a simple birdhouse, but at the same time it has higher strength, and in terms of comfort it cannot be compared with it.
Birdhouse
But those craftsmen who choose projects of maximum simplicity during construction will certainly like a wooden birdhouse. The easiest way to build it on the site with your own hands is. The pitched roof and primitive design help reduce the consumption of building materials. In addition, the roof of the country toilet makes it possible to easily place a pressure tank - a useful thing if you plan to build a toilet with a toilet.
But the design has many shortcomings. First of all, the building turns out to be shaky. In addition, it is easily blown by the wind. Finally, with heavy rainfall, moisture will likely seep inside, which will also not add comfort.
Hut
Do you want a beautiful rustic toilet that is easy to use and easy to build? Then a hut is suitable for you. The architectural form looks simple thanks to the gable roof. But at the same time, the building is resistant to precipitation and winds. The special design also makes it durable. Material consumption is also relatively low.
Types of designs of toilet structures, features of the corresponding roofs
By design, there are several types of buildings:
- The country toilet is a separate building located not far from the main residential building (10 m from the house). The most common material for roof construction is wood. But other coverings are also possible - tiles, slate. When choosing a roofing covering, remember: if it is a bathroom with a cesspool, then from time to time it is raked out independently or with the help of sewer trucks. Often the house is removed from the pit and moved to another place, leaving the contents to rot. Therefore, you should choose a cheaper and more flexible roofing material that you don’t mind breaking and can easily be repaired if broken.
- A DIY toilet combined with a shower or a toilet-shower-utility unit option. The entire structure in this case is under one roof. This design has its own characteristic features. This is a capital building that cannot be moved to another place. It's quite complicated. You will need to draw a drawing of it or use ready-made diagrams from the Internet.
- The roof for this type of toilet can be selected from any material at the owner’s request.
- Most often, the house is made of brick or brick and metal, so the technology for constructing the roof of such a structure is also somewhat different from that of wood.
- A tank for water is installed on the common roof, which is supplied to the shower room - the roof design will require a completely different one.
As you can see, the toilet roof depends on what type of construction you choose. You must first carefully study the design features of the house you have chosen and, accordingly, its roof. Choose your own roof for the toilet.
Brick country toilet
If you plan to use your country toilet for many years, and also want to properly insulate it, then it makes sense to abandon wood and use a more durable material - brick. Yes, it will take more time and effort to build with your own hands. But the result will not disappoint.
For work you will need the following materials:
- concrete,
- door,
- bricks,
- timber with a section of 30×30-40×40 mm,
- roofing material (slate, ondulin, tiles, roofing felt or any other).
When everything you need is at hand, you should study the drawings and photos, and then start building a suitable toilet with your own hands.
First of all, a cesspool is installed. We'll tell you how to do it a little later. After completing this work, you need to take care of the foundation. After all, a brick toilet weighs a lot, so you can’t do it without a reliable foundation.
A trench is dug along the perimeter of the future toilet, 40-50 cm deep and approximately 10-15 cm wide than the width of the walls of the building itself. Sand is poured to the bottom. It is evened out and richly moisturized. Formwork is also installed here (you can use plywood, straight slate, boards, slabs or any other material). On heaving soil, the foundation will have to be reinforced. This is not difficult to do - just tie a simple frame of four reinforcement rods and install it in the formwork. Then concrete is poured there. You need to let it harden for at least a couple of weeks, after which you can begin building a country toilet out of brick.
The mortar is laid on the concrete base, which is carefully leveled, and bricks are installed on top of it. It is important to check that the first row is level - it is advisable to use a level. Even small errors can cause each subsequent row to be more uneven. The optimal toilet size is from 120x120 to 140x140 cm with a height of 200-220 cm.
When the first row of bricks is laid, a thin, strong thread is stretched across the edges - this will make it easier to lay the next rows, allowing each stone to be leveled.
When laying, do not forget about the doorway - its size should be about 180-200 cm high and 60-80 cm wide. It is advisable to leave small windows on the opposite wall for ventilation. Subsequently, they can be glazed or simply left the same.
It is better to make the roof pitched. The timber frame is laid on the brick frame. If slate or tiles are used, the material is laid on the timber. When using roofing felt or ondulin, a sheet of plywood is laid on the beam, and the roof is mounted on top of it.
The garden toilet was built from brick, with your own hands, without the involvement of specialists!
Video
Do-it-yourself outdoor toilet for a summer house made of OSB boards - photos and drawings
Perhaps the easiest way to build a country toilet that is convenient enough for summer use is to use OSB boards. They are cheap, easy to process, and adjusting them to the size of a specific building is not difficult.
A foundation on solid soil can generally be neglected, and if it is built, it will be the simplest, columnar or on bricks.
First of all, the frame is assembled. To do this, you need to take a strong beam - preferably with a cross-section of 40x40 mm or more. A square measuring from 120×120 to 140×140 cm is placed in the base. The beams can be fastened together using nails or self-tapping screws. If the cesspool is large and is located almost under the entire area of the toilet, it makes sense to make a sheathing - add a few more beams in the middle of the square.
A vertical beam 200 cm high is attached to the base. In the upper part, another square is assembled in area exactly matching the base - an additional stiffening belt. The base for the future roof - a classic triangle - should be attached to it at an angle.
The frame is ready. All that remains is to cover it with sheets of OSB boards. Cutting out a suitable shape and size using a hacksaw or jigsaw is not difficult. The roof can also be made of OSB boards, but for waterproofing it should be protected with pieces of roofing felt or slate. The first can be fused or secured with small nails, and the second with screws.
Video
Toilet in the countryside made of pallets - diagram + photo step by step
If several unnecessary pallets appeared somewhere on your summer cottage, then this is an excellent material for building a cozy toilet with your own hands. They are suitable in size - from 80x120 to 120x120 cm.
Of course, first of all, the step-by-step instructions provide for the construction of the foundation. Some craftsmen will prefer to pour a strip foundation, while others will prefer to pour a regular columnar foundation made of concrete blocks or bricks. The second option is more expensive, but you don’t have to wait for the concrete to gain strength.
The first pallet with a cut hole is placed on the foundation and will serve as the basis for the entire building.
If you don't like the gaps between the slats, you can always carefully remove them and re-nail them, making them fit more tightly and adding a few new ones from other pallets.
Building walls is not at all difficult. You need to remove the crossbars from the pallets and place them one on top of the other on the butt. Then the frames are connected to each other with slats, bars or metal brackets. This way it is easy to make four walls.
Under the doorway you need to cut a hole in one of the walls. It must be reinforced along the perimeter with timber - a frame removed from the pallets that went on the walls will do. By the way, the sawn piece can also be strengthened, hinges can be hung on it and you will get a ready-made door suitable for this toilet. It is also worth making several small holes in the walls for ventilation.
If the shape of the pallets is not suitable for building walls, then you should simply disassemble them yourself. A frame is assembled from timber, which is immediately covered with slats.
The next stage is creating the roof. If you have a piece of polycarbonate from a greenhouse at hand, then you won’t find anything better. Another pallet is fixed in the upper part of the walls - most of the slats are removed from it. And polycarbonate is laid on top - both colored and transparent are suitable. It must be secured with screws with washers or wide heads. The result is a roof that is waterproof and transmits light well.
All that remains is to assemble the locker - the very “pedestal” on which you will sit, doing what is usually done in a country toilet. Several bars are attached to the walls, which are sheathed with slats. For convenience, you can also install a plastic seat - in stores it costs only a few hundred rubles.
The pallet toilet is ready! Surely photos showing the entire construction process step by step will make this work easier for you.
Video
Warm country toilet for the winter
In winter, running to the toilet in the middle of the night, even if built with love with your own hands, is not a pleasure for everyone. Therefore, many people dream of a warm toilet.
Here we should immediately make a reservation - it will only be warm conditionally. At best, being in a building, you will be protected from snow and wind. It won't be warm here. Unless you are going to connect the toilet to the heating system of the house, install an electric heater in it, or install a potbelly stove, which you will constantly feed with fuel. So, we will try to make do with a minimum of amenities.
The main thing is to insulate the toilet. This can be done in both wooden and brick buildings. Various thermal insulation materials will work, but the easiest way is to use simple polystyrene foam. It has many advantages:
- low cost,
- light weight,
- ease of processing and adjustment,
- high thermal insulation.
The toilet is lined with foam plastic from the inside. To do this, the material is cut into pieces of a suitable shape and size - the easiest way to do this is with a simple hacksaw. If necessary, the edges can be sanded with coarse sandpaper or sandpaper. They must be even so that there are no gaps left when adjusting. The foam is attached to the walls using self-tapping screws and washers - the latter will reduce the pressure on the fragile insulation. By the way, you don’t need to tighten them too much at all - thanks to the lightness of the material, just a couple of screws can easily hold a sheet of several square meters in area. You need to insulate the walls, the door and especially the roof - heat rises and the roof accounts for the lion's share of heat loss.
When the do-it-yourself cladding is completed, for greater attractiveness the toilet is also lined with plywood from the inside. It hides the foam and reduces the risk of accidental damage. The same screws are used as fasteners.
If you want a warm toilet for your dacha, then there are certain ideas for this case too. For example, installing infrared lamps would be a good choice. They consume relatively little energy and at the same time are able to quickly increase the temperature in a small building to more or less comfortable.
Video
Material selection
Another important point is to determine the material that will be used for the exterior, as well as the type of cabin itself. A do-it-yourself toilet in the country can be made from:
- metal profile. The base is made of wood or profile metal pipes, which are connected to each other by welding. Then the base is covered with sheets of metal. This material is also coated with a special compound that protects the country toilet from the negative effects of high humidity. The main advantage of using corrugated sheets is the possibility of quick construction;
- brick. Such toilets can be used for a long period, but require quite labor-intensive and expensive installation. The structure has a large mass and can only be installed on a foundation, so you will need to make a strip or columnar base.
- boards are the most common option for a toilet in the country. The main advantages are accessibility and low cost, the ability to implement various types of design, and mobility. The only disadvantage is the exposure of the boards to the negative effects of moisture, but today there are many ways to reduce this disadvantage to a minimum. For example, the service life can be significantly increased by applying a primer and painting. If the owner does not want to spoil the natural appearance of the wood, then there are numerous transparent compounds that repel moisture.
Types of country toilets
Before you start building a toilet yourself, you should explore different options. After all, there are enough of them for each master to choose the best one for himself. But to do this you need to know about the most common solutions.
Do-it-yourself country toilet with a cesspool
The classic solution for areas without sewerage is to install a country toilet with a cesspool. Equipping it is as simple as possible - you just need to dig a fairly large hole, over which to build one of the structures listed above. True, the equipment of the pit is also fraught with certain difficulties. This topic should be carefully studied in advance.
Depth of pit for country toilet
Before figuring out how to build a toilet with your own hands, it is important to determine the dimensions of the pit. Usually the depth is about 1.5-2 meters. The width is arbitrary – from 1×1 to 1.5×1.5 meters. You shouldn’t make it too big - you won’t be able to cover it with a standard size toilet on top.
But if the pit is used as a sewer for the entire house (water from the shower, sinks, and washing machine will flow here), then the volume will have to be increased further - 180 liters of volume per person.
Toilet with a barrel
Often, when equipping cesspools with your own hands, barrels are used. Moreover, they can be used in different ways - it all depends on the groundwater level in the area.
If they lie deep, then only the walls of the barrel are used. The bottom and top are removed, and the barrel is dug in at the selected location. Since there is no bottom, moisture will go into the ground and filter through the soil. Thanks to this, cleaning the country toilet is carried out less often.
But with a high level of groundwater, you have to look for another option. Here the barrel is buried in the ground without a top, but with a bottom. Sewage accumulates in it and is then easily removed using special equipment. Yes, in this case the barrel will fill much faster. But you don’t have to worry that waste products, having gone into the soil, will end up in a well with drinking water.
Tire cesspool
Another good, budget-friendly and effective way to equip cesspools is to use old tires. At many tire service stations you can get them in the required quantity for free.
The installation process is simple. A round hole of the required depth is dug in the selected location. A layer of gravel is carefully poured onto the bottom - about 15-20 cm. One tire after another is laid on top of it. The seams between them are not airtight, but still make it very difficult for sewage to seep into the soil.
Now the moisture will filter through the gravel and go into the lower layers of the soil, and the thick waste will remain in the hole and will have to be removed over time.
Pit for a country toilet made of bricks
In some cases, it is important to achieve complete sealing of the cesspool in order to prevent even a small amount of sewage from seeping into the soil. In this case, a pit made of bricks would be an excellent solution - the construction scheme is simple and even a novice master who has decided to build something with his own hands for the first time can do it.
First of all, the bottom is filled with concrete. It is not necessary to make a thick layer - 10-12 cm is quite enough. In order for the concrete to be distributed evenly, you need to make a sand cushion and moisten it generously. When the solution sets and gains strength (this takes 5-7 days), you can begin building brick walls.
First, concrete is laid around the perimeter of the concrete base, on which the first row of bricks is installed. Check with a level that they lie level - add or remove solution if necessary. Then it will go easier - the bricks seem to fall on an even first layer. The main thing is to ensure that the height of the solution is the same everywhere. Having built the walls to the desired height, let the solution harden - this will take 3-4 weeks. After this, a suitable toilet is built over the pit and you can safely use it.
Pit made of reinforced concrete rings
This solution is used if there is no danger of sewage entering groundwater. The rings themselves are an excellent choice - they are durable, unpretentious to use, and when installed correctly, they also provide almost complete tightness.
But it is unlikely that you will be able to get them for free, like, for example, tires. And due to the heavy weight, installation by hand is impossible - you will have to use special equipment.
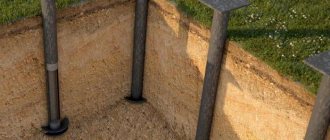
It all starts with digging a suitable hole - it should be 20-30 cm in diameter larger than the diameter of the rings themselves. The height is selected depending on the specific area - usually from two to four reinforced concrete rings are laid.
The bottom is covered with a layer of gravel 10-15 cm thick. Then the rings themselves are installed. The seams between them are sealed with concrete mortar. The bottom is filled with gravel. When the concrete has hardened, the toilet can be put into operation.
Hood for country toilet
Unpleasant odor is one of the problems associated with country toilets. Fortunately, the problem is easily solved - just build a hood with your own hands.
Its installation must begin simultaneously with the construction of the toilet itself. A pipe with a diameter of about 10 cm is installed behind the booth - parallel to the rear wall. The lower part of the pipe goes into the pit, but is higher than the surface of the sewage even at maximum fullness - the gap should be 20 cm or more. In cases where the toilet stall has already been built, the pipe must be routed under the stall using an angle adapter.
Natural ventilation
The height of the pipe should be chosen as follows - the height of the roof plus 1 meter. It is firmly fixed to the wall. It is best to use clamps or metal brackets for this. An umbrella is installed at the top - it protects the pipe from rain and other precipitation. And if you install a deflector instead of an umbrella, it will not only prevent precipitation from entering the pipe, but will also increase traction by about a third.
You also need to take care of installing ventilation inside the booth. It is necessary to provide supply and exhaust openings. Through the first, fresh air gets inside. Therefore, the inlet opening should be located at the bottom, near the floor, 15-20 cm higher. The optimal diameter is 10 cm. It would be a good idea to install a grille here to prevent leaves, insects and other foreign objects from getting inside.
Forced ventilation
The exhaust vent is located as high as possible and on the wall opposite the one where the supply vent is located. Here you need to secure an adapter with a diameter of about 10 cm and at an angle of 90 degrees. A pipe is connected to the adapter, which is also mounted on the wall. Here you should also not forget about the umbrella.
It is best to work with plastic pipes. They are cheap, easy to install, and are not afraid of temperature changes, as well as the effects of hydrogen sulfide and methane.
Do-it-yourself country toilet without a cesspool and odorless
However, not every summer resident wants to regularly give money for pumping sewage out of a pit. And the location of the site can cause serious problems. Therefore, many try to build a country toilet with their own hands in such a way that there is no cesspool that needs to be cleaned. And there are several modern solutions here. It is useful to talk about some of them.
Peat or compost, powder-closet
The toilet closet is equipped with a relatively small tank in which sewage accumulates. After each use, peat, sawdust or ash are poured into the tank. The bacteria immediately get to work and, as a result, over time, the waste turns into valuable fertilizer for the garden - real compost, on which almost any plant grows well.
Dry toilet
Perhaps the simplest solution out there. It is enough to install the dry closet on a flat surface and you can safely use it. The whole procedure goes as follows:
- Clean water is poured into a special tank.
- A special deodorant intended for dry toilets is added to the water - approximately 100 ml per 15 liters.
- A splitter is added to the toilet bowl.
- The drain pump pumps water into the bowl (10-12 pumps are enough for one flush).
- The separation valve opens, after which the solution is mixed with the solid waste.
Special chemicals transform feces, water and urine into a homogeneous mass that does not have an unpleasant odor. Every week the contents of the tank should be disposed of - into the sewer or into the soil.
Backlash closet
This option is suitable for people who do not want to leave the house to relieve themselves. The toilet is located in a heated room, as if connected to a central sewer system. But the waste does not go into the pipe, but into a hole located on the site, near the house. From time to time, when it is full, you will have to order a car to pump out the sewage.
It is extremely important to ensure high tightness if the groundwater lies at a shallow depth. It is best to use a durable plastic tank.
Do-it-yourself septic tank for a country toilet
Of course, it is easier to purchase a ready-made septic tank than to build it yourself. But if you want to save money, then it is better to give preference to the simplest option, consisting of only one sump, and not two or four, like the factory ones.
To work you will need a barrel. Impurities will settle in it. As a result, heavy particles will sink to the bottom, and light particles will form a crust on the surface. Since it is pure organic matter, it will decompose over time. The overflow through which the water will drain must be positioned so that only settled liquid can flow out. To do this, the craftsmen install a simple sewer tee. The middle one is brought out through the wall, and the side ones are installed vertically. The crust formed on top will not allow waste to penetrate into the tee from above, and the lower outlet will limit the intake of liquid.
A simple two-chamber septic tank for a toilet
The method of disposal depends on the amount of waste. For small volumes, a simple filtration well is used. If it is significant, you need to work on the filtering field. You will have to lay the drainage pipes on a bed of crushed stone and then bury them. Fortunately, standard toilet septic tanks have a small waste volume. And if chemicals do not get there, then the results of the septic tank can be discharged into the ground - the ground will not be contaminated, and the plants, on the contrary, will receive additional nutrition and will grow better.
So, getting started, take the barrel itself, as well as:
- chisel,
- hammer,
- semicircular file (or cutter for metal),
- electric drill,
- grinder and steel circle.
First of all, the lid is cut off from the barrel. There is no need to throw it away - it is better to use it as a lid to close the container. The holes through which the pipes will be connected are marked on the barrel. They should be located on opposite sides at the top. But the overflow pipe is higher than the hole through which sewage enters. Holes are made in the marked places, the edges of which are processed - this will require a chisel and a file.
A pit is dug for the barrel - approximately 30-50 cm more than the height of the container. The bottom is covered with a thick layer of crushed stone, which is leveled and compacted. The barrel is lowered into the prepared hole and a drainage pipe is connected to it. Provide for a slope so that water with sewage quickly passes from the country toilet to the septic tank. A tee is installed in the second hole - with a central outlet. The hole must be sealed with silicone sealant. This applies to overflow - the water still will not rise above the drain level.
The barrel is filled with crushed stone and covered with a lid on top. The work is complete and you can start using your new septic tank!
Classification by cabin type
The booth or cabin of a country toilet in most cases belongs to one of four types:
- “Birdhouse”,
- Hut, or “teremok”,
- hut,
- House.
Each of them has its own advantages and disadvantages, as do the materials used for their construction - wood, metal profiles, slate, brick, as well as their combinations.
When planning the construction of a toilet, you do not need to come up with its design yourself: each type has long been developed by specialists and tested many times, and the drawings are available and contain optimal dimensions that allow you to maintain compactness and ensure ease of use.
“Birdhouse”
Let’s start traditionally with perhaps the simplest, and therefore the most common, option, called a “birdhouse” due to a certain similarity with a bird’s house: the same parallelepiped extended upward with a pitched roof sloping back.
Typical birdhouse toilet
As can be judged from the presented drawings and photographs, the design of such a toilet is simple and consists of a frame covered with suitable material, with a single door in the front part. For the frame, a wooden beam is most often used; from the same beam or a smaller section, diagonal struts are made to give rigidity to the structure, and then everything is sheathed with boards. At the joints of the boards, narrow, 30-40 mm, “flashing” strips are traditionally stuffed to prevent air from blowing out of the cracks that are sure to form over time, no matter how tightly you fit the boards to each other.
Use of building materials
Wood is the most accessible material, which is easy to process and does not require special skills or special tools.
Metal is another matter: this material is perfect for our purposes, however, to install a frame from a profile pipe, you will need a welding machine and good electric welding skills. The cladding is made with sheets of corrugated sheets, which are fastened with self-tapping screws or rivets. You can’t do this without an electric drill, a screwdriver or a riveter.
Often they choose the “middle” option: a wooden frame is sheathed with metal sheets or a metal frame with chipboard or USB boards: often the determining factor is the availability of suitable materials, for example, remnants from a “large” construction project.
The usual slate is also sometimes used as the walls of a country toilet, at least as a temporary option until the main construction is completed. Slate is most often used as a pitched roof, although, of course, the “metal” version is no worse.
Sometimes the “birdhouse” is covered with boards, which are then lined with roofing felt or other similar material. This, of course, is not the best option, but can be implemented as a temporary one.
Building brick toilet walls is a good, solid and expensive option. Such a solution can often be seen already at the stage of improvement of the territory, when all residential and utility structures have already been built. A toilet made of the same brick as the rest of the buildings in the yard will look harmonious in the overall exterior.
Read also How to make paths in the garden with your own hands. Practical advice, proven solutions, photos
Disadvantages of certain building materials
A little more about the materials, or rather, about their shortcomings, since the advantages of each are described and obvious. So, wood: it should be borne in mind that the presence of a cesspool below creates unfavorable conditions for this material, so it is extremely important to pre-treat all beams and boards with any impregnation that increases the wood’s resistance to moisture and mold, and then simply paint it. If the aesthetic component is very important to you and you would like to preserve the natural look of wood, cover the surface with a special transparent varnish for external work.
Metal is good for everyone, especially corrugated sheeting, which comes with an excellent protective coating that prevents it from rusting. However, it has a high thermal conductivity, and therefore in summer it will heat up in the sun, turning the toilet into an oven, while in winter you are provided with a thick layer of frost on the inside. Therefore, you cannot do without thermal insulation in the form of polystyrene foam or mineral wool with internal lining.
As for brickwork, the point here is not the material, but its weight: any brick building requires an appropriate foundation. In this case, a strip foundation is suitable. An excellent base option for a brick toilet is a reinforced concrete slab of a suitable size with a hole above the cesspool.
Hut
This type of toilet fully lives up to its name, since it is, in fact, a gable structure similar to the time-tested Indian wigwam. The design is simple, strong and stable, and, in addition, it looks quite exotic. Sometimes you won’t even realize that there is a toilet in front of you - in such a structure you can, for example, store gardening tools.
The drawings clearly show the dimensions calculated for the average size of an adult, and the design features that give it maximum rigidity and strength.
The materials for the hut can be used almost the same as for the “birdhouse” - wood, metal, slate. Only the back and front (with a hole for the door hatch) walls can be made of brick.
To be fair, it must be said that our people, especially the rural ones, are not very fond of such exotic things, so the yard toilet of the “hut” type is not yet widespread.
Hut (teremok)
A hut-type toilet is a kind of symbiosis of the first two options and has the appearance of a gable roof with a high ridge, installed on a low box with side walls slightly expanding (usually) towards the top. With proper finishing, imitating a log house, and imagination, you can turn the hut into a real mansion (another name for this type of structure).
With comparable internal space of a hut and a hut, the latter takes up less usable space on the outside, which is due to the design features. If you compare photos of both types of toilets, you can immediately see why.
If you settle on this type of external structure of a country toilet, you can immediately forget about metal and brick, since the use of these materials eliminates the very idea of a “teremka” - a traditional semi-fairytale house, which, in principle, could not contain metal structures.
The best option is a frame made of wooden beams, covered with wooden elements that imitate a traditional log house, or, in extreme cases, with clapboard.
House
Such a banal name, oddly enough, very accurately conveys the main feature of this type of construction of an out-door toilet, which is very similar to an ordinary residential building, albeit with a slightly elongated box, which is understandable, given the purpose of the building.
As you can see, the house is the same “birdhouse”, which is topped with a gable roof (instead of a pitched one), which, by the way, makes this type of toilet warmer and more comfortable.
There are practically no restrictions on materials when building a house: everything depends on taste and the available options. Of course, a house trimmed with wood looks more comfortable than one trimmed with a metal profile, however, even here, the taste preferences of the owner of a summer cottage or household, and in some cases forced necessity, can always make their own adjustments.
Alternative types of booths
Above, we examined the main design options for the above-ground part of a country toilet, which are used in probably 99% of all buildings. Of course, no one has conducted statistical research on this matter, but this is exactly the situation, plus or minus.
Read also: How to repair a hole in a wall. Real tips and life hacks
However, there are many buildings made in a combined style, combining the toilet itself and an adjacent part in which there is an outdoor shower, a washbasin (to wash your hands after bowel movements) or a regular closet for all kinds of utensils and household equipment.
As for the washbasin, as a simpler option, you can simply attach a regular push-type washbasin to the outside of the toilet, providing it with a hanging visor or leaving it as is.
Something in between - something like a small veranda in front of the entrance to the toilet: that’s where the washbasin is located.

