It doesn't matter what material your arch was built from. It will become a full-fledged decoration of the interior only after you complete its decorative finishing. If you ordered a general project, then the experts will definitely tell you how best to decorate the arch in the apartment so that it fits perfectly into the design concept of the room.
However, if you like any decor, you can always choose it yourself, and after that you will only need to finish the cladding of this architectural element. There is no need to worry about the complexity of the process - you can handle it yourself. The main thing here is to have the desire and the necessary tools/materials. Let's talk more about finishing the arch right now.
Finishing an arch in an apartment - how can this be done?
The good thing about arches is that you can decorate not only the door with this design. This architectural element will effectively decorate a niche in your wall in a particular room; this method is also chosen when you want the window decoration to look original and exclusive.
It is precisely because of the variety of options that the requirements for arch finishing vary. If the arch is interior, it will definitely experience serious loads. The decor in this case should be distinguished not only by its external aesthetics, but also by a certain strength - this rule should not be ignored.
Review of finishing materials
The cladding of an arch in an apartment can be made with various materials - there are plenty of options
The modern market of finishing materials offers a sufficient number of solutions so that a through opening can be finished.
If there is an arch, how to finish it? Let's look at the most popular materials:
- Decorative rock;
- Wallpaper (a classic solution that has been proven for more than one decade);
- Mirrors - used for decoration not so long ago;
- Mosaic;
- Textile;
- Cork;
- Decorative plaster;
- Ceramic or tiles;
- Facing brick.
Arched corners
Vulnerable spots of the arched structure are necessarily marked with corners - that’s just the way it is. Protection is not required only for their hard cladding.
If the arch is finished with some kind of hard material, you don’t have to use arched corners - this is not necessary.
But, if you have a completely different design, it is the corners that are needed in order to protect the entire architectural structure from mechanical damage. This way you will maintain the aesthetic appearance of your arched opening for many years.
When finishing, pay special attention to arched corners, they are vulnerable
Today on sale you can choose arched plastic corners of various widths - they produce products for structures of any volume. But experts note that the following solution is a convenient size: 1 by 2 cm. The wide side of the corner is glued inside the arch - liquid nails are used specifically for this procedure. The narrow side of the corner is fixed to the facade of the arched structure.
To achieve maximum effect and finish the arch with high quality, the corner must be pressed against the base for a long time. It is best to wait about 12 hours. Therefore, use masking tape to secure the already securely glued plastic element to the arched structure.
Decorating an arch with wallpaper is not difficult
Wallpaper nowadays is often used for application on arched structures
When there is an arch, what is the easiest way to finish it? Of course, you can choose wallpaper for this task. Such cladding is not only very economical, but also simple - the design can be easily done with your own hands, the help of specialist finishers is not required.
Perform gluing
So, you have decided that wallpaper for the arch is exactly what you need. In what order should the work be done?
- First, you need to level the surface to be finished - for this, most often, putty is used;
- When the base is puttied, you can start preparing the glue. Stir the composition with a construction mixer, you can also use a drill - if you have the appropriate attachment;
- The strip of wallpaper is pasted vertically - next to the opening, the edge is folded over the arch. The bend amount is about 30 mm, no more. Next to the first strip, glue the second strip in exactly the same way - near the first;
- An allowance must also be made when gluing all subsequent strips - this is necessary;
- Next, using scissors, the corners are cut out in these allowances - this is done specifically so that there are no folds. They are glued to the arched structure and carefully smoothed out.
As part of the last stage, the vault is pasted. How to do this part of the finishing?
It's simple:
- First of all, cut a strip of wallpaper as wide as the width of the arch. The length is made a little longer - so that you can combine the pattern on the canvas;
- This strip is glued at the top of the arch, then goes down.
It is customary to smooth the wallpaper on the arch from top to bottom, then do it towards the edge. It’s better to act this way – so that there are no unpleasant surprises in the future.
Wallpaper on an arch can look more than decent
Another popular question is what are the advantages of such cladding? Indeed, we figured out how to decorate an arch with wallpaper, but is it worth doing this in your apartment?
The undoubted advantage of using wallpaper when decorating an arch is that you have a lot of patterns and colors of the material to choose from. That is, you can choose the ideal option that will easily fit into almost any room.
The cost of such cladding is also pleasantly pleasing - especially those people who really like to count money will be delighted.
There are also disadvantages, they are:
Decorating an arch with wallpaper is not durable. The material can quickly turn yellow; after a while you will feel that the cladding has lost its novelty and has lost its freshness. But that’s not all: unfortunately, wallpaper easily deteriorates due to moisture. An arch trimmed with stone does not know such shortcomings - so this is a reason to think about choosing some other facing material.
Be sure to watch the educational video: decorating arches with wallpaper. Perhaps this particular video will help you decide whether it is worth using wallpaper to decorate arched structures, or whether it is better to invest more money and get a truly beautiful structure for many years.
Decoration
It is not enough to build and install an arch into the opening. It must be decorated so that the element fits into the overall interior of the room. There are several most common options for decorating structures that allow you to come up with the design of a plasterboard arch.
See alsoImitation wood on the wall in the interior - an unusual design element
Cork wallpaper
Cork wallpaper for an arch is one of the simplest options. To implement it you will need:
- wallpaper;
- scissors;
- pencils;
- ruler;
- brush or roller for glue.
The dimensions are accurately transferred to the wallpaper, cut out and glued end-to-end onto the structure. The walls of the arch must first be covered with glue.
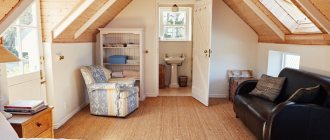
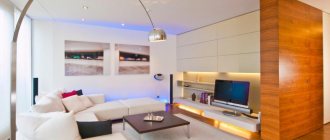
Arches in the interior will complement the design of the living room
This arch is great for small corridors
See alsoIs modern design possible in a two-room apartment in Khrushchev?
Molding
This method goes well with wallpaper and plaster. Construction stores offer customers a wide range of moldings and corners for every taste. They are attached very quickly and easily using liquid nails.
After attaching the molding, you can trim the surface of the arch with corners, thereby protecting it from damage.
See also Stylish exclusive design of a room of 18 sq. m. in a one-room apartment
Mosaic
Mosaic is an equally common material for decorating arches, which gives a lot of scope for creativity. Elements of the composition can be made from a variety of materials. It all depends on desires and possibilities.
Additional lighting can be installed on the arches
Arches need to be combined with the design
The arch looks very harmonious in this design
| Material | Advantages | Flaws |
| Glass | Durability, water resistance, resistance to temperature changes, wide range of colors | Price |
| Ceramics | Significantly stronger than glass | The difficulty of laying mosaics on an arch |
| Stone | Natural material | Complex installation technology |
| Metal | Modern design, original combination of shades | Difficult to maintain, can be damaged by household chemicals, high cost |
| Mirror | Durability, possibility of combination with other wall finishing options | Not suitable for high humidity areas |
Glass
This is one of the most ancient materials for interior decoration. This mosaic is well suited for the kitchen, bathroom and other areas of the apartment exposed to changes in temperature or humidity. Designers often use glass to decorate structures, as it allows you to play with light and has a large selection of shades. You can simply purchase chaotic elements or assemble an entire composition in the interior.
Wide and high arches are always in fashion
Instead of doors you can make an arch
A type of glass is smalt mosaic. It is distinguished by production technology, the features of which provide the material with increased resistance to stress. Smalt is not transparent like glass, which is why it looks simply unique. Both types of material do not carry much load on the plasterboard arch structure.
Ceramics
Ceramic mosaics come in a variety of shapes. Moreover, these can be circles, ovals. The surface does not always look banal. Manufacturers offer elements with painting, embossing, and craquelure.
Mosaics can be used for lining arched plasterboard openings in any room of the apartment. The material is very durable and resistant to external factors.
You can also decorate the arch with tiles
Such arches will go well with wood in the interior.
White room design with an arch looks expensive and chic
Stone
Stones of a wide variety of types are used to make decor. The tile can be polished or, on the contrary, have a natural rough surface; the shape can be rectangular or with natural points. Stone is rarely used to design arches. This is due to the complexity of the installation technology and the fairly heavy weight of the material, which does not have the best effect on drywall.
Metal
Metal mosaic in the interior is unusual and it is suitable for all shapes of arches. The trend of decorating arches in a metal style has emerged relatively recently and has already gained popularity. The surface can be of several types:
- glossy;
- matte;
- with notches;
- with stamps.
The tiles are stainless steel metal plates that are glued to the plasterboard of the arch using mortar. They are attached to a special rubberized substrate, and then to the structure. Metal goes well with glass.
The decor of the arch with wood in the interior looks harmonious
Arches can be of completely different shapes
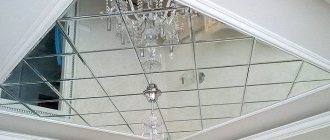
Mirror
Mirror is a beautiful and durable material. Mosaic allows you to visually increase the space in the interior, expand the walls, it is perfectly combined with all types of arched opening design.
Such a mosaic will quickly become cloudy in rooms with high humidity and become less attractive.
See alsoCreating a “masculine” interior
Finishing arches with cork
Cork is also a good solution for finishing this structure.
Decorating arched openings with cork is a very popular trend today. Everything is simple here: the material is chosen because it is very warm, natural and safe from an environmental point of view.
Finishing arches with cork can only be done when a rolled type of material is used for this work. In addition, you can easily cope with the application of self-adhesive cork wallpaper.
How can you decorate an arch with cork in an apartment? Here everything is approximately the same as with a simple wallpaper sticker - no particular difficulties can be identified. Perhaps, in order to increase the strength of the coating, after lining the arch, it is customary to cover the cork with a layer of varnish.
A small recommendation for working with cork rolls: if you are going to decorate a kitchen arched opening, choose a material that has a wax coating. Due to this, moisture will be repelled and the original appearance of the arch will remain for many years.
Watch the video: arch – finishing with cork. The material will help you avoid mistakes, especially recommended for beginners.
We use decorative plaster
Today, finishing arches with decorative plaster is not so rare - people often choose just such a cladding for their structures. And there are reasons for this, which we will talk about right now:
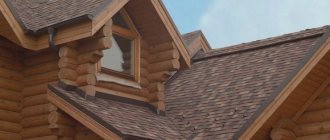
This is what a blank arched opening made of wood looks like
- Applying decorative plaster to an arched opening is very simple; no difficulties arise here. The finished finish will be durable - you can’t argue with that;
- Among the disadvantages, it can be noted that work aimed at restoring the finish is not so easy to carry out. In addition, keeping the relief clean is not as easy as just washing it. Keep this in mind if you decide that finishing the arch with decorative plaster is exactly the solution from which your interior will benefit.
To cover the surface of the opening with decorative plaster, you will need relief stamps or rollers.
Please note: using slow-drying mixtures for finishing arches (we are talking about ready-made compounds) is the right option to make the whole process easier. While the plaster is damp, it is easy to create relief on it - any craftsman will confirm this.
Execution order
- The mixture must be distributed over the surface. To avoid mistakes, carefully read the instructions: the recommended layer thickness is given there. As a rule, this figure does not exceed 15 mm;
- Then, using relief stamps or rollers, the relief is created. Rollers are generally a very convenient option for such work - they will help save not only time, but also the material itself. The same cannot be said about stamps;
- When the above procedures have been completed and the relief has already dried, the arched opening is primed (more precisely, the finish that was applied to it).
Then you have to wait - usually at least twenty hours. And you can color it. There is a special scheme here:
- To effectively highlight the relief, first apply dark paint with the roller that has a longer pile;
- The organization of the second layer looks like this: light paint is applied with a roller (the tool has a shorter pile than in the first case).
Sometimes they even choose a rubber tool. That's all - only one thing remains: you need to paint all the tops of the relief so that the work looks finished.
Stone for finishing openings
In certain cases, it would be appropriate to line the arch with stone.
An arch trimmed with stone is a beautiful solution that will decorate any room in your apartment. The spectacular design of these architectural structures with tiles or stone can be symmetrical: this is a worthy choice for country or eco style.
You can also make an asymmetrical cladding - if you decorate the arch with stone in this way, you will get a magnificent flourish in the Art Nouveau or deconstructivist style.
Place the stone in an arc
If you want the arch to be finished with stone, there is a great way - laying the material in an arc:
- Laying is carried out only on the surface, the preparation of which has been carried out carefully;
- First, it is customary to try on the tiles, and mark the cut line from the inside;
- Along the line that is drawn, you need to draw it several times with a construction knife. Then the unnecessary part is easily broken off with pliers, and the edges are smoothed with a file;
- 24 hours after completing the work, you can begin sealing the seams.
Laying tiles
- Before this work, the surface of the arch must be plastered and then primed. In addition, it is necessary to make notches;
- The solution is prepared from glue, sand, lime, cement (or the tiles can be secured with liquid nails - if the instructions for the material do not prohibit this).
If you glue the material overlapping, you won’t have to seal the outer corners later. They glue them end to end in the first row, in the second it is customary to shift them inwards.
- That is, in each of the odd rows the edge of the tile should be aligned directly with the border of the opening. But they are attached with an overlap in each of the even rows.
Working with facing plastic
How to finish the arch? Drywall will definitely help you with such work.
Suppose you decide to finish the arch with plastic. This choice can be called successful - such work is considered not very labor-intensive.
If the arch is finished with plastic, you don’t have to putty and prime the base - usually they start making the frame right away.
However, it is recommended to frequently check the level of inclination when performing work, as well as the parallelism of the entire finish. This is the only way to protect yourself from mistakes.
- A frame is built under various plastic panels - any slats, even wooden ones, are suitable for construction
- They are secured with polyurethane foam on both sides of the arch. In addition, it is necessary to install temporary spacers to hold the structure until the foam has completely hardened.
- Next, the plastic parts are cut to the required sizes, and they are mounted on slats - horizontally or vertically. Large staples and a stapler will help you here.
Decorating the arch with mosaics: options
2014-11-05 Author: Vera Category: Arches and corridor Views: 20450
There is nothing more original than decorating an arch with mosaics. It has a wide variety of shades and a unique appearance. It also has excellent technical properties.
Design decoration using mosaics
Types of mosaics for decorating a room
At the moment there are several types of such material. Mosaics can be made:
- Made of ceramics.
- Glass.
- Natural stone.
- Self-adhesive panels.
- PVC panels and other things.
All these materials are used not only for cladding the ends and corners of arched structures. Quite often walls are decorated with mosaics.
Let's take a closer look at the advantages of this design:
- Almost all types of mosaics are moisture resistant.
- They are widely used to decorate rooms with high humidity.
- For example, mosaic tiles made of ceramic or glass are suitable for decorating a bathroom.
- The kitchen apron is also lined with this material.
- Any mosaic design looks original and unusual.
Ceramic mosaic
Decoration with ceramic mosaic
This type of mosaic tile is considered the very first, the mosaic is made:
- From different types of clay dough.
- Coloring pigments to give different shades.
- Special substances that increase its quality indicators.
The shape of such a mosaic can be:
- Square.
- Round.
- Oval.
- Rectangular.
Note. The main difference between ceramic mosaic and simple tiles is its size.
It happens:
- 2x2 cm.
- 3x3 cm.
- 1x1 cm and so on.
The largest size of ceramic mosaic reaches 5x5 cm.
Surface:
- Matte.
- Glazed.
- Glossy.
- Rough.
- Smooth and so on.
Note. You can find a suitable option to decorate any surface.
Properties of ceramic mosaic:
- Moisture resistance and practicality.
- Durability and reliability.
- Frost resistance and ability to withstand fire.
- It is easy to install and clean, as it does not absorb dirt.
There is a ceramic mosaic:
- Single firing.
- Double firing.
Advice. Double-firing mosaics are considered the most durable and durable.
How it all happens.
- The clay dough is placed into certain molds.
- Pigment and substances are added to it.
- Next comes the process of mixing the raw materials.
- After this, it is placed in a high temperature chamber.
- Then, a protective agent is applied to the surface of the almost finished material, which can be with or without gloss, and again the raw material is exposed to high temperature.
Note. In some cases, the price of ceramic mosaic is quite high. This is due to the name of the manufacturer and the quality of the material.
Installation of ceramic mosaic is carried out using:
- Adhesive solution.
- Construction level.
- Cross-shaped beacons that are inserted between each tile for even spacing.
- Tile cutter for cutting ceramics with a special blade.
- Decorative putty to shade the tiles.
Work process.
- These works are quite complicated, since the process of installing each tile is painstaking.
- Initially, an adhesive solution is applied to the surface to be coated.
- The mosaic is mounted on it using a level.
- At the same time, beacons are inserted between it.
- After installation is completed, they are pulled out and the surface of the seams is treated with decorative putty.
Note. You shouldn’t immediately say that finishing the surface with ceramic mosaics will be as simple as ceramic tiles. This requires endurance and patience.
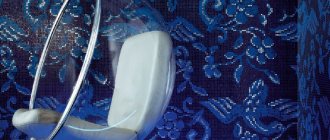
Glass mosaic in the interior
Decoration with glass mosaic
At the moment, wall decoration with glass mosaic tiles is carried out as often as ceramic tiles.
Why?
- This material has similar properties and characteristics.
- It is also durable and comes in a wide range of shades.
Note. It is worth considering in your work that glass mosaic is more fragile than ceramic.
It is made from glass, which goes through several stages of high-temperature processing. After this, paint or a certain ornament is applied to the surface of the material (see How to decorate an arch: design options).
Glass mosaic can be:
- Square or round.
- Rectangular or triangular.
- Free form.
In addition to factory production, glass mosaics can be made by hand:
- Glass bottles of different shades are used for this.
- They are broken with a hammer.
Advice. The blows should not be too strong so that the pieces of glass are of normal size.
Installation of glass mosaic is carried out using:
- Concrete mortar or special sealant for white glass.
- Construction level to obtain a flat surface as a result of finishing.
- Spatula for applying the solution.
Note. The work process is quite similar to the installation of ceramic mosaics, only it is done faster and without the use of cross-shaped beacons.
Natural stone mosaic
Decoration with mosaic stone
Natural stone and all materials made from it are currently in great demand.
This is due to:
- Environmental friendliness of the material.
- Its strength and reliability.
- Practicality and durability.
- Moisture and frost resistance.
Also, natural stone is not afraid of changes in temperature conditions and exposure to fire.
It is worth noting:
- Decorating an arch with mosaics made from this material looks more original than using ceramic or glass.
- The mosaic does not have a large mass and does not require preparatory work on the surface for its installation.
Used for this:
- Moisture-resistant adhesive for external works on fastening natural stone. There are instructions on the package for preparing it.
- A spatula for applying it to the surface.
- Building level.
Advice. To avoid having to change and trim mosaic tiles made from natural agglomerate during the work, it is best to use small sizes in the department.
The installation of this type of mosaic can be seen in the video. There is nothing complicated about it, and the work is performed in a similar way to installing ceramic tiles.
Self-adhesive mosaic
Originality of the material
This mosaic is the most popular in decorating corridors. It has excellent moisture resistance.
More details:
- It is presented in the form of a roll.
- On its surface there is imitation of ceramic, glass and other mosaics.
- It can only be pasted on a flat surface.
Note. If you wish, you can use scissors to cut out small elements from the roll and create an original design for any surface.
To glue this material you will need:
- Scissors.
- Dry rags.
- Foam roller.
- Level for even installation.
The joints of the roll are also well glued. The work process is similar to wallpapering. Whatever type of mosaic is chosen for finishing a particular surface, it must fit into the overall interior design.
Results
A neat arched doorway, the finishing of which has been successfully completed
Finishing arches is a very important step in renovation work in an apartment or a private house. This architectural element fits perfectly into any interior and perfectly decorates the room. To carry out finishing work, you can use a variety of wallpaper, lining, decorative plaster, boards (parquet or laminated), natural or artificial stone. The use of any material involves its own characteristics, which we discussed in this article. In addition, pay attention to the instructions for the materials - this way you will not make mistakes.
The easiest way to cladding a trapezoidal arch is to carry out cladding – moreover, this is the design that is called the most economical. Only the vaulted semicircle will have to be finished. For this work, it is best to choose bendable and elastic materials - they will look great on the arched surface.
In addition, we recommend that you watch a general video: how to finish an arch. The material will be useful for both experienced builders and novice craftsmen.
Types of arches
When deciding on the design of a plasterboard arch, you first need to identify the tasks it will perform. There may be several of them:
- dividing the space in the apartment into several parts;
- interior decor;
- correction of the apartment layout;
- functional solution (shelf, stand, small cabinet).
Experts distinguish several types of plasterboard arches depending on the shape of the arch.
See alsoTerracotta color in the interior: combination with other colors, photo
Roman
In another way, this type of arches is called classic. This is due to the fact that the first architectural solutions in the form of arches appeared among the Romans. The decor is great for rooms with high ceilings. At the same time, they fit well into narrow openings due to their structural features and are distinguished by their ideal arch circumference. For example, this could be the entrance to the kitchen. An architectural element will be even more original in the interior if it is decorated with lighting.
Options for decorative arches in the interior
Cool arch option in the work room
You can put flowers or other decorative elements on the shelves
See alsoBlack and white interior: features, photos
British
British arches are reminiscent of Art Nouveau style. They are a little similar to the classic design, but have a more elongated arch shape. If the passage has a large width, then the radius of the arch is truncated.
This option is ideal for low ceilings, as the somewhat asymmetrical shape visually increases the space in the interior.
The British arch looks stylish between the kitchen and the attached loggia. It can be decorated with lighting, additional recesses in the plane, stained glass and other architectural elements.
When creating an arched opening in this style, the main thing is not to overload the composition.
A long brick arch will look unusual in the kitchen interior
This arch will be an excellent addition to the decor.
See alsoFuturism in the interior: secrets, accents, layout
Ellipse
The arched ellipse is one of the simplest designs. The shape is rightfully considered universal, fits well into the interior of apartments with any ceiling height, suitable for bedrooms, kitchens, hallways, loggias.
The arch has a small bending radius, which is made from plasterboard in a matter of minutes. It can fit into any opening without reducing the width of the arch in any way. The ellipse fits perfectly with the columns. They are also made from plasterboard.
See alsoCombination of lilac with other colors in the interior
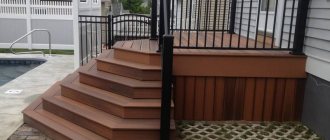
Trapeze
The arch does not necessarily have to have streamlined semicircular shapes. The trapezoid is very easy to make, but looks no less original in the interior of the apartment. To decorate an opening in this way, just cover the corners with plasterboard and think about the design of the structure.
The arched trapezoid is best combined with wood trim, adding calm and comfort to the interior.
Wood in the interior always looks beautiful
Brick in the kitchen interior will add brutality
White color in the kitchen interior looks amazing
See alsoGreek style in interior design