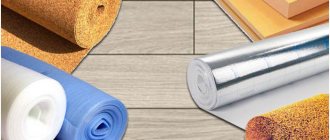
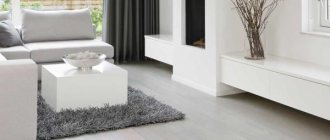
Necessary for repair
If heavy furniture was moved in the apartment without special pads or a heavy item fell on the floor, scratches may appear on the surface of the laminate. What to do? There is nothing terrible about this, everything can be fixed. If the scratches on the laminate are too deep, only then should you decide to replace the damaged board.
Scratch on the surface
To avoid scratches, you can place rugs under furniture legs. They are very relevant during a reshuffle. It is advisable to walk on laminate only in clean shoes, since various grains of sand stuck to the sole can damage the surface, and then even minor scratches will appear. You should also regularly clean the surface of the floor covering, using only products recommended by the manufacturer.
When purchasing materials for laminate flooring before repairs, you need to make sure that you are using exactly the right products, and that the work done will help correct the damage. Before doing this, it is important to carefully inspect the area and evaluate it to make sure that it is possible to carry out the repair yourself and that the work will be done efficiently. If the situation cannot be corrected, then the laminate board will need to be replaced.
Means for repairing damage to the laminate surface
The easiest method for eliminating minor damage to laminate flooring is to use wax chalk or special putties in case of deeper abrasions. The putty is also good if chips are found during repairs. Before covering up scratches, you should check if everything you need is available. After all, in order to repair a laminate floor, you need to have a repair kit, which includes:
- painting spatula;
- vacuum cleaner;
- means for repairing chips;
- clean rags.
It is also important to make sure that the lamellas match the shade of the purchased pencil or chalk, so that scratches on the laminate are not noticeable later.
Removing scratches from laminate surfaces
Full cycle of work
Initial floor condition
Peeling varnish and paint
View of the plank floor after all stripping work
Plank floor scraping process
View of a plank floor after scraping and sanding
Final result
The end result is a beautiful, smooth wood floor that you will enjoy for years to come. After all, subsequent sanding of floors is recommended to be done no later than after 8–10 years. And during these years you will not have any problems with the flooring.
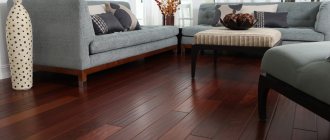
Laminate features
Laminate flooring is a decorative fabric made from multi-layered thin hard lamellas. More than 40 years ago, this flooring material was introduced as a cost-effective alternative to solid hardwood and plank flooring.
Initially, the laminate consisted of tongue and groove planks that were connected to each other using glue. However, more than 20 years ago, manufacturers developed a special form of coupling that allows you to assemble the coating into a single, solid sheet without the use of hardware, glue or other fixing agents. These are the so-called Lock and Click locks. Their effectiveness and usefulness were quickly appreciated, so today parquet and engineered boards, vinyl and cork modular coverings are produced with interlocking joints of complex shapes.
Click lock.
Lock Lock.
Thus, the classic laminate today is (from top to bottom):
- Overlay is a protective polymer film that ensures the surface of the material is resistant to moisture, abrasion, heels, animal claws, etc.
- Decorative kraft paper with a design printed on it. Depending on the collection, the image can realistically reproduce wood, ceramic tiles, natural stone, leather and many other traditional finishing materials.
- Dense HDF core board. The base has a uniform structure, its thickness varies from 6 to 14 mm. It is along the perimeter of this component that the lock is cut. Some manufacturers perform additional waterproofing treatment on the connecting part of the laminate. For this purpose, special impregnations or synthetic wax are used.
- A stabilizing layer consisting of paper impregnated with thermosetting resins. Protects the slats from residual moisture contained in the base, and also prevents warping, twisting and other types of deformation of the slats.
Laminate structure.
Do I need to change the laminate strip?
First of all, think about whether you really need it. Damage can be minor or in “invisible” and impenetrable places. You can also often limit yourself to covering up the damage with a special putty or wood sealant that matches the color of the coating. Such compositions are sold in hardware stores and supermarkets.
In another case, if the damage is significant, or is located in a visible and accessible place, the laminate strip should be replaced. There are two ways to replace laminate:
- with analysis of the coating to the desired strip,
- and indiscriminately, by cutting out a laminate sheet.
Let's take a closer look at them.
The damage can be repaired with special wood sealants to match the coating.
How to replace part of the laminate: disassembling part of the floor
This option is good when the panel to be replaced is located a short distance from one of the walls of the room. With a dismountable type of connection, it is possible to dismantle the defective lamella and replace it with a new one. The sequence of actions is as follows:
- Remove the corresponding skirting board.
- Using a pry bar, pry up the end board and release the lock.
- Carefully lift and remove the board from the lock.
- Raise all lamellas in sequence until the damaged one.
- Pull out the defective lamella and put a new one in its place.
- Lay down all previously standing panels.
- Install the baseboard.
But how to replace a lamella that lies far from the walls? Disassemble the entire floor down to the damaged board? Here it makes sense to use the second replacement option.
Preparation
In cases where the damage to the lamella is significant and cosmetic repairs without replacing it are not possible, you can locally replace the deformed lamella with a new one. First of all, you should purchase the required number of panels in accordance with what you already have. As a last resort, choose the most similar one, preferably from the same manufacturer.
Before installation, new dies should be given time to rest in the room where the replacement will take place. Stock up on everything you need: tools, adhesive if the laminate is laid on it.
Before purchasing a replacement panel, you should remove the baseboard and one laminated strip and purchase a replacement by showing the seller a sample.
The need to partially replace the laminate
Partial replacement may be required if one or more lamellas are damaged
The interior layout of most rooms is standard - furnishings are located along the walls and in the corners, the center is free. Based on this, the passage area is most at risk of damage.
The need to replace the laminate may partially arise for the following reasons:
- large dent from falling of a heavy object;
- swelling due to spilling liquid or washing floors using the deck method;
- long through crack due to temperature deformation;
- consequences of a local fire;
- damage to the front side by active chemical reagents.
Disassembling the flooring is the best way to change the defective part, but in most cases it is impossible for one simple reason - dismantling must be carried out from the wall, and there is furniture there that has nowhere to be removed. Therefore, it is necessary to replace the panels without disassembling the covering.
Causes of laminate swelling and elimination of consequences
Practice shows that the situation when the laminate is swollen is not uncommon.
Many experts argue that it is impossible to eliminate this defect perfectly and recommend replacing the flooring or laying a new covering over the damaged one.
But this is again a large additional cost.
Why does laminate flooring swell?
Water getting into joints can cause swelling.
There are various reasons why laminate flooring can swell.
How to correct a defect is a separate question; initially, it is necessary to determine the nature of the damage. A certain defect may have several possible occurrences.
So, for example, if the laminate bulges at the joint or there is a divergent seam between the panels, the reasons may be the following:
- incorrectly selected substrate for a certain type of material (when choosing a coating with a thickness of more than 9 mm, a cork or polystyrene substrate with a thickness of at least 3 mm should be used, see table);
- poorly executed installation (wide seam, lack of tight connection);
- low quality material;
- there was not enough laminate of a certain thickness (supplement with panels of a different type);
- the laminate was swollen from water (a large amount of water was spilled, which was not cleaned up for a long time; therefore, moisture penetrated into the structure of the material).
Swelling of the laminate and the formation of “waves” occur for the following reasons:
- influence of temperature influence (absence of deformation gap during installation);
- joint strips fixed flush to the panel (swelling flooring cannot expand due to lack of space and clearance).
Related article: Small toilet design
You can answer the question: “Why does the laminate diverge, what reasons caused the material to swell?” But you shouldn’t endlessly blame one of the family members if someone once spilled water, but you should calmly carry out repairs according to the suggested recommendations.
It should be remembered that laminated flooring will last a long time with high-quality installation, a well-prepared rough field and high quality material (of the appropriate brand for a particular room).
How to eliminate the effects of swelling of the laminate?
To fix the problem, you will have to disassemble the coating. “What to do if the laminate swells, and are there ways to fix the problem?” - these popular and frequently asked questions have a positive answer. It is possible to repair laminate flooring yourself.
If the laminate is swollen due to water, it is necessary to partially disassemble the cover and fix the problem. Having removed some of the panels from the damaged area, it is necessary to dry the substrate or replace it in the disassembled area.
When repairing a good quality laminate floor, the swollen element should be dried. If the lamella has not returned to its previous shape, it is necessary to replace it with a spare one (you must always have a spare one when installing a laminated covering) and assemble the floor surface.
Before asking the question: “What to do if the laminate swells like a wave all over the room?” and trying to solve the problem, you need to remove the baseboard around the entire perimeter of the room. The swollen floor should sit for several days and return to its original shape. After which, when repairing the laminate flooring, it is necessary to cut the panels adjacent to the wall by 1-2 cm, thereby creating a deformation gap.
It is worth knowing that the answer to the question of why the laminate is swollen may be the installation of a door latch or connecting strip. These attributes interfere with the natural expansion of the laminate surface and can cause swelling.
Therefore, if you observe swelling of the laminate, it is advisable to quickly dismantle all the joining strips and remove the door latches.
Related article: Photo wallpaper Paris: romantic interior
Click locks
This connection of panels is the simplest for local replacement, as it involves disconnection. The algorithm of actions looks like this.
- Work begins with removing the section of the plinth located as close as possible to the damaged lamella.
- Afterwards, the planks are dismantled: one after another in the direction of the damaged one until it is removed.
- Replace the deformed element and begin installation in the opposite direction.
This method is simple and requires only time and accuracy.
When dismantling, number the slats in the order in which they were removed so that they can be placed in the appropriate place after replacement.
Necessary tools and equipment for work
Set of tools
The process of restoring a laminate floor in itself is not particularly difficult, but to carry it out you need to have some special equipment.
To replace laminate flooring in the middle of a room, you will need to buy or rent the following tools:
- hand cutter or grinder;
- nail puller;
- pliers;
- rasp;
- ruler;
- marker;
- file;
- chisel;
- mounting gun;
- mold glue.
The work is somewhat dangerous. Therefore, it must be performed with protective glasses and gloves.
Replacing material
If the previous tips did not help and scratches or damage are still noticeable on the material, you can use another option. To do this, you need to know how to replace one laminate board. When you have the necessary tools, this job is easy to do. It is possible to replace a laminate board using several methods.
The work of dismantling laminate flooring is simple, but lengthy. You need to start with the board that is closest to the damaged one. First you need to remove the baseboard and disassemble the slats until the damaged area is accessible. After the board is replaced, the disassembled laminate should be installed in place, covered with a plinth.
Dismantling boards
If you can’t remove the baseboard or the damaged boards are not on the edge, but in the middle of the room , you can try to do the work without thorough dismantling. This technique is not easy, but if you follow all the recommendations from specialists, repairs and installation work can be done with your own hands.
For this you will need:
- new board;
- circular saw;
- electric drill;
- wood glue;
- sharp knife;
- rubber hammer;
- yardstick;
- vacuum cleaner;
- protective equipment: glasses and gloves.
Advice from experts for high-quality execution of all processes
- Before installing new boards, all connections should be cleaned of dust using a powerful vacuum cleaner.
- Newly purchased boards must match and be the same brand as the old ones.
- Also make sure the color scheme is appropriate.
- Be sure to wear glasses when cutting material.
In order for the laminate replacement to be carried out efficiently, it is necessary to disassemble the coating. To do this, carefully remove the baseboard from the wall to which the damaged board is located close. This work should be done carefully so as not to break the plinth, since it will not be possible to reuse it.
Removing the baseboard
After the baseboard is removed, it is necessary to carry out the work of dismantling the laminate. One by one, the panels need to be removed until you get to the broken area. To separate the boards, you need to lift each one at an angle of 45° and release the ends from the grooves. This should also be done carefully, remembering that later the boards will need to be connected.
What harms laminate and how to eliminate the defect that has arisen
Crevices
If you have carried out a major overhaul of the floor and installed a new laminate, but over time you begin to notice that gaps appear between the individual planks, then the cause of such a defect lies in a violation of the installation technology. It could be:
- poor preparation of the subfloor;
- using a substrate that is too thin or of poor quality;
- absence of a damper gap between the wall and the covering.
The subfloor is not prepared correctly
The base for the laminate must be absolutely flat. Otherwise, the floor first begins to creak, and then gaps form between the individual slats. In addition, large unevenness can lead to curvature of the floor surface.
You can, of course, remove the entire laminate, level the surface of the base, lay down a new substrate, and then re-install the coating, but such repairs will be associated with large labor costs and additional financial investments. If there are few defects, experts advise using a special sealant to eliminate cracks.
The cracks are thoroughly cleaned of dirt and dust, and then filled with sealant using a special rubber spatula. The drying time is indicated by the manufacturer on the packaging. After drying, the uneven seam can be trimmed with a construction knife.
If there are a lot of cracks and it is clearly visible that the floor surface is uneven, then you will have to dismantle the floor and, after eliminating the shortcomings, lay it again.
Please note! To make the laminate floor more durable, craftsmen advise using glue or self-tapping screws during installation.
Scratches
This is the most common type of damage not only on laminate, but also on any other floor covering. The cause of such defects may be sharp heels, pet claws, rearrangement of heavy objects (furniture or equipment), and more.
Scratches are the most common defect in laminate flooring.
There are deep and superficial scratches. It is very important to eliminate this defect at the initial stage, before the scratch becomes deeper and wider. Moisture and dirt contribute to the increase in scratches, deeply destroying the material throughout the cut.
Repairing laminate flooring in this case does not cause much difficulty. A special wax pencil will help to cope with the problem. The scratch is thoroughly cleaned and dried, and then carefully filled with wax using a pencil. After drying according to the manufacturer's instructions, polish the surface with a soft cloth.
To eliminate small scratches, a wax pencil is used, and deeper scratches, cracks and chips are filled with sealant
Please note! When moving furniture on a laminate floor, place soft pads under the legs to avoid scratches and chips on the flooring.
Cracks and chips
These are also fairly common defects on laminate flooring. As a rule, they are formed when heavy objects fall on the floor. A special composition is sold to eliminate chips and cracks. They fill the defects with a rubber spatula. The floor surface is immediately cleared of excess mixture. After complete drying, if necessary, the process is repeated until the composition stops settling and a smooth surface without a groove is formed.
Instead of a special repair composition, you can use acrylic sealant. Experts advise taking white sealant and gradually adding color to it, obtaining a color as close as possible to the color of the coating.
Acrylic sealant is used to repair laminate flooring.
Swelling
This situation occurs if a large amount of liquid is spilled on the laminate. Having removed water from the floor surface, we cannot remove moisture that has penetrated into the joints between the slats. A few hours after such a large leak, we can see a swollen surface of the coating.
If the pour was large-scale and especially with hot water, then most likely you will have to completely remove a piece of the coating, dry it and reinstall it, and possibly completely replace the coating.
The swollen surface of the laminate does not look aesthetically pleasing
If the scale of the “disaster” is not large, then it is enough to remove several swollen planks and press them down with a heavy load until they dry completely. After 3-5 days, the dried planks are returned to their place or purchased and new ones are laid in their place.
Stains
This is perhaps the most common defect that can significantly spoil the appearance of the floor. Removing stains is not actually a repair, but often requires considerable effort.
The manufacturer treats the surface of the laminate with special compounds that protect the material from the penetration of dirt and moisture. Therefore, it is important to remove the stain immediately. This can be done using an ordinary soft, slightly damp cloth.
It is advisable to remove stains immediately after they appear.
If varnish, paint or building mixtures get on the laminate, you will have to use special methods. For example, varnish and paint can be removed with solvent or acetone.
Please note! Do not allow the laminate to come into prolonged contact with solvents. Do not rub the surface with force. After removing the stain, you need to carefully wipe this area of the floor, first with a damp and then with a dry soft cloth or sponge.
If you accidentally drop nail polish on the laminate, you can remove it with a medium-hard brush and a small amount of washing powder. Traces from rubber shoes are removed with a regular office eraser. If the laminate is splashed with grease, first scrape off the frozen droplets, and then wipe the floor surface with a soft cloth moistened with dishwashing detergent.
Gradual concept of work
- First you need to free up access to the coating. To do this, the baseboards on the walls adjacent to the repair site are dismantled.
- After this, the corner board is unlocked with a chisel. This must be done first from the long side, and then from the small side. Carefully lift slightly and remove the board from the lock.
- Then the remaining boards are dismantled until you completely free the damaged one.
- The last stage is to replace the damaged part and reassemble the covering in the reverse order.
Note! If you did not buy the material in reserve, then you will need to go shopping and choose the right color. Before replacing the laminate, the material should sit in the room for some time in order to “get used” to the atmosphere and warm up to the room temperature.
We repair laminate flooring with an adhesive fastening system
If the laminate was assembled with glue, then it will not be possible to simply remove one damaged panel. In this case, you will have to cut the laminate.
Step 1. Use a marker to outline the floorboard with chips and scratches.
Step 2. Cut out part of the floorboard with a wall chaser (grinder).
Wall chaser
Cut out part of the floorboard using a wall chaser (grinder)
Step 3. Using a chisel to pry up the cut out area, remove it from the general floor covering.
Using a chisel to pry up the cut out area, remove it from the general floor covering
Step 4. Using a chisel, remove parts of the damaged tile from the floor covering.
Using a chisel, remove parts of the damaged tile from the floor covering
Step 5. Take a wooden block or bracket, a mallet and move the row of floorboards 1 cm towards the wall with the dismantled plinth.
Shift a row of floorboards by 1 cm
Step 6. We dismantle the remaining end parts of the damaged die, moving them horizontally with a hammer and chisel and cutting them with a grinder.
Dismantling the remaining end parts of the damaged die
Step 7. Using a chisel along the perimeter, we clean the joints of the laminate dies. Apply a thin layer of glue or sealant.
Step 8. Attach one mounting suction cup to the new board. We attach the second suction cup to the board, which will be adjacent to the long side.
Mounting suction cup
Step 9. Lifting the floorboards with suction cups, we join the joint. Remove the suction cups. We insert the bracket into the gap between the row of laminate and the wall, seal the dies so that there are no gaps in the coating. Clean off excess sealant with a rubber spatula.
Lifting the floorboards with suction cups, we join the joint
Step 10. After the sealant has dried, you can use the coating.
Prices for wall chasers
Wall chasers
Video – Repair of adhesive laminate
Expert opinion
Afanasyev E.V.
Chief editor of the pol-exp.com project Engineer.
Sometimes it is not at all necessary to disassemble the laminate and replace the dies. It is enough to purchase a repair kit that matches the color and carefully disguise chips, scratches, and other minor defects.
Sometimes it is not necessary to disassemble the laminate
Scratch removal paste
Fixing scratches with a wax pencil
Replacement of the entire floor covering
When the floors in your apartment have become worn out over time or some unforeseen situation has occurred, for example, your neighbors have flooded you, then you should begin to repair or replace them. There are two options for floor replacement: partial or complete.
- With a partial replacement, the worn floor covering is removed, but the base - a wooden floor, screed or something else - remains the same. The base is cleared of debris, examined to see how strong it is and whether there are weak points that need to be repaired. Repair and, if necessary, apply primer before installing a new coating.
- Complete replacement: carried out only if the base (wooden floor, joists, screed, etc.) is completely worn out and cannot be restored. Please note that with a complete replacement you will have to perform the following operations required by technology:
- Dismantling and removing old flooring.
- Dismantling the old foundation that has become unusable. This is an old wooden floor, joists or screed.
- A new screed or wooden flooring is being installed.
- If a perfectly flat surface is required, a new screed is sanded or covered with plywood.
- The surface is primed.
- New flooring is being installed.
- Skirting boards are being installed.
Important:
When replacing the floor in a room with high humidity (bathroom, toilet or kitchen, etc.), waterproofing should be done.
Now you know how to replace the entire laminate flooring or one board with or without disassembling the floor. Using our recommendations and advice, you can restore the decent appearance of your flooring yourself, but do not forget that the surest way to get rid of defects is to prevent their occurrence.
Types of laminate damage
Before moving on to how to repair laminate flooring with your own hands, you need to figure out what kind of damage occurs most often.
Usually this:
- Various spots. They are the most common material defect. Removing them cannot be called a repair, but this work also takes a lot of time. Leaving everything as is is not the best option, because stains spoil the appearance of the entire floor covering.
- Scratches or chips. Such damage is also very common. Their appearance can be caused by: moving furniture and other heavy objects, walking in heels, claws of pets, etc. In this case, restoration of the laminate is required.
- Various irregularities on the surface of the coating or gaps between adjacent panels. This can be caused by: failure to maintain the gap between the planks and the wall, unevenness of the base, or the wrong type of substrate.
- Swelling of the laminate. This type of injury is not as common, but is quite serious. This defect may occur as a result of flooding. In this case, you have to completely replace the damaged elements.
- Significant mechanical damage. If the planks are severely damaged, again, the only solution is to replace the damaged panels. Do-it-yourself laminate repair without disassembly is impossible in this situation.
READ MORE: How to prepare a floor for laminate
Eliminating gaps between seams
When the installation is carried out poorly or there is the influence of high humidity, it happens that the boards move from their place due to a change in volume. This creates gaps that not only spoil the appearance, but also lead to delamination of the laminate over time. To prevent this from happening, it is recommended to adhere to certain rules when connecting boards. These recommendations will help you avoid mistakes during installation, and cracks will not appear.
- It is important to acclimatize the material before starting installation, as this is a common cause of gaps appearing between boards. The laminate packaging should be brought into the room two days before the start of work.
- The base should be prepared very carefully so that it is perfectly level. Only in this case will the material fit correctly. Check evenness with a level.
- If the base needs leveling, you can use a special self-leveling mixture.
If gaps do appear between the boards, you can solve this problem differently:
- The places where the joints are located must be sealed with a composition that contains wood filler, or the coating must be dismantled.
- Prepare some or all of the surfaces correctly and re-install the flooring, finishing with the installation of skirting boards.
Floor repairs without dismantling can only be done if the gaps are very small. Before disassembling the laminate and starting installation, you should carefully remove the baseboard. Only after this can you remove the boards.
Sealing gaps
After removing the baseboards, you should check their condition. This work is important; you definitely need to check the ridges and grooves. Good material can be reused. To reduce heat loss and smooth out minor irregularities, it is necessary to lay a special underlay before laying the laminate.
When performing installation work, you should carefully connect the boards , otherwise large gaps may form between the joints. It is important to thoroughly clean the ridges and grooves and remove all dust from the coating. The connection of the material must occur on a perfectly flat surface, otherwise displacement may occur and it will be impossible to continue work, since the displacement will only increase. Slats with defects should not be used at all.
Connection of lamellas
After installing the floor, to ensure that the connection is normal, it is important to maintain constant temperature and humidity in the house. After installation is complete, glue can be applied to the places where the joints are located on the laminate for strength.
A simple solution to eliminating the gap where there is a joint is to hit the board with a rubber mallet. To avoid damaging the connection, do not apply much force. In order for the work to be successful and not have to change the laminate frequently, it is important to regulate the microclimate in the room.
If this option does not work, you need to spray colored paste into the cracks with a syringe or completely replace the laminate after leveling the base.
You can see how to replace a damaged laminate board in this video:
Average score of ratings is more than 0
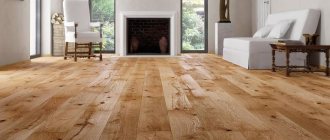
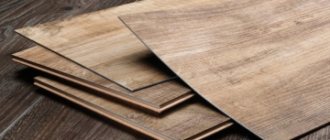
How to remove stains
During production, laminate flooring, an example of which can be seen in the photo, is treated with special compounds that protect the material from dirt penetrating deep into it. Therefore, to remove stains, it is usually enough to wipe the stained area with a dry or damp cloth. But sometimes difficulties arise in removing stains caused by varnishes, paints, and other building solutions.
Paint and varnish are easily removed with solvent or acetone. If the coating is stained with nail polish, it can be cleaned with a medium-hard brush using washing powder and a small amount of water.
READ MORE: GVL for floors - do-it-yourself installation technology
Traces left by rubber heels can be easily removed with a stationery eraser. Grease stains, after removing dried-on grease, are removed with a sponge soaked in dishwashing liquid.