Material for elegant chests
Wood, cardboard, plywood - these are the raw materials from which a creative person creates boxes with his own hands. Wooden caskets made from the following types of wood have the best conditions for storing precious stones:
- Spanish cedar;
- Linden;
- Birch.
The humidity of the workpiece should not be higher than 12%.
Cardboard is useful for a box in which craft supplies, such as knitting needles, balls, and beads, are placed. A convenient plywood box for stationery will be indispensable on your office desk.
Table decoration
Having mastered working with toothpicks and natural materials, it is easy to make a hedgehog from an onion, a lion from new potatoes, and a porcupine from beets. The next step using this technology could be the design of holiday dishes.
- An original addition to an exotic fruit salad will be berry canapés in the shape of funny ostriches.
- But charming pear hedgehogs carry ripe grapes or strawberries on their needles
- Here, cheese boats raise ham sails over toothpick masts.
Creating delicious crafts from toothpicks and various products is so exciting that ideas will not keep you waiting long, and the holiday table will surprise you every time with an unusual design solution, adding fun and joy to the celebration.
Tools for making boxes
They process wood and plywood using various devices and tools. While working, the master uses chisels of different shapes for figured carving and a jigsaw. Wood glue and a brush are used to glue various parts together.
The finished product is treated with wax or oil. Beginners who want to understand how to make a box with their own hands can study a master class on the websites. Experienced craftsmen use miniature chisels, which they make themselves from a large sewing needle.
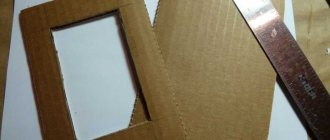
An elegant paper box is easier to make than a wooden one. The first step is to purchase corrugated cardboard, tape, PVA glue, and scissors. Fabric and beads are used for decoration.
Master class on making containers from thick cardboard
Products made from dense cellulose are distinguished by their minimal weight. In addition, with this type of material it is possible to create unusual designs. Preschoolers and beginning craftsmen can cope with the task.
To make a cardboard box, you need to prepare the following tools and materials. To this list:
- • Thick cardboard;
- • Scissors;
- • PVA glue;
- • Simple pencil;
- • Ruler;
- • Set of acrylic paints;
- • Wide and thin brush.
How to make a box with your own hands? To manufacture the structure, it is important to follow the recommendations of professional craftsmen:
1. On cardboard we draw boundaries for future details. To build a small container you will need 6 blanks. The width of the product will be 15 cm, and its length will be 25 cm.
2. Using adhesive, we fix all the parts to each other. The inside can be sealed with paper tape. You should get a rectangle, the lid of which will be fixed with metal rings.
3. Paint all parts with acrylic paint. For work it is better to use a sponge or a wide brush.
4. Let's start fixing the cover. To do this, we make through holes in one of the sides into which we will attach metal parts.
5. Next, we use velvet fabric to decorate the inside of the container. This material can be glued with PVA glue.
6. The top cover can be decorated with an unusual pattern or floral design. We decorate the decorative part with acrylic dyes.
To create a box with your own hands from cardboard and fabric, you will need on average 2 hours of free time and a minimum of available materials.
Wooden box
Small items are conveniently stored in a small wooden box with dimensions:
- Width – 16 cm;
- Length -36 cm;
- Height – 7 cm.
In order to make a wooden box with your own hands, you purchase 2 boards 16 cm wide, 36 cm long, and 0.5 cm thick. The artist will need planks 7 cm wide and of various lengths: 2 pieces of 36 cm, five pieces of 16 cm and one strip 18 cm long.
The craftsman fastens the parts together with self-tapping screws, hinges, thin nails and PVA glue. To obtain a smooth surface, the slats, boards and planks are ground.
Assembling the casket structure
First, the short side walls are nailed to the bottom with nails, then the long ones. Notches are made on planks 16 cm and 18 cm long using a jigsaw. The planks are attached to each other crosswise in the sawed areas and glued to the bottom with PVA glue.
The partitions are placed in the bottom of the box and nailed down. A 36 cm long strip is attached to the long side of the box with nails, onto which the hinges are screwed. Lastly, the lid is placed on the hinges. The result was a storage facility with 6 compartments.
Vase
We still have the top of the bottle. Let's prepare to work with it:
- disk;
- jar lid;
- thin rope;
- hot glue.
Let's get started:
- We mark two large arcs from the cut edge. We do this so that a high, sharp protrusion remains.
- Starting from this sharp protrusion and along the entire perimeter we mark points. As in the previous product, we make holes with a soldering iron.
- We take the disk, place the lid of the jar in the center, and circle it. Cut off the excess. We decorate the edges with rope and glue them with hot glue. Apply hot glue to the place where the bottle cap was. Glue the workpiece to the disk.
- We paint the product with paint from a can. We decorate the product with a ribbon. We thread it through the holes made earlier.
It turned out to be a wonderful flower vase.
Cardboard boxes
A creative person knows how to make boxes from cardboard and fabric with his own hands, spending 20 minutes of free time on 1 product. The choice of fabric for crafts is varied:
- Chintz;
- Silk;
- Velvet;
- Wool.
All details of the future product are pre-cut. Using hot glue, the fabric is glued to the paper base. A box made of corrugated cardboard is inexpensive to manufacture due to the low cost of the material. The boxes are decorated with beads, bows, and knitted flowers.
Wooden crafts
You can use different materials for homework; pay attention to how to make a wooden box with your own hands.
This is a more complex option, requiring minimal carpentry skills and appropriate tools (jigsaw, hacksaws, files, hammer, consumables). But the final result will please you with reliability and durability.
The finished product is easy to decorate, which is ideal for working with a child. Grandmothers and mothers will be delighted with a personally made gift.
- The material used is dry plywood 4-6 mm.
- The dimensions of the future product are selected individually.
- Prepare a drawing - bottom, side walls, lid. It is better to cut out the parts according to the template. Process the edges so that there is an even cut without roughness.
- Assemble the whole product, fix the pieces together with glue, small clusters or furniture staples.
- Use hinges for the lid.
- Decorate the box as desired.
Chest out of the box
A handy material for a durable box is a box of any size, for example a shoe box. First of all, they inspect it from all sides and glue the torn places with glue or tape. Then the surface inside is covered with thick fabric.
The outer side of the box is covered with light, light, shiny fabric. The product is decorated with lace ribbons, which are glued with drops of glue. The craftswoman selects the decor according to her taste and desire.
Note!
Do-it-yourself easel - types of designs, choice of materials for creation + step-by-step instructions and simple diagrams for beginnersDIY wedding glasses: a detailed master class for DIY decoration, selection of decorative elements and materials (photo + video)
- DIY phone stand | Dimensions, features and beautiful options for telephone stands
Miniature cardboard products
To create a round box from a box, use a reel of tape and available materials:
- Corrugated thin cardboard;
- Glue "Moment" and PVA;
- White acrylic paint;
- Colorless varnish;
- Two single-layer napkins with patterns;
- Decorative paper;
- Cover with thread of suitable diameter;
- Thin cardboard for the bottom.
Exquisite box
You will need: a round Raffaello candy box, checkered cotton fabric, foam rubber, scissors, compasses, cardboard, a sheet of paper with a pattern, glue, thread and needle, decorative elements - artificial flowers, lace ribbon, pearl beads, twine.
Master Class
- Cut a strip of patterned paper and glue it around the circumference of the box.
- Cut a circle out of cardboard the size of the bottom of the box.
- Prepare a volumetric circle of foam rubber the size of the bottom of the box.
- Prepare a large circle of fabric.
- Place foam rubber in the center of the fabric circle, and a cardboard circle on top, then cover it with fabric, as shown in the image. This will be the lid of the box.
- Glue the box lid onto the top of the box.
- Glue lace ribbon, beads and twine around the circumference of the box.
- Glue flowers and decorate the box to your taste.
An exquisite box from a box of Raffaello chocolates is ready!
Work order
First, the reel is primed with acrylic paint and glued inside with corrugated cardboard. Then the bottom is cut out, to which decorative paper is glued. The bottom is connected with Moment glue to the base of the future box. The outer side of the reel and the lid are decorated with decorative paper and fragments from napkins.
After the glue has dried, the surface of the box is varnished twice. An elegant miniature box will be needed to store jewelry and small handicrafts.
Storage conditions for jewelry
It is preferable to store rings, rings, and chains made of precious metals in a dry place away from sunlight. This means that the best place to save them is a wooden box. To understand how to make a jewelry box, you need to know that the inner surface is lined with soft fabric. Usually it is velvet or velor.
Caskets are made from different types of dry wood: beech, walnut, beech, mahogany. Inside, the space is divided by partitions for storing various types of decorations.
A wooden box made with your own hands is kept in the family as an heirloom and passed on to descendants. The product serves as an original addition to the living room interior.
Flowers from plastic bottles
There are a wide variety of ideas for what can be made from plastic bottles or paper. Let's consider the simplest option, a little effort and we will get magnificent flowers that can decorate the area in the yard of your house or become a decorative decoration in the house. What we need:
- plastic bottles (you can use not only transparent ones);
- thick wire;
- candle;
- hot glue and a gun for it;
- large size beads;
- scissors;
- stationery knife;
- lighter.
If you have everything you need prepared, let’s move on to the instructions on how to make crafts from waste material with your own hands:
- We take prepared plastic bottles. We separate the tops from them using a knife. After this, you can cut off the bottom with scissors. Then we divide the resulting rings from each container in half and cut out rectangles.
- Each rectangle is a future flower petal. We cut out petals from these blanks using scissors.
- We light a candle. Above it we need to process the edges of the petals so that they curve like real ones. We work carefully, as fire and plastic can burn the skin.
- Now you can collect the first flower. Apply hot glue to one end of the wire and secure the bead. We will place the petals around it using the same hot glue. First, we place several petals, add more from below, and on the very last layer it is advisable to use green petals.
- Similarly, we collect the required number of flowers. After this, using a lighter, melt the petals until slightly deformed. This way, the flowers will look even more beautiful.
Done, if you decide to take such a craft made from waste material to kindergarten, then the flowers can be placed in a pot, having first placed a floral sponge there.
Flowers can also be folded from corrugated paper
Master class on making a plywood box
Working with wood and plywood requires carpentry skills. A person who has not held a jigsaw in his hands is unlikely to be able to immediately make a high-quality product. An original do-it-yourself plywood box can be made by someone who has learned how to work with wood.
A box with five compartments is constructed from 6 parts:
- Bottom;
- Lid;
- Two short walls;
- Two long sides.
From a sheet of plywood 6 mm thick, 2 identical planks with dimensions are cut on a sawing machine: 14 cm x 10 cm, 14 cm x 7 cm, 10 cm x 7 cm. The edges of the workpieces are processed with a cone cutter at an angle of 45 ◦.
The side edges of the box are laid along a straight rail, alternating long and short sides. The boards are secured together with masking tape. Transverse joints are coated with glue when the tape is turned with the grooves outward. The glue is evenly distributed between the parts using a brush. The edges are neatly folded into a box and secured with masking tape.
Next, the bottom and lid of the future box are glued, gluing time is 2 hours. The masking tape that was used to secure the parts is removed. The overhang of the disk is set to a height of 6 mm, with which the lid of the box is cut off. In a box measuring 14 cm long, 10 cm wide, the height of the lid is 2 cm.
The cut areas of the body and cover are sanded with sandpaper until all gaps are removed. Plywood partitions are glued inside the box. The hinges are installed last.
Mirror box
You will need: acrylic plastic with a mirror coating, a ruler, felt, masking tape, good glue, a cotton swab, a construction knife.
Master Class
- Consider the size of the box. In our master class, the box consists of 4 panels measuring 12x6cm (rectangles), and 2 side panels measuring 6x6cm (squares).
- Mark the size of the panels on the acrylic plastic and, using a ruler, draw the construction knife well several times.
- Place the plastic on the edge of the table and make an even breakdown of each part of the box.
- Prepare one rectangular and two square blanks.
- Glue them together as shown in the image.
- Glue another rectangle to the structure.
- Apply glue to the top edges and carefully glue the rectangular panel.
- Leave the box blank to dry for 12 hours.
- Cut a strip of felt and glue it to the long side of the loose rectangular panel, then glue the structure as the lid of the box.
- Cover the inside of the box with felt.
- Leave the box to dry for several hours.
- Remove the protective film from the acrylic plastic and admire the mirror shine.
The mirror box is ready! I recommend watching this video!
Decorating the box
Plywood products are decorated in various ways:
- Inlay;
- Application;
- Decoupage technique.
At its core, decoupage is an applique that imitates painting. For work you will need: glue, scissors, brushes, paper napkins, white acrylic paint and varnish.
The box is covered with white paint in 3 layers, each of them is thoroughly dried. Napkins are laid out at the bottom of the box according to the selected pattern. The surface of the cut out picture is covered with glue using a brush.
The sides and lid of the box are glued in a similar way. After the glue has dried, the box is coated with acrylic glossy varnish.
The decoupage technique is successfully used to decorate cardboard boxes.
Box made from a tape reel
You will need: a reel of tape, PVA glue, strong glue or glue gun, white cardboard, a simple pencil, scissors, scrapbooking paper, a brush, a centimeter, decorative elements - lace braid, flowers, ribbons, half beads.
Master Class
- Trace the tape spool with a simple pencil 4 times on white cardboard. These will be blanks for the bottom and lid of the box.
- Cut out 4 circles and glue them together for density, so you get 2 circles.
- Glue 1 circle to a spool of tape as the bottom.
- Measure the circumference of the bobbin with a centimeter and cut a strip from white cardboard.
- Glue the strip to the circle to form the lid of the box.
- Cut out 4 circles and 2 stripes from scrapbooking paper.
- Cover the inside and outside of the box with parts cut from scrap paper, as shown in the photo instructions.
- Glue the lace trim around the circumference of the box lid.
- Tie a bow from a satin ribbon and glue it to the lid of the box.
- Decorate the box to your taste by attaching flowers and half-beads, or other decor.
The tape reel box is ready! I recommend watching this video!
Source
Antique decorating technique
To give an item an aged look, craquelure is used together with the decoupage technique. The cracking effect is achieved by applying a special varnish to the surface of the box.
The surface of the product is painted over with paint, which must dry well. The varnish is applied on top for 40 minutes. Acrylic paint is used for the second layer.
The more water is added to the paint during dilution, the larger the cracks on the surface. The brush should be brushed over one area only once, otherwise the varnish may “curl”.
During the drying process, the paint cracks; after a day, the surface is covered with acrylic varnish to secure the paint layer.