Today it is not difficult to purchase decorations for your home - hypermarkets are full of a variety of home accessories, the Internet is replete with them, and the markets are also full of a variety of crafts. But man is designed in such a way that jewelry made with his own hands will be both nicer and more beautiful to him.
One of the types of such creativity will be discussed in the article - weaving from newspaper tubes - photo illustrations will be given, the technology will be shown and examples of work will be given.
Simple weaving from newspaper tubes for beginners
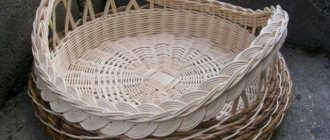
The technique itself is in many ways similar to wicker weaving, the only difference is in the material used. It’s a pity to break willow branches - it’s a living tree. Purchasing willow vines for weaving will require an investment. Newsprint is plentiful on hand and free of charge.
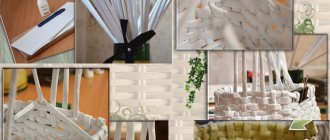
The main material for weaving is a newspaper sheet. The tube is made like this: the newspaper is cut into strips about 10 cm wide, and the edges of the rolled strip are coated with either PVA or a pencil with paper glue. It is not necessary to smear the entire strip.
To quickly make tubes, wrap a strip of newspaper around a round knitting needle.
If it is necessary to make a long tube, build up short fragments. To do this, they are inserted one into the other and coated with glue. Using this technique, you can create tubes of any length.
There are several basic technologies for weaving newspaper tubes. Depending on the type of work and what the final pattern should be, one of them is used. When working with patterns, it is important to stick to the finished pattern, and if you can’t thread the tube with your finger, you can use a crochet hook.
When weaving is completed, the ends of the tubes should be bent inward, and they are fixed either by hiding the ends or by placing them on glue.
Weaving a snowman from newspaper tubes.
We suggest you make not an ordinary snowman, but a life-size figurine of him. Of course, more patience and time will be required here, but the result is worth it. Such a snowman will become the center of a New Year's photo shoot.
We use the standard scheme for making a snowman - 3 balls fastened together with decorations and decorative elements. A special feature of making a life-size figure will be the use of large diameter balls as a frame. Fitness balls of different diameters are best suited.
Each ball is tied with twine, which will later be woven into rows of newspaper tubes and used to fasten the balls together (see photo). Then the balls are braided with newspaper tubes in sequence from large to small. You can see more details about weaving from newspaper tubes using the diagrams and videos presented in the article.
The process of deflating and pulling out the balloons is also a difficult stage. Take care of convenience in advance by installing the balls with holes for air supply to the top. If the finished figure lacks stability, use a sandbag placed in the base as a weighting agent.
Don't forget about your hands! This will be a long tube inserted through the holes in the body (at the level of the second ball). You can come up with another version of the hands.
Now we coat the product with varnish and proceed to the decoration. We make the traditional scarf, hat, buttons and carrot nose from improvised materials. Here a wider field for imagination opens up before you. Therefore, even 10 snowmen, originally made according to the same pattern, will not be similar to each other. Create a fun family of snowmen!
Such a snowman will always be surrounded by the attention of children and adults, and will also successfully fit into the interior of any home or child care facility. Start working on it early. The main thing is to prepare the raw materials, and this is about 3000 newspaper tubes.
Where to begin
After preparing a sufficient number of tubes, they decide on the shape of the product - circle, oval, rectangle, heart, some more complex shape. The bottom can either be made of cardboard or woven.
If the size of the product is small, for example, a casket or box, use cardboard as the bottom. If you plan to do something larger, you will have to weave the bottom yourself.
Weaving patterns from newspaper tubes
There are several weaving options. Each master must find one that he will use in the future.
“Rope” is the simplest and most durable weaving pattern
Between the two posts, two vines are laid crosswise in such a way that one lies in front of the work, and the other behind it.
When we circle around the posts, the vine that was in front ends up in the back, and vice versa.
To make this pattern look good, you need to take an odd number of posts.
Next, we insert the bottle as a base and weave it to the desired height.
To complete the work, we secure the working tubes, hiding them in the nearest weave. This can be done with a knitting needle.
To do this, retreat 4 rows, insert a knitting needle that will come out next to the working tube. We bend the vine and place it on a knitting needle. Carefully pull it out where the knitting needle was inserted.
We cut the tube as close as possible to the place of weaving.
Do the same with the second working tube.
For beginners, weaving from newspaper tubes is the best finishing option.
Openwork weaving from newspaper tubes in patterns
How it's done
Straight openwork is a method where stripes remain without weaving. You can weave another design into them.
- First we weave the walls to the required distance and secure them with wire.
- We retreat to the width of the gap and make several rows using the “rope” method.
- We continue to weave with the previous pattern.
Linen openwork is the second method, which is very popular.
- We make the working tubes flat using a roller, rolling pin or iron.
- Using flat strips, we intertwine the racks one after another in a horizontal direction.
- Between the horizontal rows you need to leave a distance equal to the width of the space between the posts.
How to weave the bottom correctly
The first step is to cross the eight tubes that make up the base for the bottom. Next, bend the tubes clockwise and begin weaving in a circle. Continue weaving until you get the required size for the bottom of the product. If it is necessary to lengthen the tubes, they are extended in the manner described above.
Prepare a form for tying, for which auxiliary tubes are attached vertically to it using clothespins, after which, increasing the length of the “vine” as necessary, weaving in a circle is done.
Protection with paints and varnishes
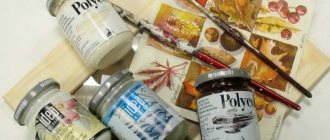
To protect the finished product from moisture and give it additional strength, it is coated with acrylic paint and then colorless varnish in 2-3 layers. Painting is done after finishing the work, firstly, it is more convenient, and secondly, if you paint the elements before weaving, they will become stubborn and rigid, and in the end it will simply not be possible to work with them.
In addition to acrylic paints and varnishes, they are suitable for coating car enamel in cans. Any application method is suitable - brush, sponge, spray gun.Acrylic paint is better than auto enamel in the sense that you can get one of your own from several different colors, whereas you cannot mix the composition in spray cans.
Weaving an original heart from newspaper tubes.
With a heart made with love from newspaper tubes, you can very skillfully decorate a house or apartment for a celebration, as well as make an original gift for a loved one. What is noteworthy is that virtually any magazine, old newspapers, even cash register tape can serve as the source material (the main thing is that it is all paper and can be easily processed and colored).
You can paint the tubes both before and after attaching them to each other. As a composition for painting, it is best to use regular paint, or in extreme cases a spray, after which all that remains is to coat the finished composition with varnish. Next, we will look at how you can make the product beautiful and stylish in more detail.
To work on the composition, you will need to prepare a wire (necessary to create the frame of the heart, all other tubes will be attached to it in the future). A set of newspapers and magazines is also selected for making the tubes themselves, glue for fastening them, and clothespins (used when reliable fixation is necessary).
The sequence of operations is as follows:
♦ The wire is kneaded, after which it must be inserted into the main tubes. This is done exclusively at the beginning of work. It is important not to take too thick a wire; you just need to correctly calculate the thickness so that it can be bent comfortably.
♦ The wire is inserted into tubes, which are used as supporting structures. Other tubes without wire will be attached in neat layers. The frame must be shaped like a heart. It is important to perform this operation efficiently, forming perfectly rounded walls of the product.
♦ The tubes at the base must be glued together, which will give the product its final shape. In the future, you will need to use exactly the same clothespins with which the edges are fixed. Take care to create optimal conditions for subsequent drying of the structure.
♦ When the basic design is ready, you need to add a tube, only in a different plane, to make the heart three-dimensional. This is necessary not only to create a visually attractive design, but also to further strengthen the heart.
♦ Once the 3D frame is complete, all the creator needs to do is weave new newspaper tubes around it to give it its final shape. There are two options for the appearance of the product. Namely, a heart, maximally intertwined with tubes, or stylized from just a few elements. Regardless of the option, wire is no longer required.
Weaving from newspaper tubes allows you to create a stylish and practical decoration for the holiday!
Techniques for weaving from newspaper tubes
The most common techniques used in this type of creativity are presented in the list below:
Simple bending is the easiest weaving method; the tubes are intertwined in one direction.
Industrial vacuum pumpDIY stencils of beautiful snowflakes from A4 paper
- DIY paper crown: ideas, templates and tips on how to make a real crown (video + 130 photos)
“Rozga” - used for vertical frame posts and in all respects repeats the technique of weaving a basket.
Volume bending - used to finish the product and give it a beautiful edge in the form of a braid. Most often found in the manufacture of wicker vases, boxes, and drawers.
The “lazy braid” is one of the easiest methods to complete a craft. The tubes are woven into one braid, which extends along at least part of the entire perimeter of the product.
“Isis” is a flat weave for finishing the edge of a box or box.
Double folding - used to give baskets a voluminous edge around the perimeter.
How to make a three-dimensional paper house: step-by-step master class and instructions for making a doll and toy house (155 photos + video)Making peony flowers from corrugated paper - a guide for beginners and a step-by-step master class on how to make a flower with your own hands
How to make a beautiful tree of happiness with your own hands: step-by-step master class for beginners (100 photos + video tutorials)
Complex folding is a decorative technique for baskets, boxes and vases, used strictly in accordance with the design of the product.
To master them, you should read the step-by-step instructions on weaving techniques from newspaper tubes.
Weaving snowflakes from newspaper tubes.
In this case, you just need a little patience, paper, glue, scissors, paint or spray. It is best to make the body of a snowflake using wire, but you can also get by using only a paper base. For this, not only ordinary soft paper is used, but also quite hard cardboard, twisted in several layers. Such material will become an indispensable basis, especially since there is no need to waste your time and effort searching for the necessary set of wire to equip the structure and give it the desired shape. You can take cardboard of any color, and then braid it with regular paper.
Weaving from newspaper tubes is carried out strictly along the body, taking into account the individual characteristics of the product. For example, you can easily use multi-colored tubes and add original decorative elements to them. At the end, the finished composition is painted and varnished, the product becomes visually attractive and perfect. This is a significant advantage of such a snowflake.
Photo of weaving from newspaper tubes for beginners
How to make a beautiful lampshade with your own hands: simple ideas for table and floor lamps (125 photos + video)How to make polymer clay at home: DIY master class (125 photos + video)
How to make a paper hat with your own hands - templates, design ideas and tips for those who are making a hat for the first time
