In any kitchen there will be a few unwanted jars that cannot be reused for canning. At the same time, they are convenient for storing bulk products or small items. Even the most ordinary container can become a decoration for a room. Many housewives decorate jars with their own hands - this makes it possible to give a second life to an unnecessary item, making it beautiful and useful.
Decorating glass jars
Glass jars are a versatile storage container for the kitchen. Most of them have appropriately sized lids that allow you to tightly close the container without letting moisture in. At the same time, they can easily be processed in any way - they can be simply painted, or any decor can be glued to the surface.
Important! When decorating jars in which food will be stored, it is better not to glue small parts. They can fall off and get into food.
Preparing for work
Before you start decorating glass jars for the kitchen with your own hands, you need to prepare your workplace, the containers themselves and materials for work.
- The work surface should be free of unnecessary things. In addition to the place itself, you need a corner where the product will dry.
- Labels from jars should be removed.
- Wash containers thoroughly. It is advisable to use dishwashing liquid or wash them in the dishwasher.
- The surface must be degreased by wiping the glass with a cotton swab dipped in acetone or nail polish remover.
- If paints or contours are used, it is necessary to work with gloves so that there are no fingerprints left on the glass surface.
- Depending on what you will create, prepare materials (paint, paper, fabric, small decorations, etc.).
- The adhesive material is selected - glue (super glue, Moment or construction glue), double-sided tape, adhesive gun.
Important! If you don’t have confidence in your abilities and imagination, it’s better to draw a sketch of the future product on paper. It will be easier to work this way.
Coloring glass jars
Acrylic paint is most often used to paint glass jars for the kitchen. It is non-toxic and can come into contact with food without harmful health effects. You can paint the surface with a brush or use an aerosol can.
Simple decor idea - full coverage with spray paint
If you use an ordinary kitchen sponge and several colors of paint instead of a brush, you will get unusual stains on the surface.
Painting with acrylic paints using a sponge
To preserve the color for a long time, it is better to cover the surface with transparent acrylic or construction varnish. To complete the look, you can add small decorative elements (for example, lace, buttons, twine, fabric).
Painting with a brush with the addition of lace, twine and small decor
Using stencils
You can draw a stencil for decoration yourself or print it on a sheet of paper. Having placed the image in the jar, pressing it tightly against the inner surface, the design is outlined with a brush or contours.
Drawing with a stencil
With the help of such stencils, the transparent jar is usually not completely covered. Therefore, you should think about what will be stored inside the container.
Example of design using stencils
Decor using stained glass paints
Stained glass paints are specially designed for painting on glass. It is advisable to apply them with a synthetic brush so that no lint remains on the surface. After work they do not require additional fixing with varnish. Unlike acrylic paint, they are slightly translucent and you can see what is inside.
The result of painting with stained glass paints
Key aspects and techniques of decoration
Do-it-yourself home decorations can brighten up the simplest decor, adding special charm and comfort to it. Using different methods, experienced needlewomen can decorate bottles, containers for house plants, kitchen and bookshelves, as well as any surface.
Using available tools, you can transform glass jars of any shape and size, giving them a functional role.
Such devices make excellent flowerpots, display cases for family photos, organizers in which you can store various small items, and other useful additions.
At the same time, cans can make very original candlesticks and lamps, suitable for creating an intimate atmosphere.
Rules for creating the perfect thing
Any decor requires following some important rules. Based on this, before decorating glass jars you will need to take into account the nuances of the process , which will affect further actions:
- The dimensions of the products determine the amount of consumables and determine the design of the final decoration.
- The choice of necessary materials and processing techniques for products will depend on the purpose of the item.
- The interior of the room in which the decoration will be located is not the least important. So, before its production, you need to take into account the color scheme, interior style and purpose of a particular room.
Understanding the features of the process, you can begin to select the necessary consumables for decoration and use them. However, you need to understand what materials may be needed based on the chosen method.
Popular Decoration Methods
If the owners have the desire and ability to assemble home decorations themselves, they will need to arm themselves with ideas taken from numerous master classes. Apart from this, there are some standard techniques that beginners can use. Among them you can choose the following:
- Decorative painting is a method characterized by convenience and elegance. Even if you don’t have the ability to draw, you can use special stencils or decorate products in the Gzhel style.
- By using decoupage, people will be able to see its simplicity and aesthetics. The result of the processing depends on the design on the napkin, the upper part of which is applied to the glass surface of the jar treated with water-based paint. To ensure a tight fit of the napkin, smooth it with a brush with varnish from the center of the product.
- Fabric or knitted elements can add uniqueness to the compositions. To create beauty, you can cover the side surfaces of the cans with elegant textiles or lace. In addition, nice options can be obtained from knitted covers and macrame (if the latter is made from silk threads, the decoration will acquire nobility and sophistication).
You can also decorate jars using the bas-relief technique , where decorations reminiscent of ancient flowerpots are made from nylon stockings with sparkles. First, the jar should be coated with a small layer of PVA, and then covered with a nylon layer (before the glue dries, you need to make several chaotic folds directed in different directions, and apply a layer of transparent varnish as protection).
Decoupage glass jars
The decoupage technique allows you to glue paper fragments so that you get the feeling that the image is drawn. To work you will need:
- a napkin with a pattern or decoupage card;
- white primer or acrylic paint;
- brush or sponge;
- PVA glue;
- transparent acrylic or construction varnish.
And of course, the container itself, well washed in soapy water.
- It is necessary to remove the lower, white layers from the napkin, leaving only the design. The required fragment is cut out with scissors or pulled out by hand to give uneven edges.
- The surface of the jar should be coated with a white primer (or acrylic paint) using a sponge or brush. Dry the workpiece for at least 30 minutes.
- A fragment of the design is applied to a white surface and glued to PVA glue using a brush. It is better to work with brush movements from the center of the image to the edges so as not to tear the paper.
- You can also use a sponge to apply some paint around the design. The workpiece must dry for at least an hour.
- The jar is coated with transparent varnish, applying at least three layers, drying each of them for at least 4-5 hours. It is more convenient to apply the varnish with a wide brush.
- The product can be decorated with ribbon, twine or other decorative elements.
The result of simple decoupage on glass
Important! When working with construction varnishes, the room must be well ventilated to avoid poisoning by toxic fumes. But acrylic varnish is odorless and not harmful to health.
Decorating with textiles
Fabric materials are often used to decorate the surface of a glass jar. The most popular are burlap, twine, shreds and lace. It is best to glue fabrics with double-sided tape or Moment textile glue.
Decor using burlap and lace
You can cut out small figures from multi-colored scraps or felt, creating entire scenes or paintings. The materials are easily glued with double-sided tape. They are also easy to sew onto a plain fabric cut to fit the container. Children love to make such crafts.
An example of working with felt
Sets for spices and storage of small items
Small jars left over from baby food can be turned into a spice set. It is also better to paint or decoupage them.
Decorating small jars of saline solution. Painting with stained glass paints
If there are a lot of seasonings, you can write their names.
Embroidery canvas and pieces of felt are glued, the name is signed with a regular pen
Decorating jars without lids
Jars without lids are used to store things that are not susceptible to moisture. They can hold pencils, pens, markers, glasses, hooks or knitting needles for needlework.
Decorating pencil holders using stained glass paints
Such containers can easily be converted into flower vases.
Lamps made from cans
By placing an LED light bulb or candle in a glass jar, you can create an unusual lamp. A real candle must be placed on a stand, or care must be taken to ensure that it does not melt completely. Otherwise, the glass will become very hot and black soot will form.
Small stones are used as a stand to prevent complete combustion of the candle.
By simply placing a garland in a glass container, you can decorate the glass jar and get an original night light.
Night light idea
And if the jar is unevenly coated with paint or lace is glued, the light from it will form beautiful patterns.
Night lights with lace
Use of small details in decoration
Jars with small details glued to them in a chaotic manner - buttons, coins, pasta, etc. - look original.
Decorated buttons covered with paint
The decoration of glass jars using natural coffee beans is very popular. Fix them to the surface using a glue gun or regular glue.
Decor with twine and coffee
Decorating the inside of the jar
If the container will simply serve as a piece of furniture, it is not necessary to decorate it on top. It is enough to place bright little things in it and it will already look beautiful. For example, you can use:
- colored buttons;
- pieces of colored glass;
- multi-colored pebbles;
- shells;
- rhinestones or beads.
And if you use your imagination, you will get amazing interior items.
Idea for decoration - inside there is sand, pieces of glass and dried flowers
A transparent jar can act as a kind of snow globe, which everyone probably had in childhood. In order to create such a decor, you need to place inside a composition of small toys, dried berries, cones or spruce branches. Secure the parts well with glue. Use cotton wool, coarse salt as “snow,” or simply spray the inside of the jar with white paint. Craft stores also sell artificial snow (made of plastic). The only difference from a snow globe will be that such a product cannot be shaken - it should simply stand still and delight with its unusualness.
Idea for decorating a “snow composition”
We decorate jars with our own hands
If you look at any glass jar, what kind of home decoration is it? But this is only at first glance. And if you use your imagination and show ingenuity and skill, the bank will be transformed. You won't recognize her as the old simpleton. You say, it’s just a waste of time, it will still turn out to be nonsense. Well, this is not necessary. If you feel the desire to get creative, decorate the jar with pleasure and a good mood, everything will work out. But the materials are all at hand, you don’t need to buy anything. This article shows ways to decorate jars that are easy to do and understandable to everyone. Start with something very simple. For example, simply paint glass jars with spray paint or acrylic paints. Flower vases are ready!
It's as easy as pie to stick sticky pictures on the jars. This way you can design jars that children will use.
Try gluing pieces of newspaper or magazine pages onto the jars. It turns out unusual if you add lace, buttons or shells to this decor.
Now take:
- small glass jar
- PVA glue
- brush
- a piece of fabric or wide braid
Using a brush, coat the jar with glue and carefully glue the fabric. If you want, add some decorations: buttons, beads, cabochons. They will have to be glued with “Moment” or with hot glue (from a gun).
Jars decorated with fabric can be used in any way you like. Most often they serve as vases for fresh flowers.
In addition to fabric and braid, the jar can be “dressed” in a matting. In this way, decorated jars fit well into interiors in the Provence style, Scandinavian and Dutch interiors, cowboy and American styles.
From the same matting it is easy to make a flower decoration for any jar; you just need to add a little nylon, silk or some other thin fabric for contrast.
Fabric, braid, matting, faux leather and, of course, lace can be a good decoration for a simple and unpretentious glass jar. The lace is glued with PVA glue and complemented with flowers, beads, and stencils.
For those who know how to knit, there is a good way to decorate cans: knit small fabrics according to the size of the cans with different patterns and stick them on. To avoid the need for gluing, knit on four needles (like knitting socks), then you will get a pipe-shaped fabric, inside of which you can simply put a jar.
If you don’t have time to knit, and for quite a long time, you can cut out fragments from knitted fabric and stick them on jars.
The next simple way to transform a jar is to wrap it with twine or knitting threads. Additional parts can be glued onto the twine.
Using twine, another vase for a glass jar is assembled - made of corrugated cardboard. You need to cut about 50-60 semicircles from a cardboard box. Using an awl, cut holes in the top and bottom of each semicircle and thread twine through them. To do this, use a large “gypsy” needle. The diameter that should be inside these semicircles should be slightly larger than the diameter of the jar that you want to put inside.
Try drawing on cans. To do this you need stained glass paints and a glass outline. It is not necessary to depict something too complex; you can limit yourself to simple images and forms. This also turns out very cute.
There are many more wonderful ways to decorate jars and one of them is decoupage. You need to take three-layer napkins and cut out the fragments you like. Then remove the top paint layer from them. So it is glued to the jar using PVA glue.
To ensure durability, the napkin must be coated several times with acrylic varnish. In this case, each layer must dry completely.
Before decorating the jars using the decoupage technique, they are usually painted. You can use spray paint or acrylic paints. Decoupage goes well with any other materials used to decorate jars.
But the jars don’t have to be painted, then they remain transparent and a thin layer of napkins can transmit light from a candle placed inside the jar.
But in this simple way you can decorate not only glass, but also metal jars. Prepare:
- jar
- ice cream sticks
- two rubber bands
- twine or knitting threads
Place rubber bands on the jar, one closer to the neck and the other closer to the bottom. Push popsicle sticks under these rubber bands and continue placing them until you have covered the entire jar. Then, in the places where the elastic bands are located, tie the jar together with the sticks with twine and tie it in a knot. It turned out to be a wonderful jar.
Instead of ice cream sticks, you can take bamboo sushi sticks or ordinary thin twigs without even peeling the bark from them.
Another natural material that can be used to decorate jars is pumpkin. Take a medium-sized vegetable and cut off its stem. Remove the seeds and pulp. Place a glass jar with autumn flowers inside.
As you understand from the examples above, jars can be decorated in many ways. There are also quite eccentric ones. Here is one of them: lining cans with coins.
And another no less original method than the previous one is to pull a rubber balloon onto a jar. Take scissors and cut off the top of the ball. Gently pull the ball onto the jar.
You can make as many colorful vases as you like. Fast and unusual. The edge of the ball can be decorated with braid, beads or cabochons.
Decorated jars are easy to use in the home. And they will certainly decorate and diversify your life. Good luck to everyone in their creativity!
How else you can decorate bottles and jars you can read here:
- How to decorate bottles for the New Year?
- DIY bottle decoupage
- How to decorate bottles for a wedding?
- Decorating bottles with twine, thread, lace and fabrics
- Making a vase from a bottle (or jar) with your own hands
- DIY bottle decoration
- Decorating bottles with improvised materials
Decorating tin cans
If you get creative and use some tips, you can turn boring cans and other tins into unusual home decor items.
Preparing for work
- First of all, you need to clean the surface of the cans. Remove labels, rinse and dry walls. If there are any unevenness, sand them with sandpaper (one or zero).
- If the metal is prone to rust, or the product will be actively used in contact with water, treat the surface with a special product. Construction and creative stores offer a large range of sprays: rust converters, anti-corrosion, inhibitor compounds, lithium or silicone grease.
Clue. If the surface of the tin can is to be covered with acrylic paint or primer, no additional means should be used - their composition additionally protects the metal from corrosion.
- The necessary materials and adhesives are selected.
- The edges of the jar are checked. The cut should not be sharp (for example, like in canned food). If there is a possibility of cutting yourself, it is better to process the top with a file, coarse sandpaper, or glue a strip of fabric.
The main difference between products made from tin and glass is that such containers can be modified. For example, drill holes to make special fastenings (to hang the product on a hook or attach a convenient handle). To do this, you may need a drill, knife or other sharp object.
Preparation before work
Before you start directly decorating the jars with your own hands, you should think through all the nuances that relate to this procedure. Preparation consists of several main stages:
- First, naturally, the workplace is prepared. Usually this is a table whose surface is covered with film or newspapers.
- Depending on the types of materials that will have to be worked with, containers and storage containers are prepared.
- Selection of material for decoration. This list will depend on the type of finish. In most cases, a means is required to attach decorative elements to the surface of the can. It's better to use a glue gun.
- Additional means are selected to clean the surface of the cans. For metal ones it can be sandpaper, for glass - acetone, clay ones are not specially treated.
The choice of all materials and the cans themselves depends on where and how the finished decorative product will be used. It is also important to think about the design of the containers. It can first be embodied on paper, and only then transferred directly to the surface.
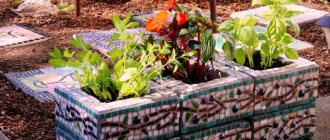
Containers for plants
Tin cans are very convenient for growing flowers and spices in the kitchen. Soil should be placed inside and plants should be planted.
If you drill several holes at the bottom of the tin and select a suitable plate or tray, you will get full-fledged plant pots.
An example of the decor of large tin cans for flowers
Decorated jars can be hung on the wall and create an amazing “living” composition.
Buckets made from tin cans
The containers to which special handles are screwed look interesting. In addition, such buckets are convenient to carry and hang on the wall.
Composition of flower pots on hooks
Handles can be not only useful, but also simply decorative.
Handles for a bucket are also knitted, twisted from fabric, or woven using the macrame technique.
Decoration with paper, twine, fabric
If the container will store things that are not afraid of moisture, you can decorate the jar with beautiful paper, magazine clippings, and even your own photos.
Decor idea using paper, lace and buttons
If you wrap a jar in a circle with twine or a rope, gluing it to the surface using a glue gun, super glue or Moment, you will get an interesting eco-style blank.
Taping with a tourniquet
You can decorate such a base with anything. Natural materials (cones, acorns, dry plants, grains, seeds), small details (buttons, pendants, shells), lace and ribbons look good with twine and rope. It is best to glue the decor using a glue gun or Moment for textiles.
Idea for decorating with twine, shells and lace
Craft stores sell textile tapes that can be easily applied to a metal surface. This way you get original multi-colored containers.
Use of textile tapes in decoration
LiveInternetLiveInternet
Quote from Fyr's message
Read in full In your quotation book or community!
Without title
Glass jars in the interior + PHOTO
https://www.tutdizain.ru
New life for glass jars. Photo
If you have a certain number of glass jars of various interesting shapes lying around in the attic, then do not rush to throw them away. There are many unconventional ways to use glass jars in the interior. In today's article we will talk about a new life for glass jars and bottles.
Vases made from glass jars
A very unusual idea is to use glass jars as various decorative vases. Properly created compositions from glass jars can easily claim the title of interior decor. You can use fabric, beads, paint, varnish, rhinestones, ribbons, paper, napkins, etc. to decorate glass jars.
Vases made from glass jars. Photo
The texture of transparent glass looks good on its own. But if desired, the container can be coated with matte varnish or painted with acrylic paint (it is not afraid of water) of a suitable color.
Beautiful vases made from simple jars. Photo
You can get an interesting effect if you first apply an inscription or design under the paint using stained glass paste.
Glass jar candle holder
A quick decor option made from a glass jar is a candlestick. Alternatively, the jar can be filled with flowers and water, and a lit candle placed on top. Also, the bottom of a glass jar can be filled with sand, expanded clay, and small pebbles, which will help fix the candle.
Candlesticks made from glass jars. Photo
Decoration of glass jars. Photo
Hanging decor from cans
Hanging decor will look very impressive against any background, be it a window, a wall, or a fence. To create it, you need to select the appropriate number of glass containers, tie the rim of the neck with twine or wire (it is important that the structure is reliable) and hang it at different heights in a chaotic manner.
Depending on the width of the neck, you can place both flowers and candles in each container. It is important to remember that the decorative effect of the compositions lies in clear water. Therefore, you need to change it daily and wash the walls from blooming algae.
Lamps made from glass jars
Now let's look at glass jars as an interior item. Oddly enough, but jars will be able to perform this function if you build a lamp out of them.
Lamps made from ordinary glass jars. Photo
Glass jars in interior decor. Photo
Showcase from a jar
The jar can be an excellent keeper of memories of a holiday at sea, a walk to the village, etc. By putting together the various elements of an event, you can put them together into a composition that will include both natural materials and souvenirs, photos, and notes.
Memorable moments in a jar. Photo
Such decor should be placed at eye level, and it will periodically remind you of a pleasant moment in life.
You can also place FLORARIUM .
Florarium in a glass jar. Photo
Glass jar photo frame
A great idea would be to use a can to create a vintage photo frame with your favorite photos. To do this, just stick a photo inside the jar and turn it over. You can also pour various decorative elements (seed beads, beads, stones) into the jar and close it with a lid.
Photo frame from a glass jar. Photo
Glasses from simple cans
Glasses made from glass jars can be an excellent item for organizing a picnic or any celebration in the lap of nature.
Jar for storing various things
The obvious fact is that glass jars are perfect for use as containers for storing various things.
Glass jars as storage for small items. Photo
Filled jars can be placed on shelves or secured to walls using metal clamps (available at any hardware store).
Photos used: etsy.com, alowcountrywedding.blogspot.com, realphotography.com, crazydomestic.com, pinterest.com


