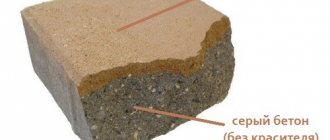
Alexander Alexandrov is in touch with you and today we will get acquainted with the technology of laying paving slabs on concrete . Many of the readers will ask the question: “Why bother with concrete, because it’s easier to lay paving slabs using a cement-sand mixture.” And in some ways they will be right, since laying paving slabs on a sand-cement base is much easier than on a concrete base; there is also no need to install a drainage system, since sand freely absorbs water. All these arguments have their place, but there are situations when it is impossible to do without a concrete foundation. For example, when you are dealing with heavy machinery. So my parents’ housemate works as a truck driver and when he is at home, he drives his MAN into the yard, covered with paving slabs laid on a concrete base. With such a weight of sand, the mixture will not cope.
Another argument in favor of concreting the base is the location of your yard or house on any dips. For example: the corner of my house is located on the site of an old basement (remodeled last year) and the use of a cement-sand base did not suit me, since water that freely passes through all the preparatory layers can play a bad joke. So only concrete, and only with drainage!
Preparatory work
So, friends, before starting any work, you need to properly prepare the site.
The first thing we do is mark the site. This is done using driven pegs and laces. Do not forget to observe the slope towards the zero line. Let me remind you that the zero line is the place from which the water will flow.
Next, you need to measure the distance from the ground to the laces. It is necessary that it is at least 30 cm from the ground.
If the distance is less, then we use a miracle of engineering called a shovel :)
We install curbs. The process of laying borders can be done either at the beginning of the preparatory work, or at the end - as you wish. If you are new to this business, then it is better to do this right away. Read how to properly install curbs with your own hands here. If you still decide to lay the curbs after laying the paving slabs, then you will have to install a temporary blind area.
Curb installation diagram
So, friends, the next step in preparing the site for laying paving slabs on a concrete base is laying geo-textiles, which prevents the germination of vegetation.
Next, we fill the entire surface of our site with crushed stone of a fraction of 20 to 40. We level it and carefully compact it. For compaction, you can use a homemade tamper, and for better shrinkage, the crushed stone can be spilled with water.
This concludes our preparatory work.
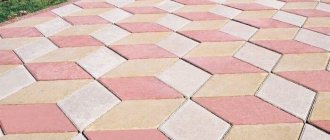
How to lay paving slabs
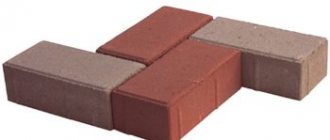
For heavy loads (for example, a roadway) it is necessary to choose tiles 8-10 cm thick, for the courtyard of a private house with the possibility of a passenger car passing - 6 cm, and for a pedestrian area (paths, lawn, porch) 4-3 cm is enough. When choosing a material , pay attention to its surface and texture. The tiles must be free of chips, cracks and any foreign inclusions. A high-quality batch of paving stones must be uniform in geometric parameters and color. The most reliable paving bricks are made using the dry vibration pressing method. It has high strength, frost and moisture resistance. The tiles must be laid on a slope so that precipitation does not linger on the surface. The optimal slope is 1 cm per linear meter. It is better if the slope is away from the building. Otherwise (if the natural slope of the soil is towards the building), take care of drainage trays. To secure the edges of the tile masonry, a border made of stone, concrete or treated durable wood is used. To get started, watch a video about laying paving slabs by professionals:
What do you need for work?
Before starting installation, prepare the following tools: a vibrating plate for grinding and compacting the surface, a mallet, marking bars, thread (rope), tape measure, a stiff brush, an angle grinder with a diamond blade, a level, a shovel, a rule and a trowel.
tools for laying paving slabs
And materials: paving slabs in the required quantity, crushed stone or sand, curb, cement-sand mixture (CSM), water.
Laying paving slabs with your own hands: step-by-step instructions
We are preparing the “trough”. Mark out the required area for tiles in advance using a meter, stakes and rope. Now it is necessary to remove the top layer of soil by 15-20 cm. The depth depends on the planned consumption of gravel and CSP. Installing a curb. It is mounted on a concrete pad 7-10 cm high using a mallet. It is better to choose concrete with increased hardness, grade - at least 100. This will simplify installation and improve the quality of work. The curb is pressed against concrete on both sides. We fill in crushed stone (or clean sand). The optimal height of the crushed stone layer is 8 cm. We compact the crushed stone on top with a vibrating plate. We prepare a mixture of sand and cement. We choose the ratio 5:1 or 3:1 (if you want to increase the strength of the solution). It is better to take sand wet. We perform the screed. To do this, pour a 3-4 cm layer of CPS, level it and tamp it well. We install the guides so that their sides clearly coincide with the marking threads. Now we align the surface between the guides using the rule. We carry out this procedure along the entire perimeter of the marking. Laying paving slabs with your own hands. We tap each block with a mallet and level it. Afterwards, it is recommended to walk over the laid surface with a vibrating plate. Trimming tiles. It is best to trim after installation. Measure the required parts and carefully cut them with a special device for cutting paving slabs. We process the seams. After laying the tiles, the seams are clogged with DSP or sand. To do this we use a brush.
Pouring concrete for laying paving slabs
All subsequent work is essentially the construction of a blind area on which paving stones will subsequently be laid.
Immediately before pouring concrete, it is necessary to decide on the issue of reinforcement. If the paving slabs will be used only for pedestrians, then you can do without reinforcement, but if the entrance to the garage or yard is paved from it, then there is no need for reinforcement. Although my personal opinion is that concrete must be reinforced in any case, as this will significantly increase its durability and strength characteristics.
Ø10 reinforcement is best suited for concrete reinforcement, which is knitted in cells from 10 to 15 cm. But if there is none, then you can buy a mesh for plaster, which is also quite suitable.
To ensure that all your work does not go down the drain in winter, you need to take care of the expansion joints. They are made very simply - 20 mm thick boards are laid several meters apart from each other, edge up.
After all of the above, you can finally pour the concrete. Last year I got hold of a Kraton concrete mixer and I realized what a wonderful thing it is, because after “oiling” it with a shovel in a cast iron bathtub, you begin to love diclofenac!
The pouring process must be carried out as quickly as possible so that the concrete layer is as uniform as possible. To prevent cracking, especially if work is carried out in hot weather, it is necessary to add a plasticizer.
We wait for the concrete to harden and remove the boards from it. We fill the newly formed expansion joint with sealant for joints of concrete floors (fortunately, construction stores have a lot of this stuff in bulk).
conclusions
No matter how advanced and advanced the technology may be, common sense and economic feasibility should always come first. Even with the use of heating and special chemicals, installation work on paving tiles in frost also has its own temperature limitations. Indicators for any plasticizers are limited to 15 degrees below zero. At lower values, any heated mixtures will not be able to fully harden and dry. Frozen water will destroy fragile concrete, if not in the substrate, then in the seams. Therefore, it is most advisable to carry out road construction in warm weather.
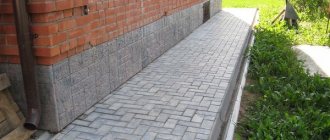
Laying paving stones on concrete
In principle, the process of laying paving slabs on a concrete base is no different from the usual one.
In order not to create duplicates on my blog, I will briefly remind you of the technology:
1. Mix the cement-sand mixture in a ratio of 6 to 1.
2. Sprinkle in an even layer over the entire work surface. Calculating the height for bedding is determined very simply. The paving slabs should protrude 2 cm above the curb, add to them the height of the paving slabs. We subtract the height of the exposed curb and this value - we get the thickness of the bedding layer. This is necessary for those who immediately installed curbs.
3. We are ramming, today you and I are ramming :)
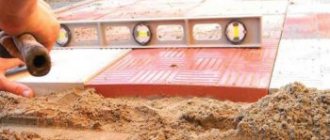
4. We set the beacons using two metal guides. The only thing is that if you are making paths, then their thickness will not always give you the opportunity to use the rule, but the need for invention is tricky and I think that solving the problem will not be difficult!
So, we work with beacons, following them with a rule, pouring a cement-sand mixture into those places where it is missing and vice versa - removing the excess with a rule.
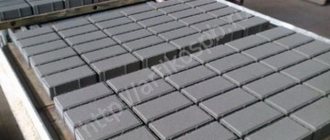
5. Then we begin laying paving slabs. Before starting work, do not forget to pull out our beacons and fill the resulting gaps with the same sand mixture.
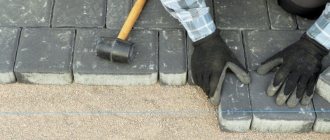
6. We begin laying the tiles from the curb, driving them into the base with a rubber mallet.
During the work, it is necessary to monitor the gaps between the paving slabs - they must be at least 5 mm.
Also, do not forget to ensure compliance with the slopes.
If you do not have a vibrating plate, then to “nailing” the paving slabs we use an ordinary flat board, hitting which we achieve the alignment of the tiles.
7. After the paving slabs are laid, they need to be “swept”.
8. You can sweep the tiles either with a cement-sand mixture or with simple sand. Simple sand allows moisture to pass through well. A mixture of cement and sand becomes like a monolith when exposed to moisture, but in frost under load it can burst, so the choice depends on many factors - weather conditions, climatic zone of residence.
Optimal conditions for paving street surfaces
The main condition for carrying out work on paving surfaces is the presence of positive temperatures. This requirement is due to the fact that the tiles are laid on a cushion, which in turn is poured onto the prepared soil. There is a presence of moisture everywhere, even if a dry mixture is used for the substrate. When frozen, water expands and the soil swells. Is it worth putting a coating on this consistency? Of course not. When water thaws, subsidence occurs in both the soil and the soil base on which the coating was installed. It is always better to wait for normal weather and lay the tiles in normal conditions.
It is important that any such work is carried out on a non-frozen surface, even if the temperature on the thermometer is above zero. Therefore, not only the temperature regime, but its stability are important. Because sealing joints also requires the absence of frost. Otherwise, the frozen mortar will simply fall out of the seams.
There are no special restrictions for working in extremely hot conditions. The only thing worth considering is that this may not be comfortable for the performers themselves, as well as for vibration machines, which can overheat greatly during large volumes of work. If a moistened cement-sand mixture is used to create a substrate, then you need to ensure that it is sufficiently and timely moistened in order to avoid its premature drying out.